Home
» How to
»
How to Clean a Fish Tank Filter Sponge: The Best Method for Your Filter
How to Clean a Fish Tank Filter Sponge: The Best Method for Your Filter
A fish tank filter sponge has two jobs at once: it catches visible debris, and in many filters it also provides surface area for beneficial microorganisms. That creates the central cleaning tradeoff. You want to remove enough waste to restore water flow without treating the sponge like a kitchen scrub pad that must look brand-new.
For most established freshwater aquariums, the safest default is simple: unplug the filter, remove the sponge, gently rinse and squeeze it in water taken from the aquarium, keep it damp, then reinstall it promptly. OASE's current aquarium maintenance guidance specifically recommends rinsing filter media in removed tank water and says the media does not need to be “squeaky clean.” See the OASE aquarium cleaning guide.
Quick comparison: which cleaning method should you use?
Method
Best for
Advantages
Tradeoffs
Rinse and squeeze in removed tank water
Default maintenance for foam that contributes to biological filtration
Gentle, inexpensive, uses water already matched to the aquarium
Less water pressure, so very clogged foam may take several rinses
Rinse in dechlorinated tap water
Foam when the manufacturer explicitly allows it, especially heavily soiled mechanical foam
Convenient and gives you a larger volume of clean water
You must condition the water correctly; manufacturer instructions take priority
Untreated tap-water rinse
Only when the specific filter maker says it is acceptable
Fast and convenient
Not the conservative choice for biologically active media because disinfectants in municipal water can affect microorganisms
Replace the sponge
Torn, permanently compressed, crumbling, misshapen, or persistently clogged foam
Restores structure and flow when cleaning no longer works
Removes established biofilm; replacing multiple biological foams at once can reduce biological filtration temporarily
The important point is that there is no universal “one rinse every X days” rule. Filter design matters. Fluval, for example, says the intake strainer sponge on its AC Series should be rinsed monthly and replaced every two months, while OASE lists a 12–18 month replacement interval for the biological foam used in its BioStyle system. Those are product-specific examples, not schedules to copy to every aquarium. Check the Fluval AC Series FAQ and the OASE BioStyle biological foam guidance.
What you need
A clean bucket reserved for aquarium use
Water removed from the aquarium during a routine water change
A towel for drips
Optional: a very soft, clean brush for robust foam with stubborn surface debris
Your filter's manual or manufacturer support page if you are unsure whether the sponge is mechanical, biological, disposable, or washable
Do not use dish soap, household detergent, bleach, or scented cleaners on ordinary reusable filter foam unless a manufacturer gives a specific decontamination procedure for that exact media. Fluval's 07 Series manual warns against soap or detergents when cleaning filter components and media because residue can harm fish. See the Fluval 07 Series manufacturer manual.
How to clean a fish tank filter sponge step by step
1. Turn the filter off before opening it
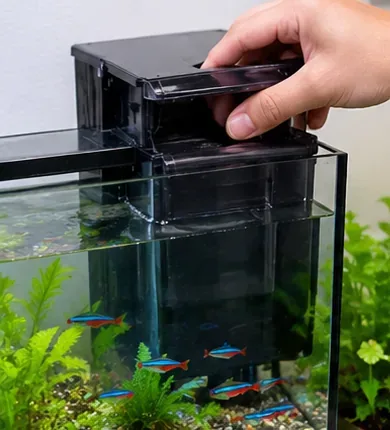
Switch off and unplug the filter before you remove a lid, pump head, cartridge holder, or sponge. This is both an electrical-safety step and a practical one: you do not want the filter running dry or pumping while media is missing. If you are already doing a partial water change, this is an efficient time to clean the sponge because you can save some of the removed aquarium water for rinsing.
Open the filter only after power is disconnected. Cleaning the sponge during a water change makes it easy to save suitable rinse water.
2. Remove the sponge and inspect what kind of dirt you are dealing with
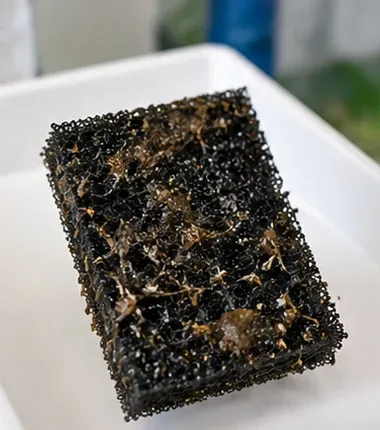
A brown or gray sponge is not automatically “bad.” The useful question is whether the pores are loaded enough to restrict flow. Look for packed fish waste, plant fragments, uneaten food, slime, or a sponge that has become compressed and no longer springs back. If the foam is torn, brittle, crumbling, or permanently deformed, cleaning may not solve the problem and replacement may be more sensible.
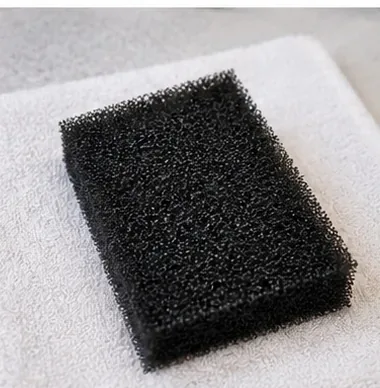
Inspect the sponge before cleaning. Heavy debris and blocked pores call for rinsing; torn or deteriorating foam may need replacement instead.
3. Rinse and gently squeeze it in removed aquarium water
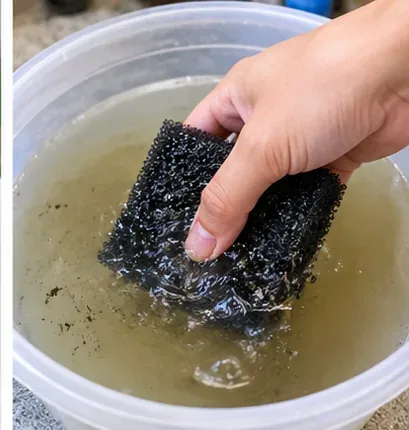
Place the sponge in the bucket of old tank water. Swish it, then compress and release it several times. The goal is to push trapped waste out of the pores, not to wring the foam as hard as possible. Repeat until the largest clouds of debris stop coming out and water can pass through the sponge more freely.
Expect the rinse water to become brown or cloudy. That is normal. A perfectly black, pristine-looking sponge is not the target; restored porosity and flow are. OASE explicitly advises that filter media only needs excessive dirt removed rather than being made spotless.
Gently compress and release the sponge in removed tank water. Stop when heavy debris is largely gone and the foam passes water freely.
4. Decide whether stubborn debris needs extra mechanical cleaning
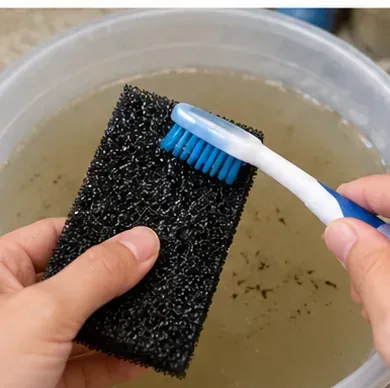
Most sponges do not need a brush. For sturdy, coarse, open-cell foam, however, a very soft clean brush can help lift a mat of plant fibers or debris from the outer surface. Use minimal pressure and skip this step if the foam is fine, fragile, bonded to another material, or the manufacturer does not recommend brushing. Do not add soap to make the foam look cleaner.
A soft brush can be used cautiously on robust foam for stubborn surface debris; it is optional, not a universal requirement.
5. Keep the sponge damp while you prepare the filter
Let excess water drip off, but do not intentionally air-dry biologically active foam before reinstalling it. Drying is useful for certain disinfection procedures or storage, but that is a different goal from routine maintenance. During normal cleaning, keeping the media wet and returning it promptly minimizes disruption to the organisms living on it.
Let excess water drain briefly on a clean towel, but keep biologically active foam damp and reinstall it promptly rather than air-drying it.
6. Reinstall the sponge in its original position
Put the sponge back in the same orientation unless your filter manual says otherwise. Make sure it is seated flat and does not leave a large bypass gap around the edges. If your filter has several stages, keep coarse mechanical foam, biological media, chemical media, and polishing pads in the order specified by the manufacturer.
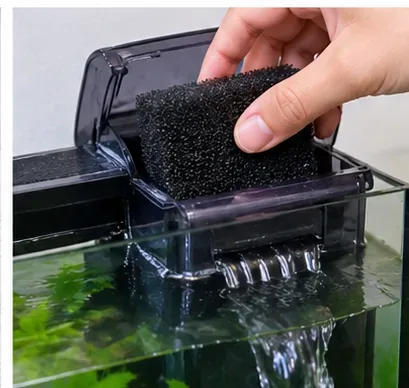
Seat the cleaned sponge fully in the filter chamber so water is directed through the foam instead of bypassing it around the edges.
7. Restart the filter and check the flow
Reconnect power according to the filter instructions. Hang-on-back and canister filters may need priming; internal filters generally need to be fully positioned in the aquarium before restart. Watch the output for a minute or two. A noticeably stronger, steadier flow is a practical sign that cleaning removed a meaningful restriction.
If flow remains weak, do not keep squeezing the sponge indefinitely. The blockage may be in an intake strainer, hose, impeller, impeller well, spray bar, or another media layer. Fluval's AC Series support notes that reduced flow can come from dirty media or the impeller assembly, so a sponge clean is only one part of troubleshooting.
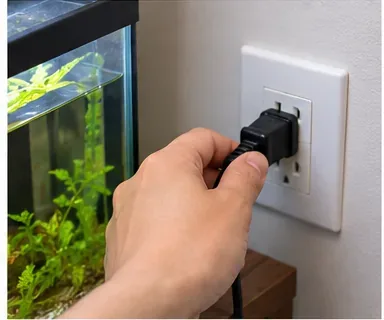
Reconnect power only after the filter is reassembled and correctly positioned. Then confirm that the filter restarts and produces normal flow.
8. Compare the result by function, not by color
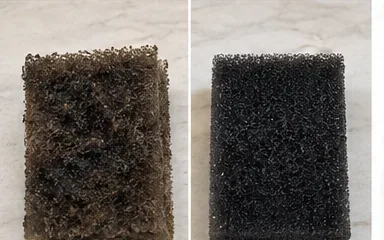
A cleaned sponge may still be stained. That is usually less important than whether it has regained open pores, elasticity, and water flow. The side-by-side difference below shows the useful outcome: most loose debris is gone without trying to sterilize the foam.
The useful difference is reduced debris and more open pores. A reusable filter sponge does not have to look brand-new after routine cleaning.
Tank water vs. tap water: what is the actual tradeoff?
Removed aquarium water is the low-risk default because it avoids introducing untreated municipal disinfectants and already matches the aquarium's chemistry and temperature reasonably well. It is especially sensible when the sponge is part of the biological filtration system.
Dechlorinated tap water can be a practical alternative when the manufacturer permits it. Fluval's 07 Series manual, for example, allows its foams to be rinsed with aquarium water or dechlorinated tap water. This can be helpful when a large, heavily loaded mechanical sponge needs more water than a small maintenance bucket provides. The tradeoff is extra preparation: the water conditioner must be used correctly, and the method should match the filter maker's instructions.
Untreated tap water should not be treated as a universal rule in either direction. Water treatment varies by location and filter designs vary by purpose. Some manufacturer procedures for particular media use running freshwater, while other instructions explicitly say to use aquarium water. When guidance conflicts, use the manual for your exact filter and media rather than copying a generic internet rule.
Should you squeeze the sponge hard or clean it gently?
Gentle repeated compression is usually the better balance. Strong wringing may remove more visible material quickly, but it can tear open-cell foam, distort fitted blocks, or shorten the sponge's life. If five or six gentle squeeze-and-release cycles do not restore flow, use a second portion of removed tank water or follow the maker's approved stronger-cleaning method rather than twisting the sponge aggressively.
When should you replace the sponge instead of cleaning it?
Replace a reusable sponge when physical deterioration becomes the limiting factor: it is torn, crumbling, permanently compressed, no longer fits its chamber, or remains clogged after proper rinsing. A manufacturer's timed schedule can also apply to specific products, but schedules differ substantially between filters.
If the filter contains multiple biological foams, avoid replacing all of them at the same time unless the manufacturer specifically instructs you to. OASE recommends incremental replacement for multiple foams and gives an example of changing one foam, then another two weeks later, so bacterial cultures have time to regrow. See the OASE guide to changing filter media.
What if the sponge gets dirty again very quickly?
Fast clogging can be a symptom rather than a sponge problem. Review how much food enters the tank, whether dead plant material is accumulating, whether stocking is high for the filter, and whether the intake is positioned where it collects excessive debris. Also inspect other filter components. If the sponge needs cleaning every few days despite normal feeding and stocking, the filter may be undersized, another media stage may be blocked, or the sponge pore size may be too fine for the load.
Do not solve rapid clogging by making every cleaning harsher. A better long-term fix may be a coarser pre-filter, more mechanical media area, a larger filter, or more frequent light maintenance. OASE notes that pre-filter foams are specifically used to remove debris before water reaches the main filter, reducing maintenance demand.
Practical checklist
Unplug the filter before opening or removing media.
Save removed aquarium water in a clean aquarium-only bucket.
Swish and gently squeeze reusable foam; do not aim for sterile-looking media.
Avoid soap, detergent, and scented household cleaners.
Use dechlorinated tap water only when it fits the maker's instructions and your maintenance goal.
Keep biologically active foam damp during routine maintenance.
Reinstall media in the correct order and orientation.
Restart the filter and verify normal flow.
Replace deteriorated foam, but stagger multiple biological-media replacements when the manufacturer recommends it.
The simplest recommendation for most established aquariums is therefore not “clean as much as possible.” It is clean enough to restore flow while preserving the sponge's structure and the filter's biological stability. Tank water is the conservative default, dechlorinated tap water is a useful manufacturer-approved option in some systems, and replacement is appropriate when the material itself has reached the end of its useful life.