Home
» How to
»
How to Clean a Microwave Filter: Grease Filter Steps and Charcoal Filter Rules
How to Clean a Microwave Filter: Grease Filter Steps and Charcoal Filter Rules
A microwave filter is easy to overlook because it sits outside the cooking cavity, usually on an over-the-range microwave. The practical rule is simple: metal grease filters are commonly washable, while charcoal odor filters are generally replaceable rather than washable. The exact removal method, cleaning interval, and dishwasher suitability depend on the model, so the owner’s manual remains the final authority.
This guide focuses on the removable vent filters used by over-the-range microwaves. It does not apply to internal electronic components, cooling vents, or waveguide covers inside the oven cavity.
Quick reference: which microwave filter do you have?
Filter type
What it does
Can you wash it?
Typical next action
Metal grease filter
Captures airborne grease from cooking below the microwave
Usually yes
Remove, wash with mild detergent, rinse, dry, reinstall
Charcoal filter
Helps reduce cooking odors in recirculating installations
Generally no
Replace with the model-specific part
Unknown filter
Varies by design
Do not assume
Check the model number and owner’s manual before soaking or dishwashing
Identify the microwave model and confirm whether the filter is grease, charcoal, or a combined assembly.
Turn the controls off and let the appliance and cooktop area cool.
Disconnect power if your owner’s manual instructs you to do so for filter service.
Have mild dish detergent, a sink or shallow pan, a soft or medium household brush, clean towels, and warm-to-hot water ready.
Do not soak a charcoal filter simply because it looks dirty. Replace it if the manual identifies it as non-washable.
How to clean a washable microwave grease filter
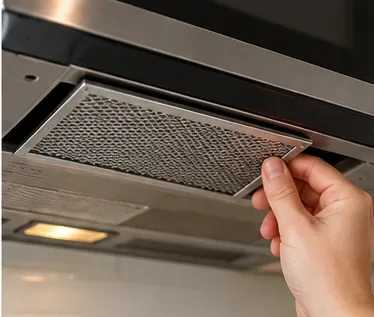
1. Locate and remove the grease filter
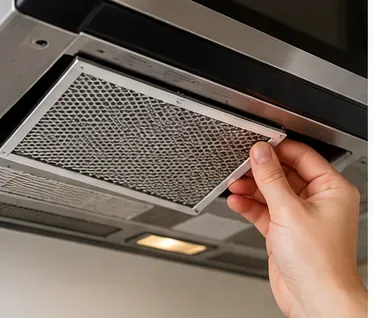
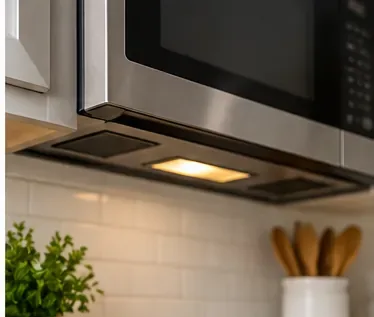
Look at the underside of an over-the-range microwave. Many filters slide sideways and drop down; others use a push-release case or a retaining screw. Do not force a filter that does not move the way you expect. Samsung documents different removal procedures for one-filter and two-filter models, and Whirlpool manuals also show more than one retaining design.
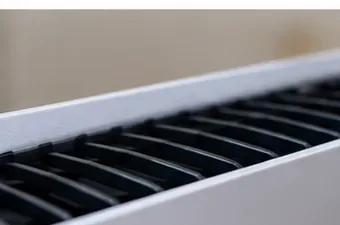
Step 1: Remove the grease filter using the tab, slide, release, or screw method specified for your microwave model.
2. Inspect the filter before washing
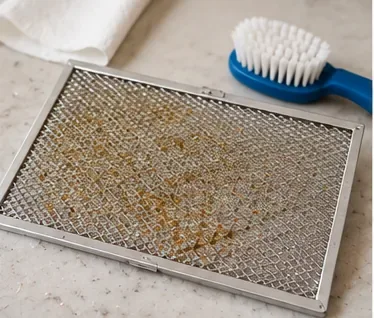
A greasy gray or brown film is normal for a filter that has been doing its job. Check the frame and mesh for tears, severe distortion, broken tabs, or corrosion. Cleaning is worthwhile when the filter is structurally sound. Replacement makes more sense when the mesh is damaged or the filter can no longer sit securely in its slot.
Step 2: Inspect the mesh for grease loading, damage, and any signs that replacement is more practical than cleaning.
3. Soak the metal filter in hot, soapy water
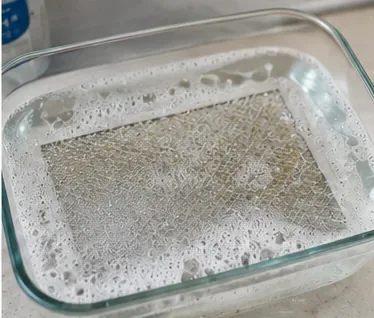
Place the grease filter flat in a sink, basin, or shallow pan. Add hot water and a modest amount of mild dish detergent. Samsung specifically instructs users to soak grease filters in hot water with mild detergent. The goal is to loosen grease without attacking the mesh or frame with harsh chemistry.
There is no universal soak time published for every microwave filter, so use the visual condition of the grease as your guide and defer to the owner’s manual if it specifies a procedure. If the water becomes heavily greasy, replacing it with fresh soapy water can be more useful than adding stronger cleaner.
Step 3: Soak a washable metal grease filter in hot water with a small amount of mild dish detergent to loosen cooking grease.
4. Gently brush stubborn grease
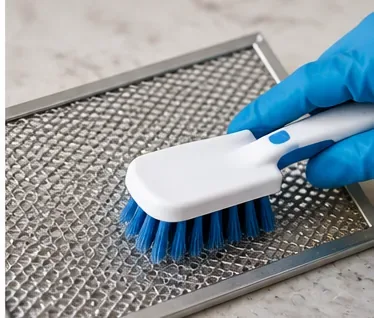
Use a small household brush to work through areas where grease remains embedded. Support the filter so you do not bow the frame, and scrub with moderate rather than aggressive pressure. Whirlpool’s consumer guidance recommends a dish brush or household scrub brush and specifically cautions against bending the filter or its frame.
If a filter still feels tacky after one pass, repeat the soak-and-brush cycle rather than escalating immediately to abrasive pads or harsh chemicals.
Step 4: Use light pressure with a soft or medium brush to work detergent through the mesh without bending the filter frame.
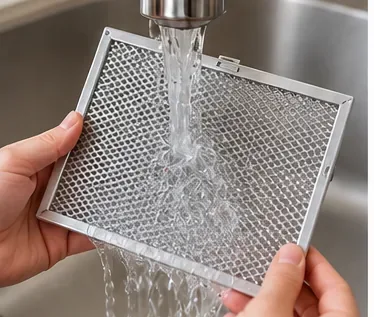
5. Rinse thoroughly
Rinse the filter with clean water until detergent and loosened grease are gone. Pay attention to the edges and corners where soap can remain trapped. A clean filter should no longer feel oily when handled carefully at the frame.
Step 5: Rinse until the water runs clear and no visible soap or loosened grease remains in the mesh.
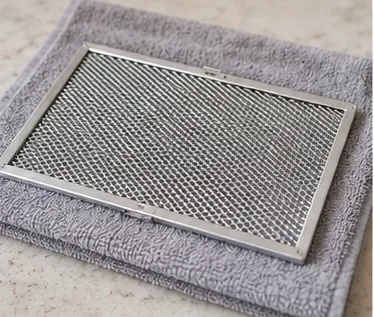
6. Dry the filter completely
Shake off excess water and let the filter air-dry on a clean towel. Whirlpool advises allowing the grease filter to air-dry or patting it dry with a clean cloth before reinstalling. Complete drying is a simple way to avoid returning trapped moisture to the filter housing.
Step 6: Let the filter dry completely on a clean towel before putting it back into the microwave.
7. Reinstall it in the original orientation
Slide or lock the dry filter back into place using the reverse of the removal procedure. Confirm that tabs are seated and the frame does not hang loose. If the microwave uses two grease filters, reinstall both. If your configuration combines a grease filter with another component, follow the specific stacking or orientation instructions in the manual.
Step 7: Reinstall the dry filter in the same orientation and locking position used before removal.
8. Reset the reminder if your model has one
Some models display a filter reminder. Samsung notes that certain models let you reset the reminder after filter service, while other models use different menus or buttons. Do not copy a reset sequence from an unrelated microwave; use the control instructions for your model.
Step 8: Return the vent to service only after the filter is secure; reset a filter reminder if your model provides one.
Can a microwave grease filter go in the dishwasher?
Sometimes, but not by default. Whirlpool says many grease filters can be placed in a dishwasher, but it also tells owners to verify this in the model’s manual. That distinction matters because frame construction, coatings, and filter assemblies vary.
Cleaning method
Best when
Tradeoff
Hand washing
You do not know whether the filter is dishwasher-safe
More hands-on work, but easier to control pressure and chemistry
Dishwasher
The owner’s manual explicitly allows it
Convenient, but not appropriate for every filter design
Replacement
The filter is damaged, distorted, or identified as non-washable
Costs more than cleaning but restores the correct part condition
Do not wash a charcoal microwave filter
For recirculating over-the-range microwaves, a charcoal filter is used to reduce odors before air is returned to the room. The major manufacturers reviewed for this guide treat these as replacement items rather than washable filters. Whirlpool says its charcoal filter cannot be cleaned and is generally replaced about every six months; Samsung gives a broader six-to-12-month range for its applicable models. GE emphasizes that charcoal filters are model-specific and should be replaced with the correct part for the microwave.
If you are unsure whether your installation recirculates or vents outdoors, check the installation instructions. Samsung notes that a charcoal filter is not needed on models that vent up or out the back, while GE states that a charcoal filter is required when an over-the-range microwave is not vented outside. For model-specific replacement cues, see GE Appliances’ charcoal-filter guidance.
How often should you clean the grease filter?
There is no single interval that applies to every microwave. Whirlpool recommends cleaning grease filters monthly or when a filter-status indicator prompts you. Samsung’s current support page says some one-filter designs should be cleaned at least monthly, while some two-filter designs call for cleaning at least every four months or as needed. Heavy frying, griddling, or high-volume cooking can load a filter faster than occasional light use.
A useful practical schedule is to follow the manufacturer’s interval first, then shorten it if airflow drops, the filter looks heavily coated, or grease begins accumulating around the vent area.
Signs the filter needs attention
The metal mesh looks visibly coated with grease.
The vent fan seems to move less air than usual.
Cooking odors linger longer on a recirculating setup.
The filter reminder is illuminated.
A charcoal filter looks grease-loaded or shiny rather than dull and porous, a replacement cue described by GE.
Common mistakes to avoid
Washing a charcoal filter: this usually does not restore its odor-adsorbing function; replace it according to the model instructions.
Forcing removal: tabs, slides, screws, and filter cases differ. Stop and check the manual if the filter resists.
Using abrasive pads by default: they can deform or damage fine mesh. Start with detergent, soaking, and a brush.
Reinstalling while wet: dry the filter completely first.
Assuming the dishwasher is always safe: use it only when the manual permits.
Running the appliance without required filters: some manufacturer instructions specifically warn against operating certain recirculating configurations without filters installed.
A practical maintenance routine
For most households, filter care is easiest when paired with another recurring kitchen task. Check the underside grease filter during a regular range-hood cleanup. If it is greasy, remove and wash it. At the same time, note whether your microwave uses a charcoal filter and when it was last replaced.
The most reliable routine is not the most aggressive one; it is the one that matches the filter type and your exact model. Hand-wash washable metal grease filters with mild detergent, replace non-washable charcoal filters, and use the owner’s manual for removal, dishwasher approval, replacement part numbers, and reminder-reset steps. Whirlpool also provides a broader official microwave filter cleaning and replacement guide for owners who want additional model-family context.