Home
» How to
»
How to Clean a Traeger Pellet Grill Safely: Grates, Firepot, Grease and Ash
How to Clean a Traeger Pellet Grill Safely: Grates, Firepot, Grease and Ash
If you own a Traeger pellet grill, “cleaning the grill” means more than brushing the cooking grates. Ash can accumulate around the firepot, grease can build up on the drip tray and in grease channels, and pellet dust can collect in the hopper. Traeger says those areas should be maintained on a schedule that reflects how often and what you cook.
This guide covers Traeger pellet grills, not the Flatrock or other flat-top models, which use a different cleaning routine. Traeger's official pellet-grill support article was updated April 14, 2026, so the steps below reflect the current manufacturer guidance available when this article was checked in September 2026.
How often should you clean a Traeger?
Traeger's current recommendation is more specific than “once in a while.” After each use, wipe spills and clean food residue from the grates. Every 2–3 cooks, or about every 20–24 hours of cooking time, deep-clean the grill interior and vacuum the firepot. Empty pellets and vacuum sawdust from the hopper monthly, clean the exterior about every three months, and clean the grease chute or equivalent downdraft area about every six months.
That schedule is a baseline. Fatty cooks such as pork belly, bacon, burgers, or brisket can produce much more grease than bread or vegetables, so the grill may need attention sooner. Traeger's fire-safety guidance is even more conservative: it recommends not exceeding 20 hours of cooking time between cleanings and cleaning more often when cooking greasy foods.
Area
Traeger-recommended timing
Spills and food on grates
After each use
Interior and firepot
Every 2–3 cooks or roughly 20–24 cook hours; sooner for greasy cooks
Hopper and pellet sawdust
Monthly
Exterior
About every 3 months, or more often without a cover
A nylon-bristle grill brush, non-wire scraper, or wooden grate scraper
Heavy-duty paper towels or disposable cleaning cloths
A dedicated shop vacuum for completely cold ash and pellet dust
An all-natural, non-chemical grill cleaner or degreaser
New drip-tray foil or a compatible liner, if your model uses one
A fresh grease-bucket or Grease & Ash Keg liner, if applicable
Heat-resistant gloves for cleaning grates while they are still warm
Traeger specifically recommends avoiding wire brushes. Loose bristles can end up in food, and wire brushes can damage some grill-grate coatings. The company recommends nylon-bristle brushes, cleaning cloths, heavy-duty paper towels, or its wooden scraper where compatible.
Should the Traeger be hot or cold when you clean it?
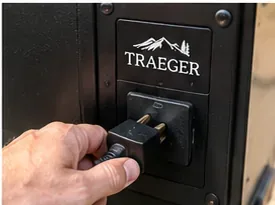
The grill must be completely cold before you vacuum ash, remove internal components, or work around the firepot. Traeger says to power off the grill, let the shutdown cycle finish, disconnect the power cord before maintenance, and make sure ash is extinguished and cold before vacuuming.
There is one useful exception: food residue on the grill grates is easier to scrape while the grates are still warm after cooking. Do that carefully after removing the food, then let the grill complete its shutdown and cool fully before the deep-cleaning steps.
After the grill completes its shutdown cycle and cools, disconnect the power cord before beginning internal maintenance.
How do you clean a Traeger pellet grill step by step?
1. Clean the cooking grates without a wire brush
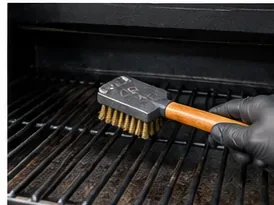
Remove food residue from the grates with a nylon brush, a compatible wooden scraper, or heavy-duty paper towels. For a deep clean, remove the grates so you can clean both sides and reach the components below them.
Use a non-wire brush or scraper on the grates; Traeger advises against wire brushes because loose bristles can contaminate food.
If grease is baked onto the grate, Traeger recommends an all-natural degreaser. Its current All-Natural Grill Cleaner directions say to spray the interior surface, allow about 10 minutes for the cleaner to work, scrub with a non-wire brush or non-abrasive pad, and wipe with a damp soft cloth. Follow the directions on whichever grill-safe cleaner you actually use.
2. Remove the drip tray, liner, and heat baffle
With the grill cold, remove the grill grates, discard an old drip-tray liner or foil if your model uses one, then remove the drip tray and heat baffle. Some models also have a lower heat shield that must be removed to clean underneath it.
Do not simply place fresh foil over a heavy layer of old grease. Grease needs a clear path toward the grease bucket, tray, tube, or keg. Traeger identifies dirty or incorrectly positioned drip trays and liners as common causes of grease pooling.
3. Vacuum cold ash from the firepot and grill body
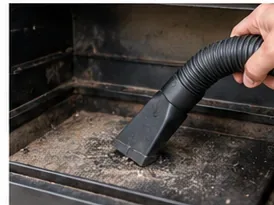
Vacuum the interior and the firepot thoroughly with a dedicated shop vacuum. The goal is to remove ash and loose debris from the firepot, the area around it, and the bottom of the grill.
Vacuum the firepot and surrounding grill cavity only after the grill and ash are completely cold.
This step matters for more than appearance. Traeger's fire guidance says the firepot should not be full of ash or overflowing pellets before ignition. Excess pellet buildup can contribute to a pellet fire when those pellets eventually ignite.
4. How should you clean the drip tray and grease path?
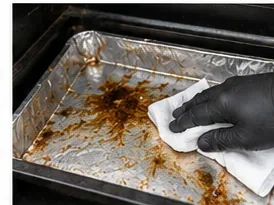
Wipe or scrape grease from the drip tray and heat baffle. Use a grill-safe, non-chemical degreaser for stubborn buildup. On newer touchscreen Timberline and Ironwood models, Traeger recommends a stiff non-metallic scraper such as a plastic putty knife, silicone or rubber tool, wooden spatula, or compatible grill scraper rather than abrasive metal tools.
Remove greasy buildup instead of covering it with another layer of foil; the grease path should remain open and able to drain.
Inspect the grease trough, tube, chute, or downdraft path used by your particular model. Grease should flow smoothly rather than forming puddles. Traeger says accumulated grease and food debris on the drip tray are a common starting point for grease fires.
5. Do you need to clean the pellet hopper?
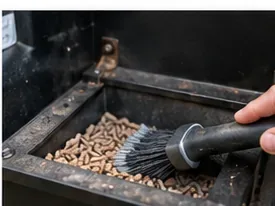
Yes, but not after every cook. Traeger's general schedule calls for emptying the hopper and vacuuming residual sawdust about monthly. Remove remaining pellets using your grill's hopper cleanout feature if it has one, or scoop them out as instructed for the model. Then vacuum loose sawdust from the hopper and, on applicable AC or D2 WiFIRE grills, the auger tube.
Periodically empty the hopper and remove pellet dust or sawdust so dry fuel can feed cleanly into the auger.
Keep water out of the hopper. Pellets that absorb moisture swell and can clog the auger. Inspect the hopper for dampness or mold and wipe it with a dry cloth or paper towel if needed. Store unused pellets in an airtight, dry container.
6. What about the grease bucket or Grease & Ash Keg?
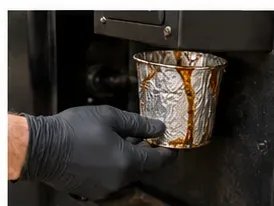
Check the grease collection system and empty it before it becomes overfilled. Traditional models may have an external grease bucket; newer Timberline, Ironwood, Woodridge, and related designs can use a Grease & Ash Keg. Replace a disposable liner when needed.
Empty the grease collection container before it overfills and replace its liner when your model uses one.
Let grease cool completely before disposal. Do not pour cooking grease down a sink. If your model uses a removable grease bucket rather than a disposable liner system, clean it according to that model's manual.
7. Wipe the interior and exterior
After loose ash and thick grease are removed, wipe grill surfaces with an appropriate all-natural cleaner. Traeger's general procedure allows its All-Natural Grill Cleaner, another non-chemical cleaner, or a diluted mixture of dish soap, water, and vinegar.
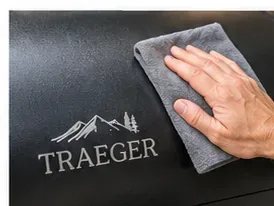
Use a soft cloth and grill-safe cleaner on the exterior rather than abrasive pads or harsh oven cleaner.
For the exterior finish, avoid oven cleaner, abrasive cleaner, and scouring pads. These can damage the coating. Wipe the surface rather than flooding it with water, especially around the controller and other electrical components.
8. Reassemble the grill carefully
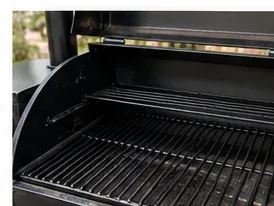
Once the cleaned components are dry, reinstall them in the correct order: heat baffle or heat shield, drip tray, new liner or foil where applicable, grease-system liner, and grill grates. Confirm that the drip tray and liner sit properly so grease can drain instead of pooling.
Reinstall the grill components in their proper positions and verify that the grease path is unobstructed before the next cook.
Model details matter here. On touchscreen Timberline and Ironwood grills, for example, Traeger says the firepot lip must sit flush in its cavity and must not catch on the auger tube. Woodridge and Westwood models also have model-specific cleaning and reassembly sequences. If your grill differs from the conventional grate–drip tray–heat baffle layout, use the cleaning section for your exact model in the official support guide.
Do you need to clean the temperature sensor?
Not routinely. Traeger's general instructions say do not clean the thermocouple or RTD unless there is visible buildup that needs to be removed. A thermocouple or RTD is the temperature-sensing component that helps the controller determine the temperature inside the grill.
That is a good example of why more cleaning is not always better. Aggressively scrubbing delicate sensing components can create a problem that was not there before.
Can you hose out a Traeger?
No. A pellet grill contains electrical controls, an auger system, a pellet hopper, an igniter, and other components that should not be soaked. Use vacuuming, scraping, wiping, and controlled amounts of grill-safe cleaner instead of spraying the interior with a garden hose or pressure washer.
Moisture is especially problematic around pellets because wood pellets expand when wet. A damp hopper can lead to swollen pellets and an auger blockage.
Should you put foil on the drip tray?
Use only the liner method approved for your grill. Some Traeger models use purpose-made drip-tray liners, and some conventional models can use foil. If you use foil, it must lie flat and must not interfere with drainage. Traeger's fire guidance lists foil that is not flush with the drip tray as one potential cause of grease pooling.
Newer grill families can have different grease-management designs, so do not automatically copy an older Traeger setup onto a Timberline, Ironwood, Woodridge, or Westwood. Check the replacement-parts or cleaning guide for your model.
What are the warning signs that cleaning is overdue?
Heavy grease or food buildup on the drip tray or rails
Grease puddling instead of flowing toward the collection container
Large amounts of ash in or around the firepot
Pellet dust accumulating in the hopper
Dirty black smoke or unusual soot buildup
Difficulty maintaining the expected cooking temperature
A grease bucket or Grease & Ash Keg that is close to full
Visible mold after storage in a damp environment
Cleaning can help prevent several of these conditions, but not every temperature or ignition problem is caused by dirt. If a clean grill still behaves abnormally, follow the troubleshooting procedure for your exact model rather than continuing to disassemble or scrub components.
What should you never do while cleaning a Traeger?
Do not vacuum warm or hot ash.
Do not skip the normal shutdown cycle just to start cleaning sooner.
Do not use a wire grill brush.
Do not pressure-wash or hose down the pellet grill.
Do not soak the hopper or allow pellets to get wet.
Do not use harsh oven cleaner or abrasive scouring pads on the exterior.
Do not routinely scrub the thermocouple or RTD when there is no visible buildup.
Do not cover grease buildup with fresh foil instead of removing it.
A simple routine that keeps cleaning manageable
After a normal cook, remove food, give the warm grates a quick non-wire brushing, wipe obvious spills, and let the grill complete its shutdown. Before a deep clean, let everything cool completely and unplug the grill. Then remove the interior pieces, vacuum ash, clean grease from the drip and drainage system, inspect the hopper and grease collector, wipe surfaces, and reassemble.
The biggest variable is what you cook. A long brisket cook or several fatty cooks may justify cleaning earlier than the standard interval. A short vegetable cook may leave very little grease. The best schedule combines Traeger's published limits with a quick visual inspection before ignition.