How to Clean a Burnt Iron Without Damaging the Soleplate
Learn how to clean a burnt iron safely, what to avoid, when household remedies can damage coatings, and how to handle stubborn soleplate residue.
There has not been a major new industry-wide rule for washing-machine filter cleaning. The most useful recent update is model-specific: LG refreshed its U.S. drain-pump-filter guidance on June 1, 2026 and continues to recommend monthly cleaning on its front-load washers and combo units. Samsung's current U.S. guidance similarly recommends cleaning the front-load pump filter at least monthly or about every 40 washes, whichever comes first. Whirlpool, however, gives different intervals by model, ranging from every few months or “occasionally” to every six months on some all-in-one machines.
That difference is the key point for today's owner: there is no universal cleaning interval or filter layout for every washing machine. The durable method is to identify your exact filter type, follow your model manual, drain residual water safely, clean the filter without damaging the pump or seal, and verify that the washer drains normally afterward.
This guide focuses on the drain-pump filter, sometimes called a debris filter or pump filter, found on many front-load washers. It is not the same thing as an inlet screen, a dryer lint filter, or a removable lint catcher found on some other washer designs.
Do not force open a panel because an online photo looks similar to your machine. Samsung states that its top-load washers do not have the front-loader-style pump filter covered by its cleaning instructions. LG likewise says its drain-pump filter is present on LG front-load washers and combo units, not its top-load washers. Whirlpool repeatedly notes that the pump filter is accessible on some models.
What to do: look up the exact model number on the manufacturer's support site or owner's manual. Search for terms such as “drain pump filter,” “pump filter,” “debris filter,” or “draining residual water.” If your manual does not show a user-removable filter, do not improvise by dismantling the washer.
Current manufacturer references include LG's June 2026 drain-pump-filter instructions, Samsung's washer cleaning guidance, and Whirlpool's front-load pump-filter guidance.
Avoid screwdrivers, pliers, harsh cleaners, and sharp tools unless the manual specifically calls for them. A stuck filter can be caused by trapped debris or a damaged component; excessive force can turn a maintenance task into a leak or repair.
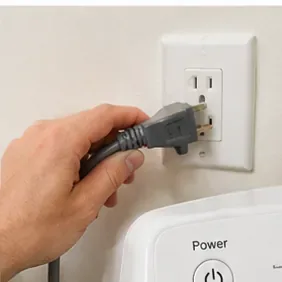
Switch the washer off and unplug it before opening the pump-filter compartment. Whirlpool and LG both explicitly instruct owners to disconnect power before filter maintenance. If the washer recently completed a hot cycle, wait until the water has cooled. Samsung warns that water left after hot cycles can be hot enough to cause injury.
What to do: do not start opening the filter just because the display is off. Disconnect the washer from electrical power and give hot water time to cool.
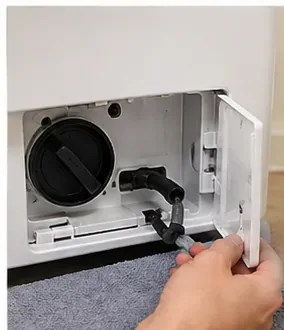
On many front-load machines, the pump filter sits behind a small panel near the lower front corner. The exact side and access method vary. Some washers place the filter behind a removable base panel or drawer; others use a hinged service door.
Many models also provide a small residual-water drain hose next to the filter. Others require you to loosen the filter slowly and let water escape into a pan. This is one reason a generic “just unscrew the filter” instruction can create a mess.
What to do: identify both the filter and any emergency drain hose before turning anything. If the layout does not match the manual, stop and recheck your model number.
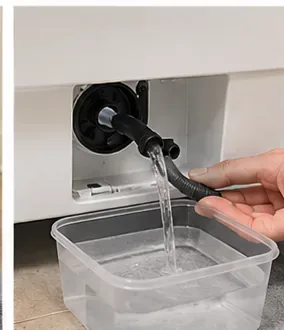
Place towels around the service opening and put a shallow container below it. If your machine has a small drain hose, pull it out only as far as the manual allows, remove its cap, and let the water empty into the pan. LG warns not to pull the hose too far because it can kink. Samsung also directs users to drain the hose completely before removing the filter.
If there is no service hose, Whirlpool's compact-washer instructions describe slowly turning the filter until water begins to flow, then closing it again when the pan needs to be emptied. Repeat until the residual water is gone.
What to do: assume that water will come out even if the drum looks empty. Use a low container and work slowly. Never remove the filter fully while the tub still contains a visible volume of water.
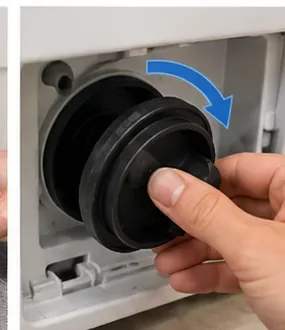
Once the washer is safely drained, turn the filter in the direction specified by the manual. Many current LG, Samsung, and Whirlpool front-load instructions use counterclockwise removal and clockwise installation. Some Samsung filters use a push-and-turn arrangement similar to a child-resistant cap.
If the filter will not turn with reasonable hand pressure, do not immediately reach for pliers. A coin, hair pin, fabric fragment, or other object can jam the mechanism from inside.
What to do: use the model-specific removal method. If the filter is seized, cracked, or obviously misaligned, stop and consult support or service rather than damaging the pump housing.
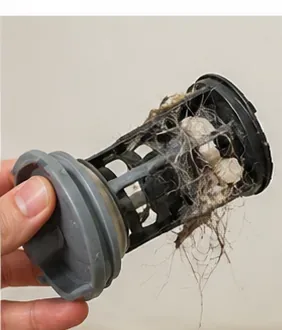
Pump filters commonly catch lint, hair, coins, buttons, threads, and other small objects before they reach or obstruct the drain pump. Remove large debris by hand, then rinse the filter under running water. Samsung and LG recommend a small soft-bristle brush for buildup; Whirlpool also says remaining residue can be rinsed away after large clumps are removed.
LG's current support guidance specifically says not to wash the pump filter in a dishwasher. High heat and dishwasher chemistry are unnecessary for this part.
What to do: clean the filter mechanically with water and a soft brush. Avoid abrasive pads, knives, solvents, and aggressive descalers unless your manufacturer explicitly approves them.
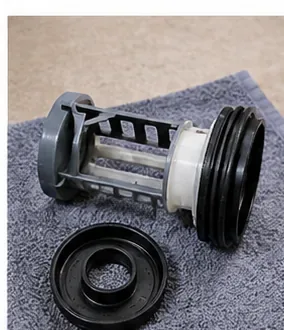
Before reinstalling, inspect the filter for cracks, warped plastic, damaged threads, or a distorted sealing surface. Also look into the filter opening for visible debris. Samsung tells owners to inspect the drain-pump impeller inside the housing and make sure it is clean. LG's current OE troubleshooting guidance says to clean the filter opening and base with a soft-bristle brush.
Do not push fingers or tools deep into a pump assembly that is not designed for user access. A visible impeller may have some normal resistance or movement characteristics that vary by design.
What to do: remove only debris you can safely reach under the manufacturer's instructions. If the impeller is damaged, the housing is cracked, or the seal will not sit properly, service is safer than forcing reassembly.
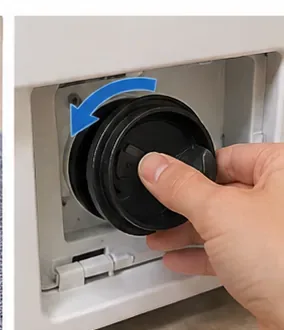
Insert the filter squarely and turn it until it is fully seated according to the manual. LG says to turn clockwise until it stops. Whirlpool commonly specifies that the filter be turned fully in, with the handle left near the correct final position. Samsung similarly instructs users to secure the filter before restoring the drain hose.
If your washer has an emergency drain hose, reinstall its cap firmly and return the hose to its clip. A loose hose cap or partially seated filter can leak during the next cycle.
What to do: verify three things before closing the access panel: the filter is fully seated, the emergency hose cap is secure, and the hose is back in its holder.
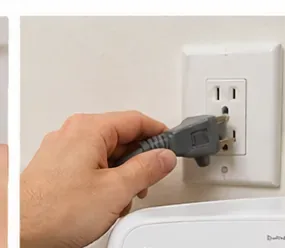
Reconnect power only after reassembly. Run the test procedure recommended by your manufacturer. Samsung's drain troubleshooting says to start a cycle and confirm that the washer drains at the beginning of the test. LG's current OE guidance recommends a Tub Clean cycle after clearing debris when troubleshooting an OE drain error. Whirlpool provides a model-specific leak check on some compact machines.
Watch the service-panel area during the first drain. A slow drip, wet floor, or renewed drain error can indicate that the filter is not seated properly, the drain hose cap is loose, or the original problem is elsewhere.
What to do: if the washer drains normally and the filter compartment stays dry, close the panel and return to normal use. If it leaks or still will not drain, stop using it until you identify the cause.
There is no single interval that applies to every washer.
| Manufacturer guidance checked in September 2026 | Published interval or wording |
|---|---|
| LG front-load washers and combo units | Monthly |
| Samsung front-load washers | At least once per month or about every 40 washes, whichever is more frequent |
| Whirlpool front-load guidance | Every few months or as needed on some models |
| Whirlpool all-in-one guidance | Every six months on specified models |
This variation is real, not a contradiction. Filter size, pump design, washer architecture, typical debris load, and manufacturer maintenance schedules differ.
What to do: use your own manual's interval as the baseline. Clean sooner if you wash pet bedding, heavily linting fabrics, work clothes with debris, or items with small objects in pockets.
A clogged filter is only one possible cause. Whirlpool and Samsung both note that drain-hose installation, kinks, standpipe setup, and other drainage problems can produce similar symptoms. Excess detergent and suds can also interfere with draining on some machines.
What to do: if the filter is clean but the washer still will not drain, inspect the external drain hose for kinks and follow the manufacturer's drain-error checklist rather than repeatedly removing the filter.
The phrase “washing machine filter” can refer to different parts. The filter in this guide is a drain-pump debris filter. Some washers also have small inlet screens where the water-supply hoses connect. Older or region-specific designs may use lint filters or other traps. Cleaning the wrong component will not fix a blocked drain.
What to do: match the symptom to the component. Slow filling points toward supply hoses or inlet screens; slow draining points toward the drain path, including the pump filter where applicable.
This is the mistake most likely to flood the floor. Even when the drum appears empty, residual water remains in the sump, hoses, and pump area. Manufacturer instructions consistently put water drainage before complete filter removal.
What to do: keep a shallow pan and towels ready every time, not only when the washer visibly contains water.
A filter that will not turn can be jammed by debris, damaged threads, or internal obstruction. Applying a large wrench or pliers can crack plastic parts or damage the pump housing.
What to do: confirm the correct turn direction and any push-to-turn mechanism in the manual. If hand pressure is not enough, use manufacturer support rather than escalating force.
Cleaning the filter is appropriate maintenance, but it does not repair a failed drain pump, broken impeller, electrical fault, damaged hose, or persistent leak. If the filter is clean and installed correctly yet the washer repeatedly shows a drain error, makes abnormal pump noises, leaks around the filter housing, or leaves significant water in the drum, the machine may need additional troubleshooting or service.
LG's current drain-error support states that continued OE errors after the filter and drain system checks can require repair service. Samsung likewise directs users toward support if a test cycle still does not drain after the basic checks.
What to do: stop repeating the cleaning procedure once the filter is confirmed clear. Record the model number, error code, and symptoms, then follow the manufacturer's diagnostic path.
The safest way to clean a washing machine filter is model-aware rather than generic: verify that your washer has a user-serviceable drain-pump filter, disconnect power, let hot water cool, drain residual water, remove and rinse the filter, inspect the opening and seal, reinstall everything securely, and test for normal drainage and leaks.
The recent 2026 LG support update does not introduce a new cleaning technology; it reinforces the maintenance pattern already seen across major front-load designs. The part that varies is frequency and access. Follow your own model's manual first, and treat monthly, every-40-washes, “every few months,” and six-month advice as manufacturer-specific schedules rather than universal rules.
Learn how to clean a burnt iron safely, what to avoid, when household remedies can damage coatings, and how to handle stubborn soleplate residue.
Learn how to clean a washing machine drain-pump filter safely, drain residual water, remove debris, reinstall the filter, and know when your model needs different care.
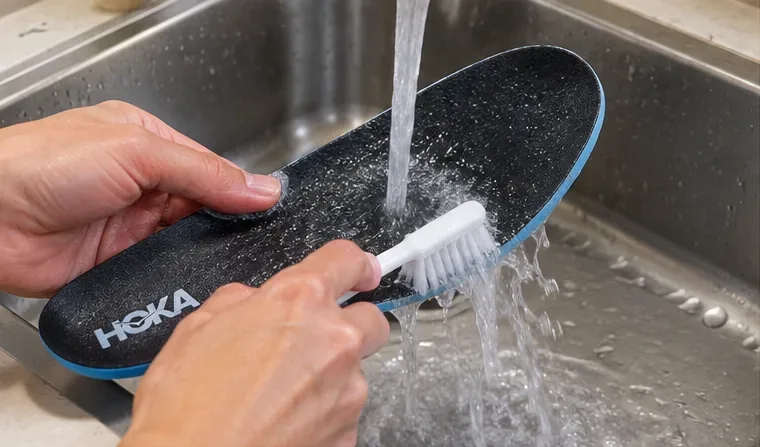
Learn how to wash HOKA sneakers by hand with cold water, mild soap, gentle brushing, and air drying, plus material-specific care and mistakes to avoid.
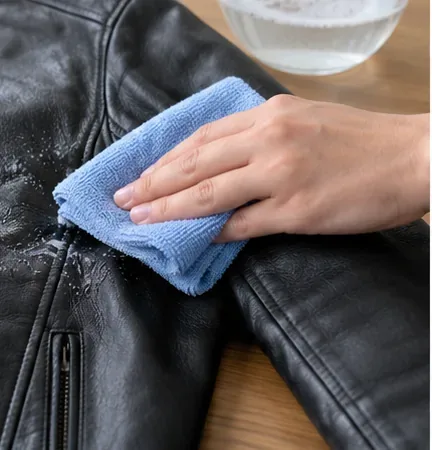
Learn how to clean a leather jacket safely in 8 steps, from checking the label and patch testing to air-drying and conditioning without damage.
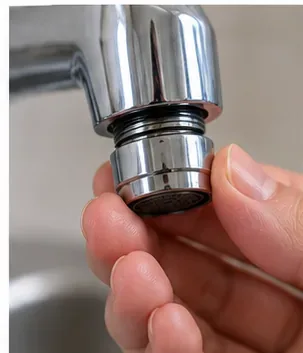
Learn how to clean a faucet aerator safely, identify threaded and recessed types, remove mineral buildup, reassemble parts, and avoid common mistakes.
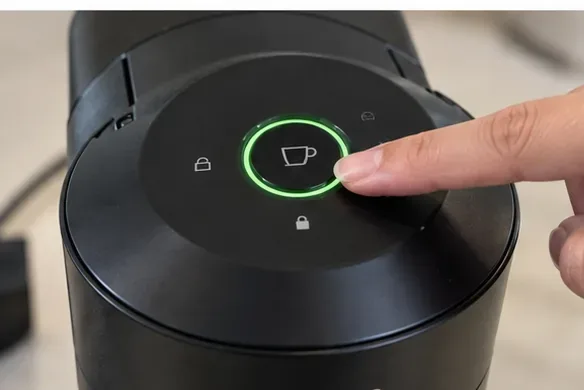
Learn how to clean a Nespresso Vertuo machine safely, run the rinse cycle, wash removable parts, avoid common mistakes, and know when descaling is needed.
Learn how to get gum out of sheets with ice, gentle scraping, detergent, and a careful wash—plus what to do with fitted, delicate, or dried-on gum.
Learn how to clean a vacuum filter safely, tell washable from non-washable filters, rinse and dry correctly, and avoid mistakes that can reduce suction.
Learn how to clean a fish tank filter sponge safely, compare tank water with tap water, know when to squeeze or replace foam, and protect filter performance.
Learn how to clean a pool sand filter safely with backwashing and rinsing, plus how to judge pressure, troubleshoot poor flow, and know when deeper service is needed.