Home
» How to
»
How to Clean an Air Fryer Heating Element Safely: A Practical Step-by-Step Guide
How to Clean an Air Fryer Heating Element Safely: A Practical Step-by-Step Guide
The safest way to clean an air fryer heating element is to unplug the appliance, let it cool completely, remove the basket and pan, then clean only the accessible heater area with gentle tools approved by the manufacturer. For many basket-style models, that means hot water on a soft sponge or cloth plus a soft-to-medium bristle cleaning brush for stuck food. It does not mean soaking the main unit, flooding the heater, scraping with metal, or taking the appliance apart.
That simple answer matters because heating-element cleaning is one of those jobs where “stronger” cleaning can create a worse problem. Philips specifically warns against steel-wire and hard-bristle brushes on the heater coating, while Ninja’s AF100 owner’s guide says to unplug the unit, never immerse the main unit in liquid, and clean the heating element with a cleaning brush. Model designs differ, so the manual for your exact air fryer should override any general method.
Illustrative Example: Grease Specks Above the Basket
This is a hypothetical example, not a real product test or customer result. Imagine that Jordan uses a basket-style air fryer several times a week for chicken wings, vegetables, and reheating leftovers. One evening, Jordan notices a little more white smoke than usual. After the appliance cools, the basket is removed and there are greasy specks and a few browned crumbs around the exposed heating area at the top.
That is a useful scenario because it separates an ordinary cleaning problem from a repair problem. Philips notes that greasy residue from previous use can contribute to white smoke and recommends cleaning the pan, basket, and heating element thoroughly. However, smoke can have other causes too. If there is an electrical or acrid burning odor, visible wire damage, sparking, melted plastic, or a fault that persists after ordinary cleaning, stop using the appliance and follow the manufacturer’s service guidance rather than treating it as stubborn grease.
Before You Start: Check What Your Manufacturer Allows
Current official instructions are similar on the basics but not identical in every detail. Philips’ U.S. support page, updated June 3, 2025, tells users to unplug the air fryer, make sure it is not hot, remove the basket and pan, place the appliance upside down on a soft cloth to access the heater, clean with a soft sponge and hot water, and use a soft-to-medium bristle brush when necessary. Philips then instructs users of the covered models to return the unit upright and run it empty for a few minutes so loosened residue falls into the pan.
Ninja’s AF100-series owner’s guide is less elaborate: unplug before cleaning, never immerse the main unit, wipe the main unit with a damp cloth, and use a cleaning brush to remove food residue from the heating element.
Those differences lead to an important rule: do not automatically copy a model-specific step such as turning the appliance upside down or running it empty after cleaning unless your manual supports it.
Hot or warm water, used sparingly on the cleaning tool rather than poured into the appliance
A soft-to-medium bristle cleaning brush if your model instructions allow it
A dry cloth or towel for the surrounding work surface
Your air fryer’s exact model number and owner’s manual
For Jordan’s hypothetical air fryer, assume the owner’s manual permits cleaning the accessible heater with a soft sponge and brush. The basket and pan can be washed separately according to their own care instructions. The main unit stays out of the sink.
How to Clean an Air Fryer Heating Element
1. Unplug the air fryer and let it cool fully
Disconnect the plug from the wall outlet before reaching into the appliance. Do not judge temperature only by the basket: the heating element and nearby metal can remain hot after cooking. Philips tells users to make sure the appliance is not hot before heater cleaning, and Ninja requires unplugging before cleaning.
In the Jordan example, the right move is to postpone cleaning until the heater area is comfortable to approach safely rather than trying to wipe away grease while it is still warm.
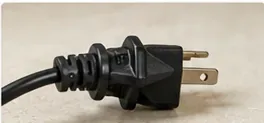
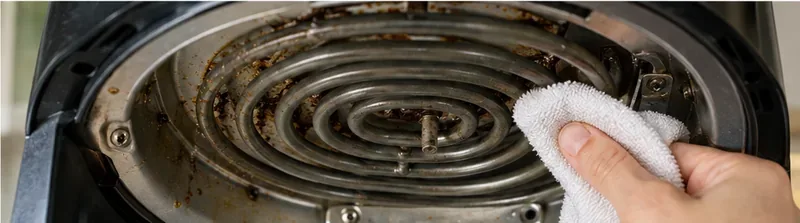
Step 1: Disconnect power first. The appliance should be unplugged and fully cool before you touch the heating area.
2. Remove the basket, pan, and permitted removable parts
Take out the basket and pan or drawer assembly so the cooking chamber is open. Clean those removable pieces separately according to the manual. Avoid removing screws, guards, fan covers, or electrical parts merely to get “better access” unless the manufacturer specifically designed them for user removal.
This is also a good time to verify the model number. If Jordan discovers that the manual gives a special steam-clean cycle or a different heater-cleaning method, that model-specific procedure takes priority over the general sequence here.
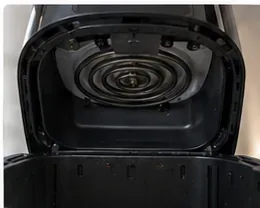
Step 2: Remove the basket and pan or other removable cooking parts so you can see the accessible heater area without forcing anything apart.
3. Inspect the heater before adding moisture
Look for three kinds of buildup: loose crumbs, stuck food particles, and a thin greasy film. You do not need to make the metal look factory-new. The goal is to remove residue that can burn, smoke, smell, or interfere with ordinary airflow around the cooking chamber without damaging the heater surface.
Jordan sees a few browned crumbs near the coil and grease on the surrounding metal. That calls for gentle brushing and wiping, not scraping.
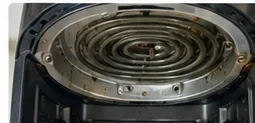
Step 3: Inspect before scrubbing. Loose crumbs, baked-on specks, and grease film need different levels of cleaning.
4. Brush away stuck food with the least aggressive tool that works
Use a soft cleaning brush first. If your manufacturer permits a medium-bristle brush, reserve it for residue that does not release easily. Philips explicitly says not to use a steel-wire brush or a hard-bristle brush because it can damage the coating on the heating element.
Work gently around accessible surfaces. Do not bend the heating coil, push tools into wiring openings, or pry behind parts that are not intended to move. A flexible brush can be useful on models whose manufacturer specifically recommends one for the area behind the heater.
For Jordan, the soft brush removes the browned crumbs without needing a metal scraper or abrasive pad.
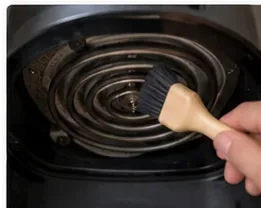
Step 4: For stuck food residue, official Philips and Ninja guidance supports using a cleaning brush; Philips specifies soft to medium bristles rather than hard or wire bristles.
5. Wipe the accessible heater and nearby interior with a soft damp sponge or cloth
Philips directs users of covered models to use a soft sponge with hot water on the inside and heating element. The key word is soft. The sponge or cloth should carry enough moisture to lift grease, but the main unit should never be treated like a washable pan.
Do not pour water into the cooking chamber, hold the heater under a faucet, or spray cleaner directly into electrical openings. Ninja specifically warns never to immerse the main unit in water or other liquid.
In the hypothetical example, Jordan dampens the cloth at the sink, wrings it out, and then wipes the greasy accessible surface. The basket and pan can receive a more conventional washing separately because they are removable parts.
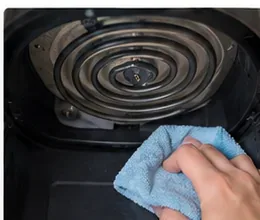
Step 5: Use a soft sponge or cloth with hot water on accessible interior surfaces and the heater when your model instructions permit it; keep water from pooling inside the main unit.
6. Wipe away loosened residue from the rest of the accessible interior
After brushing and wiping the heater, clean the nearby interior surfaces that collected the loosened particles. Otherwise, crumbs can remain in the chamber and move around the next time the fan runs.
A clean damp cloth is usually enough for the surrounding interior. Keep the control panel, vents, fan motor, and electrical connections free from excess moisture. If the residue is located behind a shield or panel that the manual does not tell you to remove, stop at the accessible surface rather than disassembling the appliance.
Jordan now has a visibly cleaner heater area and no loose crumbs sitting underneath it.
Step 6: Wipe loosened residue from the surrounding interior as well as the element so debris does not simply fall back into the cooking chamber.
7. Let the accessible interior dry completely
Before reconnecting power, make sure there is no visible water or wet cloth residue left in the chamber. Wipe away remaining moisture and leave the appliance open as needed until the accessible surfaces are dry.
There is no universal manufacturer-specified drying time that applies to every air fryer, so do not rely on an invented “30-minute rule.” Drying time depends on how damp the cleaning tool was, the design of the unit, and room conditions. The practical endpoint is a dry appliance, not a stopwatch.
For Jordan, this means waiting until the cleaned surfaces are dry rather than plugging the air fryer in immediately after wiping.
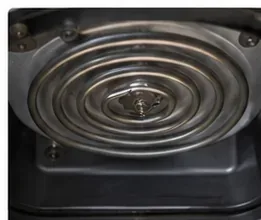
Step 7: Leave the interior clean and dry before reassembly or reconnection. Do not immerse the main unit in water.
8. Reassemble and follow the model-specific post-cleaning check
Return the air fryer to its normal upright position if you moved it, then reinstall the completely dry removable parts. Check the manual before deciding what comes next.
Philips instructs users of many covered models to run the air fryer empty for a few minutes after heater cleaning so loosened residue falls into the pan. That is a Philips model-specific instruction, not a universal rule for all brands. If your manufacturer does not specify an empty run, simply follow its own post-cleaning procedure.
In Jordan’s hypothetical case, assume the manual gives the same empty-run instruction as the covered Philips models. Jordan follows it exactly, then checks the pan for loosened residue. No claim is being made here that this would be the correct procedure for every air fryer.
Step 8: Reassemble the air fryer only after cleaning is complete. Follow your model manual for any post-cleaning empty run or other verification step.
What Not to Use on the Heating Element
Tool or method
Why to avoid it
Better option
Steel-wire brush
Philips warns it can damage the heater coating.
Soft or manufacturer-approved medium bristles.
Hard-bristle brush
Can be more aggressive than the heater coating is designed to tolerate.
Soft cleaning brush first.
Metal scraper or knife
Can scratch surfaces or deform accessible components.
Gentle brushing and damp wiping.
Pouring or spraying water into the main unit
The air fryer body contains electrical components and is not a wash basin.
Dampen the sponge or cloth away from the appliance.
Immersing the main unit
Ninja explicitly warns against immersing the main unit in water or other liquid.
Wash removable parts separately; wipe the main unit.
Removing internal covers without instructions
General user-cleaning guidance is for accessible surfaces, not unapproved disassembly.
Use the owner’s manual or authorized service path.
Does a Dirty Heating Element Cause Smoke?
It can contribute. Philips states that greasy residue left from previous use can cause white smoke and advises thoroughly cleaning the pan, basket, and heating element. Philips also lists fatty food, loose breading, and light ingredients reaching the heater as other possible causes. That matters because cleaning should not become a one-answer explanation for every smoke event.
In Jordan’s illustrative situation, visible grease provides a reasonable reason to clean. But if Jordan cleaned the appliance correctly and it continued producing an unusual electrical smell, sparks, or heavy unexplained smoke, the sensible next step would be to stop using it and seek manufacturer support rather than repeatedly scrubbing the heater.
How Often Should You Clean the Heating Element?
There is no single evidence-based calendar interval that fits every brand and cooking pattern. Philips’ older and current support materials emphasize regular cleaning and, for some models, cleaning after use; Ninja says the unit should be cleaned thoroughly after every use. In practice, inspect the heater area regularly and clean residue before it becomes a thick baked-on layer.
If you frequently cook fatty foods such as wings or bacon, inspect more often because airborne grease can reach the upper cooking chamber. If you mainly reheat dry foods and the heater remains clean, there may be less buildup to remove. The manual remains the best source for your particular model.
How to Tell Whether the Cleaning Worked
Use a simple visual and functional check rather than expecting polished metal. The accessible heating area should be free of loose food, heavy grease deposits, and wet residue. The basket and pan should be clean, the main unit should be dry, and all parts should be installed correctly.
No loose crumbs remain around the accessible heating element.
No puddled water or obvious moisture remains inside the main unit.
The heater has not been bent, scratched with metal, or forced out of position.
The basket and pan slide back into place normally.
Any manufacturer-specified post-cleaning check completes without a new warning or fault.
For the hypothetical Jordan scenario, that is the end point: not a shiny “restored” heater, but an air fryer that has been gently cleaned according to the manufacturer’s method and is ready for normal use after the required checks.
The Bottom Line
To clean an air fryer heating element safely, start with power disconnected and the appliance fully cool. Remove the basket and pan, inspect the accessible heater, loosen residue with a soft brush, wipe with a soft damp sponge or cloth as the manual allows, clear debris from the surrounding interior, let everything dry, and then follow the model-specific reassembly and verification instructions.
The most important limitation is also the easiest to remember: clean the parts the manufacturer intends you to reach; do not turn routine cleaning into appliance disassembly. Philips and Ninja both support gentle heater cleaning, but their exact procedures differ. Matching the method to your model protects both the heating element and the electrical appliance around it.