Home
» How to
»
How to Clean an Epson Printhead Safely: Nozzle Check, Head Cleaning, and Power Cleaning
How to Clean an Epson Printhead Safely: Nozzle Check, Head Cleaning, and Power Cleaning
The safest way to clean an Epson printhead is usually to use the printer’s built-in maintenance functions, not to remove the printhead or push cleaning fluid through it. Start with a nozzle check, run a standard Head Cleaning only when the pattern shows missing or faint lines, and then print another nozzle check. Escalate to Power Cleaning only if your exact Epson manual tells you to do so and the printer meets the required ink and maintenance-box conditions.
Illustrative example: imagine that Maya has an Epson home inkjet printer that has been sitting unused for several weeks. A color document now prints with pale cyan streaks. This is a hypothetical scenario, not a real test result or testimonial. We will use it to show how to make each maintenance decision without assuming that every Epson model has the same menus, cleaning limits, or waiting periods.
Before You Clean: Make Sure the Printhead Is Actually the Problem
Print quality problems can come from several sources: clogged nozzles, low or improperly supplied ink, the wrong paper setting, alignment problems, or a damaged consumable. A nozzle check is a diagnostic pattern printed by the printer so you can see whether the tiny ink nozzles are firing consistently.
Epson’s official guidance for many current models follows the same basic logic: print a nozzle check, inspect the pattern, and run Head Cleaning if the pattern has gaps or faint sections. For example, Epson’s ET-2980/L4360 maintenance instructions tell users to print a nozzle check and select Cleaning when the pattern has gaps or is faint. Epson’s computer-utility nozzle-check instructions describe the same decision process from Windows or macOS.
For Maya’s hypothetical printer, the first useful question is not “What cleaning liquid should I use?” It is “Does the nozzle check actually show missing cyan lines?” If the answer is no, repeated head cleaning may waste ink without addressing the real cause.
What You Need
A few sheets of plain paper
Enough ink for the maintenance cycle
Access to the printer’s control panel or Epson printer utility
The exact Epson model number
The official user guide for that model if the menu names or cleaning limits differ
You generally do not need cotton swabs, syringes, cleaning fluid, alcohol, distilled water, or tools to remove the printhead for the standard Epson maintenance workflow. Some professional Epson printers have model-specific procedures for cleaning the printhead area or capping station, but those instructions should not be generalized to home and office printers.
Step 1: Print a Nozzle Check Before Cleaning
Load plain paper and find the printer’s maintenance menu. Depending on the model, the option may be called Nozzle Check or Print Head Nozzle Check. Some printers offer it directly on the control panel; others also expose it through Epson’s printer utility on a computer.
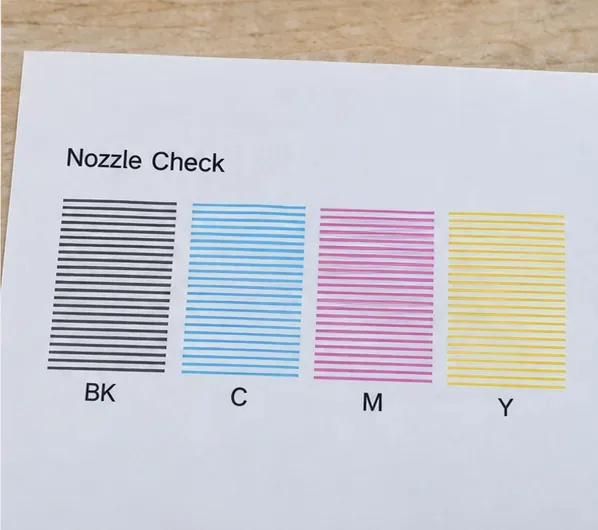
A representative nozzle-check pattern. On your real printer, compare the printed pattern with the examples in the model-specific Epson guide rather than relying on this illustration as a test reference.
Look for broken, missing, or noticeably faint segments. If the lines are complete, stop. Cleaning is not automatically beneficial when the nozzles are already clear.
In our hypothetical example, Maya sees several missing cyan segments while the other colors look complete. That gives her a reason to run a standard Head Cleaning cycle.
Step 2: Run Standard Head Cleaning
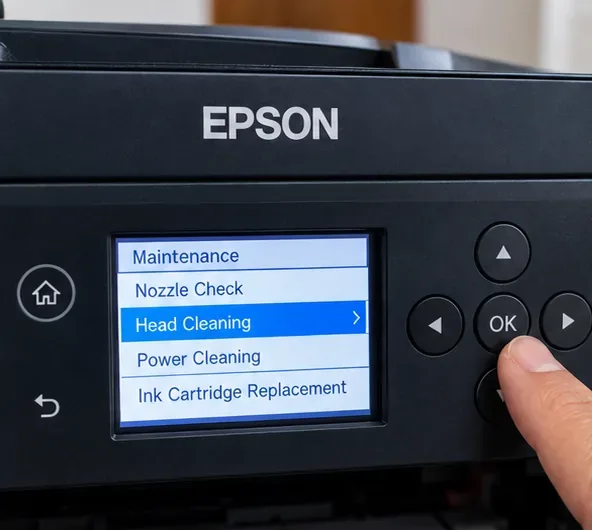
Use the printer’s built-in Head Cleaning function. The exact path varies by model, but a common route is through a Maintenance menu on the printer itself.
A representative control-panel maintenance menu with Head Cleaning selected. Menu layout and available items vary by Epson model.
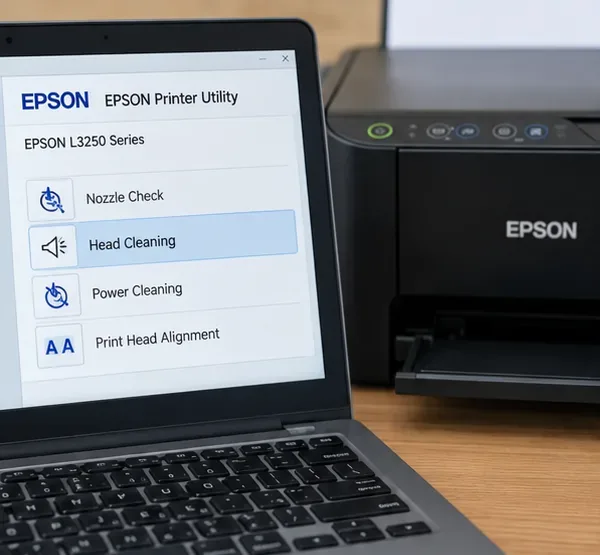
You may also be able to run the same maintenance function from Epson’s printer utility on Windows or macOS. Epson’s computer-based instructions generally direct the user to open the printer utility and choose a nozzle-check or head-cleaning function.
A representative Epson printer utility with Head Cleaning highlighted. Use your installed Epson software and model guide because names and screen layout can change by product and software version.
Once the cleaning cycle starts, let it finish. Epson manuals commonly caution users not to turn off the printer during cleaning, and some models also warn against opening the front cover during the cycle. Interrupting the process can leave the printer unable to print correctly.
For Maya, this means she selects Head Cleaning and waits for the printer to complete the process. She does not open the carriage area, wipe the nozzle plate, or add cleaning fluid.
Step 3: Print Another Nozzle Check and Decide Whether to Stop
After the standard cleaning cycle finishes, print another nozzle check. The goal is not to make the paper look “perfect” by repeatedly cleaning until the ink tanks drop; the goal is to verify whether the missing segments have returned.
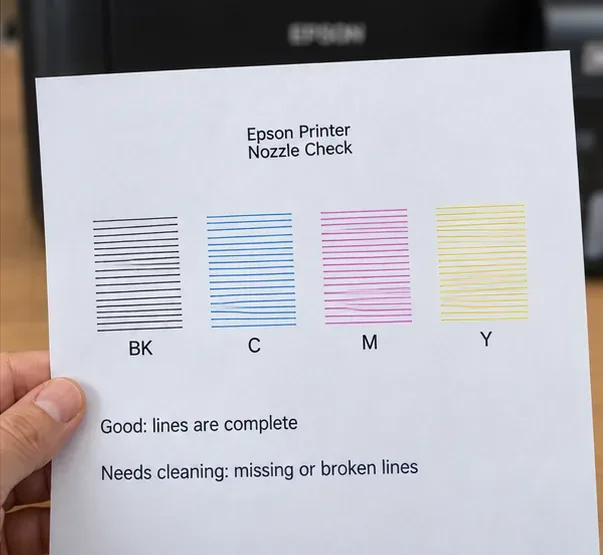
Check the pattern again after cleaning. If the real pattern is complete, stop cleaning; if gaps remain, follow the repetition limit in the manual for your exact model.
If the gaps are gone, Maya stops and prints a normal document. If the same cyan gaps remain, she can repeat Head Cleaning only within the limit Epson specifies for her model.
This is where model-specific instructions matter. Epson’s ET-2980/L4360 guide says that if gaps remain after running the nozzle check and Cleaning three times, the user should turn the product off and wait at least 12 hours before trying again. By contrast, the WorkForce Pro WF-3820 nozzle-check guide says that if there is no improvement after cleaning up to four times, wait at least six hours without printing before trying again.
Those two official examples show why generic advice such as “run cleaning three times” or “wait overnight” should not be treated as universal Epson instructions. Check the manual for the exact model.
Step 4: Use Power Cleaning Only When the Nozzle Pattern Justifies It
Power Cleaning is a stronger maintenance cycle that moves substantially more ink through the system than a standard Head Cleaning. It is not a routine first step.
Epson’s current guidance for several EcoTank models says Power Cleaning is appropriate when white or dark lines or missing nozzles remain after repeated head cleaning. Some Epson instructions are even more specific: when most lines in the nozzle check still appear, use ordinary Cleaning rather than Power Cleaning.
For tank-based models covered by Epson’s Power Cleaning guidance, Epson warns that the process consumes a lot of ink, may fill the maintenance box faster, and requires each ink tank to be at least one-third full. If ink levels or maintenance-box capacity are insufficient, the feature may not run.
In Maya’s hypothetical case, she would consider Power Cleaning only if her model’s manual offers it and the nozzle check still meets Epson’s escalation criteria. If the printer has recovered after standard cleaning, she gains nothing by running the more aggressive cycle.
Standard Head Cleaning vs. Power Cleaning
Option
Use it when
Tradeoff
Nozzle Check
You need to diagnose missing or faint nozzle output
Uses paper and a small amount of ink, but does not clean by itself
Head Cleaning
The nozzle check shows gaps or faint lines
Uses ink; repeating it unnecessarily wastes ink and may not solve non-nozzle problems
Wait and recheck
You reached the cleaning repetition limit in your model’s guide
Takes time, but avoids immediately escalating and follows Epson’s recovery sequence
Power Cleaning
Your exact manual recommends it after unsuccessful standard cleaning or a severely missing pattern
Consumes much more ink and can use maintenance-box capacity faster
Should You Manually Flush an Epson Printhead?
For most consumer Epson printers, manual flushing should not be your first response to clogged nozzles. Online procedures sometimes involve removing cartridges, moving the carriage by hand, pushing cleaning solution through ink ports, soaking nozzle plates, or removing the printhead assembly. These procedures are not interchangeable with Epson’s built-in maintenance workflow and can introduce new risks, including damaged seals, contaminated electronics, air entering the ink path, or physical damage to the printhead.
If your exact Epson service or user documentation contains a manual cleaning procedure, follow that procedure precisely. Otherwise, stay with Nozzle Check, Head Cleaning, the model-specific waiting period, and Power Cleaning where supported. If quality still does not improve, Epson’s official guides typically direct the user to contact Epson support rather than continue escalating home remedies.
What if the Nozzle Check Is Clean but Prints Still Look Bad?
A clean nozzle pattern means the next troubleshooting step may be somewhere else. Check printhead alignment, paper type, print-quality settings, genuine ink delivery, and whether the problem appears only in one application or file.
For example, if Maya’s second nozzle check has complete lines but her photos still show banding, repeating Head Cleaning is unlikely to be the best next step. She should move to alignment and media/settings checks instead.
Why Waiting Can Be Part of the Cleaning Process
Waiting after repeated cleaning is not wasted time. Epson explicitly includes rest periods in several maintenance sequences. The required duration varies by model, which is why you should not substitute a generic internet rule for your user guide.
On the ET-2980/L4360 example, Epson says to wait at least 12 hours after three unsuccessful cleanings before checking again. On the WF-3820 example, Epson specifies at least six hours after up to four unsuccessful cleanings. Some Power Cleaning instructions also require at least 12 hours before another Power Cleaning.
When to Stop Cleaning and Contact Epson
Stop escalating maintenance when you have followed the model-specific cleaning sequence and the nozzle pattern still does not recover. Epson’s guides commonly direct users to support after the recommended Head Cleaning, waiting period, and Power Cleaning steps fail.
You should also stop if the printer reports an ink-system error, maintenance-box problem, mechanical error, or another condition that prevents the normal cleaning cycle. Repeatedly restarting maintenance while an error is active can consume supplies without fixing the underlying issue.
A Practical Decision Path
Print a nozzle check.
If the pattern is complete, do not clean the printhead.
If the pattern has gaps or faint areas, run standard Head Cleaning.
Print another nozzle check.
Repeat only up to the limit in the manual for your exact Epson model.
If Epson specifies a waiting period, wait before trying again.
Use Power Cleaning only if your model supports it, the nozzle pattern warrants it, and the ink/maintenance conditions are satisfied.
If the problem remains, contact Epson support or an authorized service option instead of improvising a manual flush.
Bottom Line
Cleaning an Epson printhead is mostly a diagnostic process: check first, clean only when the pattern shows a nozzle problem, verify the result, and escalate carefully. The built-in cleaning system is designed to move ink through the printhead without requiring you to expose or physically scrub the nozzle plate.
The most important detail is the model number. Even within Epson’s current lineup, the number of allowed cleaning cycles, the required waiting period, and the availability of Power Cleaning can differ. Use the official Epson guide for your printer as the final authority, and treat any generic instructions—including this article—as a framework for understanding the decision process rather than a replacement for model-specific steps.