Home
» How to
»
How to Clean Golf Grips: Restore a Clean, Secure Feel Without Damaging Them
How to Clean Golf Grips: Restore a Clean, Secure Feel Without Damaging Them
A properly cleaned golf grip should feel free of dirt, sweat, sunscreen, and oily residue, with its original surface texture easier to feel again once it is fully dry. Cleaning can improve the feel of a grip that is simply dirty, but it cannot reverse hardened rubber, cracks, crumbling material, or permanent wear.
For standard rubber and rubber-and-cord grips, a reliable baseline is soap, water, a soft brush, and thorough drying. Golf Pride specifically recommends cleaning grips between rounds with a soft brush, soap, and water, then drying them thoroughly. However, not every grip material should be treated the same way. Some leather grips require water only, so identify the grip material before using detergent.
What should a good cleaning result look and feel like?
The goal is not to make an old grip look brand new. The goal is to remove surface contamination without damaging the grip and then judge whether useful traction remains.
After cleaning and complete drying, check for four things:
The surface no longer feels greasy or coated.
The molded texture or cord is easy to feel under your fingers.
The grip does not feel slick simply because soap residue was left behind.
The material is still flexible and structurally sound, without cracks, crumbling, or severe glossy wear.
If the grip is cleaner but still feels hard, polished, or slippery, cleaning has probably reached its limit. Golf Pride lists a slick or glossy surface, firmer-than-normal feel, crumbling rubber or cord, and worn cosmetics as signs of grip wear. Its grip-wear guidance recommends replacing grips when those wear signs become evident rather than trying to clean indefinitely.
Can every golf grip be cleaned with soap and water?
No. The soap-and-water method is appropriate for many common rubber and synthetic grips, but material-specific instructions take priority.
Golf Pride recommends a soft brush, soap, and water for routine grip cleaning. IOMIC also says its grips can be wiped with dish soap and warm water. By contrast, The Grip Master tells owners of its tactified leather grips to use plain water and a towel and to avoid detergents or solvents because they can reduce tack and damage the leather.
If you are unsure what your grip is made from, check the manufacturer before cleaning. This is especially important for leather, wrapped, foam-like, or specialty tacky grips. You can compare current manufacturer instructions at Golf Pride Grip Care, IOMIC Grip Care, and The Grip Master’s care FAQ.
What do you need to clean standard rubber or cord grips?
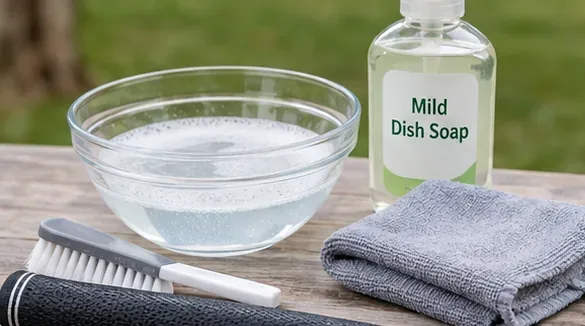
For a basic cleaning session, gather a bowl or bucket of warm water, a small amount of mild dish soap, a soft-bristle brush, a clean cloth, and a dry towel. The brush should be soft enough to lift grime from texture and cord without aggressively scraping the surface.
Step 1: Gather soap, water, a soft brush, and clean towels before you start so the grip can be cleaned and dried in one session.
If your grip manufacturer gives different instructions, use those instead. The steps below are intended for conventional rubber or rubber-and-cord grips that are compatible with soap and water.
How to clean golf grips in four steps
1. Mix a small amount of soap with warm water
Use enough soap to create a light cleaning solution rather than a concentrated detergent bath. You are trying to remove hand oils, sweat, dirt, and residue from products such as sunscreen. Heavy soap does not necessarily clean better and can create more residue to remove afterward.
Before wetting the grip, look at its condition. If it is cracked, crumbling, separating, or badly polished smooth in the areas where your hands sit, replacement is likely to produce a better result than cleaning.
2. Scrub the grip gently with a soft brush
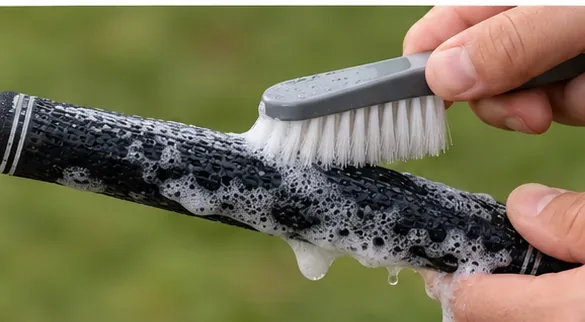
Dip the soft brush into the soapy water and work over the entire gripping surface with light to moderate pressure. Pay extra attention to the areas where the lead hand, trail hand, and thumbs normally contact the club. Those zones often collect the most oil and show the most wear.
Step 2: Work the soapy water across the textured surface with a soft brush rather than trying to scour the grip aggressively.
The quality check at this stage is visual: dirty foam or loosened grime is expected, but the grip surface itself should not be shedding material. If rubber or cord starts to crumble while you clean, stop. That is a wear problem, not a dirt problem.
3. Remove the soap and loosened residue
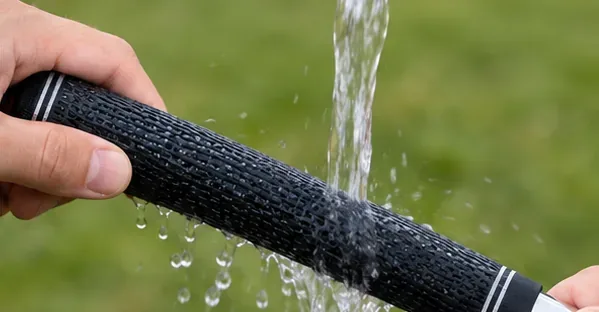
Rinse the cleaned grip with fresh water or wipe it thoroughly with a clean, water-dampened cloth until the soap and loosened debris are gone. Do not leave a detergent film on the surface, because a residue-coated grip can feel slick even though the underlying material is clean.
Step 3: Remove the soap and suspended dirt with clean water so no slippery detergent film remains on the grip.
If the water or cloth still picks up obvious grime, repeat the gentle cleaning cycle once rather than immediately reaching for a stronger chemical. Solvents and harsh cleaners are not a universal upgrade; they can be incompatible with some grip materials.
4. Dry the grip thoroughly before judging the result
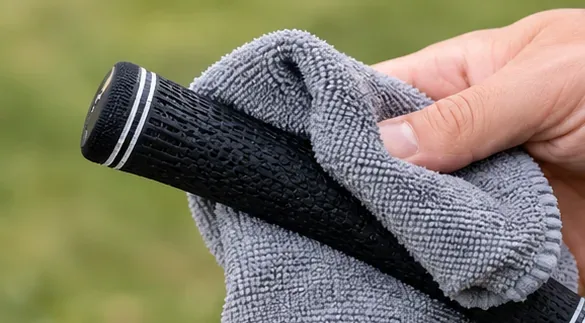
Use a clean towel to remove surface water, then allow the grip to finish drying before deciding whether the cleaning worked. Golf Pride specifically emphasizes thorough drying because moisture works against the clean, secure feel you are trying to restore.
Step 4: Dry the grip thoroughly with a clean towel, then let any remaining moisture dissipate before evaluating traction.
Do not evaluate tackiness while the grip is wet. Once dry, hold the club normally with clean, dry hands. A successful cleaning should leave the texture clearer and the grip free of oily or soapy film. The exact amount of tack depends on the grip design and material, so compare it with its own normal feel rather than expecting every grip to become sticky.
When should you clean it again, and when should you stop?
What you notice after drying
Best next step
Grip feels clean and the texture is easy to feel
Use it normally and keep it dry between rounds.
Grip still feels soapy or unusually slick
Rinse or wipe again with clean water, then dry thoroughly.
Visible grime remains but the material is healthy
Repeat one gentle soap-and-water cleaning cycle.
Grip is glossy, hard, cracked, crumbling, or permanently slick
Cleaning is unlikely to restore worn material; consider regripping.
Grip is leather or another specialty material
Stop and follow that manufacturer’s care instructions.
How often should golf grips be cleaned?
There is no single schedule that fits every golfer. Golf Pride encourages regular cleaning and specifically notes cleaning between rounds, while also recommending that grips be checked for wear at least annually. How often you actually need to wash them depends on playing frequency, sweat, humidity, dirt, sunscreen, and how the clubs are stored.
A useful trigger is condition rather than a rigid calendar. If the grip feels noticeably oily, dirty, or less secure than usual, clean it. If you play in hot or humid weather, practice frequently, or use sunscreen heavily, buildup may return faster.
Also keep your hands reasonably clean during play. Golf Pride recommends wiping dirt and oils from the hands with water and a clean towel to reduce residue transfer. This does not replace grip cleaning, but it can slow the buildup that makes grips feel dirty.
What cleaning mistakes can reduce the quality of the result?
Using a harsh solvent because the grip is very dirty. Compatibility varies by material, and stronger chemistry can damage specialty grips.
Using an abrasive or stiff brush. The goal is to lift contamination, not grind down the grip surface.
Leaving soap behind. Residue can make a clean grip feel slippery.
Judging traction while the grip is still wet. Dry it completely before deciding whether the surface feel has improved.
Trying to clean away structural wear. Hardening, cracking, crumbling, and polished wear are replacement signals, not cleaning problems.
Can cleaning extend the life of golf grips?
Regular cleaning can help preserve the useful feel of grips by removing the dirt, oils, and moisture that accumulate during play. Golf Pride states that proper care can extend grip life and recommends keeping clubs in a cool, dry place away from prolonged sunlight and heat.
But cleaning has a limit. Grips are wear items. Golf Pride recommends regripping at least once a year as a general guideline, with actual timing changing according to how much a golfer plays or practices. That recommendation is not a guarantee that every grip must be replaced on the same date; visible and tactile wear still matters.
Final quality check
Before putting the club back in the bag, make sure the grip is dry, clean to the touch, free of soap residue, and still structurally sound. Then hold it with clean, dry hands and make a few normal practice swings in a safe area. You should not need to squeeze unusually hard simply to keep the club secure.
If the surface is still glossy, hardened, cracked, or slippery after a careful cleaning, changing cleaners is unlikely to solve the underlying wear. At that point, replacing the grip is the more appropriate maintenance step.