How to create a Zalo chat group on the computer

Creating a Zalo chat group on your phone is not difficult and you have also known in the article of the same name before. But Zalo for PC is also a popular free and popular chat tool today. Users can also set up Zalo chat group on computers similar to on mobile devices.

Zalo

As mentioned before, Zalo is one of the mobile chat applications that supports the most operating systems, including on mobile and on computers (besides Windows, there are Zalo for Mac and Zalo for Linux ). And in addition to using these downloaded versions, we can also use Zalo directly on the web to create chat groups.

How to create a Zalo chat group on the computer

Video tutorial to create group chats on Zalo PC

How to create a Zalo PC chat group

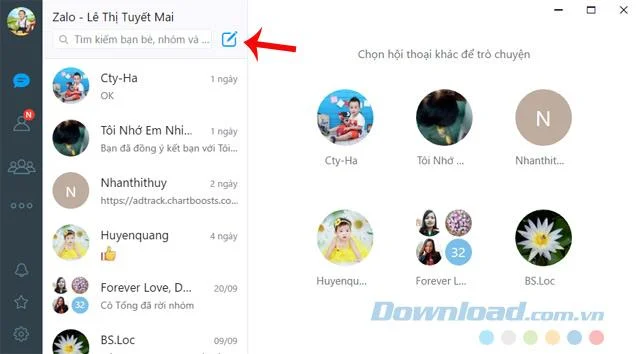
Step 1 : On the main interface of Zalo computer, click the Create Chat icon (as shown in the picture below) or use the key combination Ctrl + N to create a new Zalo chat group.

How to create a Zalo chat group on the computer

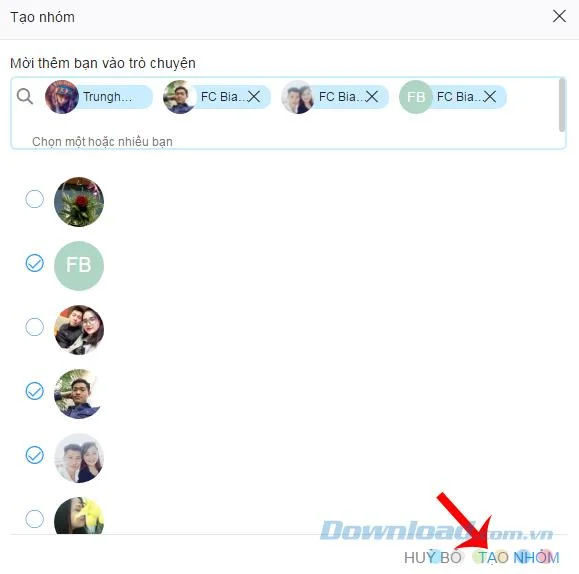
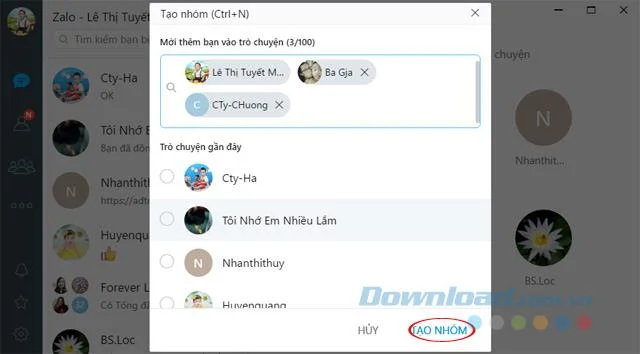
Step 2 : The Create group window appears, invite more friends to the group chat. Zalo supports group chats with up to 100 people. After selecting group members, click the Create group button to create group chats.

How to create a Zalo chat group on the computer

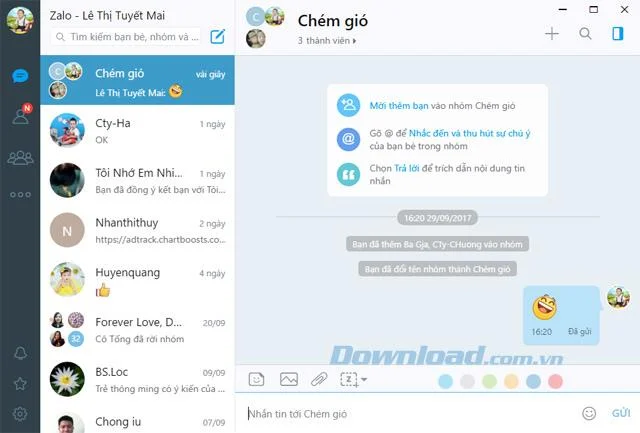
Step 3 : Give the group a name, then start a conversation with everyone right away.

How to create a Zalo chat group on the computer

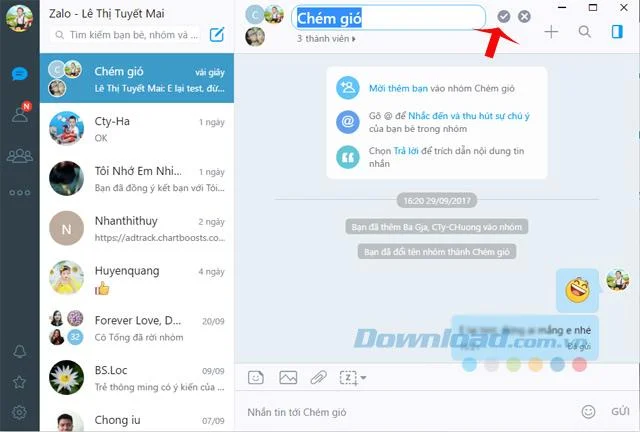
Step 4 : After creating the group successfully, you can add and remove members as you like. When you want to change the group name, just hover over the group name, a pencil appears next, click on it, and then change the name. Then, click on the checkmark icon to finish the renaming.

How to create a Zalo chat group on the computer

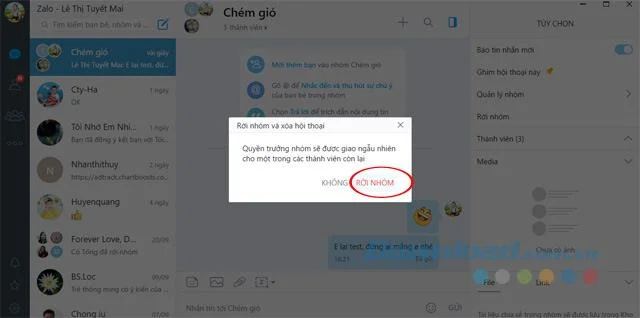
Step 5: When you want to leave the group, just click the Options icon , then select Leave group.

How to create a Zalo chat group on the computer

Step 6: The Leave group and delete dialog box appears, click Leave group to exit the group.

How to create a Zalo chat group on the computer

Manage, arrange group chat Zalo PC

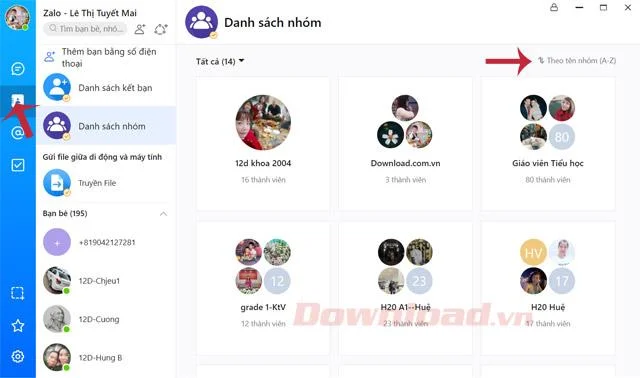
You can view groups more visually thanks to the group list sorting feature. Click on the Contacts icon in the left sidebar, then Group List . Here will list the entire Zalo group list.

How to create a Zalo chat group on the computer
Zalo chat group

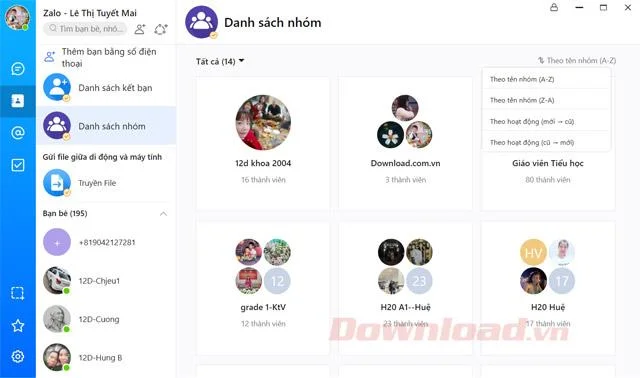
At this time, click the arrange icon in the upper left corner, there are 4 sorting criteria:

  • Sort by group names A - Z.
  • Sort by group name Z - A.
  • Sort by old activity - new.
  • Sort by new activity - old.
How to create a Zalo chat group on the computer
Sort Zalo group

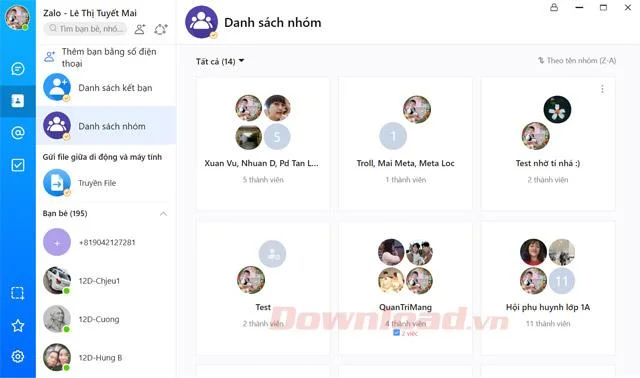
After choosing the sort by any type will display that style for you to easily manage.

How to create a Zalo chat group on the computer
After sorting Zalo group

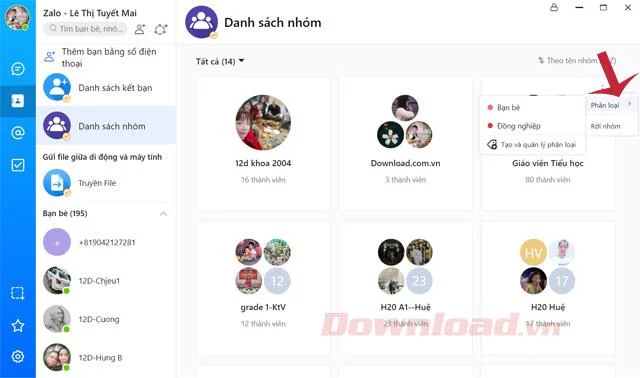
Also here, you can classify chat groups for more convenient management: Friends, Colleagues, Family ... or you can click Leave group to leave the group.

How to create a Zalo chat group on the computer
Classification chat group Zalo

How to chat Zalo group on the web

Step 1 : You access the link above to go to the homepage of Zalo online, then proceed to log in as with Zalo version for the computer.

How to create a Zalo chat group on the computer

Step 2 : Confirm your login by following the request that appears after that.

How to create a Zalo chat group on the computer

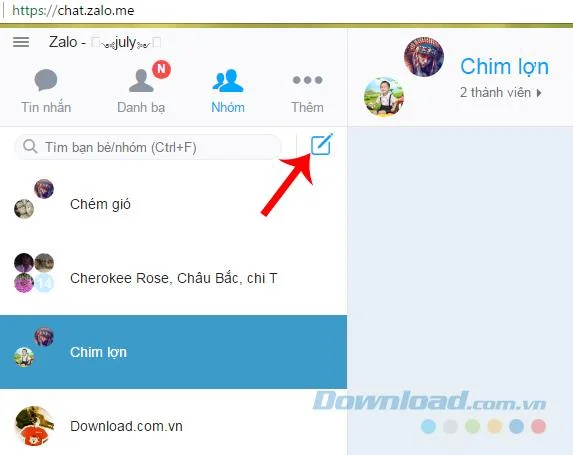
Step 3 : From the main interface of Zalo web platform, you also left-click on the Add chat group icon as below.

How to create a Zalo chat group on the computer

Step 4: Proceed to select and add new people to the group as done above.

How to create a Zalo chat group on the computer

So you've just added two ways to create Zalo chat group, hope with these simple instructions, your conversation with friends and relatives will be easier and more convenient.
I wish you successful implementation!

Leave a Comment

Enable FIPS Mode on SLES 15 and Verify the Boot State

Enable FIPS Mode on SLES 15 and Verify the Boot State

Follow SUSE’s SP7 procedure to enable FIPS mode, reboot safely, verify the active policy, and check whether your compliance requirement calls for validated modules.

Set Up a LUKS-Encrypted Data Volume on SLES

Set Up a LUKS-Encrypted Data Volume on SLES

Compare YaST and cryptsetup for a new encrypted SLES data volume, choose LUKS1 or LUKS2, and verify unlock and mount behavior safely.

Build a Custom AppArmor Profile on SUSE Linux

Build a Custom AppArmor Profile on SUSE Linux

Create, refine, and verify a least-privilege AppArmor profile on SLES 15 SP7, with a clear note on SLES 16’s SELinux default.

Build a Local SUSE Update Server with RMT on SLES 15

Build a Local SUSE Update Server with RMT on SLES 15

Set up RMT on SLES 15, mirror entitled repositories, and verify HTTPS registration and package access from a test client.

Join SLES 15 to Active Directory with SSSD in YaST

Join SLES 15 to Active Directory with SSSD in YaST

Connect SLES 15 to AD with YaST’s SSSD-based logon management, then verify directory lookup, domain login, and Kerberos tickets.

Enable SLES Live Patching and Verify a Kernel Fix

Enable SLES Live Patching and Verify a Kernel Fix

Set up the right Live Patching path for SLES 16.0 or 15 SP7, apply eligible kernel fixes, and confirm what is active without confusing it with a reboot-required kernel update.

Install and Sign Custom Kernel Modules on SLES 15 Secure Boot

Install and Sign Custom Kernel Modules on SLES 15 Secure Boot

Load a custom SLES 15 kernel module without disabling Secure Boot. Match the running kernel, sign the .ko file, enroll a MOK key, and verify loading.

Keep Services Available During a SLES 15 SP5 to SP6 Upgrade

Keep Services Available During a SLES 15 SP5 to SP6 Upgrade

SLES 15 SP5 can migrate online to SP6, but each node must reboot. Use a tested rolling upgrade or blue-green cutover to keep workloads reachable.

Apply the SLES 15 STIG Safely with OpenSCAP

Apply the SLES 15 STIG Safely with OpenSCAP

Use SUSE’s supported STIG profile to scan SLES 15, test remediation, review remaining findings, and retain assessment evidence.

Restore Cockpit Access to SUSE Linux Enterprise Server

Restore Cockpit Access to SUSE Linux Enterprise Server

Trace a failed Cockpit connection through DNS, port 9090, the systemd socket, firewalld, TLS, and login settings using current SUSE guidance.