Home
» How to
»
How to edit music file information with 3uTools
How to edit music file information with 3uTools
Video How to edit music file information with 3uTools
Many audio files, mostly music files, will be edited with the external title in a simple way, but not in the details inside the file, in some cases such as When putting music on TV, the file will show a different name or no name.
If you encounter such a case, please use 3uTools software, this software will help you edit details of audio files, music files in accordance with information that audio files must have, follow below. This article is to know how to edit music files with 3uTools. Check out the article Instructions to install 3uTools on the computer.
Instructions to edit music file information, edit audio file information with 3uTools software
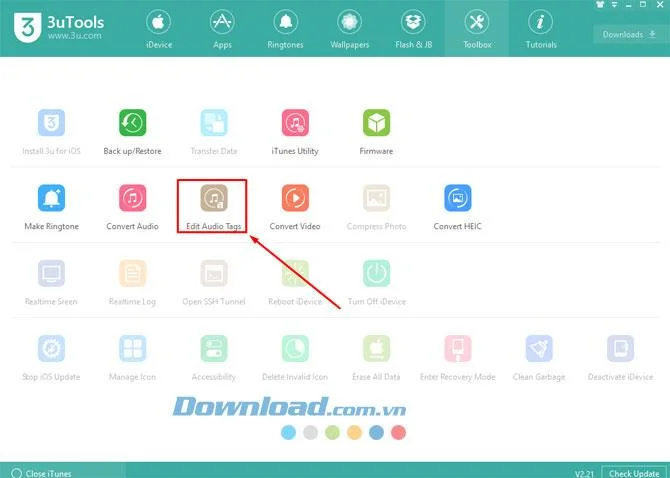
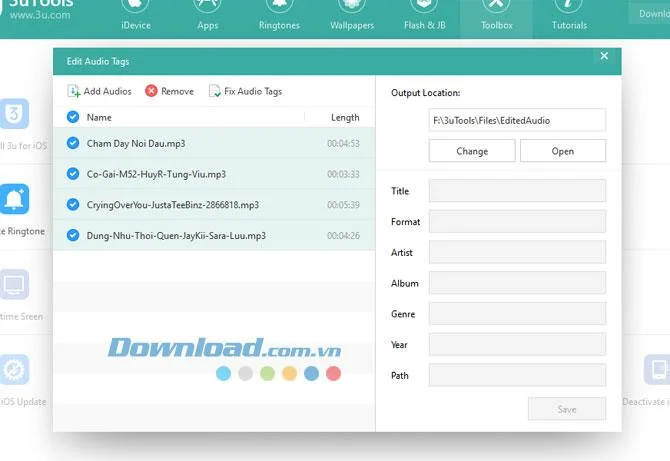
Step 1: Launch 3uTools and then click Edit Audio Tags.
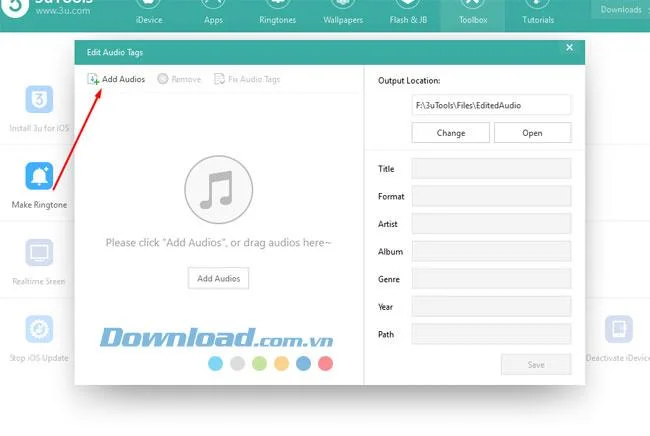
Step 2: Click Add Audios to add the audio file, the music file you want to edit.
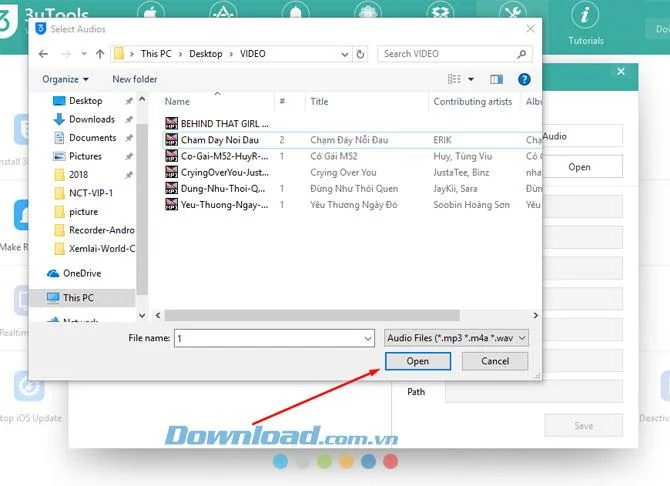
Step 3: You can select multiple music files to edit, select and click Open to open the music you want to edit.
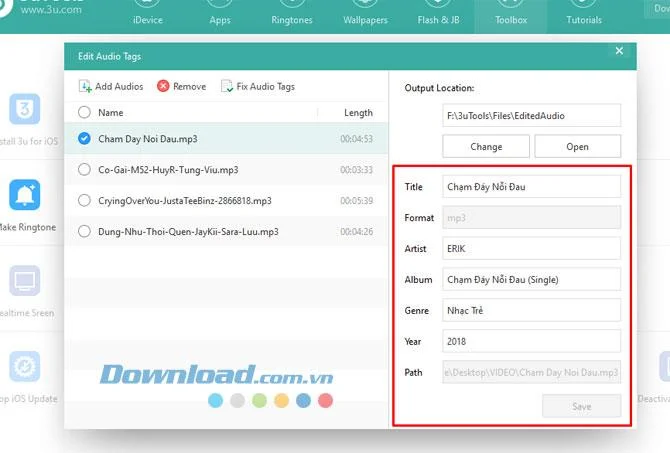
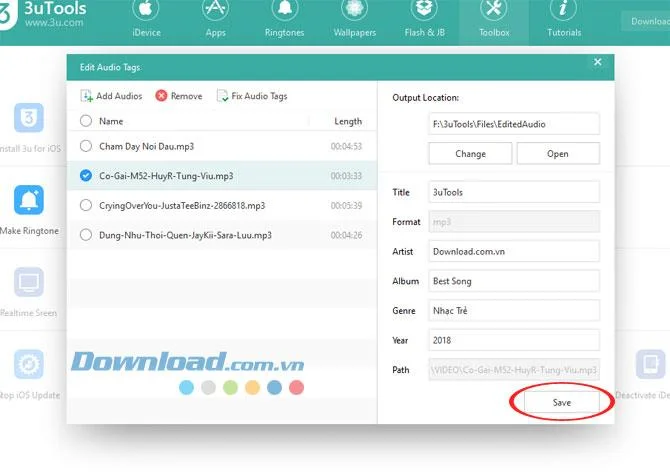
Step 4: Select the song in the playlist you want to edit, in which you will have the following options:
Title: The title of the song.
Artist: Performing artists.
Album: The album of the song.
Genre: Genre of music.
Year: The year the song appears.
If you select 2 or more tracks in the playlist you will not be customized.
Step 5: After editing the file, click Save to save the edited information.
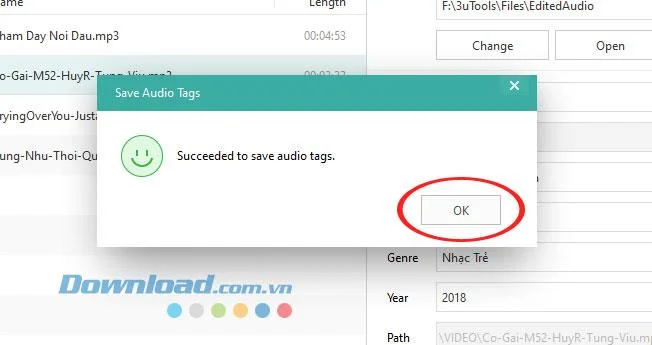
Step 6: When the message Secceeded to save audio tags appears, you have successfully edited the information of the audio file. Click OK to finish.
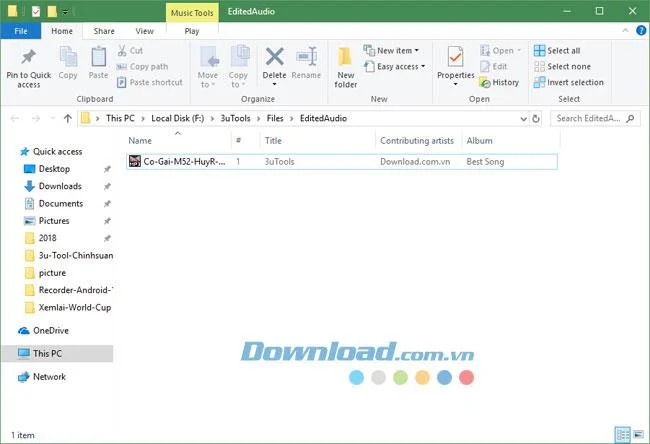
Then click Open in the link above to open the folder containing the edited music files.
With instructions on editing audio files, editing music files with 3uTools above will help you correct the sound file information, from which will choose the most accurate audio files.
In addition to editing the audio file information above, you can convert the audio file format, change the tail of the music file, select the audio format to be used for your device through the article How to convert audio formats bar, change music tail with 3uTools.