Home
» How to
»
How to Get Permanent Marker Off a Dry-Erase Board Without Damaging the Surface
How to Get Permanent Marker Off a Dry-Erase Board Without Damaging the Surface
Permanent marker on a dry-erase board usually looks worse than it is. Current manufacturer guidance still supports a simple first-line fix: cover the permanent ink with a fresh dry-erase marker, then erase or wipe it away. Quartet specifically recommends tracing over accidental permanent-marker writing with fresh dry-erase ink, waiting briefly, erasing, and then cleaning the board with an approved board cleaner. 3M gives a similar overwrite-and-wipe approach for accidental use of a non-specified marker on its DI-NOC whiteboard film.
The important exception is board type. Some specialty surfaces behave differently. For example, 3M's Post-it Easy Erase Permanent Marker Whiteboard is intentionally designed so permanent marker can be removed with water and a cloth. A standard melamine, painted-steel, porcelain, glass, or specialty film board should therefore be cleaned according to its own surface instructions rather than with a one-size-fits-all household solvent.
Quick reference: what to try first
Situation
Best first action
Avoid
Permanent marker on a standard dry-erase whiteboard
Cover with fresh dry-erase marker, then erase and clean with approved board cleaner
Jumping straight to harsh household chemicals
Permanent marker on a glass dry-erase board
Use the dry-erase overwrite method, then the cleaner specified for glass
Assuming standard whiteboard cleaner is correct for every glass board
Post-it Easy Erase Permanent Marker Whiteboard
Water and the recommended cloth can remove permanent marker
Adding chemicals that the product does not need
Unknown or specialty board surface
Check the model or manufacturer instructions first
Abrasives, solvents, or melamine sponges before confirming compatibility
Faint residue after the first pass
Repeat the dry-erase-marker method, then use approved board cleaner
A fresh dry-erase marker, preferably a dark color so you can see where you have covered the permanent ink
A clean dry-erase eraser or soft microfiber cloth
The cleaner approved for your board surface
One or two clean dry towels or microfiber cloths
The board manufacturer's care instructions if the surface type is unclear
You usually do not need rubbing alcohol, acetone, abrasive powder, a razor blade, or a magic eraser for the first attempt. Quartet explicitly says it does not recommend general household cleaners for its boards. Starting with the least aggressive manufacturer-supported method protects the coating and makes troubleshooting easier if residue remains.
Step 1: identify the board surface and the mark
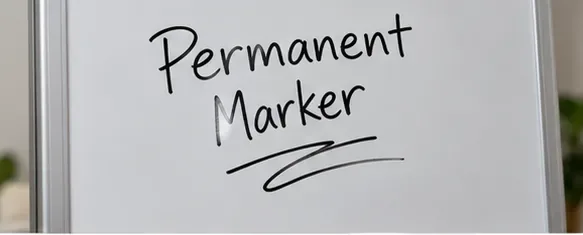
Start by confirming the problem is permanent-marker ink and noting the board surface before applying anything.
Confirm that the writing is actually permanent marker rather than old dry-erase ink, paint marker, grease pencil, or another material. Then identify the board surface if you can. A standard framed whiteboard may be melamine, painted steel, porcelain, or another coated surface. Glass boards and specialty films can have different cleaning requirements.
If you know the brand or model, check the current care page before applying anything beyond dry-erase ink and a soft eraser. This matters because a method that is harmless on glass may be unnecessarily aggressive on a coated board.
Practical check: if the board has a label, model name, or purchase record, use that information now. If not, begin with the dry-erase-marker method because it is specifically supported by major whiteboard manufacturers and does not require an added household solvent.
Step 2: use a fresh dry-erase marker over the permanent ink
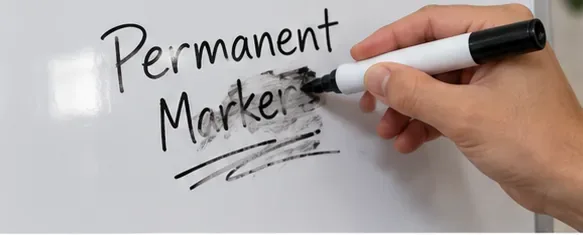
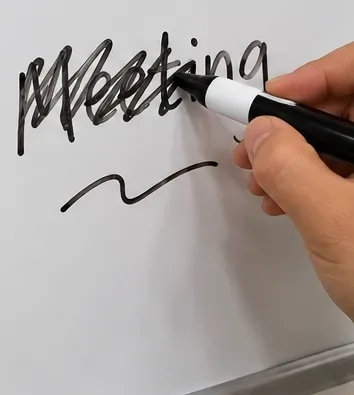
Cover the permanent ink with fresh dry-erase marker, following the manufacturer-supported first-line method for standard whiteboards.
Trace directly over the permanent marker with a fresh dry-erase marker. Quartet's current FAQ recommends using a fresh dry-erase marker over the permanent writing; its dry-erase whiteboard guidance specifically says a black dry-erase marker can be used for this purpose.
Freshness matters. Dry-erase markers that are nearly empty may not lay down enough ink to wet the full mark consistently. Cap the marker tightly when not in use so it remains effective for ordinary writing and cleanup.
Practical check: cover the actual permanent ink rather than merely drawing beside it.
Step 3: cover the entire permanent mark
Work across the full permanent mark so the fresh dry-erase ink contacts the entire stained area.
Work across every line of the permanent-marker writing. You do not need to color a large area of clean board; target the stain itself. The goal is full contact between the fresh dry-erase ink and the permanent mark.
Quartet's FAQ says to wait a few minutes before wiping. 3M's DI-NOC whiteboard-film technical guidance instructs users who accidentally use a non-specified marker to write over the mark with a dry-erase marker and wipe it off immediately using the prescribed maintenance method. Those instructions are slightly different because they apply to different surfaces.
Practical check: follow your board manufacturer's timing when available. For a standard Quartet-type whiteboard, a short wait of a few minutes is consistent with its current FAQ. Do not leave the overwritten ink on indefinitely.
Step 4: erase or wipe the treated ink
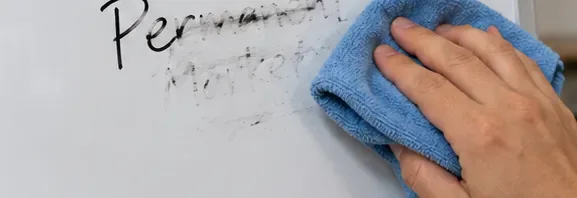
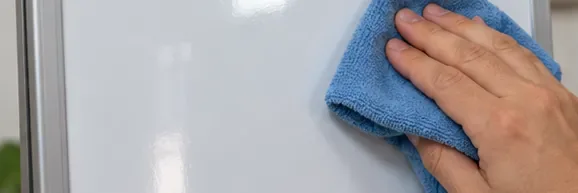
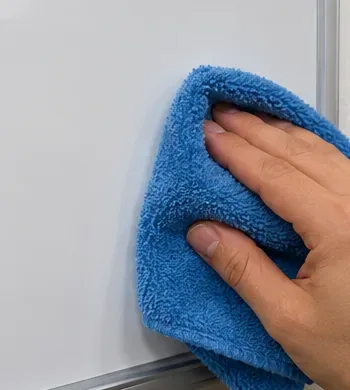
Erase or wipe the treated area with a clean whiteboard eraser or soft microfiber cloth.
Use a clean whiteboard eraser or a soft microfiber cloth to wipe the area. Avoid grinding the cloth into the board with excessive pressure. If the method works, much or all of the permanent ink should lift along with the dry-erase ink.
A dirty eraser can spread ink dust back across the surface. Quartet advises monitoring erasers for residue and washing the microfiber component with water or replacing the eraser when it starts spreading residue.
Practical check: use a clean wiping surface. Fold a microfiber cloth to expose a fresh section if the first section becomes dark with ink.
Step 5: inspect the board before escalating
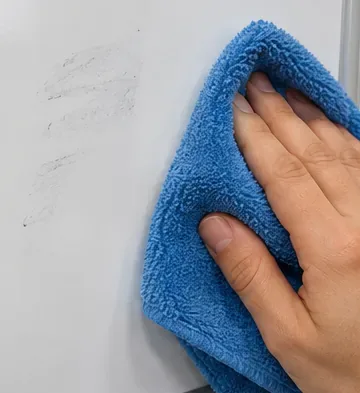
Inspect the board under good light; faint residue may need the same dry-erase-marker treatment repeated once more.
Look at the board from several angles under good light. A gray haze may simply be loose ink residue rather than a permanent stain. Do not assume that a faint shadow means the board needs a stronger chemical.
Quartet describes ghosting as ink particles trapped in the pores or surface of a board and recommends a three-part maintenance routine: erase, clean, and dry. That routine is useful after permanent-marker removal because it separates ink removal from final surface cleaning.
Practical check: if most of the permanent marker is gone but a small patch remains, repeat the dry-erase-marker step on that patch only.
Step 6: repeat the gentle method where needed
Repeat the gentle wipe only where residue remains rather than escalating immediately to stronger household chemicals.
For stubborn remnants, draw over the remaining permanent ink again with a fresh dry-erase marker and wipe with a clean cloth or eraser. A second targeted pass is preferable to immediately reaching for a household solvent that your board maker may not approve.
If repeated dry-erase treatment does not improve the mark, stop and check the board's official care instructions. Permanent-marker removal becomes more surface-specific at that point. Some manufacturers may specify their own cleaner, while specialty products such as 3M's Post-it Easy Erase surface are designed for water-based cleanup.
Practical check: if each pass is making progress, continue gently. If there is no improvement, switch from experimenting to checking the manufacturer.
Step 7: clean the board with the approved cleaner and dry it thoroughly
After the ink is gone, use the cleaner approved for your board type and dry the surface thoroughly.
Once the permanent ink is gone, clean the area according to the board's normal maintenance instructions. Quartet recommends applying its board cleaner, wiping it away with a dry towel, and then going over the surface again with a second dry towel so no cleaning solution remains.
For Quartet glass boards, the company says not to use its standard whiteboard cleaners and instead recommends its glass-board cleaner. That is another reason not to treat “dry-erase board” as a single material category.
3M's DI-NOC whiteboard-film technical sheet allows water or whiteboard cleaning spray with soft paper towels or microfiber cloths and specifically says not to use non-whiteboard cleaning wipes. You can review the technical sheet at 3M's DI-NOC Whiteboard Film technical data sheet.
Practical check: after cleaning, the surface should feel dry to the touch before you write on it again.
Step 8: confirm the board is clean and ready to use
A fully clean, dry board is ready for normal dry-erase use again.
A clean board should have no visible permanent ink, oily film, cleaner streaks, or damp patches. Write a small test line with a dry-erase marker in an unobtrusive corner, let it dry normally, and erase it. If it erases cleanly, normal use can resume.
If the board now smears badly, ghosts immediately, or has a visibly dulled patch where a strong cleaner was used previously, the writing surface itself may have been damaged. Cleaning cannot restore a coating that has been physically abraded or chemically altered.
Why the dry-erase-marker trick works well as a first step
Quartet's FAQ explains the practical mechanism in simple terms: the permanent-marker ink can bind with the fresh dry-erase ink, allowing the combined mark to be erased. The important takeaway is not the chemistry label; it is that the technique is documented by a board manufacturer and uses a product the surface was designed to accept.
That makes it a safer default than experimenting with stronger household cleaners. It also gives you a clear stopping point: if the supported method fails, check the board's material-specific care instructions rather than escalating randomly.
What about rubbing alcohol, acetone, hand sanitizer, hairspray, or magic erasers?
These methods circulate widely online, but they are not equally appropriate for every dry-erase surface. Quartet explicitly says it does not recommend general household cleaners for its whiteboards or glass boards. Abrasive melamine sponges can also alter glossy coatings if used aggressively, and strong solvents may affect painted or laminated surfaces.
That does not mean every alternative cleaner will damage every board. It means the safe recommendation depends on the manufacturer's approved materials and cleaning agents.
Use this rule: if the dry-erase-marker method and approved board cleaner do not work, look up the exact board's maintenance instructions before using a solvent or abrasive product. If no instructions are available, test any manufacturer-compatible option in a tiny inconspicuous area first.
Special case: Post-it Easy Erase permanent-marker whiteboard surfaces
3M sells a Post-it Easy Erase surface specifically designed to accept both dry-erase and permanent markers. On that product, 3M says permanent marker can be removed with water and the provided cloth, without harsh chemicals. That is a product feature, not a universal rule for all whiteboards.
If you own that specific type of surface, follow its instructions rather than using the dry-erase-over-permanent method by default. The 3M product page states that water and a cloth are the intended permanent-marker cleanup method.
Troubleshooting checklist
Permanent ink still visible: repeat the dry-erase-marker overwrite method on the remaining lines.
Gray haze remains: use the board cleaner approved for the surface, then dry thoroughly.
Ink smears instead of erasing: switch to a clean eraser or fresh microfiber cloth.
Board is glass: use glass-board-specific maintenance instructions rather than assuming standard cleaner is correct.
Board is a specialty film: check the product's technical sheet before using household cleaners.
Surface looks dull or scratched: stop scrubbing; the coating may be physically damaged.
Unknown material: identify the board or contact the manufacturer before using a solvent.
How to prevent the problem next time
Store permanent markers separately from dry-erase markers, especially in classrooms and conference rooms where the barrels may look similar. Use a dedicated tray or color-coded container for dry-erase markers. Keep caps on tightly so dry-erase ink stays fresh, because fresh marker ink is easier to erase.
Regular board maintenance also helps. Quartet recommends erasing writing after use, cleaning the board periodically with the correct cleaner, and drying it fully. A clean surface makes it easier to recognize when a mark is truly permanent ink rather than ordinary ghosting or residue.
Bottom line
For a typical dry-erase board, the most practical first method is also the one directly supported by current manufacturer guidance: cover the permanent marker with a fresh dry-erase marker, wait according to the surface instructions, erase with a clean eraser or microfiber cloth, then finish with the cleaner approved for that board and dry it completely.
The main caution is surface type. Standard whiteboards, glass boards, specialty films, and permanent-marker-safe whiteboard products do not all use the same cleaning chemistry. Start with the least aggressive approved method, repeat it once if needed, and check the manufacturer before escalating to household solvents or abrasives.