Home
» How to
»
How to Get Sticker Residue Off Clothes: Methods Compared and a Fabric-Safe Process
How to Get Sticker Residue Off Clothes: Methods Compared and a Fabric-Safe Process
Sticker residue on clothing looks simple, but the best removal method depends on two things: the fabric and the adhesive. A washable cotton T-shirt can tolerate treatments that may be inappropriate for silk, leather, suede, or a dry-clean-only garment. The safest approach is therefore not to reach for the strongest solvent first. Start with the lowest-risk method that fits the care label, then escalate only if the residue remains.
The guidance below was checked against current manufacturer and U.S. care-label information in September 2026. The Federal Trade Commission's Care Labeling Rule guidance explains why care instructions matter: manufacturers are expected to provide washing, drying, and warning information that can be followed without substantial harm. For sticker adhesive specifically, Clorox's clothing guidance recommends a color-safe presoak and, if residue remains, an alcohol-based hand sanitizer before washing and air-drying.
Quick decision guide: which method should you choose?
Method
Best fit
Main advantage
Main tradeoff
Color-safe presoak or liquid detergent
Most washable cotton, polyester, and blends
Low-risk first step that also prepares the garment for washing
May need more than one round on old or heavy adhesive
Rubbing alcohol or alcohol-based sanitizer
Washable, colorfast fabric with stubborn residue
Can loosen adhesive more quickly than detergent alone
Needs a hidden-area colorfastness test; not a good default for delicate or dry-clean-only items
Commercial adhesive remover labeled for fabric
Sturdy washable garments with persistent residue
Designed specifically for sticky adhesive messes
Product-specific exclusions apply, and treated clothing should be laundered as directed
Professional cleaner
Silk, leather, suede, valuable garments, or dry-clean-only clothing
Avoids home solvent experiments on sensitive materials
Costs more and may take longer
If you are unsure which row fits your garment, use the care label as the deciding factor. When the label says dry clean only, or the fabric is especially delicate, the sensible action is to stop before applying home solvents.
Step 1: Check the care label before treating the adhesive
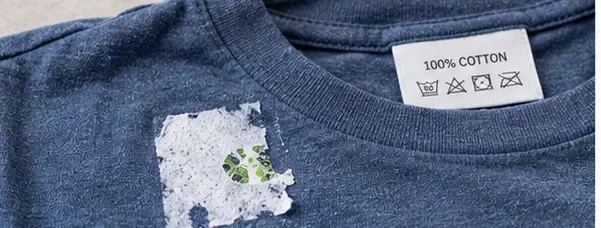
Read the care label first; the safest adhesive-removal method depends on whether the garment is washable and what the fabric can tolerate.
A common misconception is that sticker residue is only a surface problem, so the fabric type does not matter. It does. The FTC requires care instructions because normal cleaning methods can damage some textiles or garment components. Tide also advises checking fabric content and the care label before using solvent-based glue treatments, and it cautions against trying those methods on delicate or dry-clean-only fabrics in its official glue-stain guide.
Action: Identify whether the garment is machine washable, hand washable, or dry clean only. If you plan to use alcohol or a commercial remover, test a hidden area first and let it dry before judging color or texture changes.
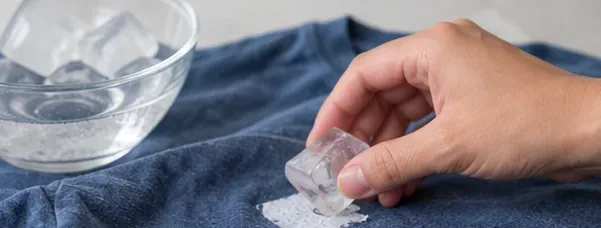
Step 2: If the residue is thick and gummy, cold can make mechanical removal easier
Cold can be useful when the residue behaves like a thick, gummy deposit that is easier to lift once firm.
Cold is not a universal sticker-residue treatment, and it does not chemically dissolve adhesive. Its value is mechanical: a soft, gummy deposit can become firmer and easier to lift. Whirlpool specifically recommends ice or freezing for gum on fabric in its fabric gum-removal guidance. That evidence is for gum rather than sticker adhesive, so treat this as an optional technique for residue with a similar gummy texture, not as a guaranteed sticker solution.
Action: Use cold only when the residue is thick, tacky, and sitting above the fibers. If the adhesive is already a thin smear soaked into the fabric, skip this step and move to pretreatment.
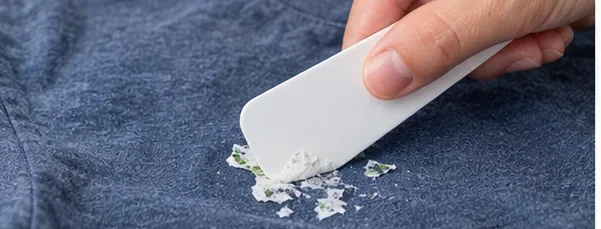
Step 3: Lift paper and excess adhesive with a dull edge
Use a dull edge to lift loose sticker material without cutting or aggressively abrading the fibers.
Scraping harder is not necessarily better. Tide recommends removing excess glue with a dull knife or similar edge while taking care not to tear the fabric. The goal is to remove material that is sitting on top of the cloth, not to grind adhesive deeper into the weave.
Action: Work from the outside of the residue toward the center with a plastic card, spoon, or dull butter knife. Stop if the fabric begins to fuzz, stretch, or snag. On knits and delicate weaves, minimal mechanical action is safer.
Step 4: Choose the mildest pretreatment likely to work
Option A: Start with a color-safe laundry presoak
For ordinary washable clothing, a laundry-focused treatment is the lower-risk place to begin. Clorox's sticker-residue instructions call for soaking the garment in a solution made with its bleach-free color-safe stain remover, then using an alcohol-based hand sanitizer only if the sticker remains partially attached. You do not need to use that exact brand to understand the tradeoff: a product labeled for washable fabrics is generally a more conservative first choice than a general-purpose solvent.
Action: Follow the stain remover's current label directions exactly, including dilution, soak time, and fabric exclusions. Do not improvise a stronger concentration because stronger is not automatically safer or more effective.
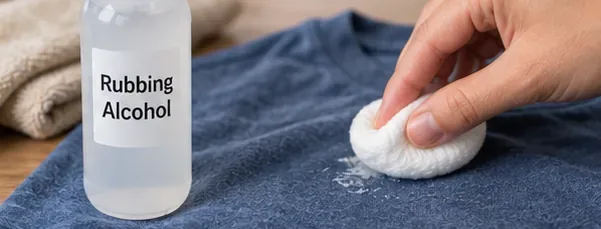
Option B: Use alcohol when adhesive remains and the fabric passes a spot test
For stubborn residue on washable, colorfast fabric, alcohol can be dabbed onto the adhesive after a hidden-area spot test.
Another misconception is that rubbing alcohol is harmless on all clothing because it evaporates quickly. Official guidance does not support that assumption. Tide recommends testing a solvent on an inconspicuous area for colorfastness before using it on adhesive, while Clorox specifically suggests alcohol-based hand sanitizer when sticker residue remains after soaking.
Action: Put a small amount of rubbing alcohol or alcohol-based sanitizer on a white cotton swab or cloth and test an inside seam. If no dye transfers and the fabric looks unchanged after drying, dab the adhesive rather than flooding the whole area.
Option C: Use a commercial adhesive remover when the garment and product label allow it
A purpose-made adhesive remover can be useful when household laundry treatments are too slow. However, the tradeoff is a longer exclusion list. Goo Gone's official clothing directions say to pretest first, not to treat clothing while it is being worn, and to launder treated clothing shortly after application with extra detergent. The same manufacturer lists silk, leather, and suede among surfaces on which the product should not be used.
Action: If you choose a commercial remover, use only one whose current label explicitly permits fabric or clothing. Follow its material exclusions and laundering instructions rather than assuming all adhesive removers are interchangeable.
Step 5: Blot and lift instead of spreading the residue
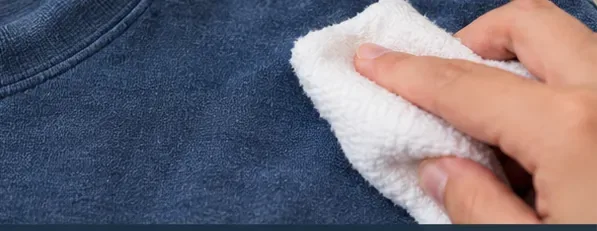
Blot the treated area with a clean white cloth so loosened adhesive transfers away from the garment instead of spreading.
Rubbing in large circles can enlarge a sticky patch. When a solvent or pretreatment starts to loosen the adhesive, the useful next move is controlled transfer: blot with a clean white cloth, rotate to a fresh area of the cloth, and keep working from the edge toward the center. White cloth makes it easier to see whether fabric dye is transferring.
Action: Blot until the surface feels less tacky. If dye appears on the cloth, stop and rinse or follow the product's removal instructions rather than continuing to scrub.
Step 6: Wash according to the garment's care label
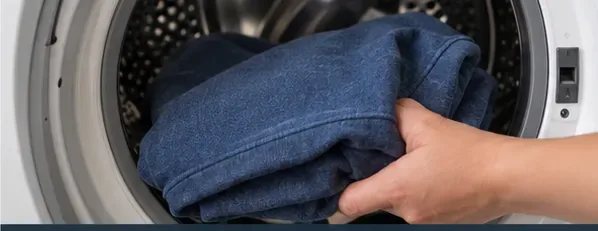
Once the excess adhesive is removed, wash the garment using the cycle and temperature permitted by its care label.
Hotter water is not always the better choice. Tide advises using the hottest temperature allowed by the care label for its glue-removal process, while the FTC makes clear that care labels specify washing and drying conditions intended to avoid substantial harm. In practice, that means the label—not the adhesive stain—sets your temperature ceiling.
Action: Wash with your normal detergent using the warmest or hottest setting the garment label permits. If a specialty adhesive remover instructed separate laundering, follow that direction.
Step 7: Air-dry and inspect before using the dryer
Inspect the former sticker area after washing and before machine drying; remaining tackiness means the treatment should be repeated.
The idea that dryer heat will finish the job is risky. Clorox's sticker-residue procedure ends with air-drying and repeating the treatment if needed. Tide similarly advises repeating glue-removal steps before drying when adhesive remains. Heat can make a remaining stain harder to deal with, so the dryer is not a troubleshooting tool.
Action: Let the garment air-dry enough to evaluate the area. Rub clean fingers lightly over the fabric. If it is still tacky, shiny, stiff, or visibly marked, repeat the least aggressive method that previously helped.
Step 8: Decide whether to repeat, escalate, or stop
A finished garment should feel normal, show no visible adhesive, and no longer feel tacky before it returns to regular wear and drying.
The right endpoint is not "I used a powerful cleaner." It is a garment that looks and feels normal without color loss, fiber damage, or tackiness. If a mild presoak removes most of the residue, repeating it may be smarter than escalating to a solvent. If alcohol works but starts pulling color, stop. If a commercial remover is excluded for your fabric, do not override the label simply because the adhesive is stubborn.
Action: Repeat the same safe method once or twice if it is clearly improving the residue. Change methods only when progress has stalled and the next method is compatible with the garment. For valuable, delicate, embellished, or dry-clean-only clothing, switch to a professional cleaner rather than increasing chemical strength at home.
What about vinegar, dish soap, peanut butter, or acetone?
Internet advice often treats every sticky substance as the same problem. The evidence is more limited. Dish soap may help with oily residue, but the official sources checked for this article give more direct support to laundry stain removers, alcohol-based treatments, and fabric-approved adhesive removers for clothing. Vinegar and peanut butter are commonly suggested online, but they were not part of the clothing-specific manufacturer guidance used here, so they are not first-line recommendations in this process.
Acetone is a different case: Tide discusses nail-polish remover for certain strong glues such as cyanoacrylate, with a colorfastness test first. That does not mean acetone should be the default for ordinary sticker residue. It is a stronger solvent with more potential compatibility issues.
Action: For an ordinary price sticker, name tag, or label adhesive, begin with laundry-safe pretreatment. Reserve stronger solvents for residue that truly requires them and only when the garment and product instructions permit their use.
Best method by common situation
New cotton or polyester shirt with a fresh sticker mark: Remove loose paper, presoak or pretreat with a color-safe laundry product, wash, then air-dry and inspect.
Sturdy jeans with stubborn tackiness: Scrape gently, spot-test alcohol, dab the residue, blot, then launder according to the label.
Old adhesive that survived a wash: Try a fabric-approved commercial adhesive remover after a hidden-area test, then launder as its label directs.
Silk, leather, suede, or dry-clean-only clothing: Avoid improvising with alcohol or general adhesive remover; use a professional cleaner.
Thick gummy material sitting above the fibers: Cold may make mechanical lifting easier, but use it as a prep step rather than assuming it will dissolve the adhesive.
Final checklist
Read the care label before applying anything.
Remove loose sticker paper and excess adhesive with a dull edge.
Start with the least aggressive treatment that fits the fabric.
Spot-test alcohol or commercial adhesive remover.
Blot instead of spreading loosened adhesive.
Wash within the garment's allowed temperature and cycle.
Air-dry and inspect before machine drying.
Stop and use professional cleaning when the fabric is delicate, valuable, or dry clean only.
Sticker residue usually comes off more reliably when you treat it as a compatibility problem rather than a force problem. The fastest method is not always the safest, and the safest method is not always the fastest. Match the treatment to the garment, verify progress before adding heat, and escalate only when the next option is supported by the fabric and product labels.