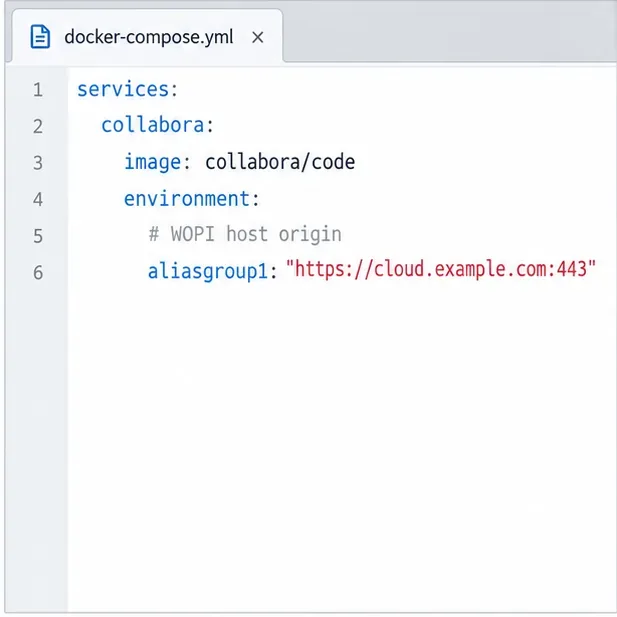
Deploy Collabora CODE on Kubernetes with Helm

Install the official Collabora Helm chart, configure WOPI access and ingress affinity, and verify the deployment without common setup mistakes.
ProShow Producer is an extremely professional photo slideshow software and is highly appreciated from experts as well as users. Not only beautiful effects are available, users can also insert text into videos on ProShow Producer simply.
Inserting text into photo slides is one of the ways users make their videos more impressive, interesting and unique. That can be wishes, words of love, or simply a few lines to joke with friends ... With just a few simple clicks, you can do this.
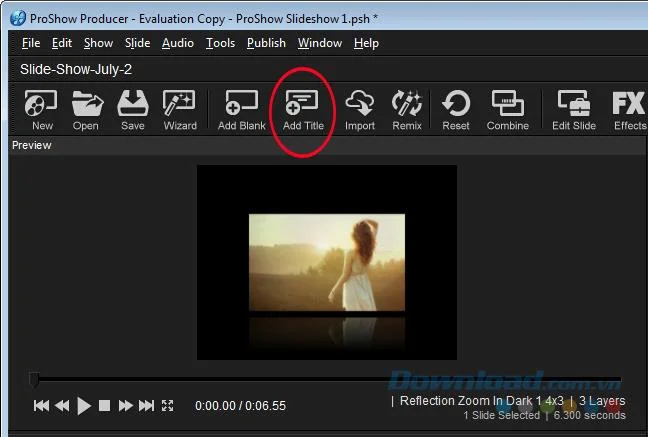
Step 1 : Open the ProShow Producer software on your computer, then open the photos and videos to insert text, then left-click the Add Title icon to get started.
Step 2 : New interface appears, you will see an observation box called Caption Text . This is where we enter the text to insert into the image.
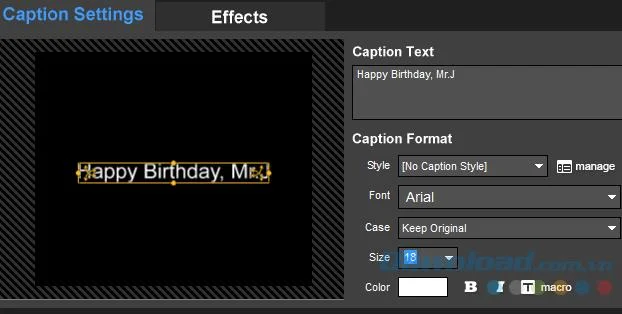
Enter any content you want, including accented Vietnamese
For example, you enter the line " Happy Birthday, Mr.J " in the frame, in the Caption Settings window will show you how and how this text will appear in the image. If you do not like it, you can use some additional options in Caption Format .
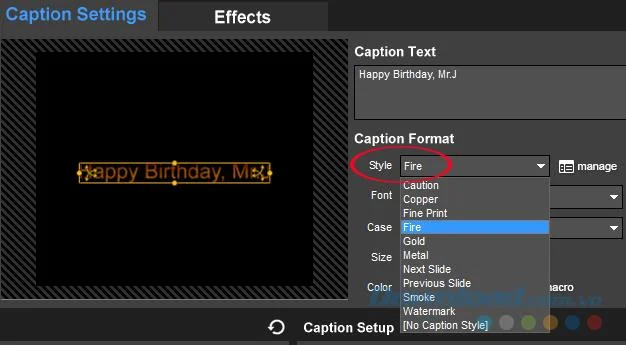
Caption Format includes the following options:
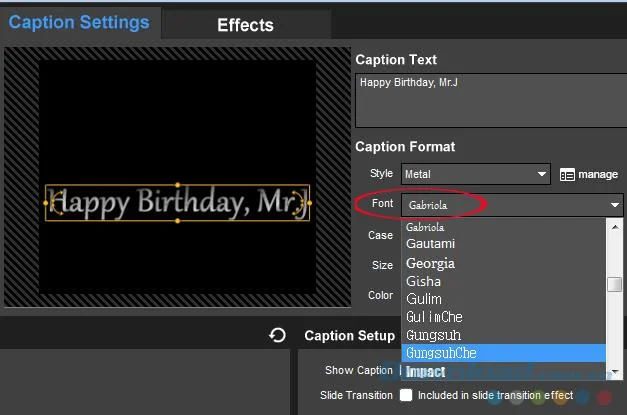
Use the options below to increase the effect, making the text more pleasing and impressive
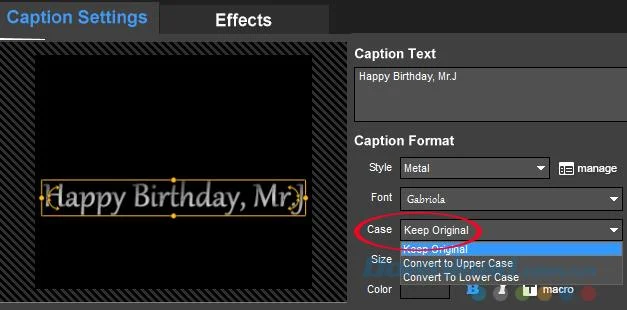
Each of these options brings certain changes and display to the word. Depending on the picture, content and your liking that you choose accordingly. With Case , we can:
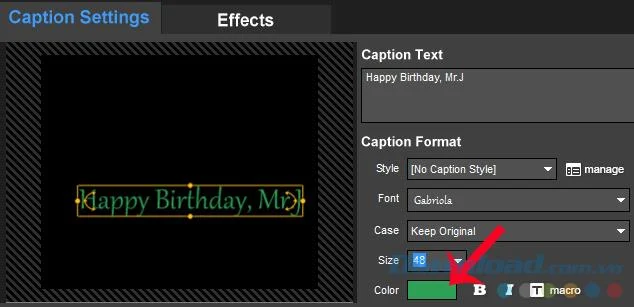
You can also change the text size for larger, beyond the display frame, then use the mouse to rotate the image in different directions, or resize the image by left clicking, holding and moving mouse.
An important note if you want to use text in ProShow Producer videos, is that this tool only allows users to use either Style or Color text effects . That is, if using Style, it is not possible to change other colors for text and vice versa.
Step 3: After creating the text content like that, left-click on the OK (lower right corner of the screen) to save. And back to the main screen of ProShow Producer, you will see that there is one more frame, that is the text we have just made added.
ATTENTION:
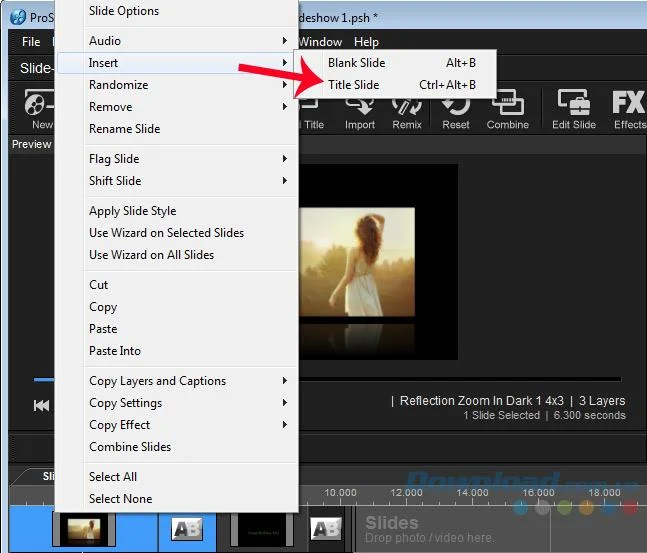
Another way for you to access the Caption interface is to right-click the image's frame (below the slideshow interface) and select Insert / Title Slide or use CTRL + ALT + B also have the same feature.
As a video in the form of slides, these text inserts are not only for illustrative purposes, but also for quotes, transitions that make my slide show more impressive, funny and unique.
Install the official Collabora Helm chart, configure WOPI access and ingress affinity, and verify the deployment without common setup mistakes.
Use browser requests, WOPI logs, and targeted proxy checks to find why Collabora opens a blank document—and choose a fix that fits the evidence.
Configure CODE Docker dictionaries and tag document passages correctly so English, French, and other supported languages receive the right spell-checking.
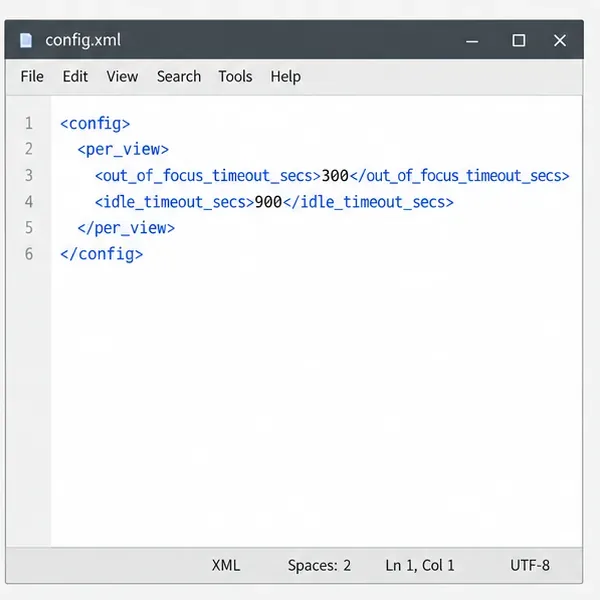
Adjust the per-view inactivity threshold in coolwsd and distinguish it from background-tab dimming, document unloading, autosave, and login expiration.
Stop scheduled CODE update checks, review optional remote services, and use outbound network controls without breaking document editing.
Enable secure document editing in Seafile by configuring Collabora’s discovery URL, HTTPS, and WOPI access for your deployment.
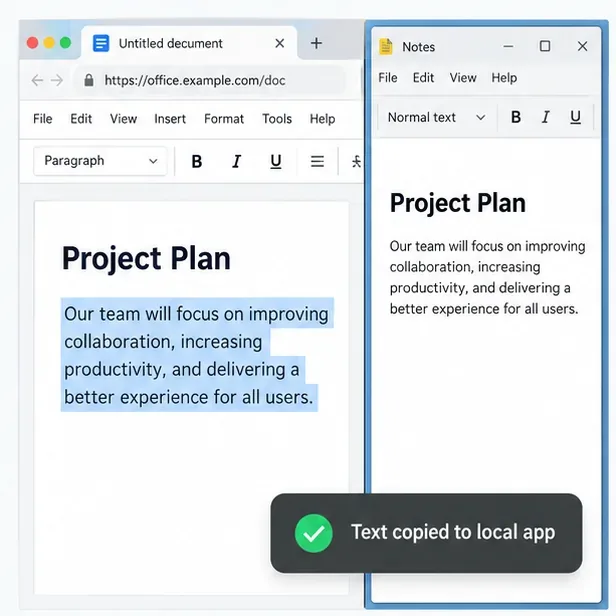
Test the system clipboard, adjust browser permissions, and identify when an embedded Collabora integration needs an iframe policy change.
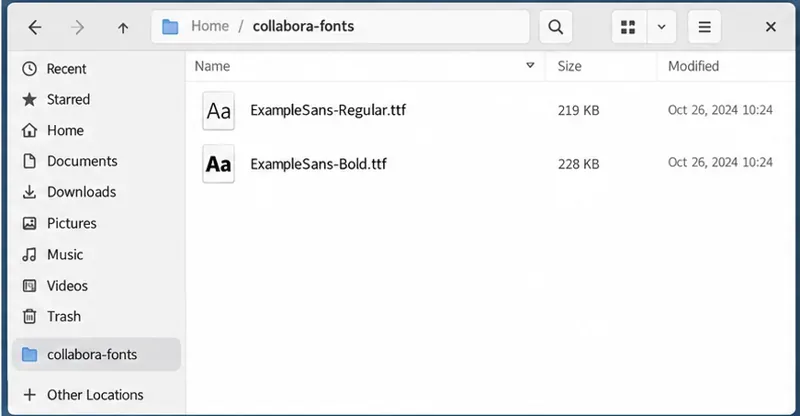
Mount font files into Docker and Collabora’s systemplate so custom typefaces appear in the editor and render correctly in documents.
Back up coolwsd.xml and its deployment sources, restore them safely, and verify CODE before users return to editing.
Allow the exact Nextcloud or other WOPI origin in CODE, then verify the active host allow-list and distinguish it from Nextcloud’s source-IP restriction.