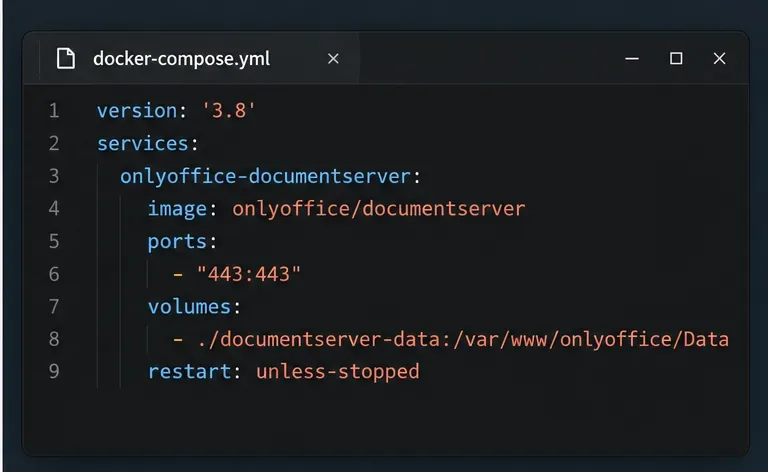
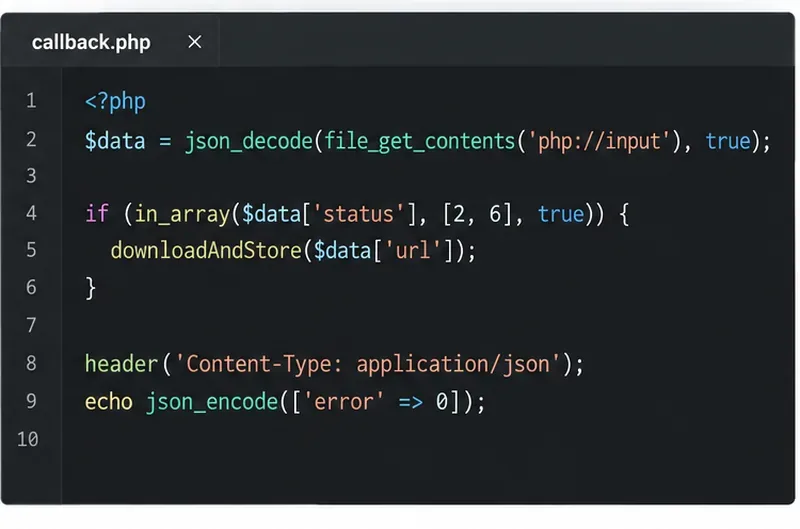
Deploy ONLYOFFICE Docs Enterprise with Its Official Compose File

Start the Enterprise Docker Compose stack, persist its license and data, configure JWT safely, and confirm the editors are ready to integrate.
Viber is currently a chat software that is no stranger to Smartphone users. So you already know how to use Viber on a computer yet? And is there any difference with using it on a computer? The answer is no? Just download Viber to your computer, install and use Viber easily after activation.
Viber
Viber for mac
Viber for Linux
Viber for Windows also allows you to make free calls and texts to anyone who installs Viber and anywhere. The only requirement is that the device needs to be connected to the Internet. So please refer to the tutorial of using Viber to make free calls and messages from your computer to your friends' phones absolutely free.
Step 1: Double-click the Viber installation file that you have downloaded. When the Viber Setup window appears, select the I agree to the license terms and conditions check box , then click Install.
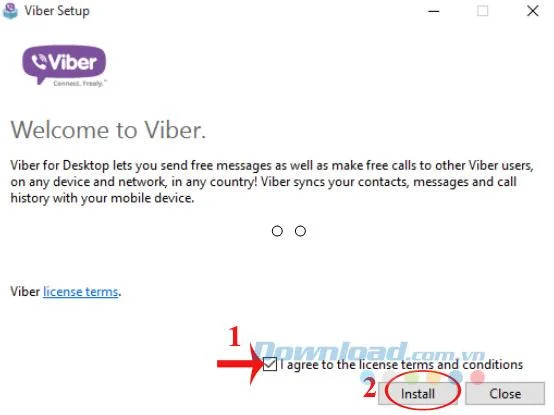
Step 2: The installation of Viber starts, please wait a bit.

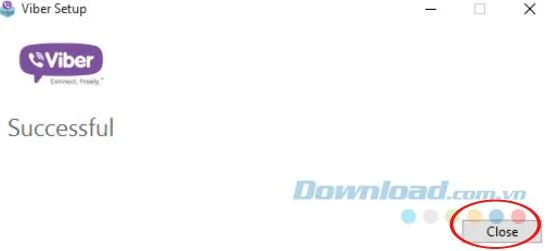
Step 3: After successfully installing Viber, a notification window will appear, just click Close.
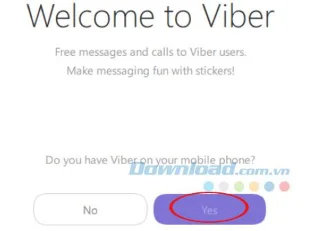
Step 4: During the first use, Viber will ask you to use Viber on your phone? If not, click No , and if used, click Yes.
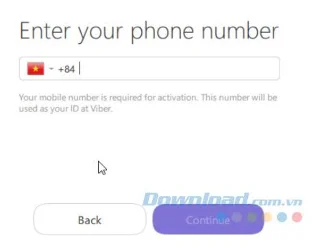
Step 5: The Enter your phone number window appears, select the Country and enter the phone number you are using to activate your Viber account. After entering, click Continue .
Step 6: The latest Viber version allows you to scan the QR Code to activate your account, no need to wait for the activation code as before.
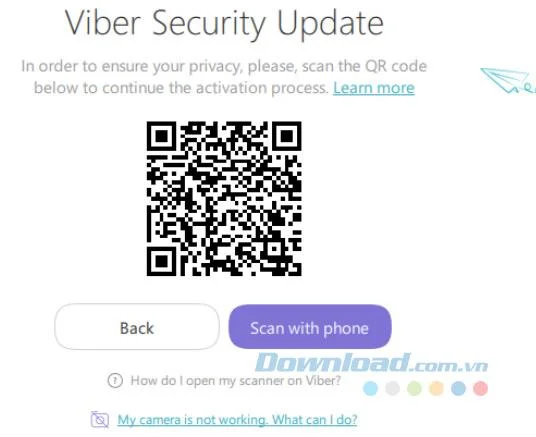
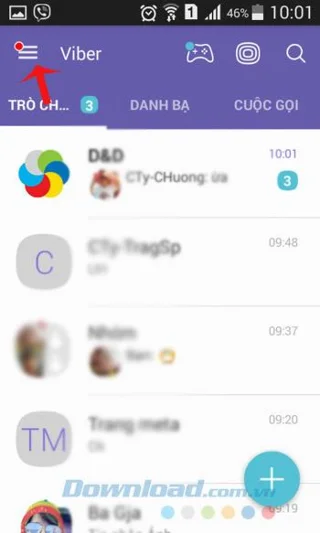
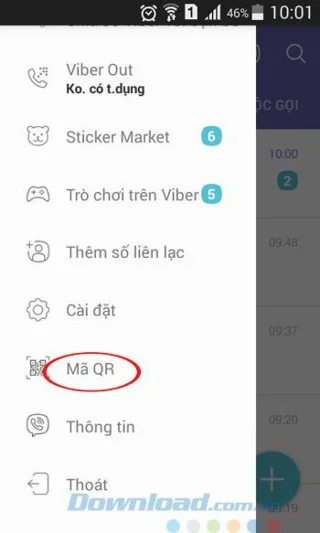
Step 7: Open the Viber app on your phone, click the 3 dashes icon in the top left corner of the screen, select QR Code . Then put the camera in the center of the square on the computer to scan automatically.
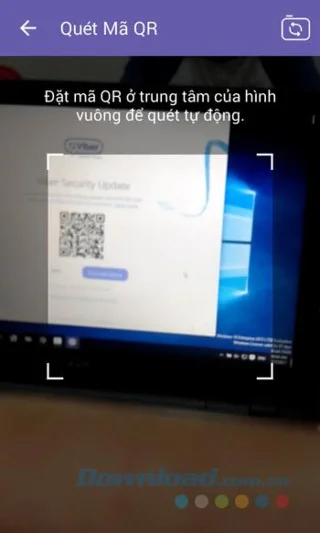
Step 8: When the camera has detected the QR Code, a notification window will activate the Viber account on the computer successfully. Click Open Viber to start using Viber on the computer.

Step 1: Now you will see the main interface of Viber for PC is divided into 3 parts . In the middle is the chat area, the right side is the Emoticon section, the top left is the list of recent messages.
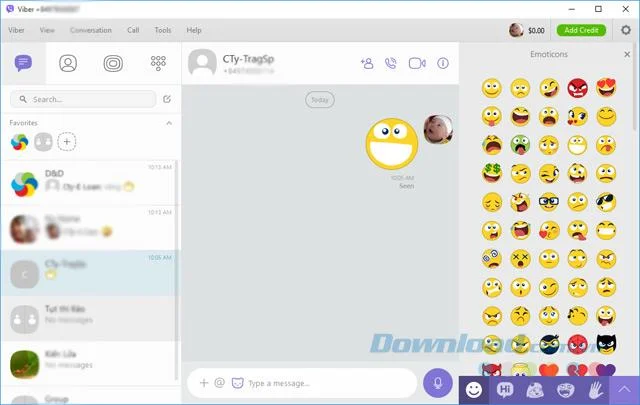
Step 2: Viber will automatically synchronize all information on the phone Viber including: Contacts, message history, calls ... Contacts on Viber will only show users who have installed and used Viber . If the synchronization process takes too long, restart the Viber software on the computer.
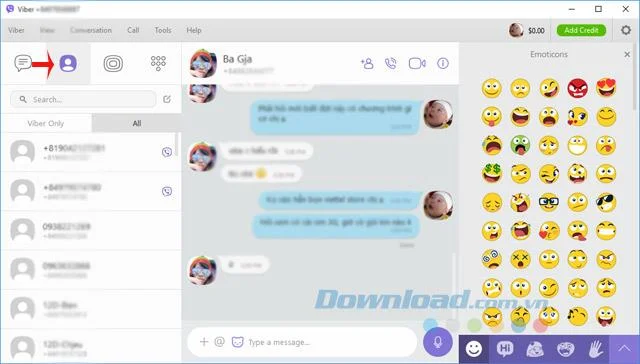
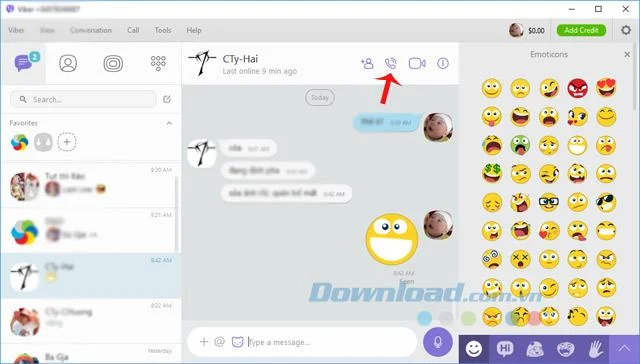
Step 3: To make a video call, make a call or send a voice message, just select someone from the contacts list. Then, click the corresponding icon as shown below.
Step 4: Also want to call someone not in the contacts, click the keyboard icon , then enter the phone number to call in the Phone number box . Then, press the phone icon or message to contact a friend.
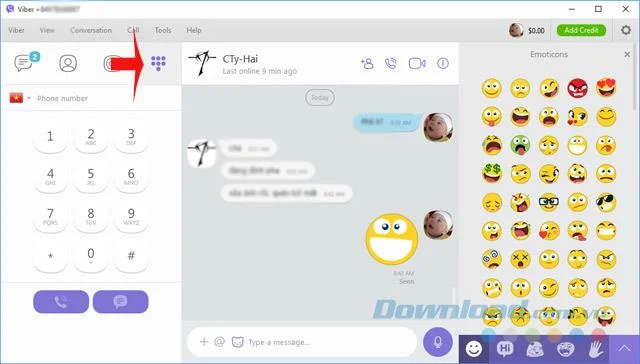
Note: To make a Viber phone call from computer to phone, the computer needs a microphone to create audio input for the call.
So from now on whether using your phone or computer, you can make free calls to anyone. Not only that, when using Viber you can create group chat very easily. In addition, you can use some additional software such as: Zalo , Y ahoo , Skype ... to chat, call, text message for free.
Start the Enterprise Docker Compose stack, persist its license and data, configure JWT safely, and confirm the editors are ready to integrate.
Use an ONLYOFFICE JavaScript macro to remove nonprinting characters and trim extra spaces from a defined spreadsheet range, with a safe review workflow.
Connect ONLYOFFICE DocSpace to Active Directory or OpenLDAP, import users and groups safely, map account fields, and schedule reliable synchronization.
Move portal data from Disk Default to a supported cloud storage provider, or relocate Docker data safely by changing its host volume mapping.
Identify whether Document Server uses a Linux package or Docker, remove only its components, and check remaining data without deleting shared services by mistake.
Trace slow collaborative editing to Docker resource pressure, proxy connections, or document load, then choose the fix that matches your measurements.
Install custom fonts in ONLYOFFICE Document Server, compare persistent Docker mounts with direct copies, rebuild the font list, and verify the result.
Choose where TLS should terminate, mount a trusted certificate and private key safely, and verify HTTPS access to a Dockerized ONLYOFFICE Docs server.
Embed the ONLYOFFICE editor in your PHP app, sign its configuration with JWT, and save edited files through a secure callback.
Set the proofing language for the whole document or selected text, confirm spell checking is active, and identify when a server dictionary is missing.