Pin messages in the chat group, also known as message pin has been updated on the phone Viber before, but now computer users have the opportunity to experience this interesting feature. Help team members quickly read important messages, without having to spend time searching.
Download Viber PC
Just update to Viber 7.9.5.8, then follow the steps below to pin messages to the top of the conversation easily:
Guide Pin messages in computer chat group Viber
Pin message available
Step 1: Open the group chat, right-click the message you want to pin, select Pin . Any member of the group can pin a message, not just the Admin.
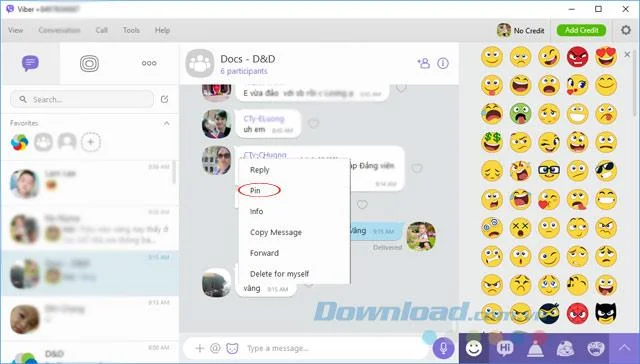
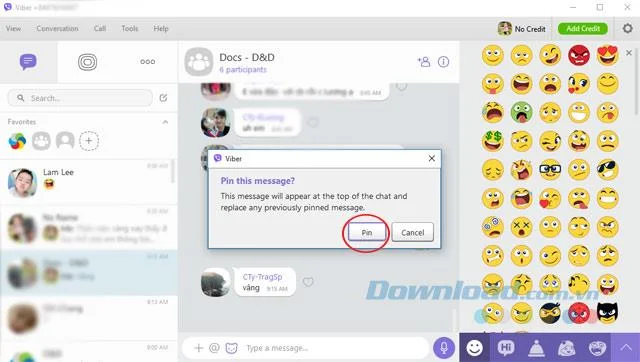
Step 2: Immediately a message box will appear asking if you want to pin this message to the top of the chat group? If yes, select Pin .

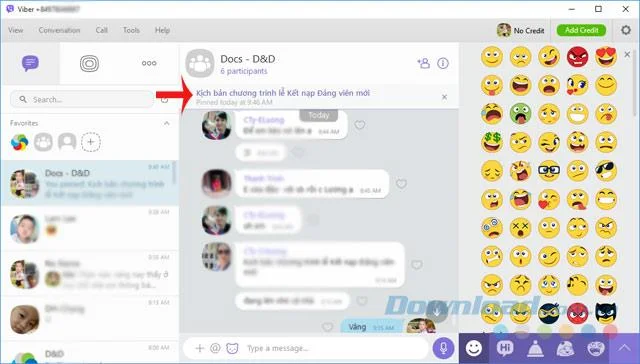
Step 3: Now you will see the message has been pinned to the top of the conversation already, any group member can view this message easily.

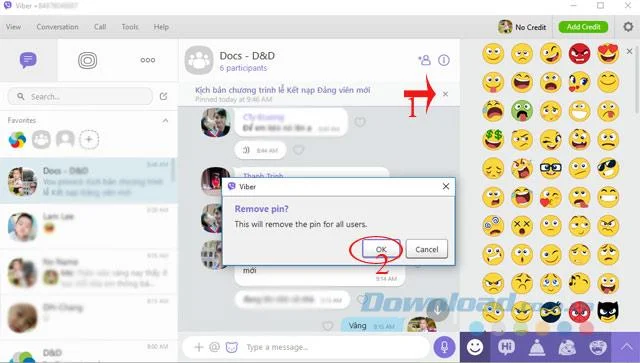
Step 4: When you want to unpin a message, just click the X icon next to the pinned message, then click OK in the Confirm Pin confirmation dialog box, the message will disappear.

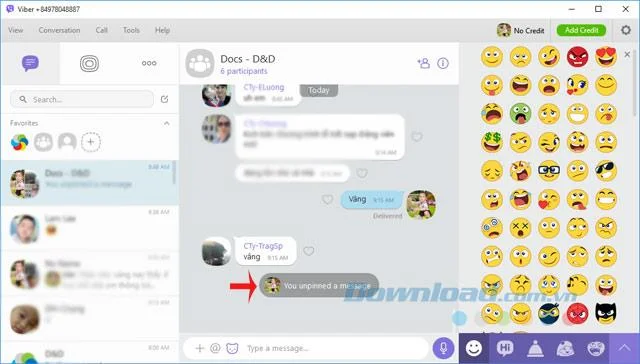
Step 5: After removing the pin, a message will appear in the chat interface.

Pin new message
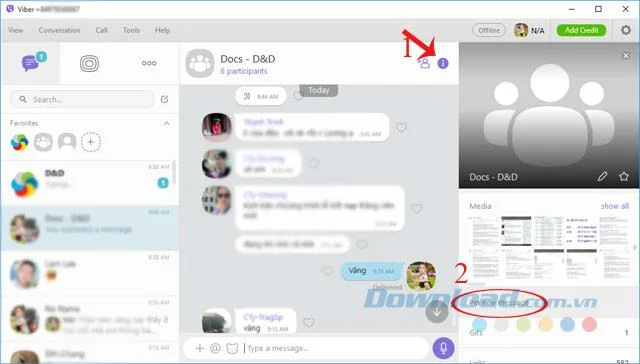
Step 1: When you want to pin a new message, click the i icon in the upper right corner of the group chat interface, select Pin New Messenger.

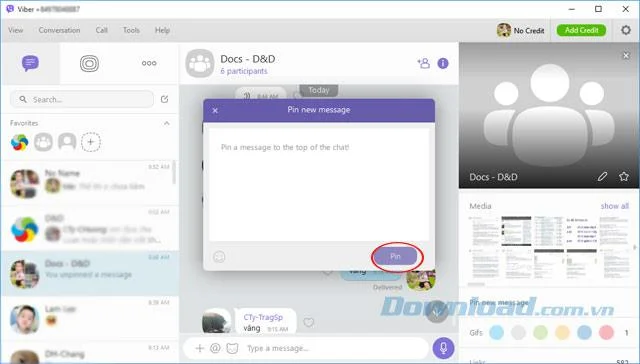
Step 2: The Pin New Messenger dialog box appears, enter the message content you want to pin to the top of the conversation, and then press Pin.

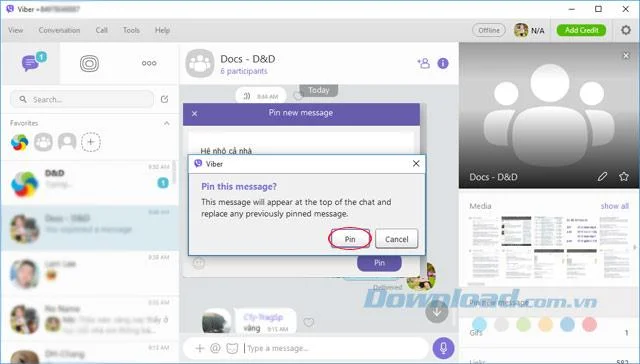
Step 3: When the Pin this messenger dialog box ? appears, simply click on the Pin to confirm.

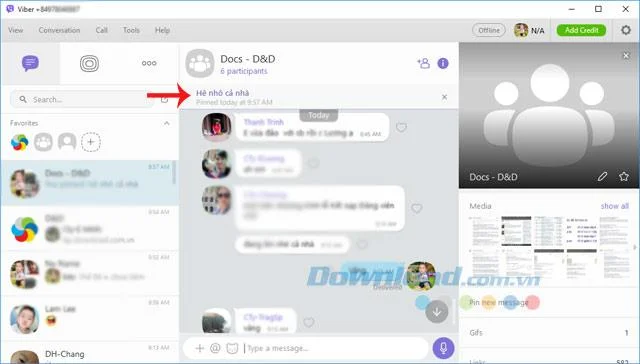
Step 4: So that new message will pin to the top of the conversation, so that all members see easier.

Video tutorial pin message in computer group Viber chat
Pin message feature useful when group chat too crowded members, discuss many issues at once, making important messages easily lost. So why hesitate any longer to experience this feature only!
I wish you successful implementation!