Home
» How to
»
How to reduce Rebuilding File on Internet Download Manager
How to reduce Rebuilding File on Internet Download Manager
Video How to reduce Rebuilding File on Internet Download Manager
If you are using the download tool Internet Download Manager, have you ever noticed this detail? That's when downloading at 99% or 100% complete, but IDM still runs and has not allowed users to use that file. Why?
The pause is when IDM joins the split files into a perfect file for our use and the process is called Rebuilding File. How long IDM Rebuilding File will take depends on the size of the file, the number of files split, and the speed and quality of the Internet being used.
To save and minimize this time, we just need to change some settings inside this download support tool. Let's see how to do it!
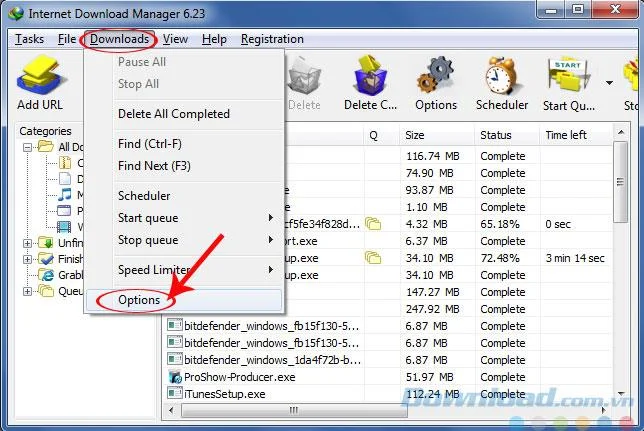
Step 1: You start up IDM. From the main interface, click the Downloads tab , select Options.
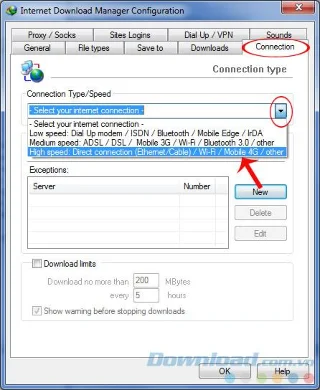
Step 2: A new window appears, continue to select Connection. At the first item, Connection Type / Speed, click the arrow icon, then select the last item High speed ...
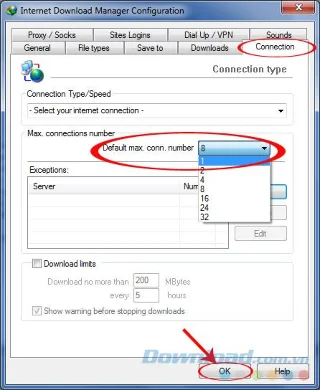
Item below, Default max.conn . number - This is the number of files that IDM will split to be able to download faster. The larger the number of files, the longer the rebuild time, so instead of the default of 8, select the smaller number, or the smallest, is 1, then OK.
Select the display number as 1 to shorten rebuilding time
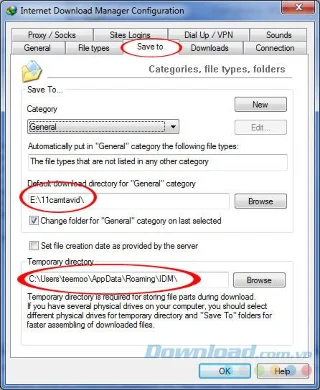
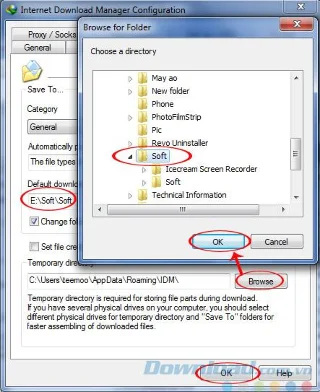
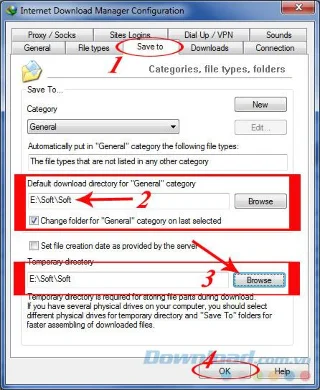
Step 3: Go back to the Configuration window , select the Save to tab , you will see there are two different paths (Default downloaded ... and Temporary directory) below, slightly modified so that both locations are the same. .
Click Browse to select the path to a new location for both frames.
After adjustment, as the picture below, if you do not want, you can customize the new position.
After adjusting the path, click OK
This adjustment will not affect the quality or reduce the size of the downloaded file, but can shorten the time to join the file for us to use faster.