How to Remove a Sink Drain Stopper Without Damaging the Drain
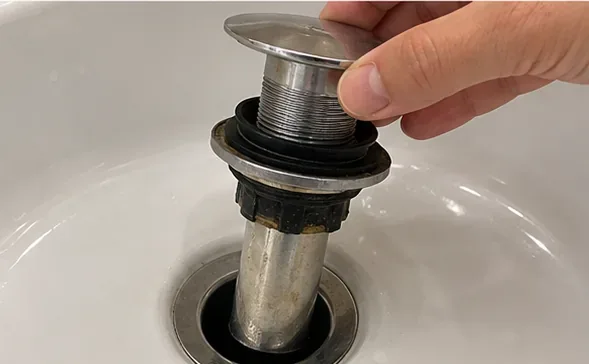
Learn how to remove a bathroom sink drain stopper, release a pop-up pivot rod, check the result, and know when a different method is safer.
Removing a sink drain stopper should end with a simple, measurable result: the stopper comes out without damaging the drain, the linkage remains intact, and the sink still opens, closes, and drains normally after reassembly. The fastest method depends on the stopper design, so the first decision is not which tool to grab—it is whether the stopper is held from above or by a rod under the sink.
This guide focuses on bathroom sinks. It covers the common lift-rod pop-up design in detail and explains when a push-style or other stopper needs a different approach. It does not cover kitchen basket strainers, garbage-disposal flanges, or removing the entire drain body.
A good result is not simply getting the metal cap out of the basin. You should be able to remove the stopper with controlled force, keep the retaining hardware reusable, and put the system back together without creating a leak.
| Check | Good result | Change approach if... |
|---|---|---|
| Stopper release | The stopper lifts out once its retaining mechanism is free. | You are prying, twisting hard, or pulling against obvious resistance. |
| Linkage | The pivot rod, nut, clip, and strap remain undamaged. | The rod is bent, the nut is seized, or plastic parts begin to flex or crack. |
| Reassembly | The stopper opens fully and closes fully. | Travel is limited or the lift rod no longer moves the stopper predictably. |
| Seal and drainage | The closed stopper holds water reasonably and the open stopper drains freely. | Water continues to pass despite full closure, or drainage became worse after reassembly. |
| Leak check | No water appears around the pivot-rod nut or drain body below the sink. | Any new dripping starts after the work. |
The common bathroom-sink pop-up stopper is operated by a lift rod behind the faucet. Under the sink, that lift rod connects to a perforated strap, and a horizontal pivot rod enters the side of the drain body. That horizontal rod can physically hold the stopper in place. Both Delta's bathroom sink stopper guidance and Kohler's pop-up drain instructions describe removing the rod before lifting out a retained stopper.
A push pop-up, sometimes called a push-button or click-style drain, is different because you operate the stopper by pressing the stopper itself rather than using a faucet lift rod. Removal details vary by product. Delta maintains separate push pop-up removal guidance, which is a useful reminder not to assume every stopper uses an under-sink pivot rod.
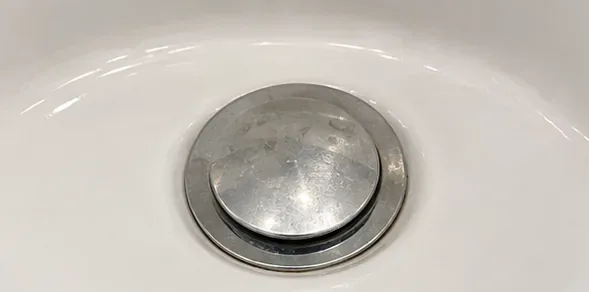
For a typical lift-rod pop-up, preparation is light. Clear the cabinet so you can see the back of the drain. Put a towel or shallow container under the drain because the pivot-rod opening may release a small amount of water or residue. A flashlight is useful. Many retaining nuts can be loosened by hand; adjustable pliers may help if a nut is snug, but use them carefully so you do not crush plastic parts or scar finished metal.
You normally do not need to shut off the faucet's water-supply valves just to remove a drain stopper because you are not opening the supply plumbing. However, avoid running the faucet while the pivot rod is removed, and keep water out of the basin until the drain hardware is reassembled.
Open the stopper fully and pull upward gently. Some stoppers are intentionally installed so they can lift out for cleaning. If yours comes free with little resistance, stop there—you do not gain anything by taking apart more plumbing.
If the stopper rises slightly but will not leave the drain, look under the sink. If you see a horizontal rod entering the drain body, the stopper is likely retained by that rod. Do not pry the stopper with a screwdriver. The right result is release of the retaining mechanism, not overpowering it.
On a conventional pop-up drain, the horizontal pivot rod enters the side or rear of the drain body and typically connects to the vertical perforated strap from the faucet lift rod. Kohler describes this linkage as the connection between the lift rod and the ball lever or ball rod assembly.
You usually do not need to remove the P-trap or loosen the large drain locknut just to take out the stopper. Focus on the smaller nut around the pivot rod. If the workspace is cramped, take a photo before disassembly so you can reproduce the rod and clip positions.
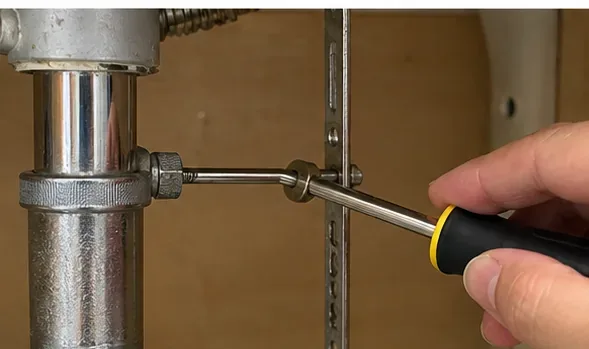
Support the rod with one hand and unthread the small retaining nut around it. Start by hand. If it is too tight, use pliers lightly and stop if the entire drain body begins to rotate.
Once the nut is free, pull the horizontal rod straight back. Delta's guidance says that pulling it away from the drain by about an inch can be enough to free the stopper. You may see a ball, gasket, or washer associated with the rod; note how those parts sit before moving them farther. The goal is only to disengage the rod from the stopper, not to dismantle the drain unnecessarily.
Quality check: after the rod is withdrawn, the stopper should feel noticeably freer from above. If it still feels mechanically locked, do not increase force. Check whether the rod is fully clear of the stopper's lower loop and whether your drain uses a different retention design.
Return to the basin and lift the stopper vertically. A slight change in angle can help the lower stem clear the drain opening, but hard twisting should not be necessary on a standard lift-rod pop-up once the pivot rod is disengaged.
If the stopper still will not come out, check three things before switching methods: the horizontal rod may still project into the stopper, the lower eye or loop may be catching on the rod, or the drain may not be the lift-rod style you assumed. At that point, identify the brand or model and use its removal instructions rather than forcing the part.
With the stopper out, remove hair, soap residue, and other buildup from the stem and the accessible drain opening. Warm water, mild dish soap, and a soft brush are suitable for ordinary residue. Avoid mixing drain chemicals or introducing a new cleaner into a drain that may already contain a chemical product.
Inspect the stopper's sealing surface, lower loop or eye, pivot rod, pivot ball, gasket, and retaining nut. A cracked plastic nut, badly corroded rod, torn seal, or deformed stopper can explain poor operation and may justify replacement instead of repeated adjustment.
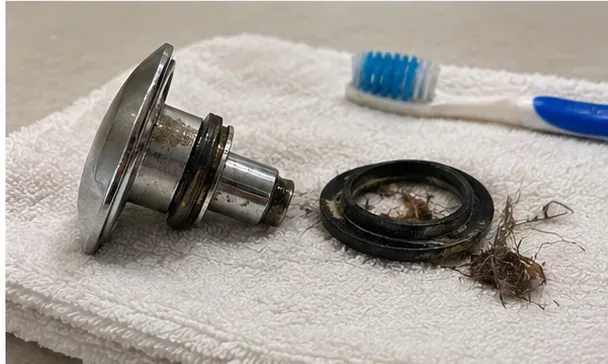
Reassembly is generally the reverse of removal. Place the stopper back in the drain in the orientation that lets the pivot rod engage its lower loop. Insert the rod through the drain body, reinstall the retaining nut, and reconnect the rod to the strap or clip if you disconnected it. Tighten the pivot-rod nut enough to seal and hold the rod while allowing normal movement; excessive force is not a substitute for correct alignment.
Operate the lift rod several times before running water. The stopper should rise high enough for normal drainage and drop far enough to seal. If travel is wrong, Kohler advises adjusting the linkage by moving it to a different hole in the link and then retesting the stopper movement.
Next, run water with the stopper open and watch below the sink. Then close the stopper, add some water to the basin, and operate it again while checking the pivot-rod nut and surrounding drain body for drips. If the mechanism moves correctly but the basin still will not hold water, the issue may be stopper adjustment or the sealing surfaces rather than removal technique. Delta's pop-up sealing guidance distinguishes stopper sealing problems from leakage around the drain flange.
Change approach when the hardware in front of you does not match the lift-rod mechanism described above. A push pop-up with no horizontal rod may release from above, but the exact procedure depends on the drain assembly. A stopper with a threaded cap, hidden screw, or proprietary cartridge should be handled according to its product instructions.
Also stop and reassess if the pivot nut is severely corroded, the drain body rotates when you try to loosen the nut, plastic parts are cracking, or a leak begins. Those signs indicate that the job is shifting from simple stopper removal to drain repair.
If your goal is to clear a slow sink, taking out the stopper only gives you access to the top of the drain. Hair and residue may be caught below the stopper, but a deeper blockage can be in the trap or farther down the branch drain. If the opening is clear and the sink still drains slowly, continuing to disassemble the stopper will not necessarily improve the result.
Likewise, removing the entire drain flange is a different repair. That job can involve the large retaining nut below the sink and a new seal with an appropriate gasket, silicone, or plumber's putty depending on the product and sink material. Do not loosen those parts merely because the stopper itself is stuck.
On many lift-rod pop-up drains, the horizontal pivot rod passes through or engages the lower part of the stopper. Until that rod is withdrawn, the stopper can remain mechanically retained. Delta and Kohler both document this arrangement.
Not always. If you can loosen the pivot-rod nut and move the horizontal rod far enough to release the stopper without disturbing the strap connection, that is often simpler. If access is poor or the rod cannot move freely, disconnecting the clip from the strap may make the job easier. Preserve the original hole position so reassembly starts from the same adjustment.
Only if the manufacturer's procedure specifically calls for it. Gripping a visible chrome cap with pliers can scratch the finish and does not solve an under-sink retention problem. For a lift-rod pop-up, releasing the pivot rod is the more relevant action.
Professional help is reasonable when the drain body is corroded or spinning, access is too tight to work safely, a plastic drain is cracking, the sink begins leaking after adjustment, or the job expands into replacing the drain assembly. Those conditions change the task from simple stopper removal into a repair where sealing and component compatibility matter.
The best way to remove a sink drain stopper is the method that releases its actual retention mechanism with the least unnecessary disassembly. For a lift-rod pop-up, that usually means loosening the pivot-rod nut, withdrawing the horizontal rod, and lifting the stopper from above. The job is complete only when the stopper can be reinstalled, opens and closes correctly, drains normally, and leaves the cabinet dry.
Learn how to remove a bathroom sink drain stopper, release a pop-up pivot rod, check the result, and know when a different method is safer.
Learn how to clean AirPods Max cushions safely using Apple’s recommended detergent method, proper drying time, and mistakes to avoid.
Learn how to clean a baseball glove safely with gentle wiping, careful drying, light conditioning, and proper storage, plus mistakes that can damage leather.
Remove permanent marker from a dry-erase board safely with a fresh dry-erase marker, proper wiping, approved board cleaner, and surface-specific precautions.
Learn how to clean a burnt iron safely, what to avoid, when household remedies can damage coatings, and how to handle stubborn soleplate residue.
Learn how to clean a washing machine drain-pump filter safely, drain residual water, remove debris, reinstall the filter, and know when your model needs different care.
Learn how to wash HOKA sneakers by hand with cold water, mild soap, gentle brushing, and air drying, plus material-specific care and mistakes to avoid.
Learn how to clean a leather jacket safely in 8 steps, from checking the label and patch testing to air-drying and conditioning without damage.
Learn how to clean a faucet aerator safely, identify threaded and recessed types, remove mineral buildup, reassemble parts, and avoid common mistakes.
Learn how to clean a Nespresso Vertuo machine safely, run the rinse cycle, wash removable parts, avoid common mistakes, and know when descaling is needed.