Home
» How to
»
How to reverse the scroll direction in Windows 10
How to reverse the scroll direction in Windows 10
Video How to reverse the scroll direction in Windows 10
On Windows, when scrolling down the web page will also scroll down, when scrolling up the mouse will pull up, but on the Mac the opposite. If you are using 2 operating systems on the same machine, it will be difficult to operate. Therefore, it is best to reverse the mouse direction for homogeneity, more convenient operation.
However, a lot of people don't know how to reverse the mouse direction, which is different for each computer. Please refer to the following article of Download.com.vn to know how to reverse the scrolling direction on Windows 10.
Instructions to reverse the mouse scroll direction on Windows 10
For Touchpad on Laptop
Different computers will have different actions, but basically the Touchpad driver has this function built-in. In the framework of this article we will guide you on Lenovo and Asus Laptop series, while other models do the same.
On a Lenovo Laptop
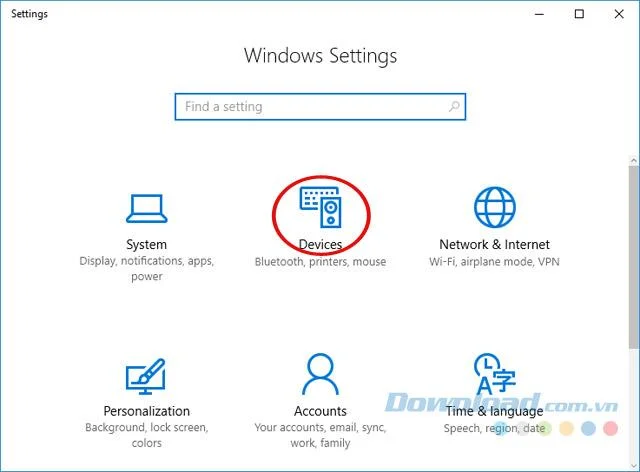
Step 1: Press Windows + I key combination to access Windows Settings , then select Devices.
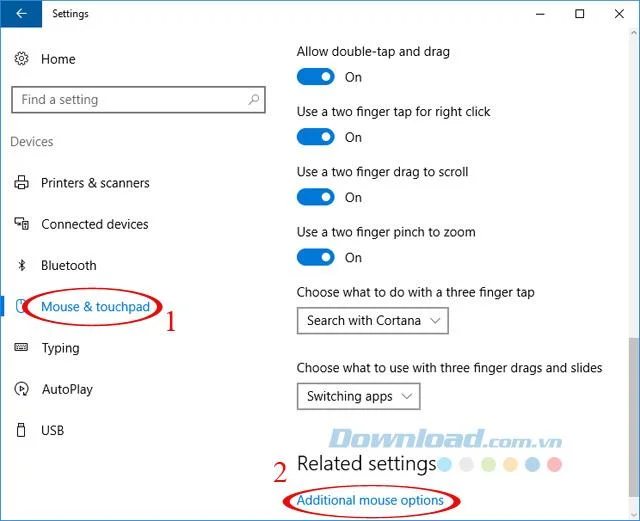
Step 2: Switch to the Mouse & Touchpad card . In the right pane, scroll down to the bottom and select Additional Mouse Options.
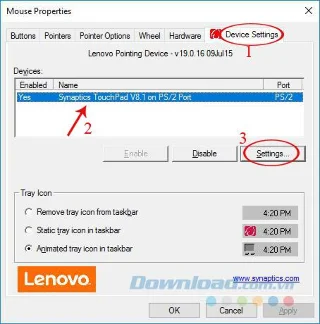
Step 3: Mouse Properties window appears, click the Device Settings tab . In some models, it may be ClickPad or ELAN. In the Devices list , select the correct Touchpad on your device, and then click the Settings button just below.
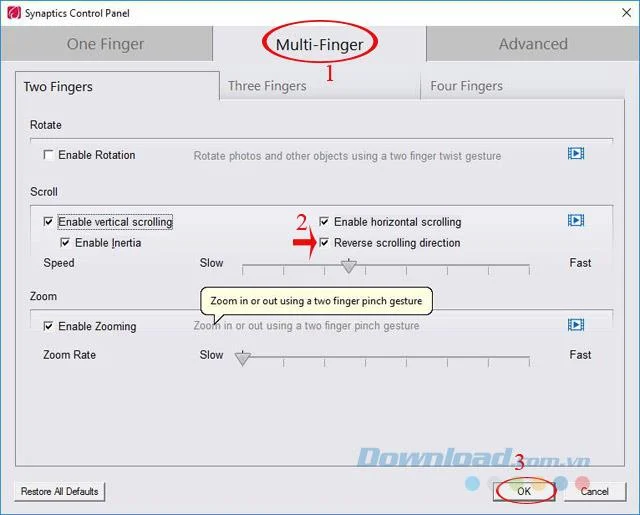
Step 4: Synaptics Control Panel interface appears, switch to Multi-Finger tab . At Scroll , check the Reverse Scrolling Direction box , then click OK.
Step 5: Finally, check the Touchpad to see if the mouse scroll direction has been reversed.
On Asus Laptop:
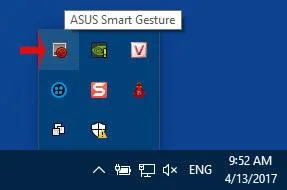
Step 1: On Asus Laptop, Touchpad Driver is separated into separate management software. You just need to click on the Touchpad icon in the system tray.
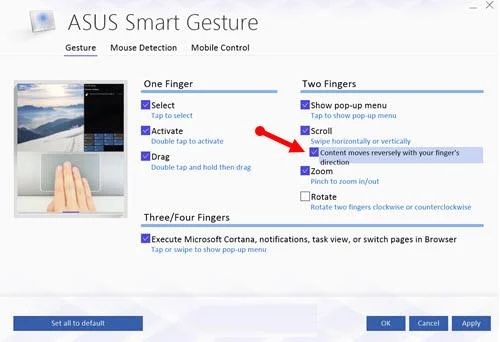
Step 2: Asus Smart Gesture interface appears. In the Two Fingers section , navigate to the Scroll line and select the Content moves resersely with your finger's direction box.
For scrollbars on mouse
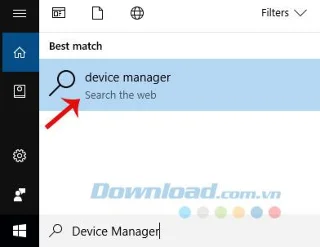
Step 1: Type the keyword Device Manager into the search box, then select Device Manager.
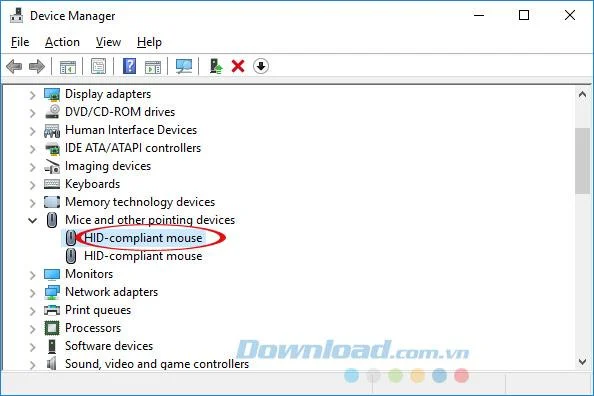
Step 2: The Device Manager window appears, navigate to Mice and other pointing devices , double-click on your external mouse device. Here, we will double click on the HID-compliant mouse.
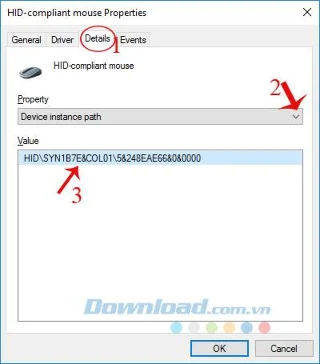
Step 3: Interface HID-compliant mouse Properties appear, switch card Detail . In the Property section , click the dropdown arrow and select Device istance path. Record the indicator behind the HID in the Value box .
Step 4: Next, press Windows + R key combination to open the Run window , type regedit in the Open box and click OK.
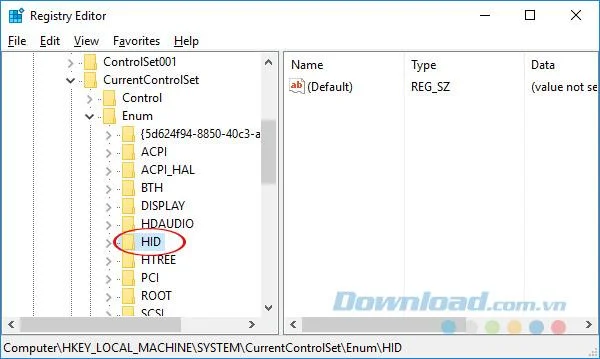
Step 5: Registry Editor window appears, navigate to the following path:
HKEY_LOCAL_MACHINE \ SYSTEM \ CurrentControlSet \ Enum \ HID
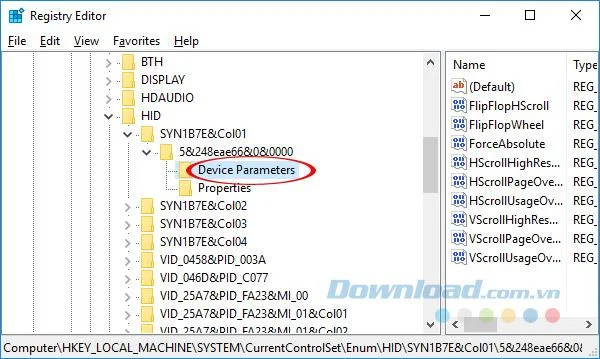
Step 6: Search for the correct key with the same name as the HID name of the mouse listed in step 3 above. Open the subkeys in the folder just found, click Device Parameters.
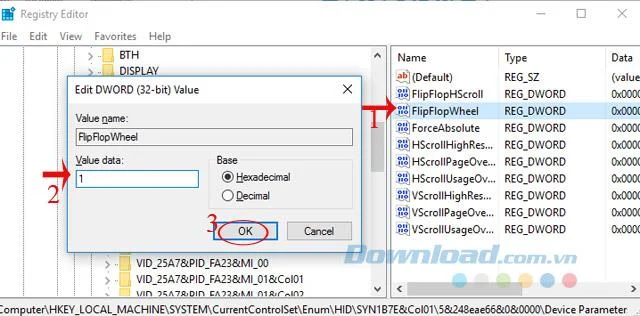
Step 7: Look to the right frame, find the key FlipFlopWheel , double click on it to open. Then change the value in the Value Data box from 0 to 1, and then click OK.
Step 8: Restart the computer, you will see the scroll direction has been reversed.
So you already know how to reverse the scroll wheel direction on Windows 10 then, quite simple, right guys?