Keep Writer Revisions Visible When Exporting to DOCX
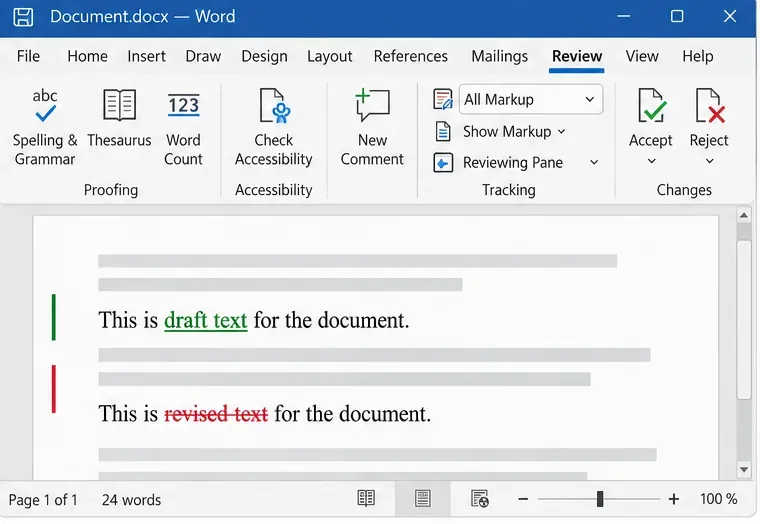
Track edits in Writer, preserve an editable ODT source, and check the exported DOCX in Word before sharing it.
Setting up Gmail in Outlook is the best way for you to manage all your email accounts in one place. Or if you're bored of Gmail, installing Gmail in Outlook will also be one of the options that you might consider.
However, before you do, you also need to have an Outlook account , otherwise we will be asked to create a new Outlook account to do this.
Gmail for iOS Gmail for Android
Turning on IMAP is the first and most important thing for Outlook to access your mail. You log in your Gmail account on the computer, then select the gear icon in the upper right corner of the screen, go to Settings .
At Forwarding and POP / IMAP , we will make our initial settings. There are two options: POP and IMAC but POP is too old and no longer popular so in this article we will use IMAP by selecting Disable POP.
In IMAP Access, tick the Enable IMAP item . If there are too many messages coming in different sizes in your account, you can use Folder Size Limits to limit the synchronization of messages that are too large.
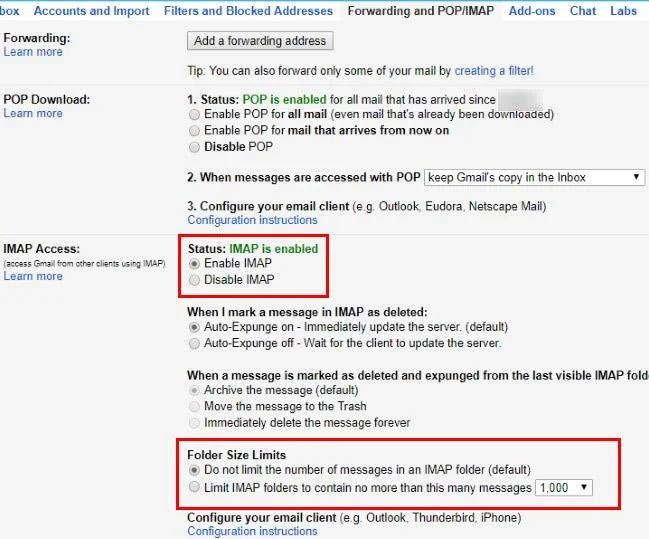
This is also an option, because many people do not know that, to avoid email abuse, Gmail will temporarily lock a user's account if they download an email volume exceeding 2.5MB.
Another note that you need to remember is that if you are setting up 2-layer security for GMail , we will need to do another operation, because Outlook does not support this protection setting. Or alternatively, you click on the avatar icon in the upper right corner of the screen / My Account / Sign-in & Security / App passwords , then create another password to use on Outlook.
If you are freaking out about having to remember many passwords for an email account, don't worry, because the password we just created, just enter it once in Select app / Mail / Select device / Windows Computer. . If desired, you can also select Other to name this new custom name.
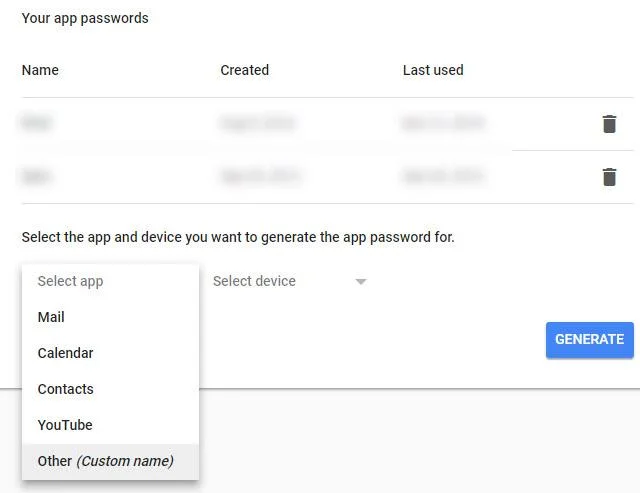
Finally, click Generate to enter and remember this password for the next time.
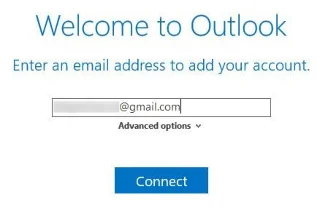
Access your Outlook account, select File / Info / Add Account / enter your Gmail account and then left-click Connect . Now Outlook will ask for your Gmail password, re-enter and then Connect again.
ATTENTION:
If you are using two-layer security, you will enter the new password we have just created, not the password you normally use.
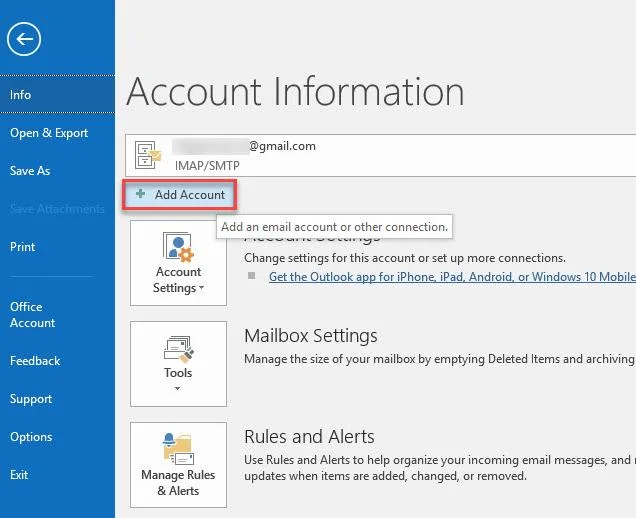
In some cases there may be an error message, if sure what you enter is correct, just select Retry to run again. When the Account setup is complete table appears, select OK . If you have the Gmail app installed on your mobile device, you can uncheck the Set up Outlook Mobile on my phone section.
Outlook for Android Outlook for iOS
If you have more than one Outlook account, you can use the left tab to switch between them. Click the arrow icon to expand the account and display all folders.
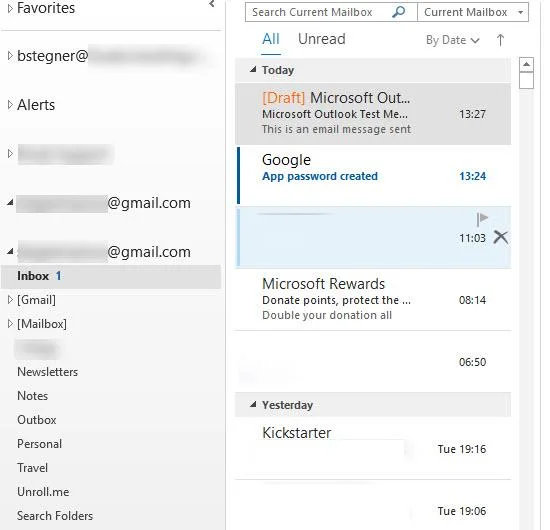
One important note that you need to keep in mind is when using Outlook to view and respond to messages from synchronized emails, make sure you are selecting the right account to manipulate. If not, you can use From to change these email addresses.
Actions that Download.com.vn have instructed in the article only sync mail in the email address, but if you want to sync other things (such as Contacts, Calendar ...) can follow the instructions in the article How to import Google contacts into Outlook and Windows Live Mail.
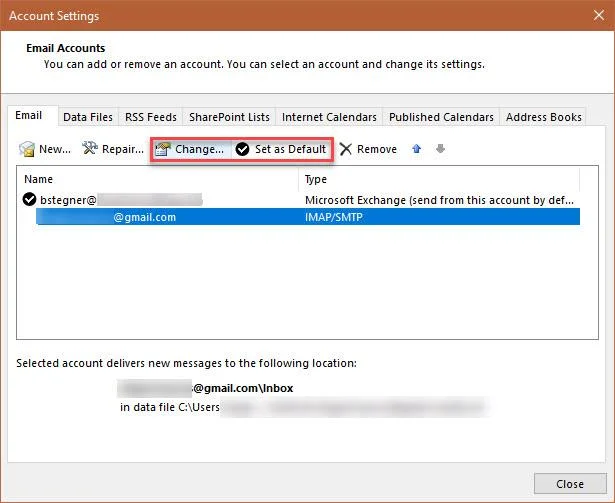
For those who use Gmail regularly in Outlook, it is best to choose Gmail as the default email tool by going to File / Info / Account Settings / Email tab / selecting the account you use most often / Set as Default.
If one day, you no longer want to keep the synchronization between these two email services, you can cancel them by selecting the account you want to delete sync / Account Settings / Change / Mail to keep offline / change depending on Select inside from All to 1 Month.
This article is just one of the tips that Download.com.vn thinks is quite handy and necessary if you are using more than one service or email address to work daily.
Track edits in Writer, preserve an editable ODT source, and check the exported DOCX in Word before sharing it.
Follow SUSE’s SP7 procedure to enable FIPS mode, reboot safely, verify the active policy, and check whether your compliance requirement calls for validated modules.
Compare YaST and cryptsetup for a new encrypted SLES data volume, choose LUKS1 or LUKS2, and verify unlock and mount behavior safely.
Create, refine, and verify a least-privilege AppArmor profile on SLES 15 SP7, with a clear note on SLES 16’s SELinux default.
Set up RMT on SLES 15, mirror entitled repositories, and verify HTTPS registration and package access from a test client.
Connect SLES 15 to AD with YaST’s SSSD-based logon management, then verify directory lookup, domain login, and Kerberos tickets.
Set up the right Live Patching path for SLES 16.0 or 15 SP7, apply eligible kernel fixes, and confirm what is active without confusing it with a reboot-required kernel update.
Load a custom SLES 15 kernel module without disabling Secure Boot. Match the running kernel, sign the .ko file, enroll a MOK key, and verify loading.
SLES 15 SP5 can migrate online to SP6, but each node must reboot. Use a tested rolling upgrade or blue-green cutover to keep workloads reachable.
Use SUSE’s supported STIG profile to scan SLES 15, test remediation, review remaining findings, and retain assessment evidence.








