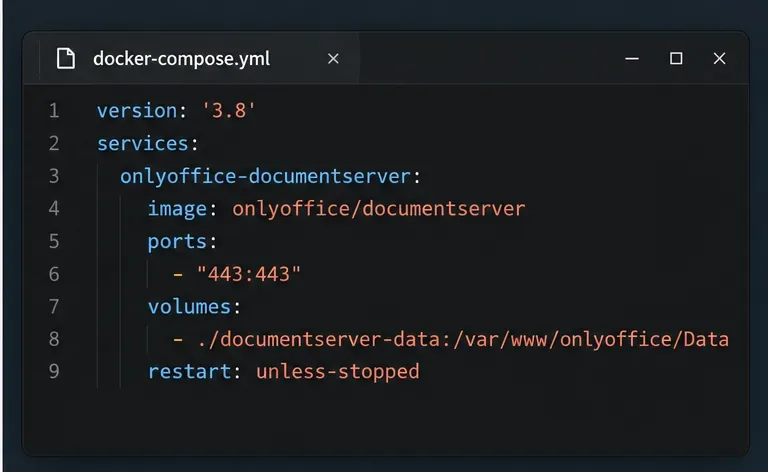
Stop Unwanted Printing and Downloads in ONLYOFFICE
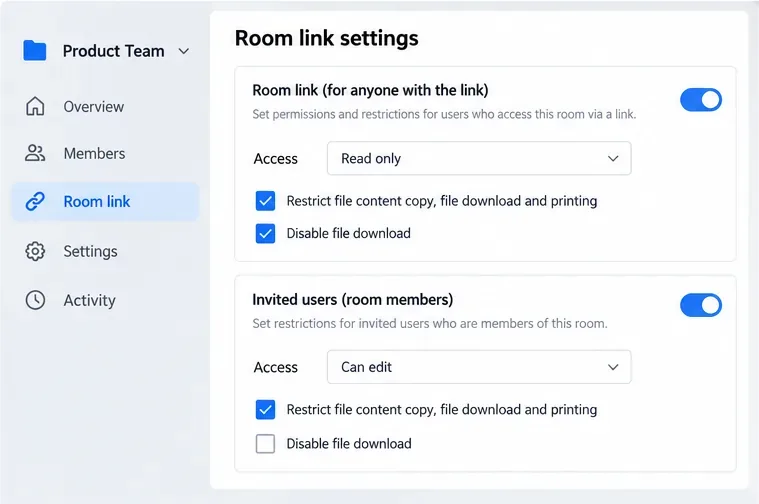
Set print and download limits for ONLYOFFICE links, room members, or Docs API sessions, then verify the restrictions from a recipient account.
You often work on a web browser, you must have saved a lot of bookmarks, installed many extensions on it, but every time you install the device, it often loses everything or when working on another computer, you will not be able to use that data. .
Fortunately, all of the most popular web browsers today: Google Chrome, Firefox, Opera, Microsoft Edge and Internet Explorer allow users to sync browsing data across all devices. This helps you synchronize your bookmarks, autocomplete, bookmarks, add-ons, history, passwords ... However, each browser has a different set of settings. So invite you to follow the article below to know how to do it on each browser:
For Google Chrome browser, synchronizing data is quite simple, just create a Google account, then follow the steps below to sync everything on all devices:
Step 1: Open Chrome up, click the 3 vertical dots icon in the top right corner of the screen, select Settings (Settings).

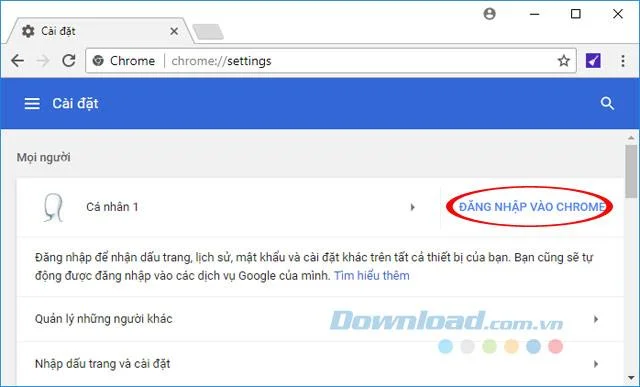
Step 2: Go to the People setting , click Sign in to Chrome (Sign Chrome) to sign in to your Google account.
Step 3: Next, the message "You are logged in and turned on" is displayed , click OK.

Step 4: At the Synchronization section , click Enter your passphrase to start synchronization.
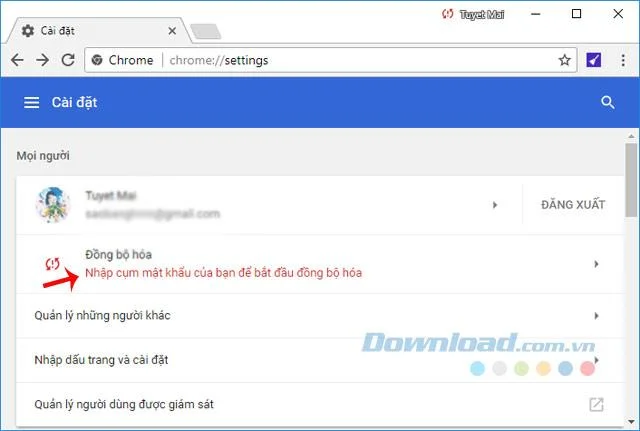
Step 5: Then, enter the password and click the Submit button .
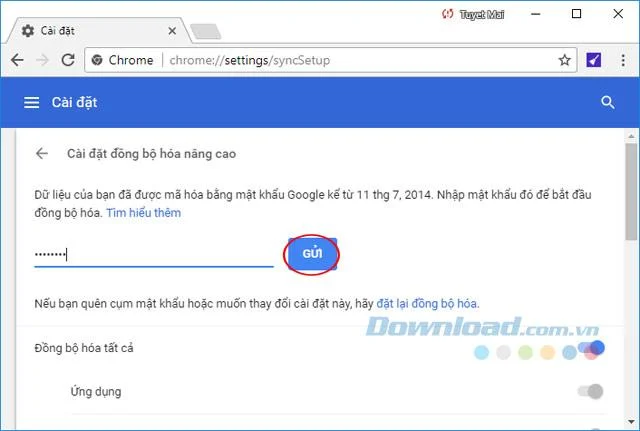
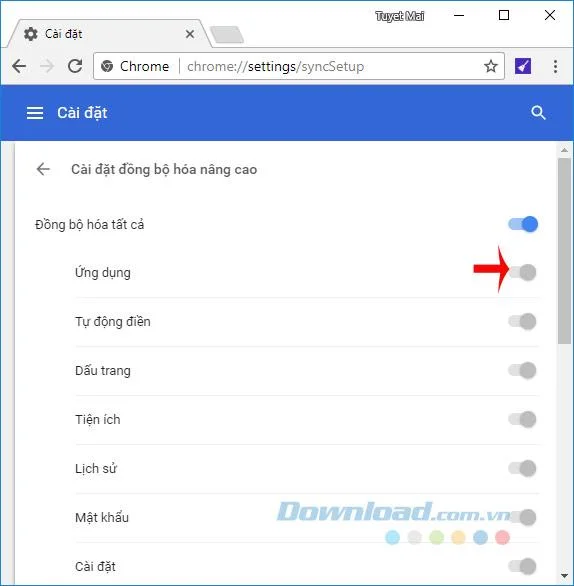
Step 6: You can also manually adjust the sync data easily if desired. Just drag the slider beside each item to turn it on or off as you like. Google Chrome supports application syncing, autofill, bookmarks, extensions, history, passwords ...
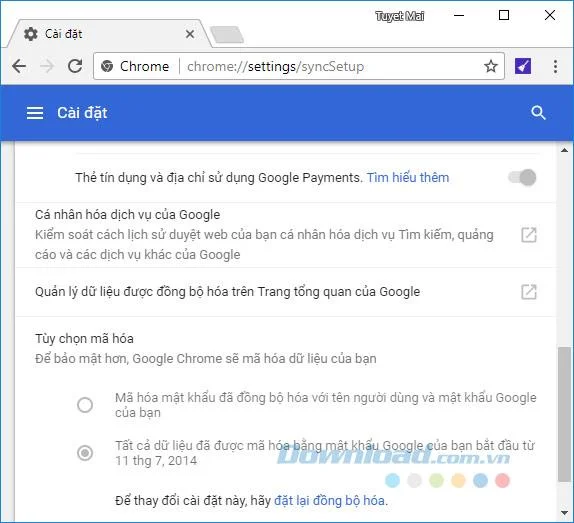
Step 7: In addition, to ensure data synchronization, Google also supports users to set a password to synchronize data encryption. It is best to enable this feature to avoid unintended data synchronization.
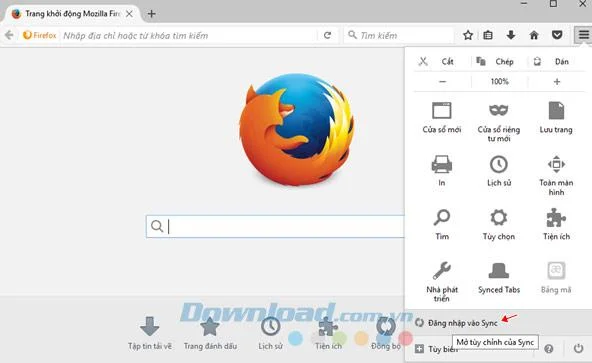
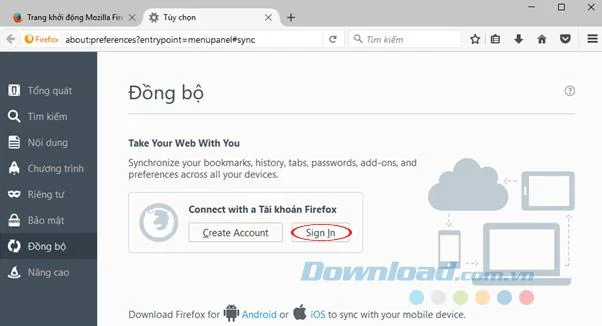
Step 1: Firefox browser also provides the same browser data synchronization function as Chrome. Just click on the 3 dash icon in the top right corner of the browser, select Sign in to Sync.
Step 2: If you already have a Firefox account, click Sign In to login, and if you do not have an account, click Create Account to create a Firefox account.
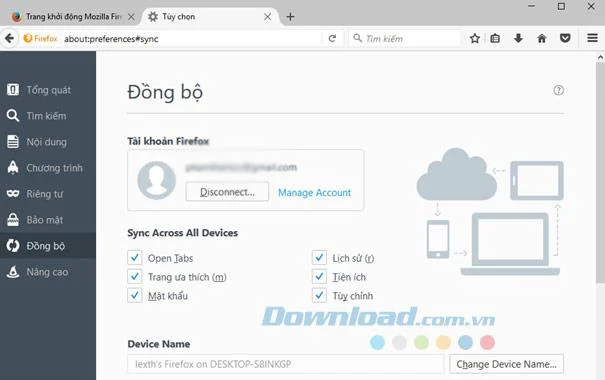
Step 3: After completing the login, you will be provided with a list of synchronization options that Firefox supports such as: Sync tabs, history, favorite pages, add-ons, passwords, custom .. .
Opera is the browser that supports the earliest synchronization feature, in this latest version this feature still works very well. Usage as follows:
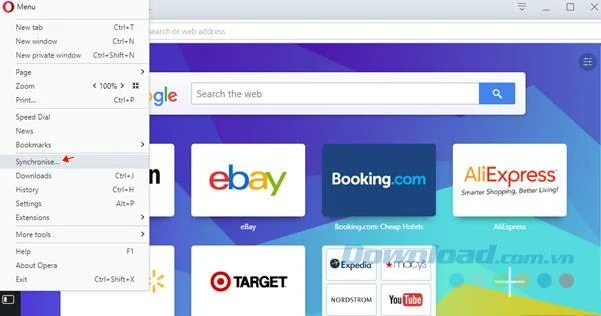
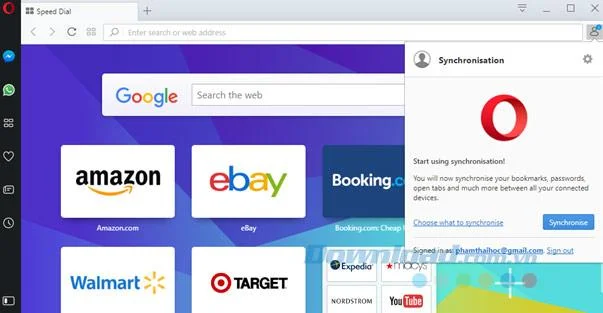
Step 1: Click the Opera icon in the upper left corner of the browser, select Synchronize.
Step 2: The login dialog box appears, enter your Opera account. If you do not have an account, click Create my account to create a new account.
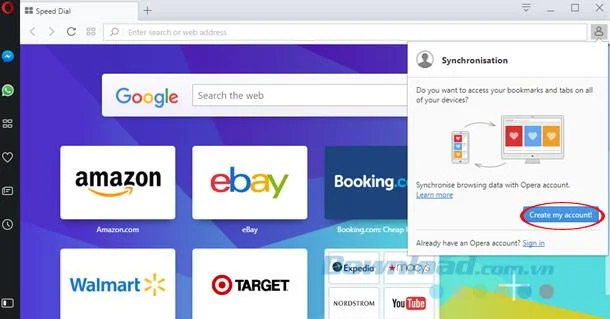
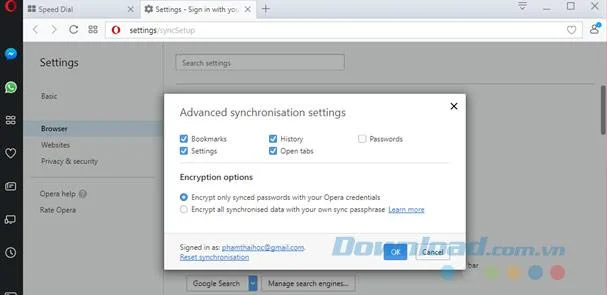
Step 3: Once the login is completed, the data will be synchronized automatically. If you want to personalize the synchronization, then click on the line Choose what to synchronize .
Step 4: Then tick the item you want to sync, then click OK.
Microsoft also integrates backup and data synchronization features for 2 browsers Microsoft Edge and Internet Explorer. Just follow the steps below to enable this feature:
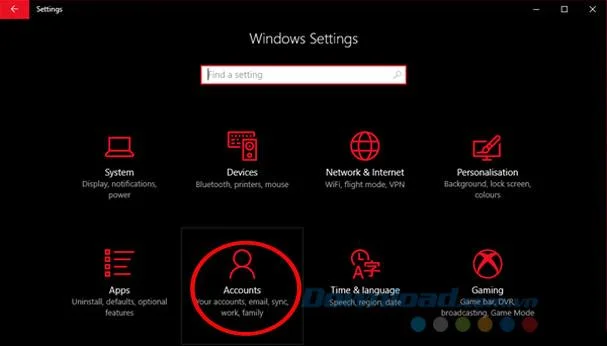
Step 1: Use a Microsoft account for Windows 10, then open Settings and click Accounts.
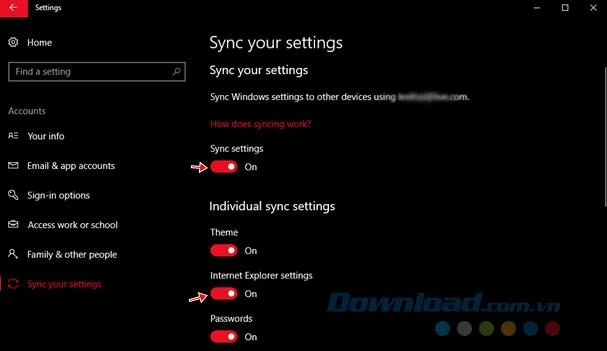
Step 2: In Accounts , click on the Sync your settings group . Slide the slider to ON in the Sync settings and Internet Explorer settings options.
So now you can use browsing data on any device already. Pretty simple, isn't it?
I wish you successful implementation!
Set print and download limits for ONLYOFFICE links, room members, or Docs API sessions, then verify the restrictions from a recipient account.
Set a backup destination, schedule, Mail coverage, and retention limit in ONLYOFFICE Workspace, then verify the archive is ready to restore.
Start the Enterprise Docker Compose stack, persist its license and data, configure JWT safely, and confirm the editors are ready to integrate.
Use an ONLYOFFICE JavaScript macro to remove nonprinting characters and trim extra spaces from a defined spreadsheet range, with a safe review workflow.
Connect ONLYOFFICE DocSpace to Active Directory or OpenLDAP, import users and groups safely, map account fields, and schedule reliable synchronization.
Move portal data from Disk Default to a supported cloud storage provider, or relocate Docker data safely by changing its host volume mapping.
Identify whether Document Server uses a Linux package or Docker, remove only its components, and check remaining data without deleting shared services by mistake.
Trace slow collaborative editing to Docker resource pressure, proxy connections, or document load, then choose the fix that matches your measurements.
Install custom fonts in ONLYOFFICE Document Server, compare persistent Docker mounts with direct copies, rebuild the font list, and verify the result.
Choose where TLS should terminate, mount a trusted certificate and private key safely, and verify HTTPS access to a Dockerized ONLYOFFICE Docs server.