Schedule Reliable Backups for ONLYOFFICE Workspace

Set a backup destination, schedule, Mail coverage, and retention limit in ONLYOFFICE Workspace, then verify the archive is ready to restore.
Wakuoo also supports virtualization technology (VT). Here's how to enable VT on Wakuoo emulator .
Wakuoo is a new Android emulator software that was released not long ago, since 2021. However, Wakuoo provides quality features no less than popular Android emulators today. You can run almost any of your favorite games on Wakuoo, and you can even enable VT.
VT - Virtualization technology is a technology that provides the ability to run multiple separate operating systems on one server hardware, thanks to which the emulator can take advantage of more resources. You should enable VT because it can improve your computer's performance and at the same time, allow Wakuoo to run smoother & faster.
Instructions for using VT on Wakuoo
You have 3 ways to do this:
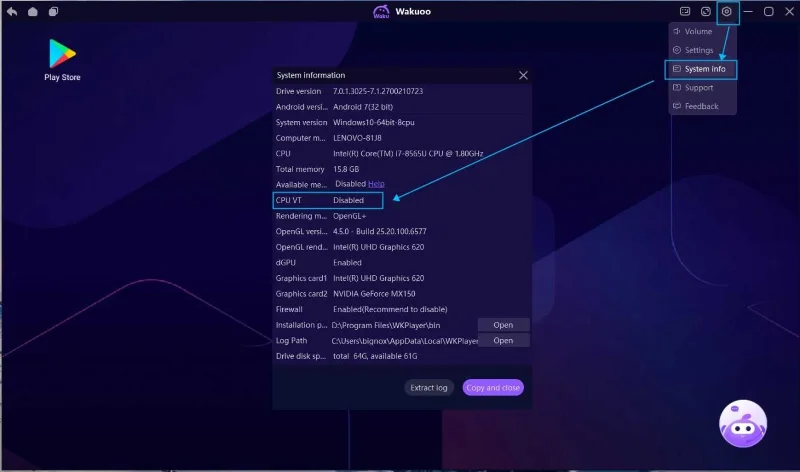
Wakuoo will automatically check for you whether your PC has VT enabled or not. You can go to Settings >> System info >> CPU VT >> Enabled/Disabled to see this setting.
When opening a game that requires VT service, Wakuoo will automatically notify you.
LeoMoon CPU-V not only detects whether the CPU supports hardware virtualization, but also checks its status in the BIOS.
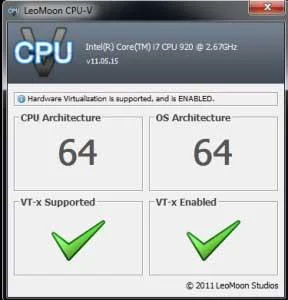
If the test results show a green check mark in VT-x Supported, it means your computer supports virtualization. If it is a red x , the computer does not support VT. However, you can still install Wakuoo as long as you meet the installation requirements.
If the result shows a green check in VT-x Enabled, it means VT has been enabled in the BIOS. If it is a red x , follow the steps below to enable VT in Wakuoo.
1. Check the system information in Wakuoo and find the computer model or BIOS model.

2. Enter the BIOS interface: Restart the PC first. During the reboot process, press Delete/F12 or the corresponding shortcut on your computer model, continuously until you enter the BIOS interface .
3. Turn on VT:
1. Find the VT option on the BIOS page. (Often called Virtual or Virtualization, some cases VT-X or SVM)
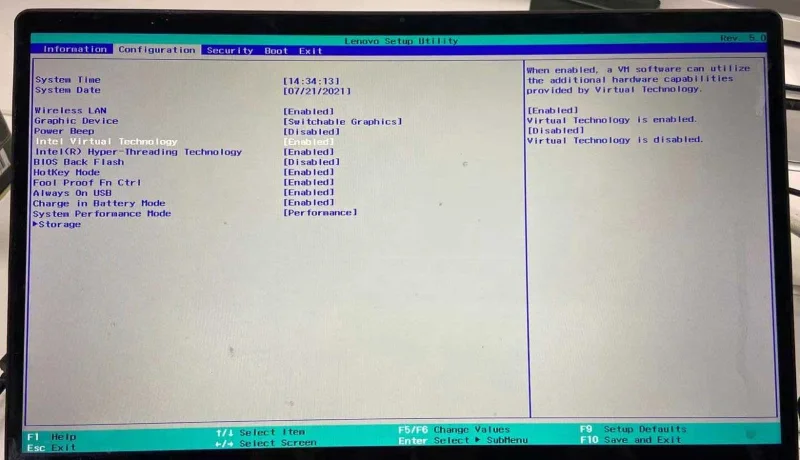
2. Click Advanced >> Processor (CPU) >> Virtual or Virtualization . On some computers, VT is in Configuration or Security.
3. Set the VT option to Enabled .
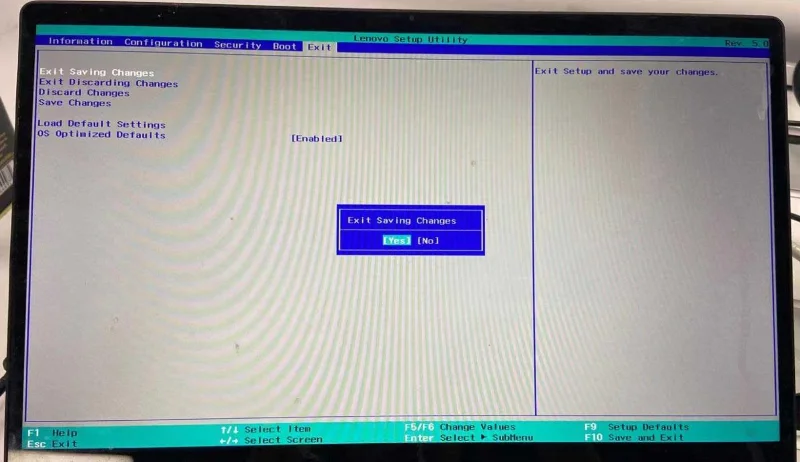
4. Press Save (F10) or Exit Saving Changes to save and exit.
How to fix common errors when turning on VT on Wakuoo
You may encounter these two common problems:
1. Conflict between VT and Microsoft
If you are running Windows 8 or Windows 10, you may encounter a conflict error between Microsoft's VT and Hyper-V technologies.
Turn off Hyper-V by following these steps: Go to Control Panel >> Programs and Features >> Turn Windows features on or off >> uncheck the box before Hyper-V .
2. Block and kill viruses
If your VT is enabled in the BIOS, but the test results still show a red line under VT, it is likely that anti-virus software has blocked this feature. Take for example Avast!, to fix the problem:
Above is how to turn on VT on Wakuoo . It's simple and easy, right?
Set a backup destination, schedule, Mail coverage, and retention limit in ONLYOFFICE Workspace, then verify the archive is ready to restore.
Start the Enterprise Docker Compose stack, persist its license and data, configure JWT safely, and confirm the editors are ready to integrate.
Use an ONLYOFFICE JavaScript macro to remove nonprinting characters and trim extra spaces from a defined spreadsheet range, with a safe review workflow.
Connect ONLYOFFICE DocSpace to Active Directory or OpenLDAP, import users and groups safely, map account fields, and schedule reliable synchronization.
Move portal data from Disk Default to a supported cloud storage provider, or relocate Docker data safely by changing its host volume mapping.
Identify whether Document Server uses a Linux package or Docker, remove only its components, and check remaining data without deleting shared services by mistake.
Trace slow collaborative editing to Docker resource pressure, proxy connections, or document load, then choose the fix that matches your measurements.
Install custom fonts in ONLYOFFICE Document Server, compare persistent Docker mounts with direct copies, rebuild the font list, and verify the result.
Choose where TLS should terminate, mount a trusted certificate and private key safely, and verify HTTPS access to a Dockerized ONLYOFFICE Docs server.
Embed the ONLYOFFICE editor in your PHP app, sign its configuration with JWT, and save edited files through a secure callback.