Microsoft Word is a text editing tool that is widely chosen by users, because it provides so many useful features. You can enter mathematical formulas, draw charts, insert images, videos, embed links ... extremely quickly and conveniently.
In particular, also provides users with a ruler (Ruler) to help align the margins, indentation, even keep everything aligned thanks to tab stops. This ruler is extremely useful and convenient to align text faster than ever. Invite you to follow the article below to take full advantage of the "power" that this bar brings:
Instructions for activating the ruler ruler in Word
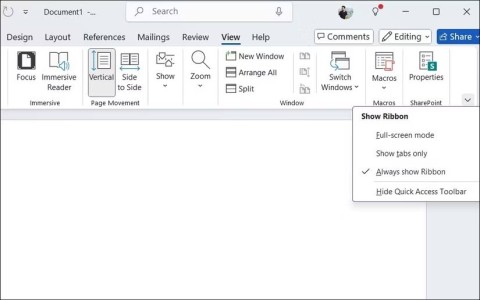
First, you must leave the Print Layout view , then switch to the View tab .

Then, check the Ruler box to activate the alignment of the margins.

Note: Ruler consists of 2 components, horizontal ruler (Horizontal Ruler) can be displayed in both Web Layout and Draft modes, but vertical ruler (Vertical Ruler) does not.
Instructions for using ruler bars in Word
Set margin distance on the ruler
The margins on the ruler are shown in white and gray:
- The gray area at both ends is the margin you have set.
- The white area is the active area, which contains the text.
The gray area starts with the number indicating the margin distance that you adjusted in Page Setup to 0, then starts again from 0 in the white area. You can set inches or centimeters by going to File> Options> Advanced> Show Measurements In Units Of to change.
Note: This unit will apply to all other measurement features in Word.

You can align the margins directly on the ruler by: Dragging the mouse between the gray and white ruler area at the margin you want to adjust, then dragging left or right (up or down).

With Word's default 8.5 x 11-inch paper setting, the horizontal ruler starts at 1 (1 inch margin), then returns to 0 when the left margin is gone, continuing to run to 7.5 for the horizontal area. rest. With the same vertical ruler starting from 1 for the 1 inch margin, returning to 0 when the margin is out and running to 10 for the remaining vertical area
Set indentation on ruler
On the ruler, there is a lump of two triangles that are pressed together and a rectangle, which controls the indentation for individual paragraphs. Just click the text (Press Ctrl to select multiple paragraphs or Ctrl + A to select the whole document), then drag to edit.

This big department has 3 small departments, responsible for the following:
- Drag the bottom rectangle rectangle: Will adjust the indent (left alignment) for the whole paragraph. When pulling that piece, the other 2 pieces follow.

- Drag the middle triangle: Will indent (left alignment) for all lines except the first line.

- Drag the top triangle: Will indent (left align) the first line in the paragraph.

And for the white lump on the far right, drag it to align the whole paragraph with the right paragraph.

Add tab stops (Tab Stop)
By default, in a Word document, there are no tab points, every time you press the tab, the cursor will move to 8 characters. Setting tab stops will help you organize and control the text better. Look to the top left corner of the document (right on the vertical ruler), you'll see the Tab Stop button .

Click the button to customize the tab stops that you will set, each time is a different type of Tab Stop:
- Left (Left): Text is left-aligned starting from the tab stop is set.
- Center (Center): Text is centered around the tab stop is placed.
- Right: Right- aligned text, ending at the tab stop is set.
- Decimal: Arrange decimals in line with each other, very suitable if you need statistics with multiple numbers.
- Bar Tab: This tab type does not create actual tab stops, but will add a line at the place where it is placed. Can be used to divide vertical columns in cases where no table is needed.
Access Page Setup
Double click any blank (gray) area on the ruler to open the Page Setup window , you can also open Page Setup from the Layout tab on the Ribbon.

The Page Setup window appears, on the Margins tab you can set the layout for the text page:
- Margins: Allows editing the top, bottom, left and right.
- Gutter: The section that is left out to bind to the document, by default blank.
- Orientation: choose paper orientation vertically or horizontally.
And the Paper tab allows adjusting the size and paper size accordingly. Most of the default Paper Size settings in Word are Letter (for US paper) with dimensions of 215.9 x 279.4mm.

Tips for using the Ruler ruler on Word
- While browsing through tab stops without knowing what it means, just drag the mouse out and return it to the description dialog box.

- To insert a Stop Tab, simply click where you want to place on the white area of the horizontal ruler. The Tab Stop icon appears, letting you know that every time you press the Tab key, the cursor will run to the nearest location where the Tab icon is located.

- You can add different Tab Stops and drag your mouse to move them. You can even double click on any Stop Tab to set them up as you wish.

- To delete a Stop Tab, drag and drop it from the ruler.
Hopefully this article will help you align text quickly, more conveniently thanks to this ruler Ruler. In addition, you can also use keyboard shortcuts for editing, as well as faster text alignment.
I wish you successful implementation!
