Instructions for installing and using Zalo on your computer

After a period of release Zalo for mobile devices, the publisher has officially launched the desktop version. Zalo PC allows users to freely text, call, chat for free.

All messages and contacts are synchronized between computer and phone, helping you not miss any conversation. However, users are used to using Zalo on their phones, when switching to a PC is a bit strange. So invite you to refer to how to install, use Zalo on PC in the following article:

How to install Zalo on a computer

Zalo Zalo for Mac

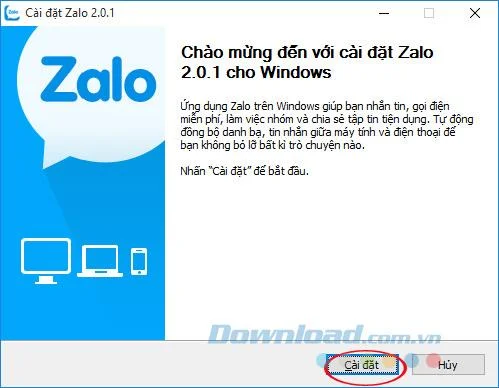
Step 1: Download Zalo according to the download link above, and then double-click the installation file. When the Install Zalo window appears, click Install to start.
Instructions for installing and using Zalo on your computer

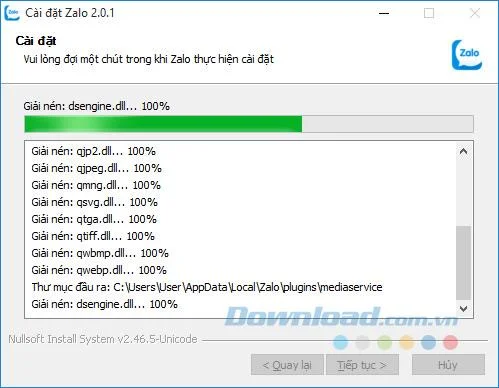
Step 2: The process of installing Zalo for PC is quite simple, you just need to wait a bit.

Instructions for installing and using Zalo on your computer

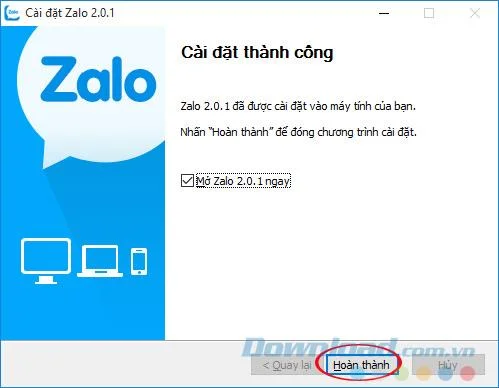
Step 3: Then, click Finish to finish.

Instructions for installing and using Zalo on your computer

Step 4: At this time, Zalo will ask you to scan the QR code or get a confirmation code to login.

Instructions for installing and using Zalo on your computerInstructions for installing and using Zalo on your computer

Step 5: Open Zalo on your phone, click the icon 3 horizontal dots in the top right corner of the screen, select Scan QR code . When the QR code scanning interface appears, bring the camera phone to scan the QR code on the computer screen to log in. If you do not have Zalo on your phone, you must install Zalo on your phone first:

When finished scanning the QR code on the computer, Zalo on the phone will appear the message "Do you want to log in to Zalo on the device named ...?" , click Sign in to allow.

Instructions for installing and using Zalo on your computerInstructions for installing and using Zalo on your computerInstructions for installing and using Zalo on your computer

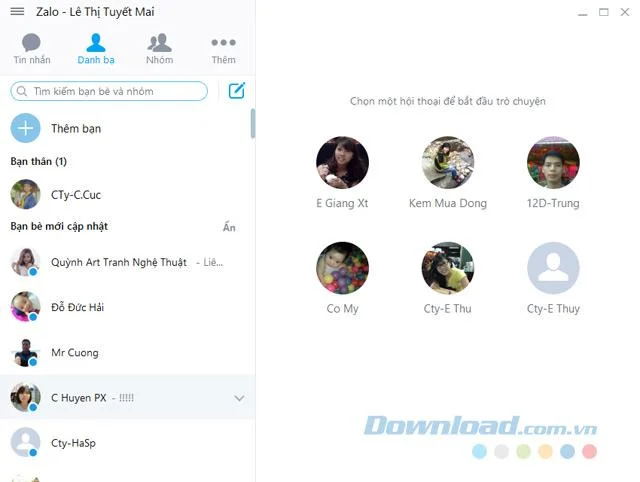
Step 6: After logging in successfully, the main interface of Zalo on PC will appear as follows:

Instructions for installing and using Zalo on your computer

Instructions for using Zalo on PC

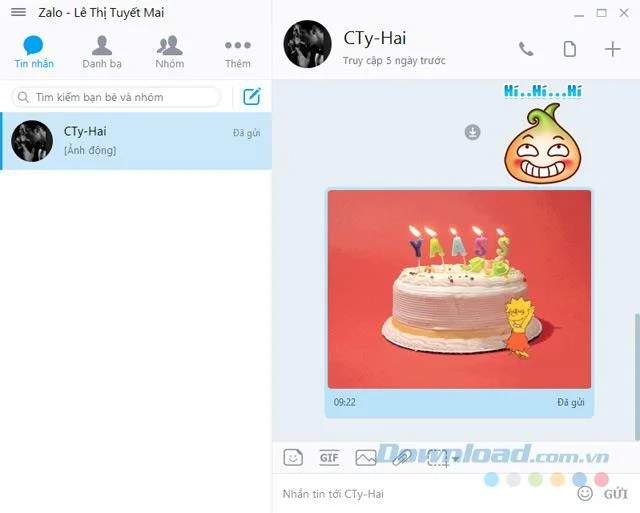
Now you can chat, text, chat with your friends similar to Viber , Skype ... Zalo for PC also supports sending GIFs, taking screenshots, sharing photos, sending files .. .

Instructions for installing and using Zalo on your computer

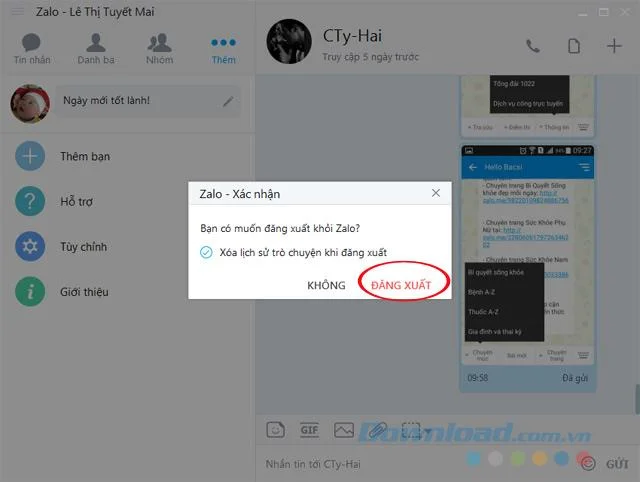
Zalo for PC has the option to log out of the computer if you do not want to use it anymore by: Clicking the 3 dashes icon in the top left corner of the screen, select Logout . When the confirmation window appears, click Sign out to be done.

Instructions for installing and using Zalo on your computer

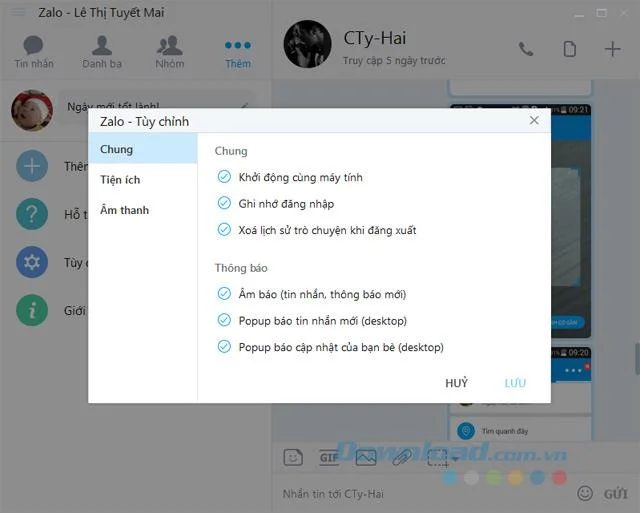
You can also customize to allow booting with the computer or remember the password by: Click Add , select Settings , then check the box:

  • Start with computer.
  • Remember login.
  • Clear chat history when logged out.
  • Sounds (new messages, notifications).
  • New message popup.
  • Popup alert of friends.

Then, click Save for the changes to be applied.

Instructions for installing and using Zalo on your computer

Video tutorial on installing and using Zalo on a computer

With just a few very simple steps, you can chat freely with friends and loved ones, at no cost. Pretty convenient, right? If you do not like the process of installing Zalo on this cumbersome laptop, you can access and log in Zalo directly from the browser very simply according to the following tutorial:

Instructions for using Zalo Web right in the browser
Leave a Comment

Enable FIPS Mode on SLES 15 and Verify the Boot State

Enable FIPS Mode on SLES 15 and Verify the Boot State

Follow SUSE’s SP7 procedure to enable FIPS mode, reboot safely, verify the active policy, and check whether your compliance requirement calls for validated modules.

Set Up a LUKS-Encrypted Data Volume on SLES

Set Up a LUKS-Encrypted Data Volume on SLES

Compare YaST and cryptsetup for a new encrypted SLES data volume, choose LUKS1 or LUKS2, and verify unlock and mount behavior safely.

Build a Custom AppArmor Profile on SUSE Linux

Build a Custom AppArmor Profile on SUSE Linux

Create, refine, and verify a least-privilege AppArmor profile on SLES 15 SP7, with a clear note on SLES 16’s SELinux default.

Build a Local SUSE Update Server with RMT on SLES 15

Build a Local SUSE Update Server with RMT on SLES 15

Set up RMT on SLES 15, mirror entitled repositories, and verify HTTPS registration and package access from a test client.

Join SLES 15 to Active Directory with SSSD in YaST

Join SLES 15 to Active Directory with SSSD in YaST

Connect SLES 15 to AD with YaST’s SSSD-based logon management, then verify directory lookup, domain login, and Kerberos tickets.

Enable SLES Live Patching and Verify a Kernel Fix

Enable SLES Live Patching and Verify a Kernel Fix

Set up the right Live Patching path for SLES 16.0 or 15 SP7, apply eligible kernel fixes, and confirm what is active without confusing it with a reboot-required kernel update.

Install and Sign Custom Kernel Modules on SLES 15 Secure Boot

Install and Sign Custom Kernel Modules on SLES 15 Secure Boot

Load a custom SLES 15 kernel module without disabling Secure Boot. Match the running kernel, sign the .ko file, enroll a MOK key, and verify loading.

Keep Services Available During a SLES 15 SP5 to SP6 Upgrade

Keep Services Available During a SLES 15 SP5 to SP6 Upgrade

SLES 15 SP5 can migrate online to SP6, but each node must reboot. Use a tested rolling upgrade or blue-green cutover to keep workloads reachable.

Apply the SLES 15 STIG Safely with OpenSCAP

Apply the SLES 15 STIG Safely with OpenSCAP

Use SUSE’s supported STIG profile to scan SLES 15, test remediation, review remaining findings, and retain assessment evidence.

Restore Cockpit Access to SUSE Linux Enterprise Server

Restore Cockpit Access to SUSE Linux Enterprise Server

Trace a failed Cockpit connection through DNS, port 9090, the systemd socket, firewalld, TLS, and login settings using current SUSE guidance.