Tango is a popular free messaging app with lots of outstanding features compared to normal applications on the market today. Tango helps you connect with all your Tango friends and those who don't have Tango installed with the Tango out feature. Chat is never interrupted by downloading Tango for PC and connecting with friends anytime, anywhere.
Download.com.vn will guide you how to use the free texting and calling application Tango on your computer. First, you need to download the Tango application for PC.
After downloading and installing the Tango application from Download.com.vn and launching the application, you are directed to a screen with the default interface of an iPhone.
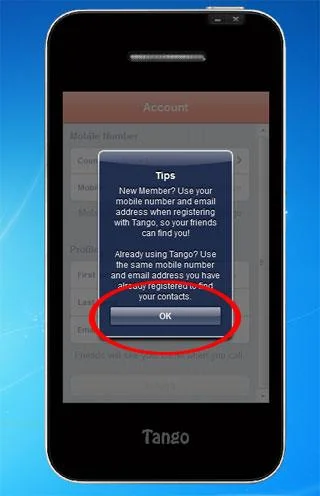
Click Ok to continue.
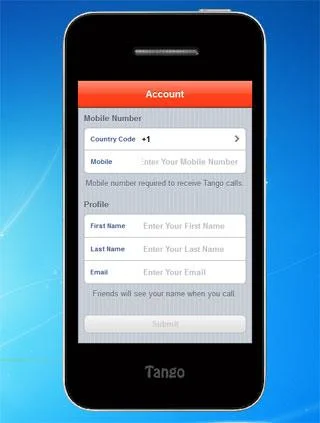
If you are a new member, you need to use your phone number and email address to register for Tango on your PC and help your friends find your contacts. Use the same phone number and email you registered to find contacts. Enter the correct country code, phone number, full name, email address on your screen.

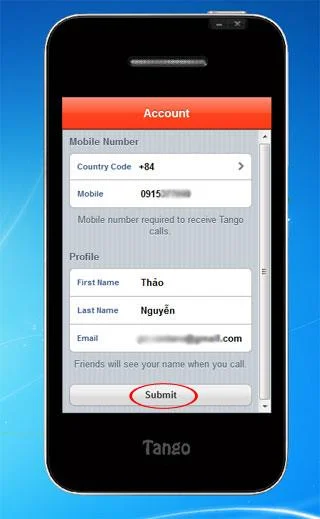
Click on County Code and select Vietnam >> Enter mobile phone number >> First Name >> Last Name >> Email Address and click Submit

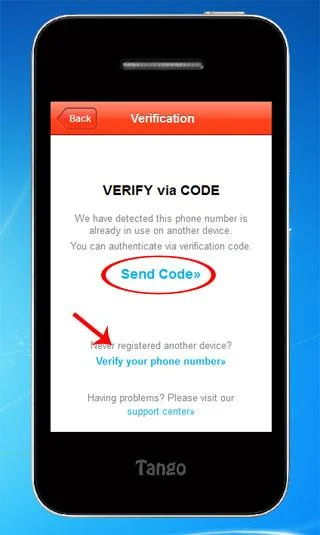
After Submit, you wait a few seconds and continue to be directed to the screen below. Click Send Code to receive verification code if the phone number you have registered has ever registered to use Tango on your phone. Or click Verify your phone number if your phone number has never been used on any device.
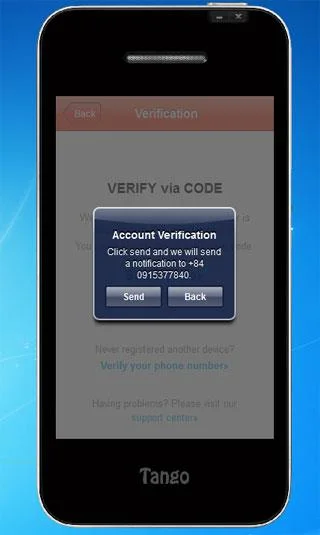
The Tango application sends you an account verification request by sending a code to the phone number >> press Send.


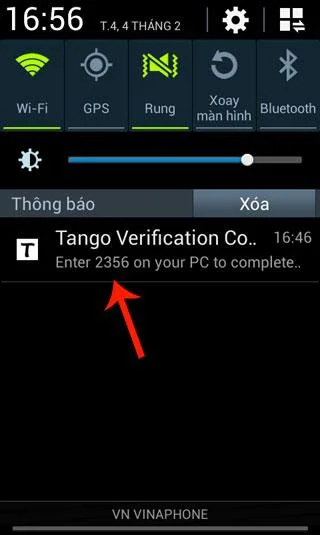
Shortly thereafter, on his phone, Tango issued an authentication code to register for an account to use Tango on PC.

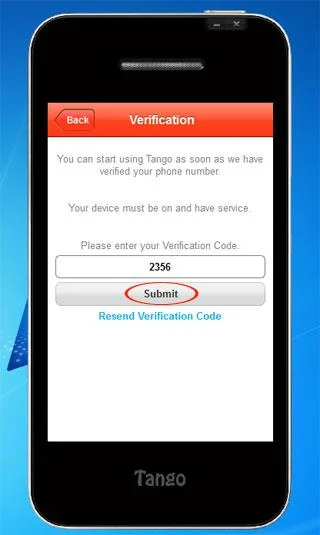
Enter the 4-digit code Tango sends you to the screen below to continue:

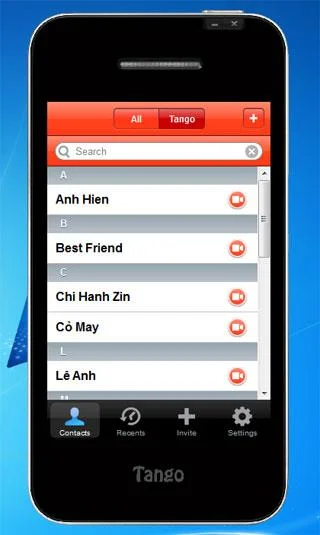
And you can use Tango now

Above is the guide to install Tango on your computer. Good luck!