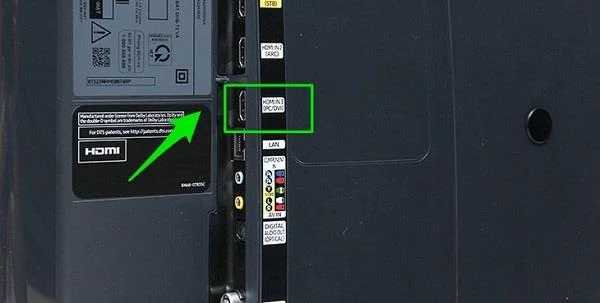
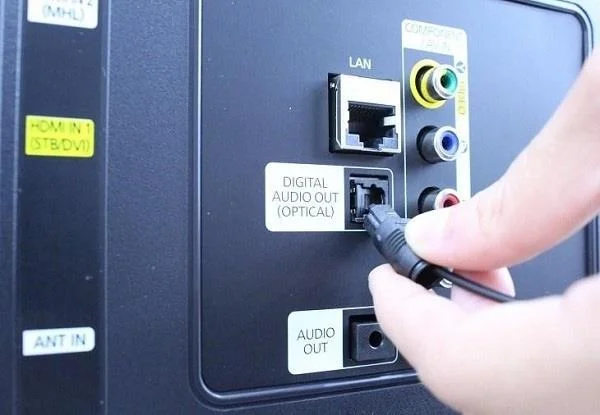
The connection of the amplifier to the TV not only brings louder sound, but also helps to create the most extreme, vibrant and authentic entertainment space for users. Below, WebTech360 will introduce you to some of the most popular ways to connect TVs and amplifiers today!
Use AV cable to connect TV and amplifier
AV cable line, also known as composite cable, is used to support the transmission of audio through two red and white audio wires. With two wires with different colors, the installation makes connecting the TV to the amplifier simpler and easier.
To connect the TV sound to the amplifier, do the following 2 steps:
Step 1: Plug 2 cables into the AUDIO OUT port (red and white ports) on the TV. Note to remember to plug each wire with the corresponding port color.
Step 2: The 2 remaining wires at the opposite end plug directly into the amplifier with the corresponding color, and the connection is complete.
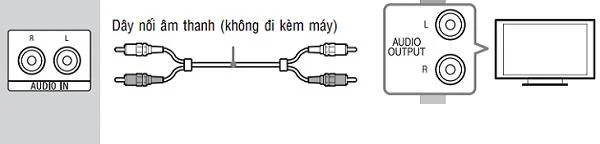
Use AV cables that are suitable for long production TV equipment
See more:
>> "Solve" the TV ports
>> Some common connection ports on stereo systems, speakers
Use an HDMI cable to connect the TV to the amplifier
Using an HDMI cable is a way to connect the TV to the amplifier used by many people. However, the required condition for these 2 devices to connect together is that both the TV and the amplifier have HDMI (ARC) ports so that the output of the sound to the speaker is done correctly. Therefore, for devices using HDMI ports, it is usually not possible to connect the amplifier to the TV.
>> How to buy HDMI cable for TV?
>> How to connect a laptop to a TV via HDMI
To make the connection, do the following 2 steps:
Step 1: First, determine the correct HDMI port on the TV, followed by the proceeding to plug one end of the HDMI cable into the previously searched port.
Step 2: Plug the other end of the HDMI cable into the amplifier's HDMI port for the connection to be completed.

Connecting via HDMI is the most common method
Use optical cable
Optical cable is a digital audio connection cable, also known as an optical cable. With the wire shell structure painted with Duraflex compound to help the signal not be disturbed to the outside, the wire allows the TV to output sound to the speaker or amplifier in a vivid and realistic way.
>> [Answer] Everything about amp symbols you should know

Use optical cable
Nowadays Optical connection is becoming more and more popular on new generation smart TVs because it brings many advantages. Optical port on the TV has a square jack, usually denoted DIGITAL AUDIO OUT (OPTICAL).
The steps to connect include:
Step 1: Connect the Optical cable to the DIGITAL AUDIO OUT (OPTICAL) port on the TV of each family.
Step 2: For the other end of the cable should be plugged into the correct position at the amplifier.
However, nowadays, not all TV equipment or amps are integrated with Optical ports, so before you want to connect the TV and amiply via Optical port, you need to find out whether your TV model supports connection or not.
Above are 3 simple ways to connect amply with TV that are most commonly applied. Depending on the characteristics of each TV line, you can choose for yourself a way to switch the sound from the TV to the most suitable amplifier, bringing a true and lively entertainment space for your family after each meal. hey.
See more:
>> Instructions on how to connect a phone to a TV via bluetooth to play music
>> User guide for connecting TV to phone by MHL
>> What is the best amplifier today? Should buy amply brand?