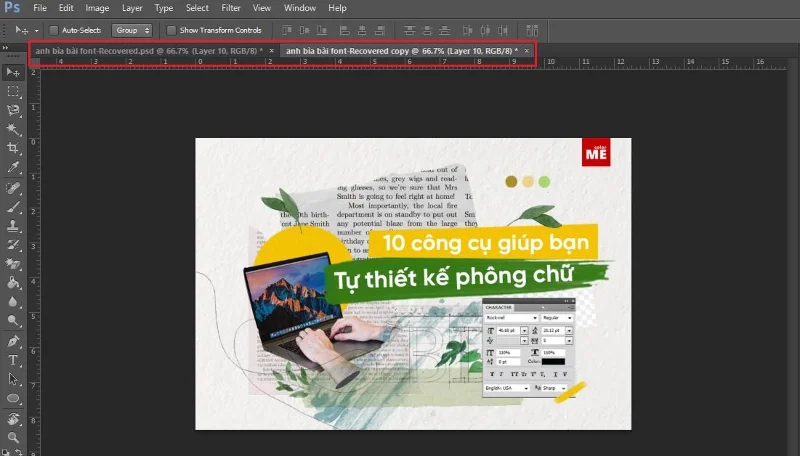
Copying layers will make your manipulations when using Photoshop easier, understanding how to copy basic layers will help you master this tool. The following article will show you how to quickly copy layers in Photoshop .
Top 5 Super Fast Ways to Copy Layers In Photoshop Can't Be Ignored
During the photoshop process, sometimes you have to duplicate layers into two or more copies to manipulate without affecting the original layers. Duplicating multiple layers is both convenient to work with, and breaks down work and determines completion levels so that you can more easily distribute work.
For those who are new to Photoshop, cloning and manipulating sub-layers is considered a form of data backup. Duplicate the layers before moving on to a new step. If there is a mistake, you just need to delete the extra layer and go back to duplicate the original layer then continue doing it without starting from 0.
To help you perform layer copy operations quickly and effectively, please see the detailed content on how to copy layers in Photoshop right here.
Super Fast Copy Layer In Photoshop Can't Be Missed
Copy layer on same Photoshop file
This is the most common way to copy layers, all operations to add, edit, and adjust images on an image file need to use copied layers to manipulate.
Duplicating layers on the same photoshop file is also quite diverse and has many different methods, here we will learn the two most commonly used layer cloning methods .
Duplicate layers in Photoshop with keyboard shortcuts
The simplest and most commonly used way to copy a layer is to select the layer to be duplicated, then use the Ctrl + J key combination . For more than one layer, you just need to select all the layers to duplicate then use Ctrl + J to complete the process. Very simple and easy to remember right!
Sometimes you only need to duplicate a small part of the object in the layer to manipulate without duplicating the entire layer.
Just select the object you need to duplicate in the layers panel > Create a zone for the object to be separated using whatever tool you find most appropriate in the Selection Tool group (V) > Then hold the key ALT simultaneously drag and move the object to another position.
How to copy layer using Duplicate Layer option
Method 1: Drag and drop the layer to be duplicated into the New Layer icon at the bottom of the Layers panel.
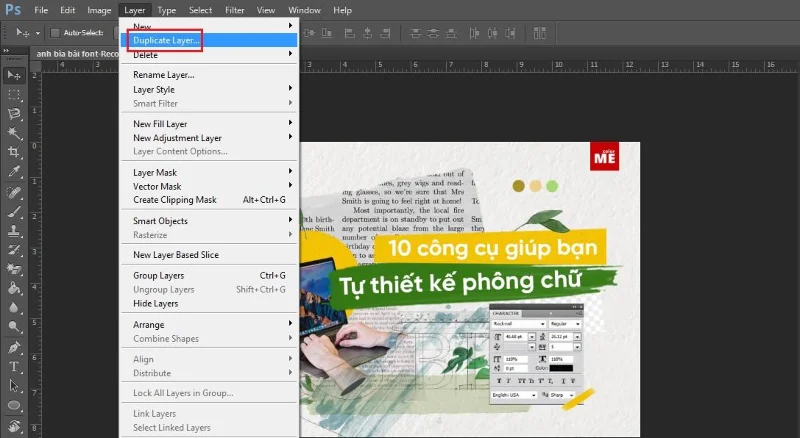
Go to menu Layer > Duplicate Layer Or Layer > New > Layer and Copy (Ctrl+J) .
Press and hold Alt + Drag the layer 's shape area to another location.
Right click on the layer to be duplicated, select Duplicate Layer .
Method 2: Select the layer to duplicate in the layer panel > Select Duplicate Layer .


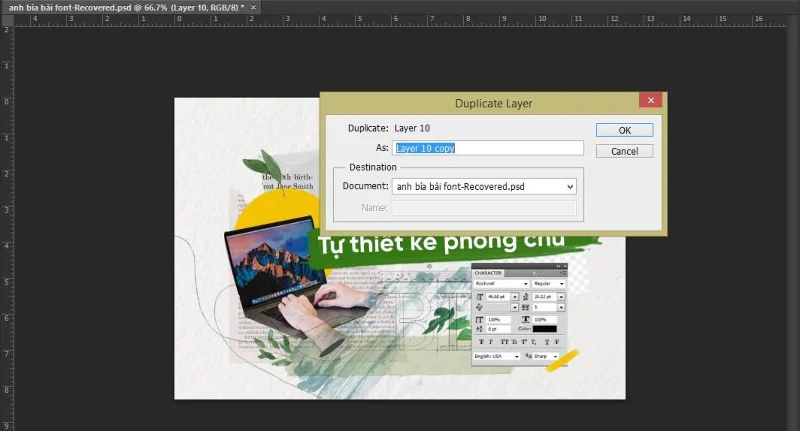
Note: With the Duplicate Layer feature, you can copy layers from one file to another in Photoshop. Or through another image by selecting a new file in the Document section.
Copy the layer to a new working file
If you find it difficult to stack too many layers in a file, or you want to separate a part of your subject into a new file. Follow the simple way of copying the layer below.
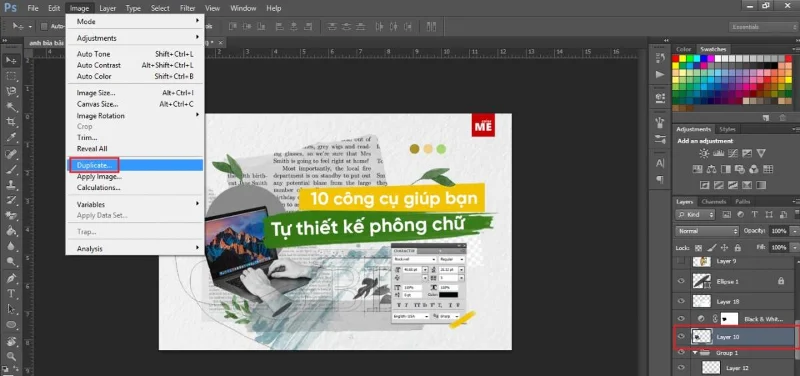
Step 1: Select the layer that you want to create a new file.
Step 2: On the menu bar of the main page in Photoshop, select Image > Duplicate Layer to open the Duplicate dialog box .

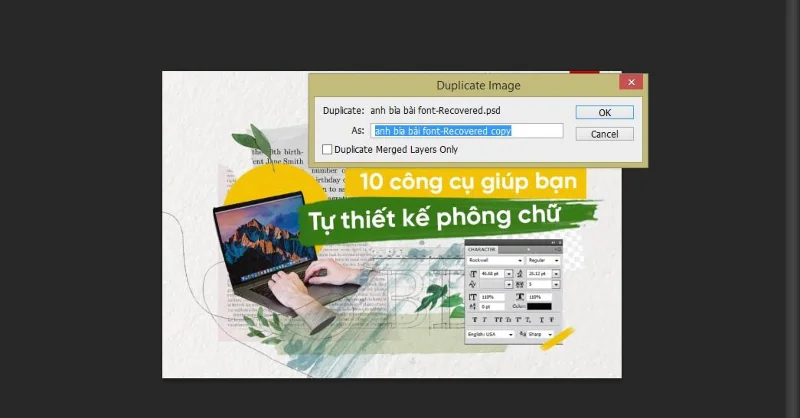
The Duplicate dialog box appears:

Step 3: In the Duplicate dialog box , name the layer to be split in the As section . If you leave the default, the layer will automatically duplicate a new PSD file .

Thus, we have learned 3 simple steps to copy layers to a new working file. Similarly, you can also copy to another PSD if needed.
Copy layer from one PSD file to another PSD file
You work with many related projects, the problem of copying layers between PSD files is inevitable. Let's take a look at 2 ways to copy layers from one PSD file to another PSD file!
Method 1: Similar to copy layer to a new working file.
Select the layer that you want to create a new file .
On the menu bar of the main page in Photoshop, select Image > Duplicate Layer to open the Duplicate dialog box .
In the Duplicate dialog box , name the layer to be split in the As section . Then in the Document section we select the PSD file that the new layer needs to be copied to.
Method 2: To duplicate the layer from one PSD file to another PSD in this way. First you have to open both PSD files at the same time and follow the steps.
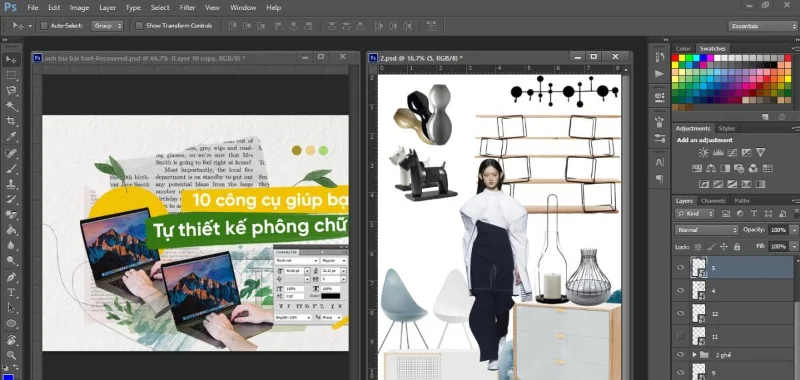
You should move 2 PSD windows to 2 different sides to be able to work on both PSD files at the same time . You can do as shown in the description.

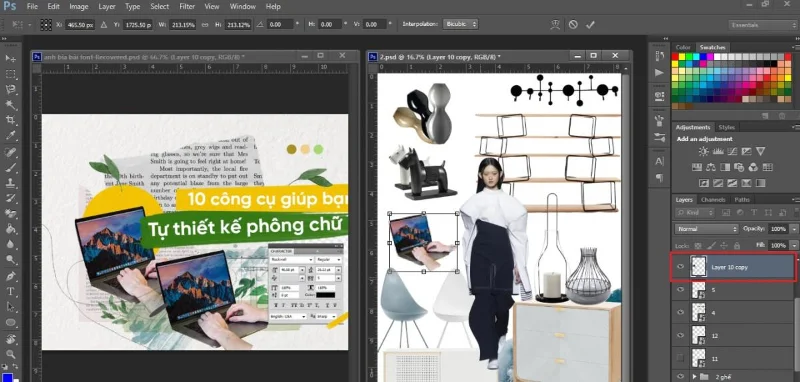
Click on the layer you want to copy and move it to the PSD file you want to move.

After it has been converted to the new PSD file, the layer will appear as shown in the image. You can now manipulate and edit layers on the new PSD file.
In addition, you can refer to the configuration below, a minimum configuration that allows you to perform smooth photoshop.
Configuration for Designer: HHPC GAMING - INTEL CORE i3 10100 | 16G RAM | GTX 1050Ti
➤ MAINBOARD: GIGABYTE H410M-H
➤ CPU: INTEL CORE i3 10100 up to 4.3G | 4 CORE | 8 THREAD
➤ DISPLAY: JONSBO CR-1000 RGB
➤ RAM: COLORFUL BATTLE AX 16GB BUS 3000 DDR4 (1x16GB)
➤ VGA: NVIDIA GTX 1050Ti 4GB GDDR5
➤ SSD: GIGABYTE SSD 240G SATA III ➤ HDD
:
CUSTOMER CUSTOMIZE
SOURCE: COOLERMASTER PC700 700W
➤ CASE: JETEK KAMADO ( NO FANS )
So WebTech360 has gone through a few tutorials on how to quickly copy layers in Photoshop so you can quickly copy any layer. Good luck!