Home
» How to
»
Ways to speed up file copying on Windows 10
Ways to speed up file copying on Windows 10
Video Ways to speed up file copying on Windows 10
Data copying is one of the most commonly used tasks on PC. Here are ways you can copy files faster on Windows 10.
Because copying data is so simple, not many people really care about it. However, when it comes to copying large files, this process is usually more time-consuming. You can then use the following methods to speed up file copying on Windows 10.
Using keyboard shortcuts is always a great way to work more efficiently, and File Explorer is no exception. To copy & move regular files, you can use some of the common key combinations below:
Ctrl+ X cut file, move file to clipboard so you can paste it into another location. When the paste is finished, this file will disappear from the original location.
Ctrl+ C to Copy. The copy job is like cutting, except that the original file remains after you have a copy of it in the new location.
Ctrl+V is a shortcut to paste data. Use this key combination to move the cut file or create a second copy at a new location.
Besides, you can use Ctrl+ Shift+ Nto quickly create new folders and save files copied onto it. Alt+ →/ ←allows you to "jump" to the previous or next directory. Use Alt+ Upto level up a directory system.
2. Shortcuts on computer mouse
If you prefer to use a mouse, you can apply some of the following tips:
Hold down Ctrland click on the files you want to select at any location. To select multiple files in a row, click on the first row, then, hold Shiftwhile clicking on the last row. This allows you to select a large number of files to copy or cut.
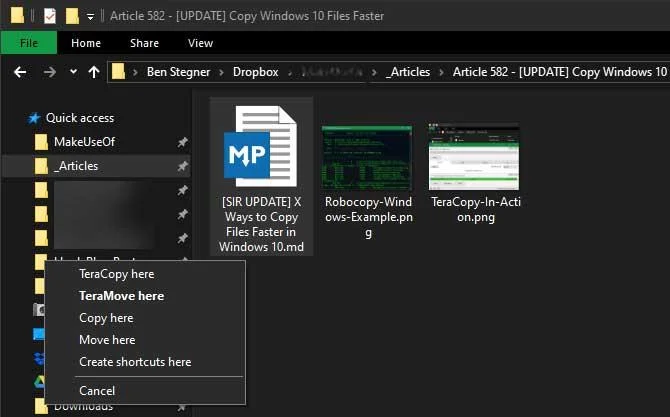
Normally, clicking and dragging files with the left mouse button will move them to a new location (similar to cutting and pasting). However, if you click, then drag them with the right mouse button, you will see a small menu. It allows you to choose to copy or move files. This is a very handy solution when you do not want to use keyboard shortcuts.
3. Use Windows 10
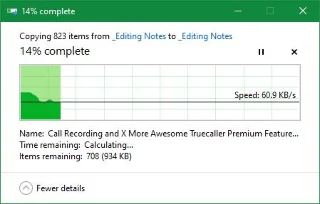
Windows 8 & 10 has a much better copying interface than Windows 7 and earlier versions. It runs faster, even showing speed graphs over time.
If you copy a lot of files at a time, it combines everything together so there aren't too many floating windows around. You can also pause and resume each process, prioritize an activity, or pause the data transfer for a long time while using your computer for other work.
Best of all, the copy dialog in Windows 10 will not stop completely if a conflict occurs. It keeps running, at the same time, allowing users to respond later. This feature is much better than having to exit the current activity for a while, just to return to the session and find the activity you want to pause for 10 seconds.
4. TeraCopy
The above three solutions are the simplest way to speed up data copying on Windows 10. If you want to be faster, you need to install a dedicated copying application, the most prominent of which is TeraCopy.
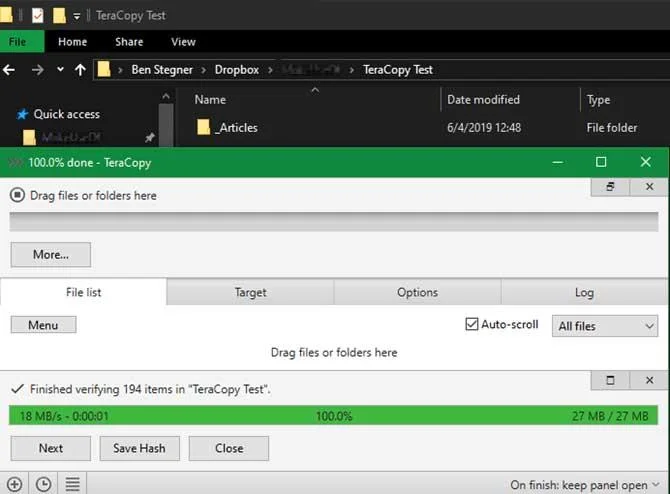
This application offers more options than the built-in keyboard shortcuts. It uses special algorithms to speed up the copying process. This application can check file copies to ensure they are 100% homogeneous. If you're often confused when dragging & dropping a file, you can turn on the confirmation dialog to make sure you really want to do it.
TeraCopy also has some other outstanding advantages that make it more useful. If you like, you can integrate the application with File Explorer to default to perform all copy / paste operations with TeraCopy. It also retains the original date & time on the copied file.
Of course, the software also ignores error files, allowing users to evaluate them after "freezing" the entire process. Overall, this is a great tool for those who have to copy files regularly.
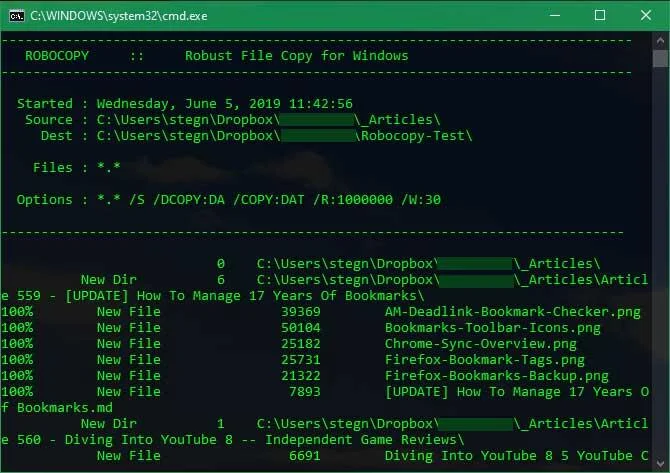
If you don't mind digging into the Command Prompt, you can try a utility tool called Robocopy (short for Robust File Copy). It provides more "power" for advanced users who need to run complex file copying operations.
Robocopy runs replication tasks faster. Those who need a quick copy over the net will find this tool really useful. To use Robocopy, open a Command Prompt or PowerShell window. Type robocopy and get a parameter based on what you want to do.
If you often have to run the same copy operation, you should create a batch file so you can double click to run it. You can even set the script to run through the Task Scheduler without any further action.
6. Upgrade drive to accelerate file copying
Hardware plays an important role in data processing speed. Computer users often know that older hard drives (HDDs) will run slower than SSDs. Copying files on the HDD usually takes longer. Therefore, if you do not already have an SSD, consider upgrading the drive to speed up file copying.
Here are some ways to copy files more efficiently on Windows. If there is any other effective solution, do not hesitate to share with Download.com.vn .