Home
» How to
»
Zalo PC is faulty! The cause and how to fix it
Zalo PC is faulty! The cause and how to fix it
You often use Zalo PC to message, call, video call for free, but suddenly one day you can not login Zalo, display error codes 2017, 2020, 2028, do not worry.
Error Zalo 2017, also known as Account error is not ready, usually occurs on both computers and phones, due to inaccurate system time, when logging in Zalo will receive a red message that you cannot log in. Item. Now, just adjust the system time to be accurate:
With Windows 10
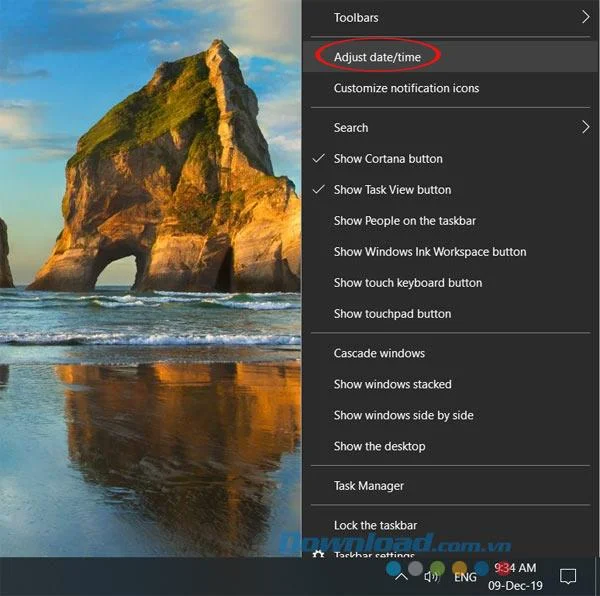
Step 1: Right-click the time on the Taskbar, select Adjust date / time.
Click Adjust date / time
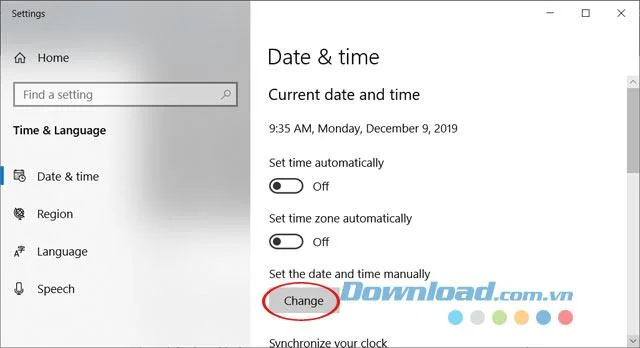
Step 2: Settings interface appears, at Date & Time , click the Change button to change the time for the computer.
Click on Change
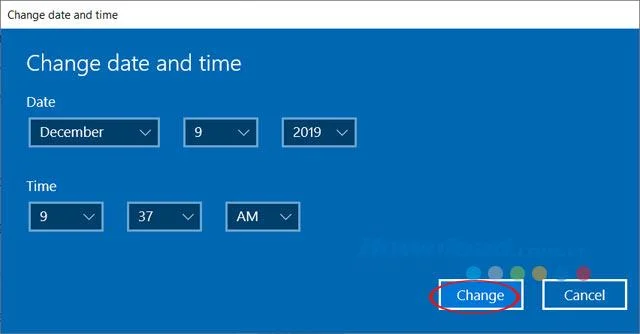
Step 3: Enter the exact date and time for the computer, if the time difference you also need to change and then press the Change button to save changes.
Change the date and time
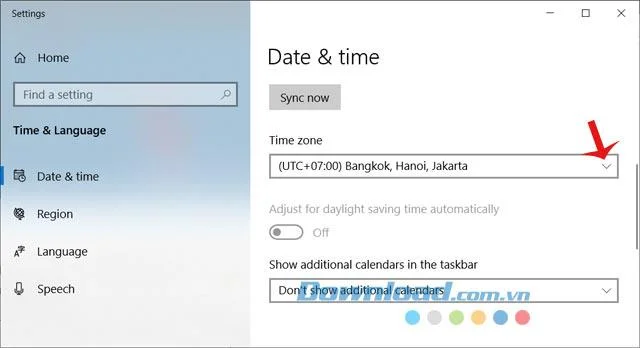
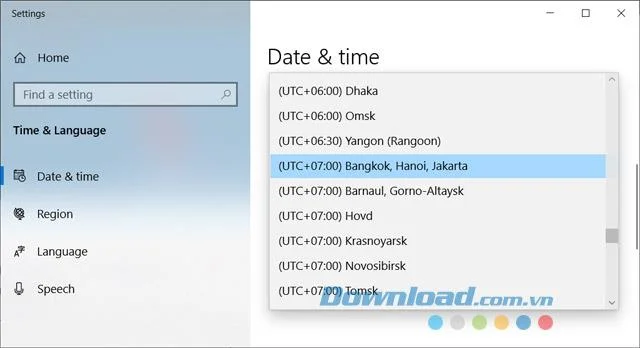
Step 4: Then return to the time-changing interface, then click the drop-down arrow in the Time zone section .
Step 6: After fixing, update Zalo computer to the latest version.
With Windows 7
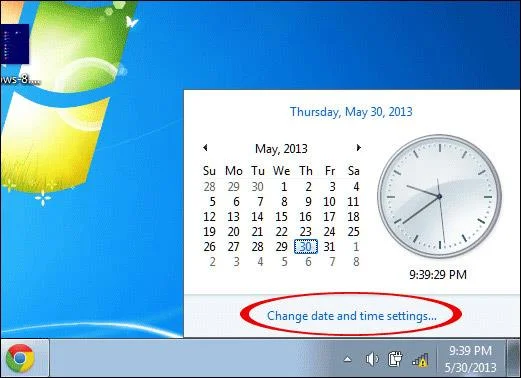
Step 1: For those who are using Windows 7, double-click on the date and time display to appear the time window details. Then click Change date and time settings .
Change date and time settings
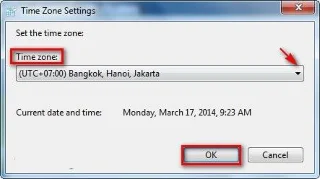
Step 2: Select Change Time Zone to change the exact time zone of Vietnam. Next, in the Set the time zone section, select Time zone , here will select time zone (UTC + 07:00) Bangkok, Hanoi, Jakata. Finally, click OK to change the time zone.
Time Zone Settings
Step 3: After fixing, please update Zalo computer to the latest version.
Fix Zalo 2028 error when logging in Zalo on your computer
If you encounter error 2028 when logging in Zalo on your computer or laptop, you only need to change your Zalo account password on your phone. Then log back in Zalo on the computer is.
Fix Zalo 2020 - Temporarily ban account usage
Error 2020 is because you violated the regulations when using Zalo, so the account is temporarily banned. To overcome this problem, you must register a new Zalo account or contact Zalo's support hotline: 1900 561 558 for assistance in resolving.
Error can not upload photos, new status Zalo
When the Zalo account fails to upload photos, the new status, you need to log out of Zalo, and then log in Zalo again.
Error typing Vietnamese Zalo on PC
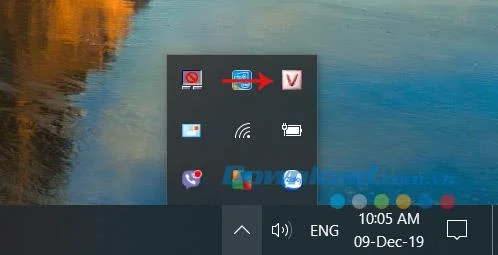
When you can't type Vietnamese on Zalo PC, you need to check that you have installed Vietnamese typing tools such as Unikey , Vietkey ... yet? If installed, check that the correct Vietnamese typing mode is selected?
Select Vietnamese typing mode
And if you have not yet typed in Vietnamese, need to check that the version of Zalo you are using is too old? If too old then proceed to upgrade Zalo to the latest version.
Error can not display images on Zalo
Error does not display images on Zalo due to two reasons, one is due to a problem with the network connection, the other is the image is no longer on the device is using Zalo. To overcome this situation, you should log in Zalo again.
Above are 6 common errors when using Zalo on PC, hope to help you. And in case of using all the above methods but still not overcome, you can use some other applications or exchange such as SMS, Viber , Skype ...