What is the best AI photo background remover?

People spend too much time manually removing backgrounds, and AI isn't always the magic it claims to be.
This tutorial will show you how to instantly convert a high contrast black and white photo in Photoshop using Gradient Maps. There are many ways to convert a photo to black and white, but Gradient Maps are one of the best because they are fast, easy to use, and produce great results. This article will show you how to use Gradient Maps and the secret behind why Gradient Maps give black and white photos such a high contrast look.
Gradient Maps vs. Photoshop's Desaturate Command
To really see how well Gradient Maps can work with black and white images, compare it to Photoshop’s Desaturate command, which is a quick way to remove color from an image. Both Gradient Maps and the Desaturate command are essentially one-click solutions, so let’s see which one is better at converting an image to black and white.
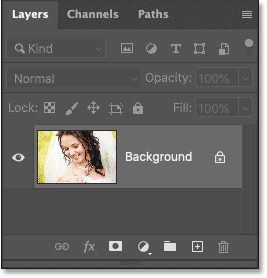
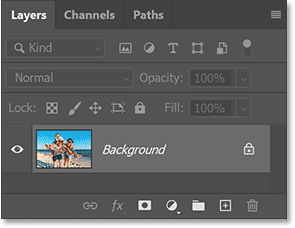
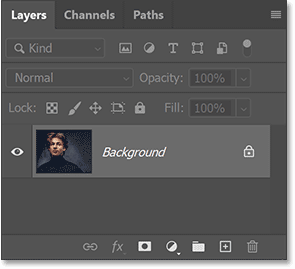
We'll start with the Desaturate command. In the Layers panel, the image will appear on the Background layer:
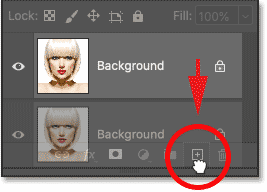
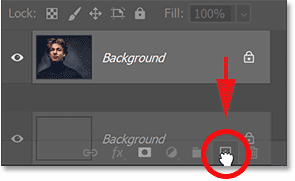
Make a copy of the Background layer by dragging down the New Layer icon :
Then double-click on the name of the copy (Background copy):
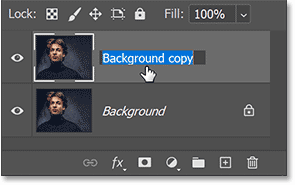
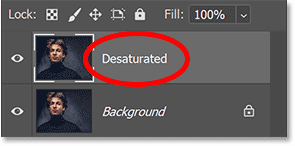
And rename it to Desaturated . Press Enter (Win) / Return (Mac) to accept:
To remove the color, go to the Image menu in the Menu bar , then go to Adjustments :
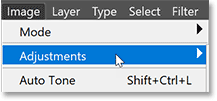
And select the Desaturate command:

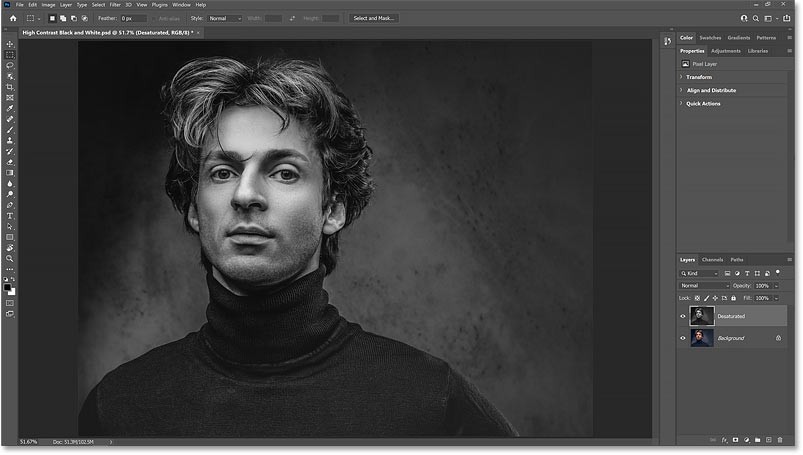
Photoshop instantly removes the color from the image, leaving black and white.
But the results aren't very impressive. There are no dark shadows or bright highlights to create the high contrast we expect in a beautiful black and white image. Instead, it just looks like an image without color:
How to Convert Image to Black and White Using Gradient Map
So let's compare the result from the Desaturate command with the result we got when using Gradient Map.
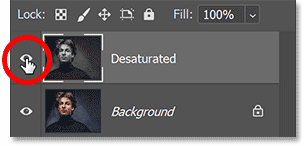
Turn off the Desaturated layer by clicking on its visibility icon:
Step 1: Reset Photoshop's Foreground and Background colors
Before adding a Gradient Map, make sure that in the toolbar your Foreground and Background colors are set to default, with black for the Foreground and white for the Background:

The reason is that by default, Gradient Maps use gradients based on the current Foreground and Background colors. So if your color is set to something else, click the little Reset icon above. Or press the letter D (dèault) on your keyboard:

Step 2: Add Gradient Map adjustment layer
Then, to add a Gradient Map, go back to the Layers panel, click the New Fill or Adjustment Layer icon at the bottom:
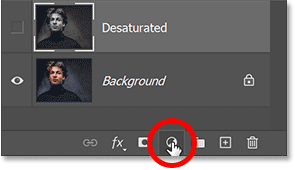
And select a Gradient Map adjustment layer from the list:
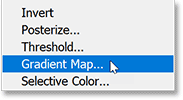
Immediately, we get a much higher contrast black and white image, with darker shadows, brighter highlights, and more detail overall:

Compare the results
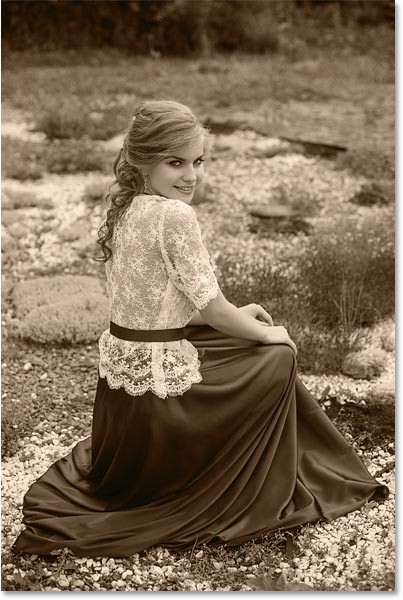
Here is a comparison of the results from the Desaturate command (left) and the Gradient Map (right).
You can easily see how much better the black and white version of the Gradient Map looks, despite taking the same amount of time. The higher contrast makes the image pop, with more detail in the model’s face and hair, and clearer patterns on the sweater and in the background:

How do Gradient Maps convert images to black and white?
So why are Gradient Maps so effective at creating high-contrast black and white images? There are actually two reasons. The first is because of the way Gradient Maps work: Gradient Maps take the original colors in an image and replace them with colors from a gradient.
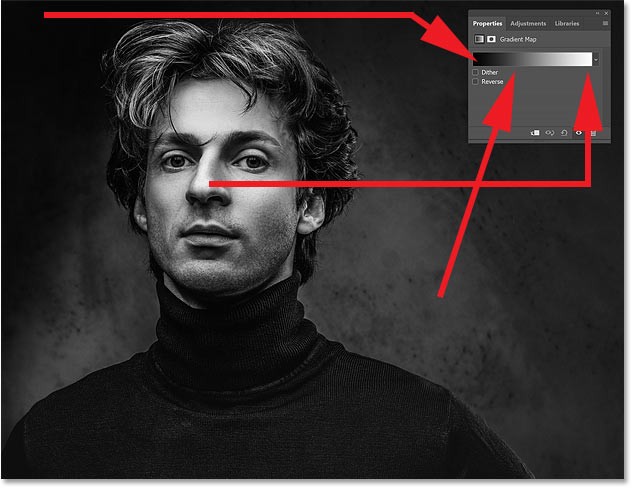
In the Properties panel , we'll see the gradient that the Gradient Map is using. By default, this gradient is based on the Foreground and Background colors, which is why we'll reset them to black and white:
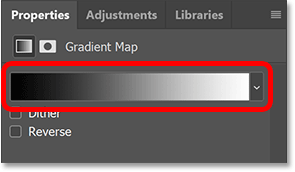
Gradient Maps replace colors based on their brightness. So, since we're using a black to white gradient, the darkest colors in the image will be replaced with black or dark gray. The lightest colors are now white or light gray. And the colors with brightness in between now have shades of gray from the intermediate tones in the gradient:
Why do Gradient Maps produce high contrast images?
So that's why the image is converted to black and white when the Gradient Map is added. But why is the black and white image so high contrast? Why is the contrast of the Gradient Map higher not only than the desaturated version, but also higher than the original image? The reason is because of an option in the Gradient Editor.
Open Gradient Editor
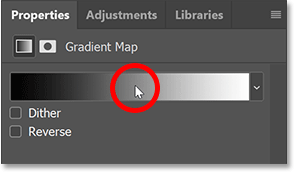
To open the Gradient Editor, click the gradient in the Properties panel :
Smoothness Options
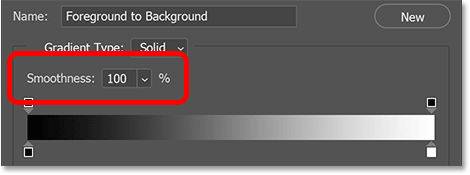
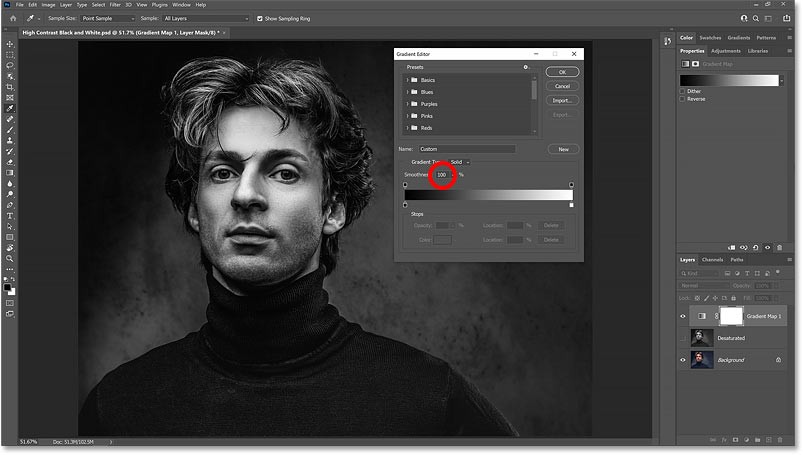
And here in the Gradient Editor, just above the gradient preview bar, there's an option called Smoothness . By default, Smoothness is set to 100% . That means Photoshop is trying to smooth out the transitions between different colors, or in this case, different shades of gray, in the gradient:
How does smoothness affect contrast?
But this smoothing feature also increases the contrast in the gradient. It increases the difference between dark and light tones by pushing dark tones towards black and light tones towards white. And this is what gives black and white images their higher contrast appearance.
Let's see what happens to the image if we reduce Smoothness to 0%:

The high contrast is lost and the black and white image now looks more like the result from the Desaturate command:
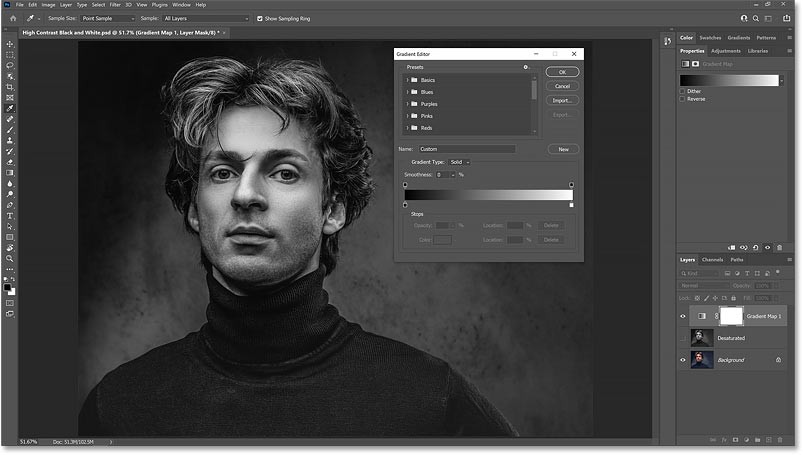
But when Smoothness is increased back to 100%, the higher contrast returns:
Expand and contract dark and light areas
If you pay attention to the gradient preview bar as you increase and decrease the Smoothness value, you can actually see what's happening to the gradient. Notice how the darkest shades on the left and the lightest shades on the right extend inward toward the midtones with Smoothness set to 100%:

But when you reduce the Smoothness value, those darkest and lightest shades are pushed back toward the edges, brightening the midtones. And at 0% smoothness, we get a more natural transition from black to white:

Leave Smoothness at 0% for now and click OK to close the Gradient Editor.
And here's a comparison between the desaturated version (left) and the Gradient Map with Smoothness set to 0% (right). Now that we've removed the advantage of the Gradient Map by reducing the smoothness, the two versions look more similar, although the Gradient Map still looks a little better:

Of course, the purpose of using a Gradient Map is to get that high contrast effect. So, open the Gradient Editor again and reset the Smoothness to 100%. Then, click OK to close it. And now, we're back to our high contrast black and white image:
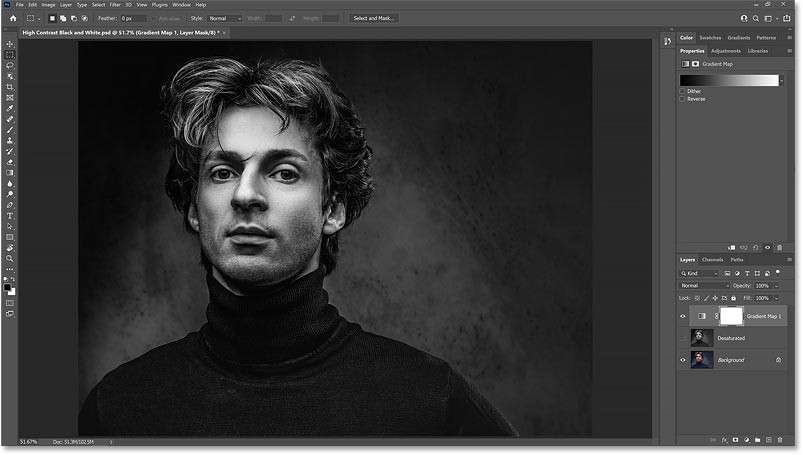
You’ve seen why Gradient Maps create such high-contrast black and white photos. But to use a Gradient Map, just make sure your Foreground and Background colors are set to default. Press D on your keyboard if they aren’t already set. Then, in the Layers panel , click the New Fill or Adjustment Layer icon , select Gradient Map , and you’re done!
But Gradient Maps can do more than convert images to black and white. They're also great for adding creative color effects to images.
People spend too much time manually removing backgrounds, and AI isn't always the magic it claims to be.
This tutorial will show you how to easily turn a photo into a pencil sketch using Adobe Photoshop.
Many people used to find resizing images very annoying until they learned about Photoshop's simple channel-based protection method.
Add a quick and easy poster effect to your images using Photoshop to recreate the classic look of posters printed with limited ink colors.
There are many AI photo editors that make Photoshop a second choice and AI features are useful tools for editing photos without having to learn complex Photoshop.
Photoshop 2025 packs new AI tools, smarter selections, and features you didn't know you needed until now.
This tutorial will show you a quick and easy way to add a monochrome color effect to an image using Adobe Photoshop.
This tutorial will show you how to add canvas space and drop shadow to your photo in Photoshop to create a simple yet stylish photo border.
Adobe's Lens Blur tool makes it easy to review your photos, adding depth and focus to your photos.
Hidden away in the app, Photoshop Actions is a beloved feature of the popular photo editing tool, meant to speed up workflows without the need for AI.
Lightroom and Adobe Photoshop are two of the best photo editing tools, but while many professionals use both together, you only need Lightroom if you're an amateur photographer.
This tutorial will show you how to create a cool Picture in Picture effect with Adobe Photoshop by taking a single photo and creating the illusion that a smaller, cropped version of the same photo is inside it.
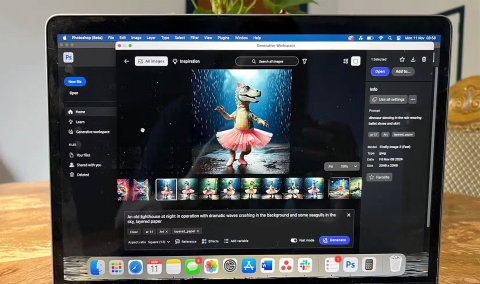
Generative Workspace is one of the top AI features announced at Adobe Max 2024. It will be the new home for your Generative AI images and files.
With Generative Fill, powered by Adobe's Generative AI called Firefly, anyone can add realistic water reflection effects to their photos simply by drawing a selection, typing a few words, and clicking a button.
This tutorial will show you how to copy an image and paste it into a selection in another image using the Paste Into command in Adobe Photoshop.
Tired of Microsoft Teams Error 53003 Access Denied blocking your meetings? Discover proven, step-by-step fixes to troubleshoot and resolve it quickly – no tech expertise needed!
Tired of Microsoft Teams media errors ruining your calls? Follow our expert, step-by-step guide to fix audio, video, and media issues quickly. Restore crystal-clear meetings today!
Struggling with Microsoft Teams "Classic" login error? Discover proven, step-by-step fixes to get back online fast. Clear cache, reset credentials, and more—no tech skills needed!
Struggling with Microsoft Teams Test Call mic error? Discover step-by-step troubleshooting for microphone issues, from quick checks to advanced fixes. Restore crystal-clear audio in minutes!
Struggling with Microsoft Teams Error AADSTS90023 Invalid Authentication? Discover step-by-step fixes to resolve this Azure AD issue quickly. Clear cache, reset credentials, and get back to seamless collaboration today!
Struggling with Microsoft Teams Error 1200? Discover proven step-by-step fixes to resolve connection issues, clear cache, and get back to seamless collaboration. Quick recovery tips inside!
Frustrated with your Microsoft Teams status stuck on 'Away'? Uncover the top reasons like idle timeouts and power settings, plus step-by-step fixes to get back to 'Available' fast. Updated with the latest Teams features.
Stuck with Microsoft Teams error "Administrator Has Disabled Chat"? Discover proven step-by-step solutions for admins and users to restore chat functionality fast. No tech skills needed!
Stuck with Microsoft Teams Error CDL_WORKER_FAILURE? Follow this step-by-step guide to troubleshoot and fix it quickly. Proven solutions for seamless Teams experience.
Stuck with Microsoft Teams JavaScript Error on Mac? Discover quick, step-by-step fixes to resolve it fast. Clear cache, update, reinstall & more for seamless Teams on macOS. Get back to work!
Tired of the frustrating "Error En Teams" popping up in Microsoft Teams? Get instant fixes for this Spanish language glitch. Step-by-step guide with proven solutions to restore seamless collaboration. Works on Windows, Mac, and web!
Tired of Microsoft Teams transcription errors ruining your meetings? Follow this expert troubleshooting Microsoft Teams "Transcription Error" accuracy guide for quick fixes, pro tips, and flawless results. Boost reliability today!
Master how to join a Microsoft Teams meeting by ID and passcode effortlessly on desktop, mobile, or web. Step-by-step instructions with screenshots for quick access – no invite required!
Struggling with Microsoft Teams "Error Q" QSP? Discover step-by-step fixes for smooth calling, meetings, and chats. Clear cache, update app, and more—no tech skills needed!
Struggling with Microsoft Teams Uninstall Error: Access Denied? Discover proven, step-by-step solutions to completely uninstall Teams effortlessly. Quick fixes for Windows users—no tech skills required!
