What is the best AI photo background remover?

People spend too much time manually removing backgrounds, and AI isn't always the magic it claims to be.
Add a quick and easy poster effect to your images using Photoshop to recreate the classic look of posters printed with limited ink colors.
This tutorial will show you how to create a poster effect for an image in Photoshop. The term posterize means to limit or reduce the number of colors in an image to recreate the look of a poster printed with a limited number of ink colors.
So instead of a continuous tone image with smooth color transitions, posterizing creates abrupt changes from one color or brightness level to another. This significantly reduces the amount of detail in the image and gives the image a more drawn or spray-painted appearance.
And while the effect may seem complicated, once you know the steps, you can do it from start to finish in just a few minutes!
Step 1: Add a Posterize adjustment layer
Let’s start by creating the initial poster effect. And to do that, all we need to do is apply the Posterize image adjustment. But to keep the effect separate from the image itself, we’ll apply Posterize as an adjustment layer.
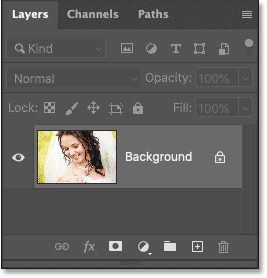
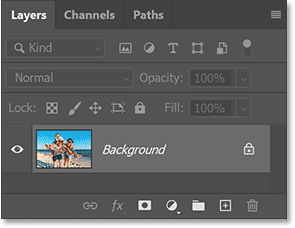
In the Layers panel , the image appears on the Background layer.
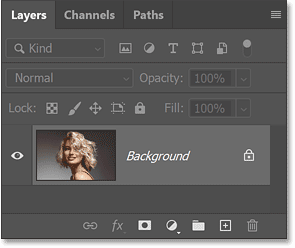
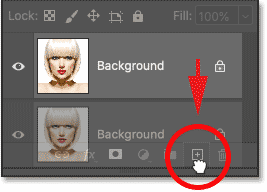
Click the New Fill or Adjustment Layer icon at the bottom of the Layers panel.

Then select Posterize from the list.
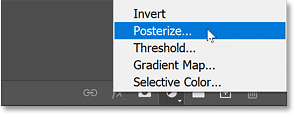
Photoshop adds a Posterize adjustment layer above the image.
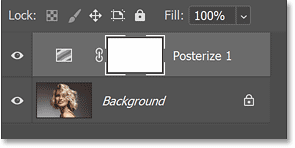
And right away, you'll see the original poster effect. Next, we'll learn why the colors look that way and how to adjust them.
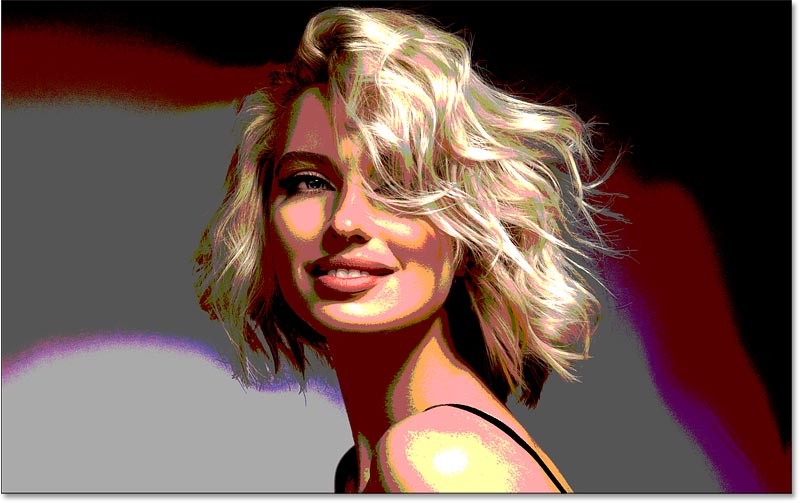
How the Posterize image adjustment process works
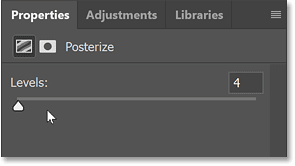
Let's quickly see what's going on with the Posterize adjustment. The controls for the adjustment appear in the Properties panel . And there's a single slider called Levels that's set to the default value of 4 .
Photoshop color channels
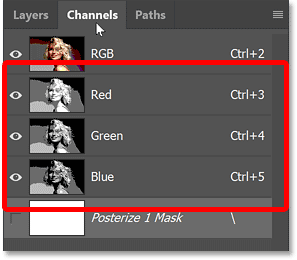
Levels controls the amount of brightness in each of Photoshop's three color channels (Red, Green, and Blue). If we switch from the Layers panel to the Channels panel , we'll see the Red, Green, and Blue channels, all of which blend together to create the colors we see in our images.
With Levels set to 4 , we will limit the image to only 4 shades of red, 4 shades of green, and 4 shades of blue, for a total of 64 possible colors (4x4x4).
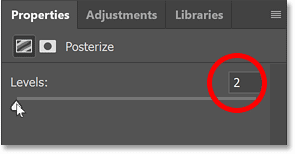
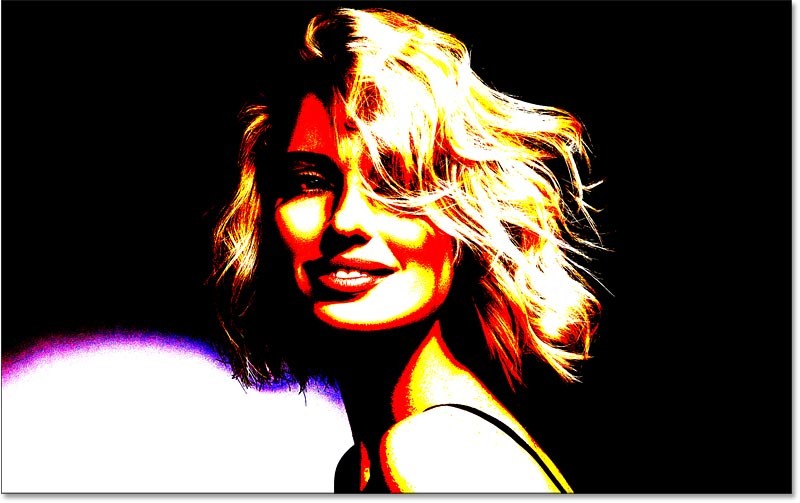
The lowest setting you can choose for Levels is 2 , which gives you just 2 shades of each of red, green, and blue.
This results in the least amount of detail in the image and the strongest poster effect.
And if we drag the Levels slider all the way to the right to its maximum value of 255:
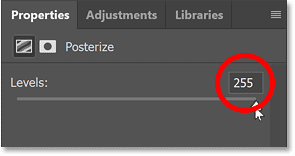
Basically, we're turning off the Posterize adjustment and viewing the image in full color.
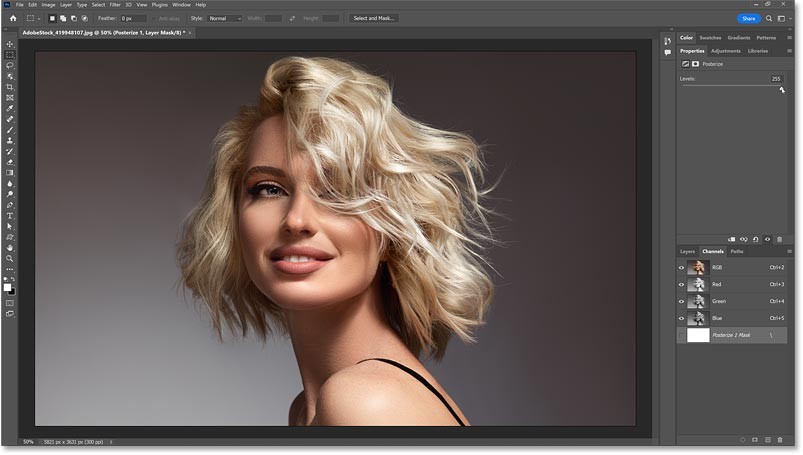
Switch from the Channels panel back to the Layers panel.
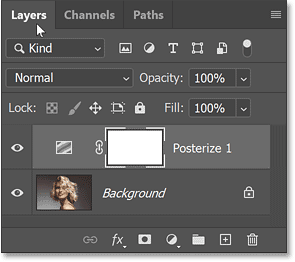
Find the best performing value
So lower values create a much stronger poster effect. And for most images, values between 4 and 10 work well.
The easiest way to find the best value for your image is to click on the current Levels value to highlight it. Then use the up and down arrow keys on your keyboard to cycle through the values.
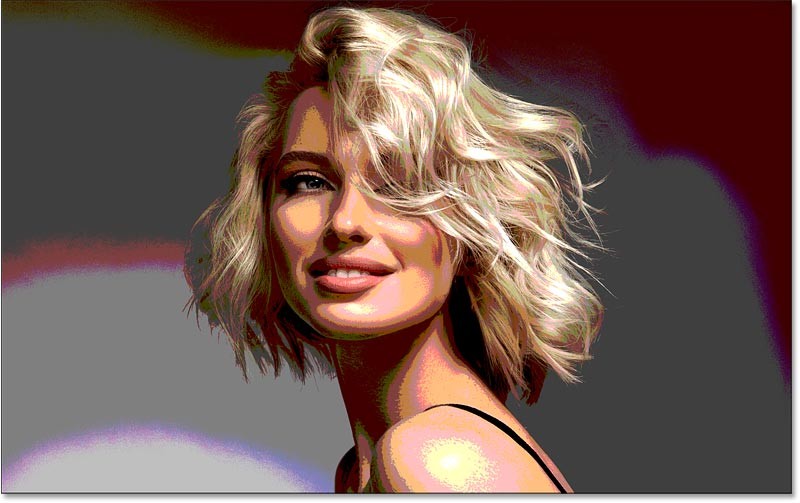
For this image, a Levels value of 5 looks best.
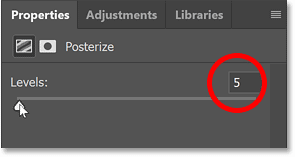
And here is the result.
Step 2: Change the blend mode to Luminosity (optional)
Notice that we see some odd colors in the image, especially in the skin tones. This is because we gave Photoshop too few colors to work with. Depending on your image, these colors may be the effect you want, as they give a more realistic poster look.
But if you want to restore the original colors of the photo, simply change the blend mode of the Posterize adjustment layer from Normal to Luminosity.
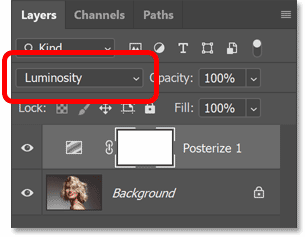
The Luminosity blend mode limits the effect to only the luminosity values, leaving the original colors unchanged. This is really personal preference, but for this image the original colors look better.
If you prefer a more realistic poster effect, change the blend mode back to Normal.
Step 3: Add a Levels adjustment layer
To get a little more control over the effect, add a Levels adjustment layer between the image and the Posterize layer.
In the Layers panel, click the Background layer to select it.
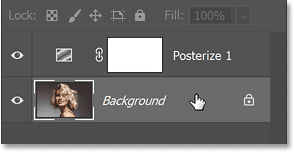
Then click the New Fill or Adjustment Layer icon at the bottom:

And this time choose Levels.
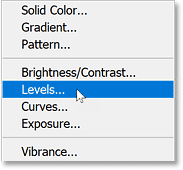
Photoshop adds a Levels adjustment layer above the image and below the Posterize adjustment layer.
Step 4: Drag the Midtone slider
In the Properties panel, look for the Midtone slider below the middle of the chart.
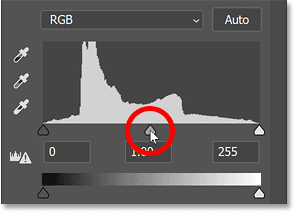
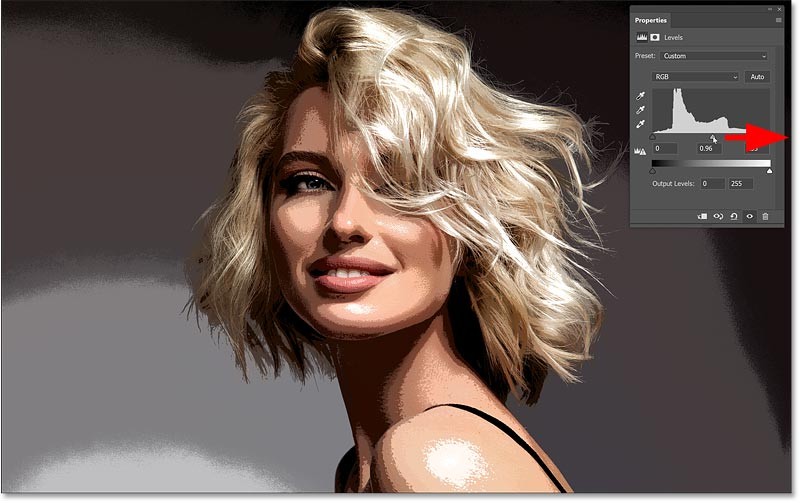
Then drag the slider left or right. Dragging left will push the effect more towards lighter tones.
And dragging the slider to the right will bring out more of the darker tones. You don't want to drag it too far in either direction. The default Midtone value is 1. For example, I'd lower it to 0.96 just to add a little more contrast.
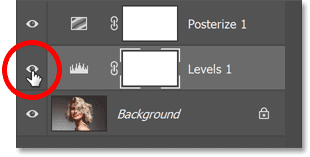
Click the visibility icon of the Levels adjustment layer to toggle it on/off and compare the effect with and without the Midtone adjustment.
Step 5: Group the two adjustment layers
At this point, if you're happy with the poster effect applied to your entire image, you can stop here and be done. But if you want to limit the effect to just your subject, here's how to do it.
First, you need to put your two adjustment layers into a layer group. So in the Layers panel, click on one of the adjustment layers to select it. Then, hold down the Shift key on your keyboard and click on the other adjustment layer to select both of them.
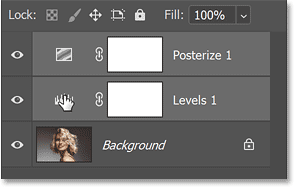
With both layers selected, click the Layers panel menu icon:
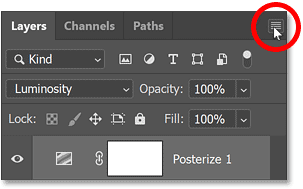
And select New Group from Layers .
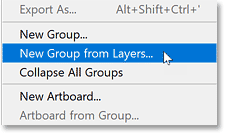
Name the group Posterize and click OK .

Back in the Layers panel, the adjustment layers appear inside a new Posterize group. You can rotate the group to open or close by clicking the arrow next to the folder icon.
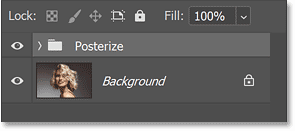
Step 6: Turn off the group and select the image layer
Turn off the effect for a moment, just to be able to see your original image, by clicking on the group's display icon.
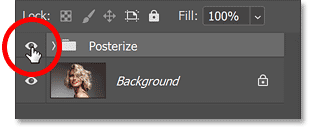
Then click on the image layer to activate it.
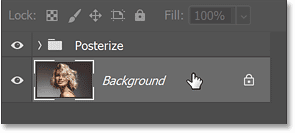
Step 7: Select Select Subject
We need to select our main subject. And the quickest way is to use Photoshop's Select Subject command.
Go to the Select menu in the menu bar and choose Subject.
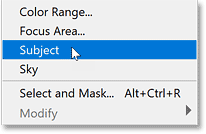
Photoshop analyzes the image, and after a few minutes, the selection outline appears. Often, people want to refine the selection, especially around hair, using Photoshop's Select and Mask workspace. But we don't need a perfect selection for our poster effect. A good enough selection is enough. And so far, Select Subject has done a great job.
This article will quickly show you how to clean up any problem areas after turning the selection into a layer mask, which we'll take next.
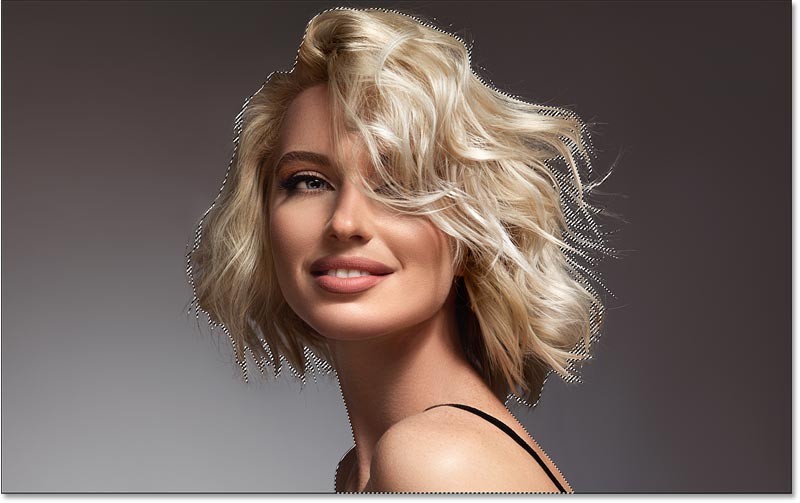
Step 8: Select and enable the Posterize group
With the outline selected, click the Posterize group in the Layers panel to select it. Then, click the group's visibility icon to turn the effect back on.
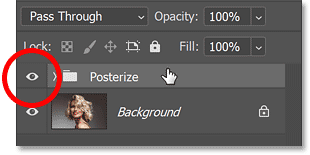
Step 9: Add mask layer to group
Click the Add Layer Mask icon at the bottom of the Layers panel.

And Photoshop instantly converts the selection border into a layer mask, limiting the poster effect to just the subject.
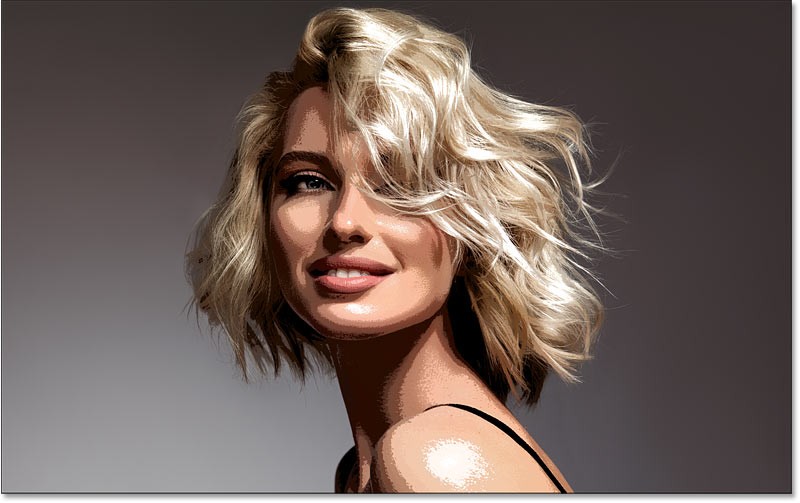
Step 10: Clean up the mask layer if needed
In the Layers panel, the layer mask thumbnail has been added to the group. The white area on the mask is the selected area and is where the effect is visible. The black area is everything outside the selection and is where the effect is hidden.
If you hold down the Alt key on a PC or the Option key on a Mac and click on the mask layer thumbnail:
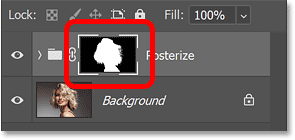
You should see the mask layer itself in the document. And notice how well Select Subject works, especially with the woman's hair. Hold Alt (Win) / Option (Mac) and click the mask layer thumbnail again to hide the mask and return to the image.
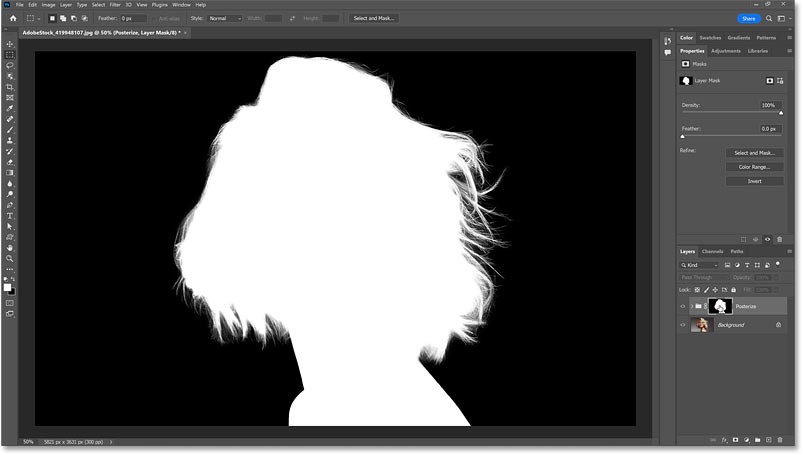
Paint on the layer mask to add or subtract areas.
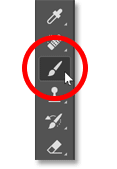
But if there are any parts of the subject that the Select Subject command missed, or if there are any parts of the background that need to be removed from the effect, simply select the Brush Tool from the toolbar.
Then, paint white on the layer mask to add an area to the effect, or paint black to remove an area from the effect. Use the left and right bracket keys ( [ and ] ) on your keyboard to adjust the brush size as needed.
People spend too much time manually removing backgrounds, and AI isn't always the magic it claims to be.
This tutorial will show you how to easily turn a photo into a pencil sketch using Adobe Photoshop.
Many people used to find resizing images very annoying until they learned about Photoshop's simple channel-based protection method.
There are many AI photo editors that make Photoshop a second choice and AI features are useful tools for editing photos without having to learn complex Photoshop.
Photoshop 2025 packs new AI tools, smarter selections, and features you didn't know you needed until now.
This tutorial will show you a quick and easy way to add a monochrome color effect to an image using Adobe Photoshop.
This tutorial will show you how to add canvas space and drop shadow to your photo in Photoshop to create a simple yet stylish photo border.
Adobe's Lens Blur tool makes it easy to review your photos, adding depth and focus to your photos.
Hidden away in the app, Photoshop Actions is a beloved feature of the popular photo editing tool, meant to speed up workflows without the need for AI.
Lightroom and Adobe Photoshop are two of the best photo editing tools, but while many professionals use both together, you only need Lightroom if you're an amateur photographer.
This tutorial will show you how to create a cool Picture in Picture effect with Adobe Photoshop by taking a single photo and creating the illusion that a smaller, cropped version of the same photo is inside it.
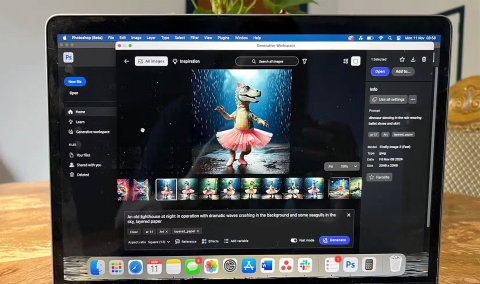
Generative Workspace is one of the top AI features announced at Adobe Max 2024. It will be the new home for your Generative AI images and files.
With Generative Fill, powered by Adobe's Generative AI called Firefly, anyone can add realistic water reflection effects to their photos simply by drawing a selection, typing a few words, and clicking a button.
This tutorial will show you how to copy an image and paste it into a selection in another image using the Paste Into command in Adobe Photoshop.
Long-distance travel can involve heavy traffic, changing weather conditions, and rider fatigue. If you are also dealing with the responsibilities of moving home, such as packing belongings or coordinating accommodation, a long ride may add unnecessary pressure to an already busy schedule.
Tired of Microsoft Teams shortcut error preventing you from opening the app? Follow our expert, step-by-step guide with the latest fixes for instant resolution. Works on Windows, Mac & web – no tech skills needed!
Tired of Microsoft Teams Task Management Sync Error halting your workflow? Follow our proven, step-by-step fixes to resolve sync issues fast and restore seamless task collaboration. No tech expertise needed!
Struggling with Microsoft Teams Wiki Error Formatting? This step-by-step guide reveals proven fixes for common wiki tab issues, ensuring smooth editing and collaboration in Teams. Get back to productive wikis fast!
Struggling with Microsoft Teams installation error on Linux? Discover step-by-step fixes for Ubuntu, Fedora & more. Resolve dependency issues, crashes, and errors quickly with our ultimate guide. Get Teams running smoothly today!
Struggling with Microsoft Teams "Error Page" not loading? Get step-by-step fixes for desktop, web, and mobile. Solve Microsoft Teams Error Page issues quickly and resume seamless teamwork today.
Tired of Microsoft Teams "Error Screenshot" blocking your workflow? Get proven, step-by-step solutions to resolve screenshot errors in Teams instantly and boost productivity. No tech skills needed!
Tired of Microsoft Teams "Error U" User blocking your chats? Get proven, step-by-step fixes to clear cache, reset, and restore seamless collaboration instantly.
Unlock the precise locations of Microsoft Teams registry keys on Windows 11. Step-by-step guide to find, access, and safely tweak them for optimal performance and troubleshooting. Essential for IT pros and Teams enthusiasts.
Tired of Microsoft Teams "Training Error" Video Lag ruining your meetings? Follow our step-by-step guide with the latest fixes for smooth video calls—no more frustration!
Frustrated by Microsoft Teams "Error occurred" during sign-in? Discover proven, step-by-step fixes to get back online fast. Clear cache, reset app, and more for seamless login. Works on Windows, Mac & web.
Struggling with Microsoft Teams "Call Error" Disconnecting? Discover proven, step-by-step fixes for call drops, network issues, and more. Get back to seamless meetings fast with our expert troubleshooting guide.
Stuck in Microsoft Teams Error 2603 login loop? Get proven step-by-step fixes to resolve the issue fast and restore seamless teamwork. Clear cache, reset, reinstall – all covered!
Tired of Microsoft Teams voice call errors? Follow our step-by-step guide to troubleshoot no audio, echo, or call drops. Proven fixes for crystal-clear calls every time.
Struggling with Microsoft Teams "Workflows Error" in Power Automate? Discover proven, step-by-step fixes to resolve connection issues, permissions, and more. Get your workflows running smoothly today!
