What is the best AI photo background remover?

People spend too much time manually removing backgrounds, and AI isn't always the magic it claims to be.
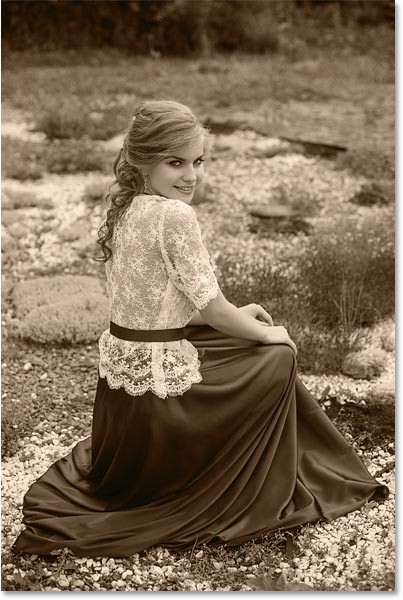
This tutorial will show you how to easily turn a photo into a pencil sketch using Adobe Photoshop . We'll start by turning a photo into a black and white sketch, then we'll show you 3 different ways to add color to your sketch, including using the original color of the photo, a single color, and a gradient!
Table of Contents
The article used Photoshop 2021 but all steps should work with Photoshop 2022 and 2023. These first steps will turn the photo into a black and white sketch.
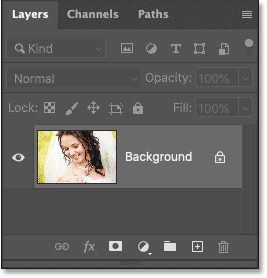
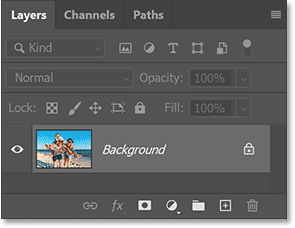
We'll start in Photoshop's Layers panel, where the image appears on the Background layer:
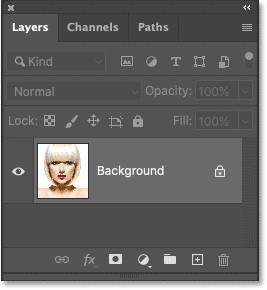
We will need this image when we add color to our sketch later, so to keep it safe, we will make a copy of it.
Click on the Background layer and drag down to the New Layer icon :
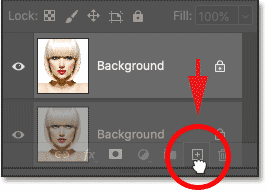
Make a copy of the Background layer.
A copy appears above the original:
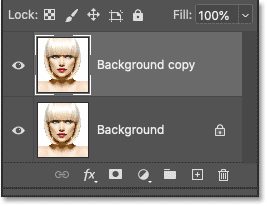
Next, we'll remove all the color from the Background copy layer using Photoshop's Desaturate command.
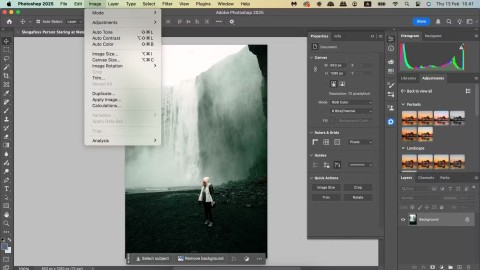
Go to the Image menu in the menu bar along the top of the screen, select Adjustments , and then select Desaturate :
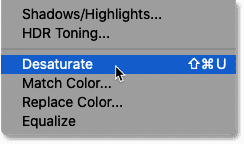
Photoshop desaturates the image, leaving us with a black and white version:
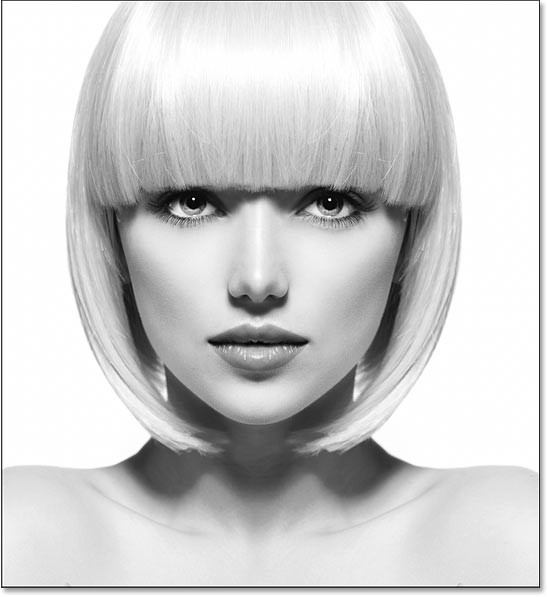
Back in the Layers panel, create a copy of the desaturated version by dragging the Background copy layer down to the new layer icon:
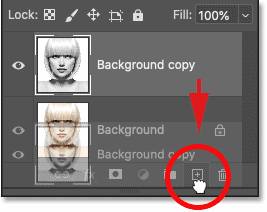
And again, the copy appears above the original:
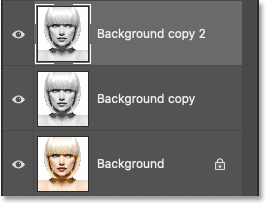
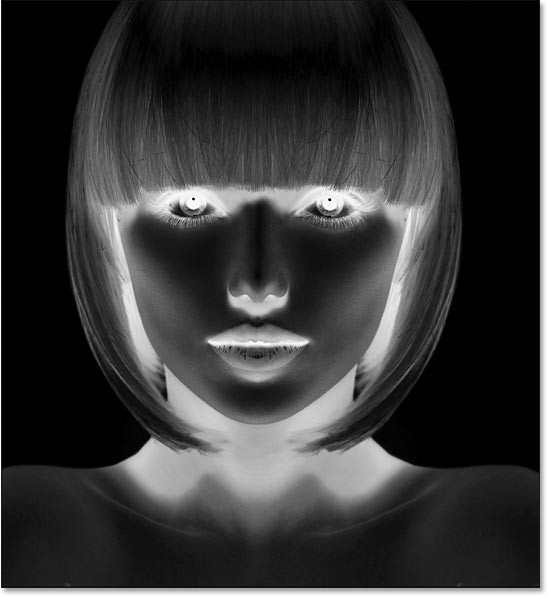
We need to invert the brightness levels on this layer, making the highlights darker and the shadows brighter. To do that, we'll use Photoshop's Invert command.
Go to the Image menu , select Adjustments , then select Invert :
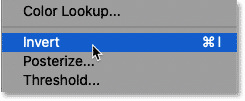
This inverts the image, creating a negative film effect:
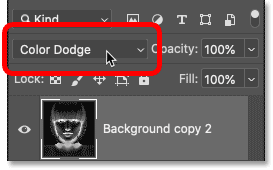
In the Layers panel, change the blend mode of the inverted layer from Normal (default) to Color Dodge :
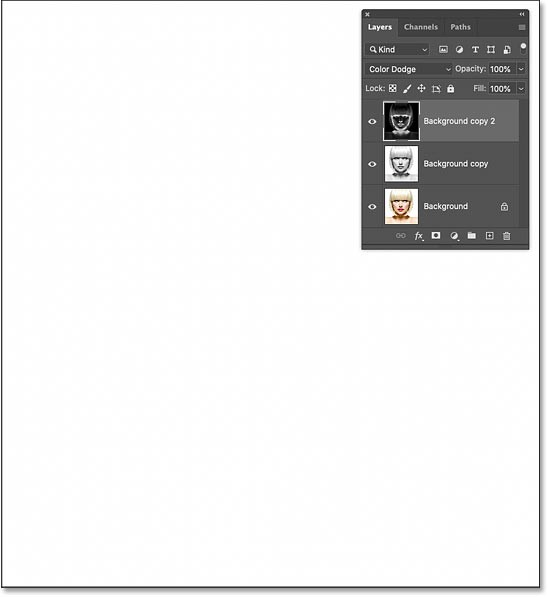
The document turns completely white, although you may see a few scattered black areas depending on your image:
To create the sketch effect, we'll blur the inverted layer with Photoshop's Gaussian Blur filter. But to keep the filter settings editable, we'll apply the Gaussian Blur as a smart filter. And to do that, we'll first need to convert the layer to a smart object.
In the Layers panel, click the menu icon in the upper right corner:
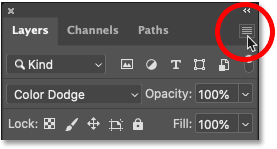
And select Convert to Smart Object from the menu:
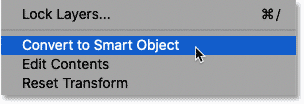
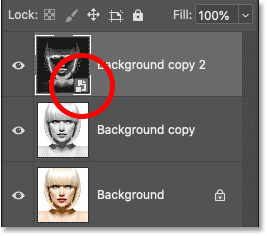
An icon appears in the layer preview thumbnail, letting us know that the layer is now a smart object and we're ready to apply the filter:
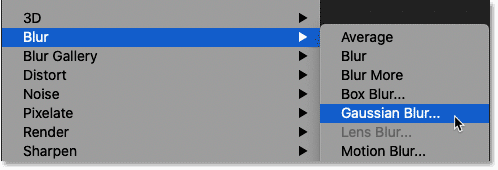
Go to the Filter menu in the menu bar, select Blur , then select Gaussian Blur :
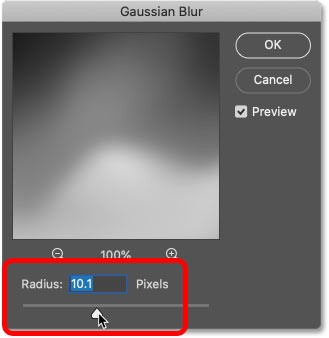
Then, in the Gaussian Blur dialog box, drag the Radius slider along the bottom to blur the contents of the layer. The sketch effect you achieve will depend on the amount of blur you apply. A lower radius value will create a sketch with smooth thin lines, while a larger value will create a more realistic sketch.
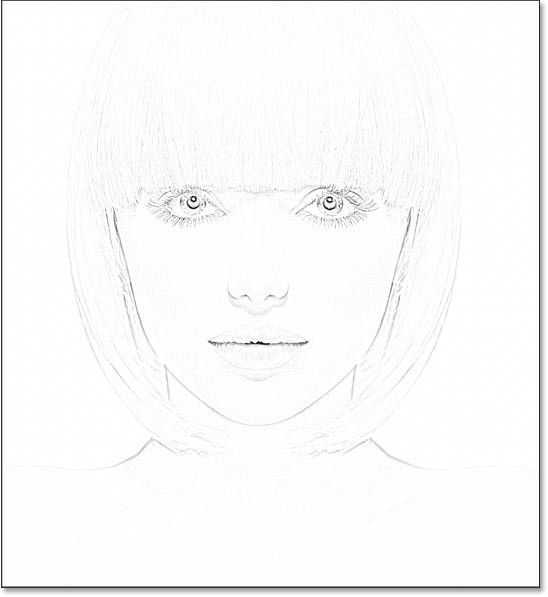
For example, if we choose a fairly low radius value of 10 pixels:
Finished with this effect here with very smooth lines:
But if we increase the value to a much higher value, say 45 pixels:
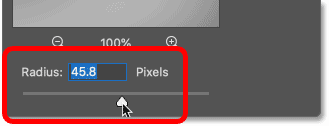
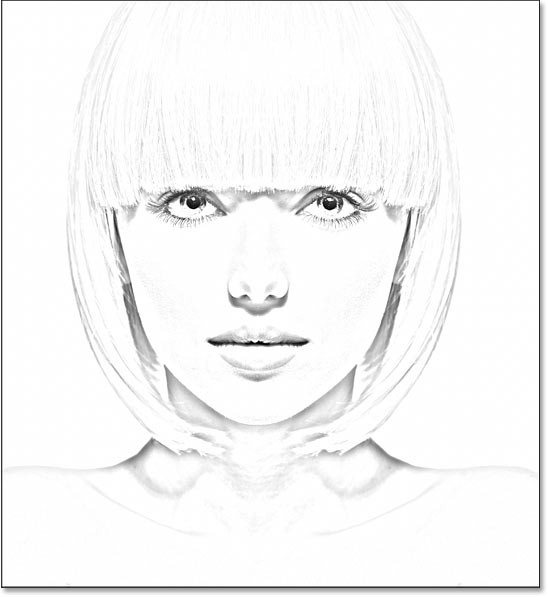
The effect looks more like the original photo. The radius value you need will depend on the photo and the look you want, so pay attention to the photo as you drag the slider to evaluate the results.
In this case, the example will use the second, more realistic version. Click OK when you're done to close the Gaussian Blur dialog box:
How to edit Gaussian Blur settings
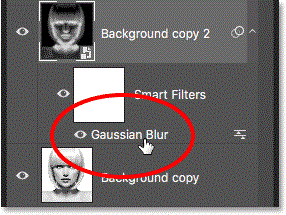
Since we applied the Gaussian Blur filter to a smart object, the Layers panel will show this filter listed as a smart filter below the smart object. You can double-click the word Gaussian Blur at any time to reopen the filter dialog and experiment with different settings:
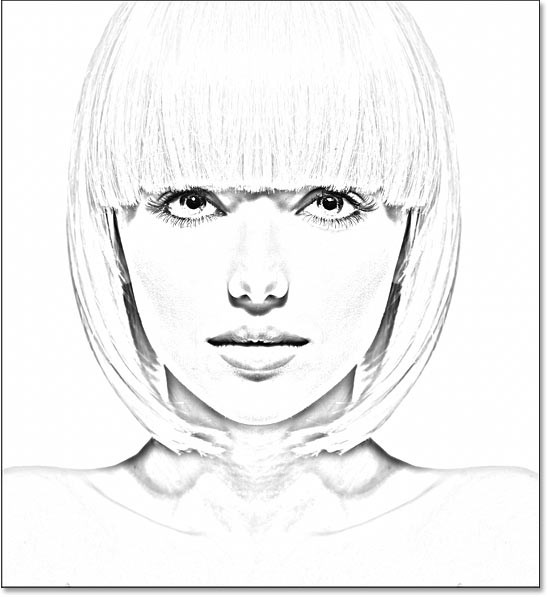
At this point, the sketch might look too bright with too little contrast. But we can darken it very easily using a Levels adjustment layer and a blend mode layer.
Still in the Layers panel , click the New Fill or Adjustment Layer icon :
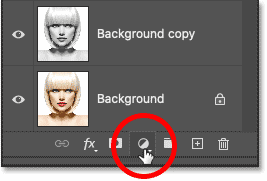
And select Levels from the list:

Photoshop adds a Levels adjustment layer above the smart object:
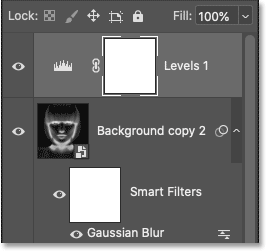
Then, to darken the sketch, simply change the blend mode of the adjustment layer from Normal to Multiply :
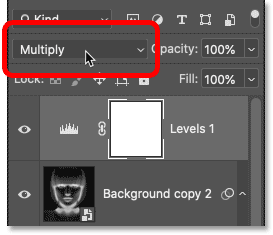
The Multiply blend mode is one of a group of blend modes that darkens the entire image. And instantly, the sketch looks much darker:
How to adjust brightness
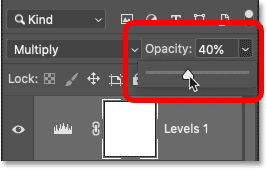
If your sketch looks too dark, reduce the Opacity of the adjustment layer, which is located directly across from the blend mode option in the Layers panel. The further you lower the opacity from 100%, the more the layers below the adjustment layer will show through, brightening up your sketch.
For example, mine would be reduced by about 40%:
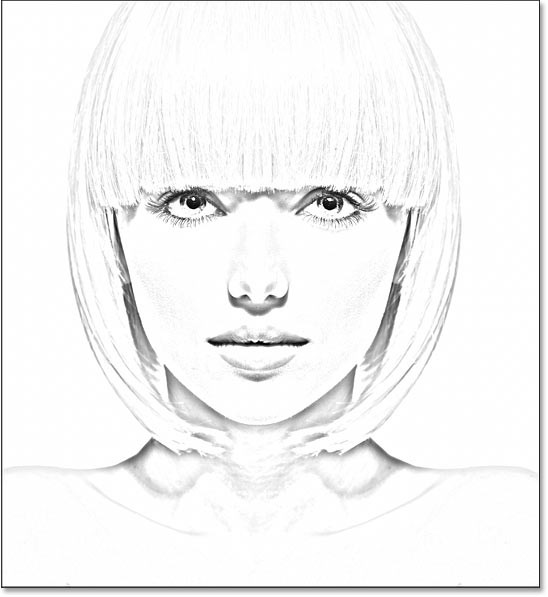
And with that, we have our black and white version of the sketch! Next, the article will show you a few different ways to add color:
These next steps will add color to the sketch using colors from the original image. Then, we'll show you how to fill the sketch with a single color, then with a gradient effect.
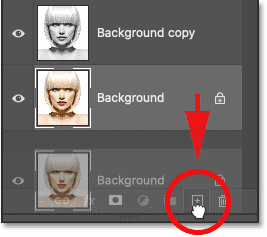
In the Layers panel, create a copy of the original image by dragging the Background layer (the original layer at the bottom) down to the New Layer icon :
The copy (Background copy 3) appears between the Background and Background copy layers :
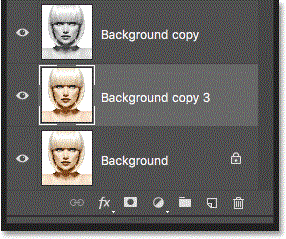
Now our Layers panel is cluttered with copies of the Background layer. And they all have names like Background copy, Background copy 2, Background copy 3 but they don’t tell us what the layer is used for. So let’s rename our new layer to something more descriptive.
Double-click directly on the Background copy 3 name to highlight it:
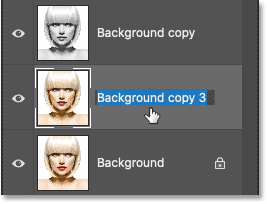
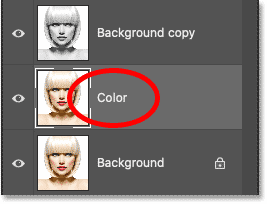
Then rename it to Color. Press Enter (Win) / Return (Mac) on your keyboard to accept it:
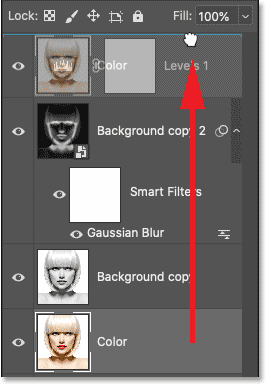
We want the image to appear above the sketch. So click on the Color layer and drag it above the Levels adjustment layer. When a blue line appears above the adjustment layer, release your mouse button:
The image temporarily blocks the sketch from view:
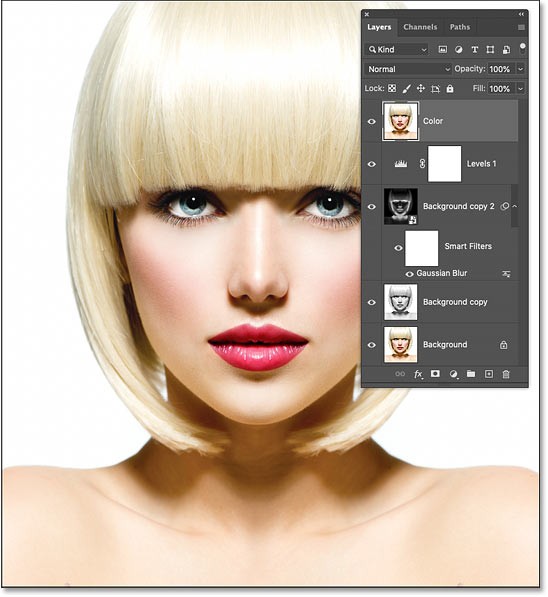
To blend the color from the image into the sketch, change the blend mode of the Color layer from Normal to Color :
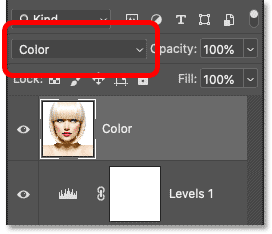
Blend mode Color tells Photoshop to only blend the colors from the active layer with the layers below. And just like that, we've added the original color back to the sketch:
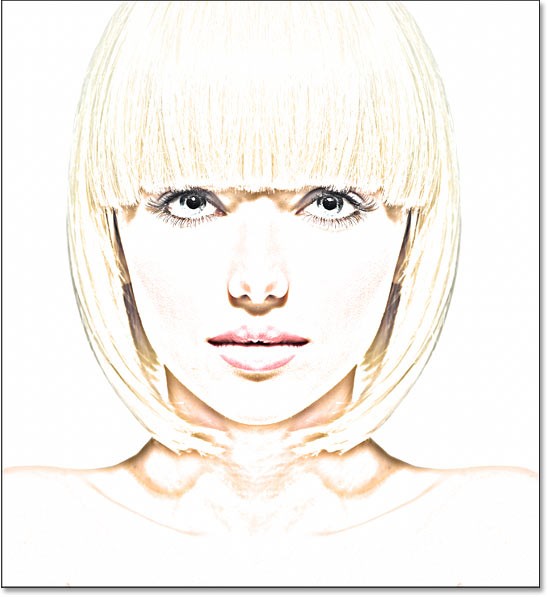
How to adjust color intensity
If the color is too dark, reduce the layer opacity. For example, reduce it to 50%:
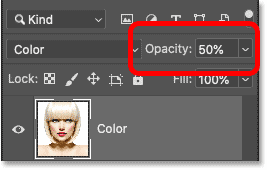
When the opacity is reduced, the colors become more subtle. And that's how to color the sketch using the original colors of the photo:
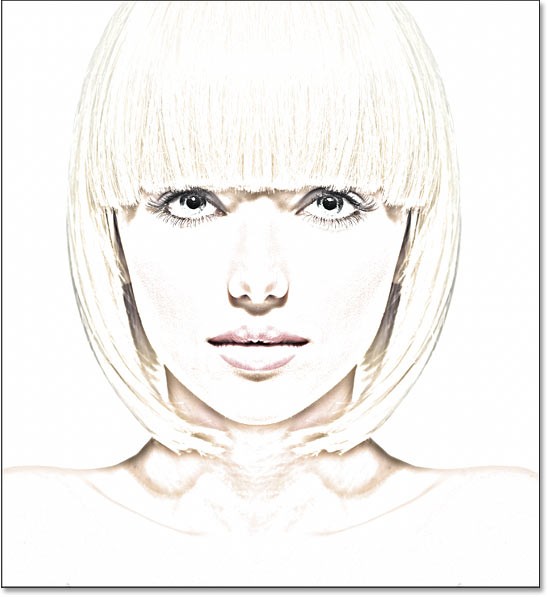
If you'd like to see what your sketch would look like with colors from a photo, you can stop here. Otherwise, check out the second way to add color, this time using a single color. Then, we'll finish the tutorial by learning how to colorize your sketch with a gradient effect.
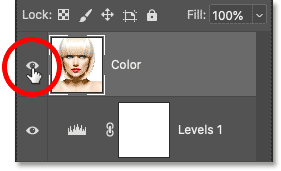
Before going any further, turn off the Color layer we used in the previous steps by clicking on the visibility icon (eye) in the Layers panel:
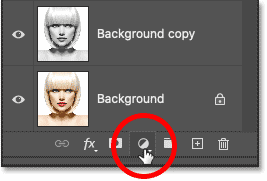
To fill the sketch with a single color, we'll use a Solid Color fill layer. Click the New Fill or Adjustment Layer icon at the bottom of the Layers panel:
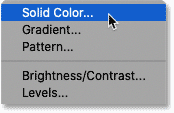
Then select Solid Color from the list:
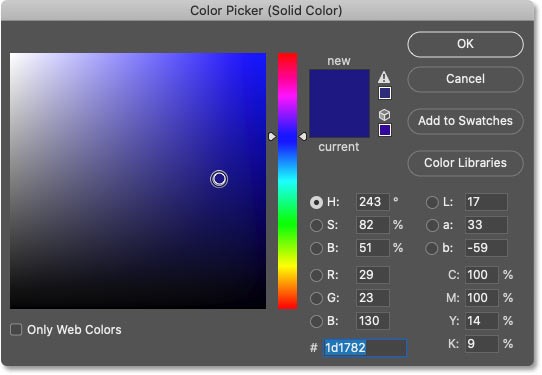
Photoshop opens the Color Picker, where we select the color we need. Don't worry about choosing the wrong color because you can always go back and choose a different color, as we'll see later.
The example will try a shade of blue. Click OK when you're done to close the Color Picker:
In the Layers panel, the Solid Color fill layer appears above the other layers. And in the document, the color you selected will temporarily block the sketch from view:
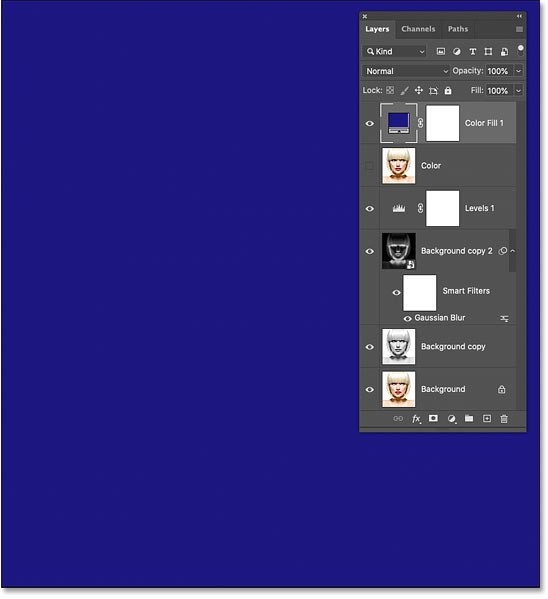
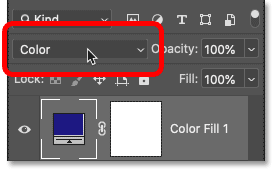
To blend the color into the sketch, change the blend mode of the fill layer to Color:
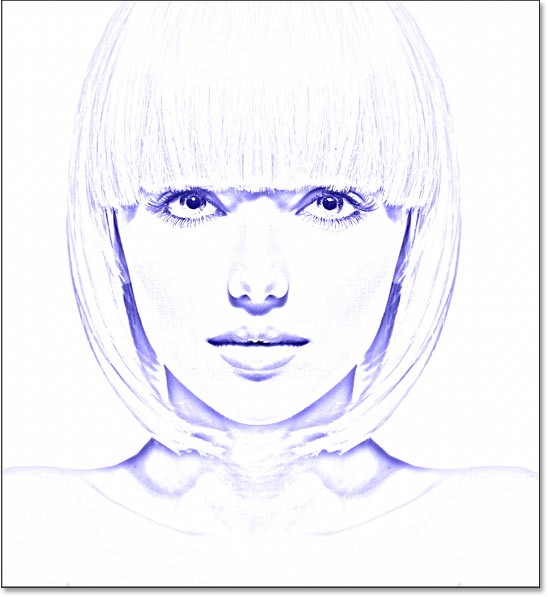
And here is the result with the sketch highlighted in blue:
How to change color
To try a different color, double-click the fill layer's color swatch in the Layers panel:
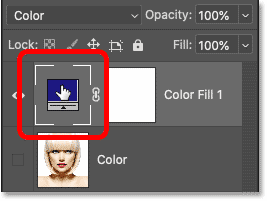
Then, select a new color from the Color Picker. As long as the Color Picker remains open, you can continue to select different colors and see a live preview in the document.
The example will select a shade of purple. When you're done, click OK to close the Color Picker:
And now the sketch is colored purple:
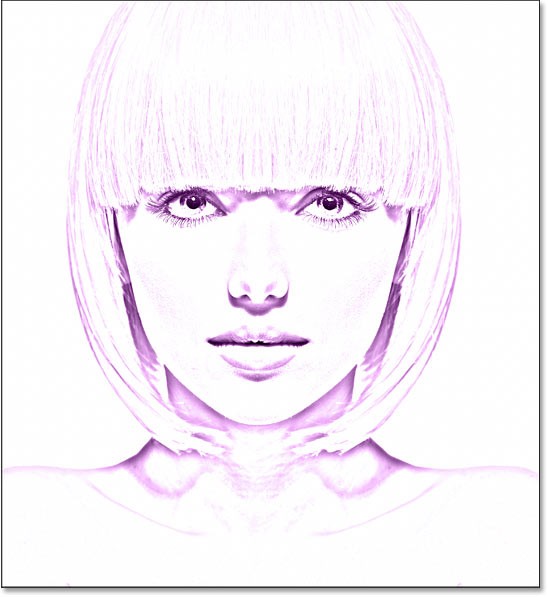
Adjust color intensity
If the color is too dark, reduce the Opacity value of the fill layer. For example, reduce it to 70%:
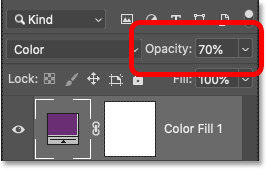
And that's how to add a single color to your sketch! Next, we'll finish things off by learning how to color your sketch using a gradient effect, and then we'll show you how to switch between all these different versions to choose the one you like best:
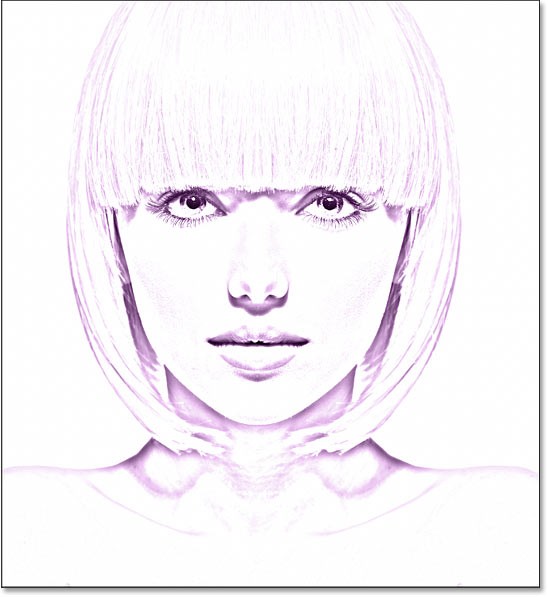
At this point, we have learned how to convert a photo to a black and white sketch, how to restore the original colors from the photo, and how to add a single color. We will finish this tutorial by learning how to colorize a sketch using a gradient effect.
We won’t be covering how to create your own custom gradient here. Instead, we’ll be using one of Photoshop’s built-in gradient effects. And in the latest versions of Photoshop (2020 and up), there are a ton of new gradient effects to choose from.
First, if you've been following along from the beginning, turn off the Solid Color fill layer we used in the previous steps by clicking on that layer's visibility icon in the Layers panel:
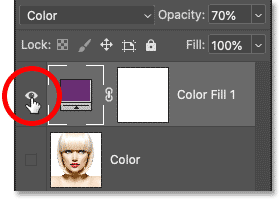
This will restore the black and white version of the sketch:
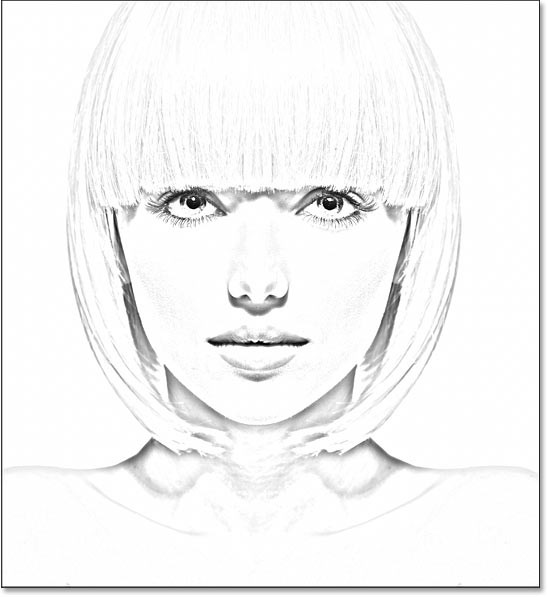
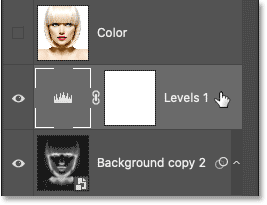
To colorize our sketch with a gradient effect, we’ll use a Gradient fill layer. And we’ll add the fill layer right above the Levels adjustment layer. First, click on the Levels adjustment layer in the Layers panel to make it active:
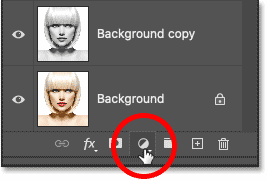
Then, click again on the New Fill or Adjustment Layer icon :
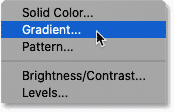
And select Gradient from the list:
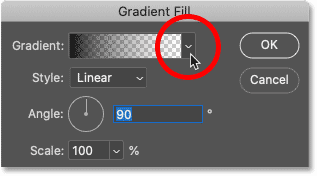
In the Gradient Fill dialog box, select a gradient by clicking the small arrow next to the gradient swatch:
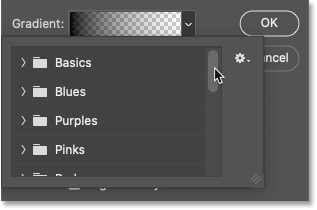
This will open the Gradient picker with many new gradients added in Photoshop 2020. The gradients are divided into groups based on theme (Basics, Blues, Purples, etc.):
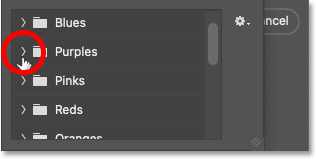
To open a group, click the arrow next to the group's folder icon. Rotate to open the Purples group:
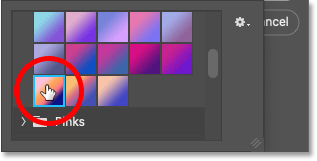
Then, to select a gradient inside the group and close the Gradient picker, double-click the gradient thumbnail:
Gradient settings
Back in the Gradient Fill dialog box, you can change the Style of the gradient from Linear (default) to Radial, Angle, Reflected, or Diamond:
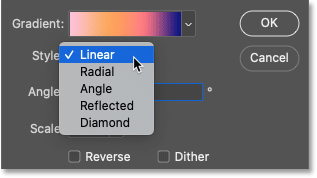
You can reverse the order of the gradient colors:
And you can change the Angle of the gradient. For example, we will leave it at 90 degrees by default:
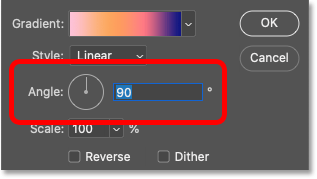
Click OK when you're done to close the Gradient Fill dialog box. The gradient temporarily blocks the sketch from view:
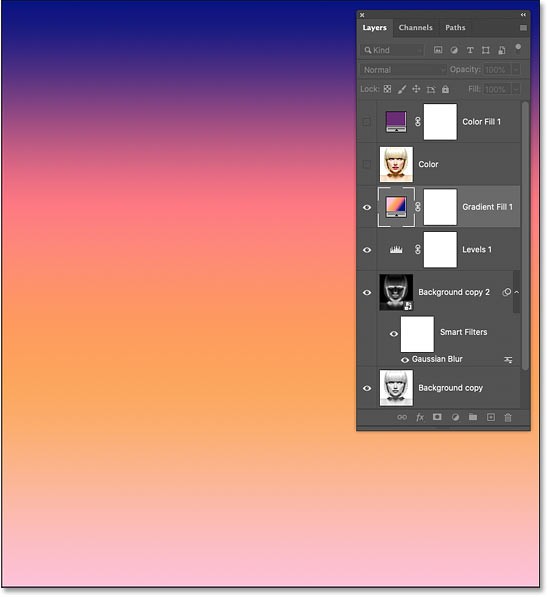
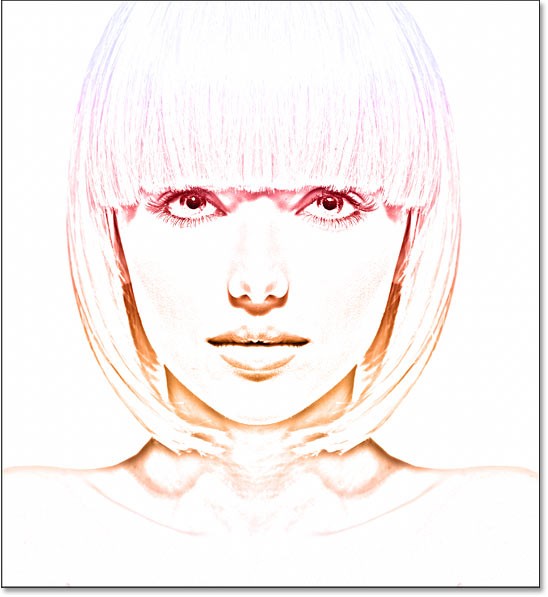
Back in the Layers panel, the Gradient fill layer appears above the Levels adjustment layer. To blend the gradient colors with the black and white sketch, change the blend mode of the Gradient fill layer from Normal to Color :
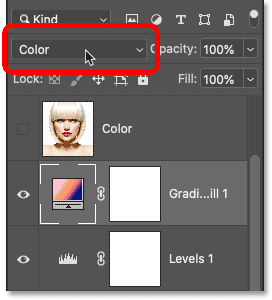
Then adjust the color intensity if needed by reducing the layer opacity:
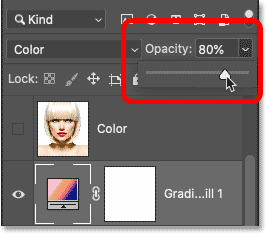
And here is the sketch using gradient colors:
How to choose a different gradient or edit settings
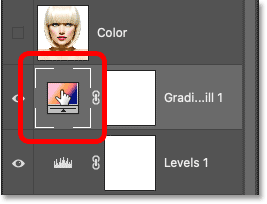
To try a different gradient or edit any of the gradient options (Style, Reverse, Angle), double-click the Gradient fill layer's color swatch. This will reopen the Gradient Fill dialog box, where you can make any necessary changes:
Now that we've colored our sketch with a gradient, what if you want to go back to the original color, or a solid color version, or even a black and white version? Here's how to switch between the different effects.
To hide all color effects and go back to the black and white version, simply turn off the Color layer, Solid Color layer, and Gradient fill layer using their visibility icons. For example, we turned off the Color and Solid Color layers, so the Gradient fill layer will also be turned off:
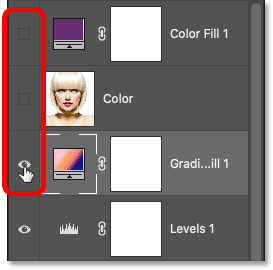
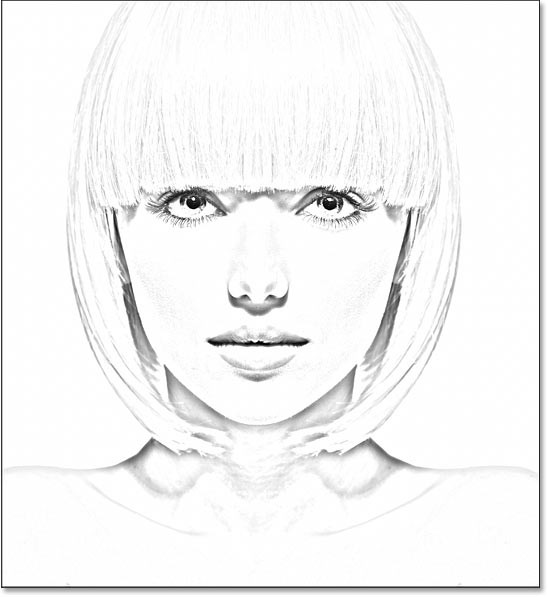
Turn off all 3 color effect layers, we will return to our black and white sketch:
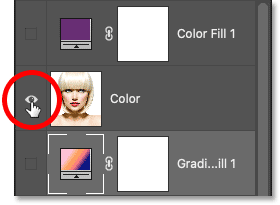
Then, to enable one of the color effects, click on the visibility icon for that effect. For example, I'll enable my Color layer. Make sure you only enable one color effect at a time, otherwise they'll blend into each other:
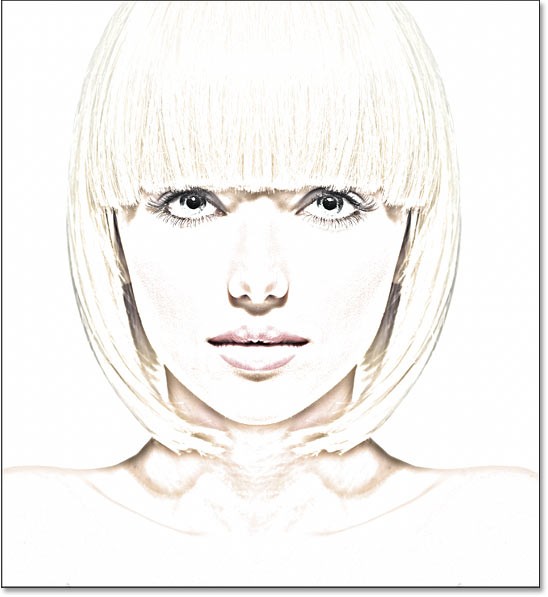
And when we turn on the Color layer, we return to the original color of the image:
And that's it! That's how to turn a photo into a black and white pencil sketch, along with a few different ways to colorize a sketch in Photoshop!
People spend too much time manually removing backgrounds, and AI isn't always the magic it claims to be.
Many people used to find resizing images very annoying until they learned about Photoshop's simple channel-based protection method.
Add a quick and easy poster effect to your images using Photoshop to recreate the classic look of posters printed with limited ink colors.
There are many AI photo editors that make Photoshop a second choice and AI features are useful tools for editing photos without having to learn complex Photoshop.
Photoshop 2025 packs new AI tools, smarter selections, and features you didn't know you needed until now.
This tutorial will show you a quick and easy way to add a monochrome color effect to an image using Adobe Photoshop.
This tutorial will show you how to add canvas space and drop shadow to your photo in Photoshop to create a simple yet stylish photo border.
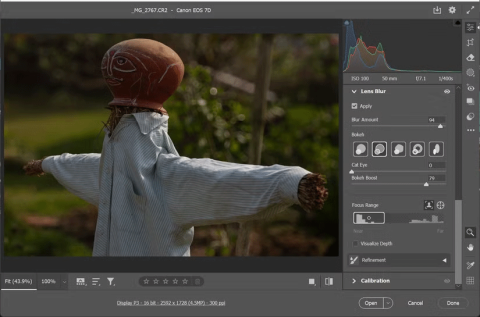
Adobe's Lens Blur tool makes it easy to review your photos, adding depth and focus to your photos.
Hidden away in the app, Photoshop Actions is a beloved feature of the popular photo editing tool, meant to speed up workflows without the need for AI.
Lightroom and Adobe Photoshop are two of the best photo editing tools, but while many professionals use both together, you only need Lightroom if you're an amateur photographer.
This tutorial will show you how to create a cool Picture in Picture effect with Adobe Photoshop by taking a single photo and creating the illusion that a smaller, cropped version of the same photo is inside it.
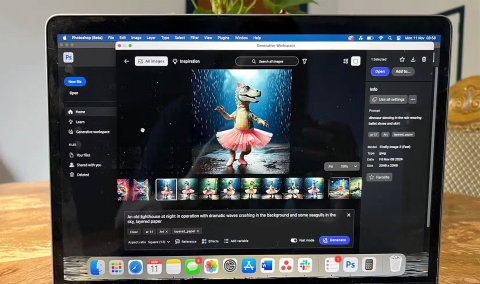
Generative Workspace is one of the top AI features announced at Adobe Max 2024. It will be the new home for your Generative AI images and files.
With Generative Fill, powered by Adobe's Generative AI called Firefly, anyone can add realistic water reflection effects to their photos simply by drawing a selection, typing a few words, and clicking a button.
This tutorial will show you how to copy an image and paste it into a selection in another image using the Paste Into command in Adobe Photoshop.
Frustrated with Microsoft Teams Breakout Rooms not creating? Discover proven fixes for "Breakout Rooms Not Erstellen" errors. Step-by-step guide ensures smooth meetings every time.
Stuck with Microsoft Teams "Error T" today? Get proven, step-by-step troubleshooting for Microsoft Teams "Error T" with quick fixes, causes, and solutions to get back to seamless collaboration. Works on desktop, web, and mobile!
Tired of Microsoft Teams "On iPhone" App Error crashing your meetings? Discover proven fixes for sign-in failures, crashes, and glitches on the latest iOS. Step-by-step guide with quick wins!
Tired of the Microsoft Teams Web Client "Disabled" Error blocking your meetings? Follow our proven step-by-step fixes to solve Microsoft Teams Web Client Disabled Error fast – no IT help needed!
Discover how to check your Microsoft Teams version using PowerShell in seconds. Step-by-step guide for IT pros, admins, and everyday users to verify updates, troubleshoot issues, and stay ahead. Accurate, fast, and foolproof methods revealed!
Struggling with Microsoft Teams Guest Access Not Working? Discover proven fixes, from quick checks to advanced troubleshooting, to get guests collaborating seamlessly in no time.
Lost important files in Microsoft Teams? Discover the exact location of the Microsoft Teams Recycle Bin and follow our proven steps to recover deleted files quickly and easily—no tech skills required!
As you age, many of your bodys organs can weaken, but it doesnt have to be that way if you take care of yourself. Here are the most essential vitamins for women over 50.
Struggling to locate your Microsoft Teams ID or account details? This step-by-step guide shows exactly where to find your Microsoft Teams ID and account info on desktop, web, mobile, and more for seamless collaboration.
Unlock the power of Microsoft Teams transcription for meetings with this step-by-step guide. Learn how to enable transcription, prerequisites, and tips for accurate transcripts to boost productivity and accessibility. Perfect for teams in 2026.
Tired of Microsoft Teams "Unknown Error" crashing your meetings? Discover step-by-step troubleshooting fixes that work instantly. Clear cache, reset app, and more—no tech skills needed!
Not all supplements are beneficial for irritable bowel syndrome (IBS), some may even worsen your symptoms.
Struggling with Microsoft Teams Error AADSTS70008: Expired Security Token? Discover step-by-step fixes, from quick sign-outs to advanced cache clears, to get back to seamless collaboration instantly. Updated with the latest solutions.
Tired of Microsoft Teams Error C Data crashing your meetings? Get proven, step-by-step solutions to clear cache, reset, and restore seamless teamwork. Fast, reliable fixes for the latest Teams versions.
Discover how to use Microsoft Teams background images effectively with step-by-step guides, custom upload tips, and best practices to make your video calls professional and engaging. Elevate your remote work game today!


