What is the best AI photo background remover?

People spend too much time manually removing backgrounds, and AI isn't always the magic it claims to be.
This tutorial will show you how to add canvas space and drop shadows to your photos in Photoshop to create a simple yet stylish photo border. We start by creating a basic effect with a white border and black shadow. The tutorial will then show you how to customize the effect by selecting border and shadow colors directly from the photo itself.
Step 1: Open the image in Photoshop
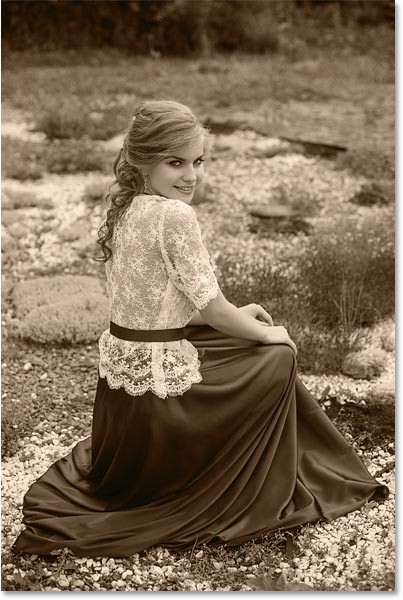
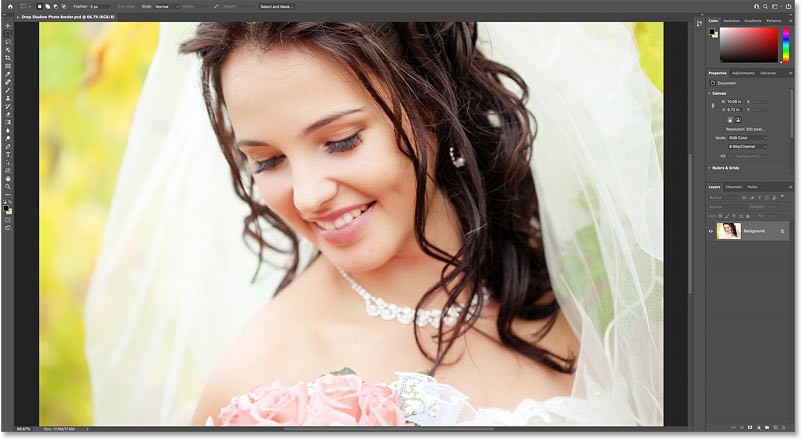
Start by opening your photo. For this example, we'll use this photo from Adobe Stock:
Step 2: Unlock the Background layer
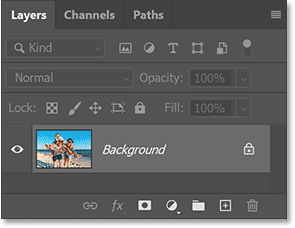
In the Layers panel, the image appears on the Background layer. And at this point, the Background layer is locked, indicated by the lock icon to the right of the layer name:
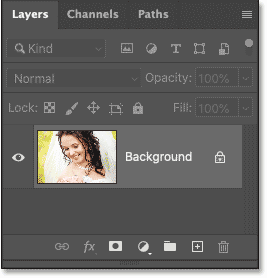
To put a border around the image, we need to add a new layer below the image. But we can't do that when the Background layer is locked. So to unlock it, click on the lock icon.
Or if you're using an older version of Photoshop and clicking the lock icon doesn't work, press and hold the Alt (Win) / Option (Mac) key on your keyboard and double-click the lock icon:
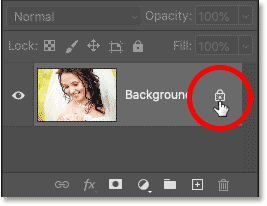
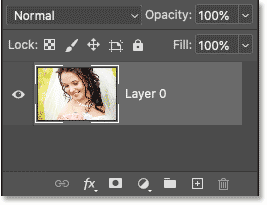
Photoshop renames the layer from Background to Layer 0 and the lock icon disappears:
Step 3: Add a Solid Color fill layer
To create the image border, we will use the Solid Color fill layer.
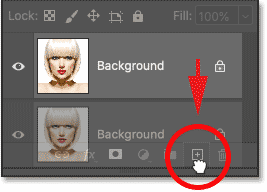
Click the New Fill or Adjustment Layer icon at the bottom of the Layers panel:
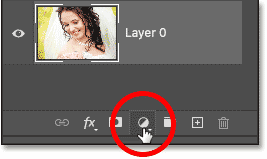
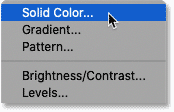
And select Solid Color from the list:
Then, in the Color Picker, select white by setting the R, G, and B values to 255. We'll use white as the outline color for now and will show you how to change it later. Click OK when you're done:
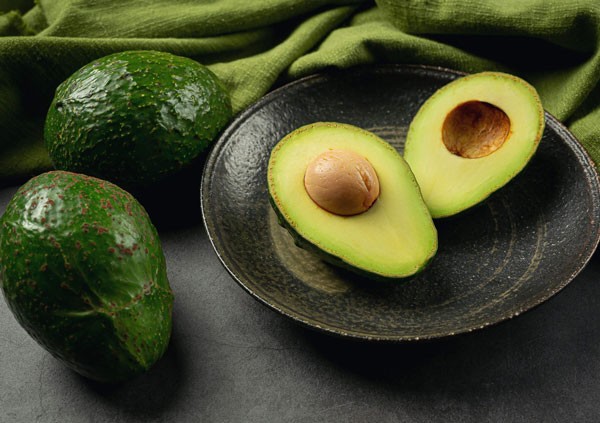
Back in the document, the white from the fill layer temporarily blocks the image from view:
Step 4: Move the fill layer below the image
To fix that, click on the Solid Color fill layer in the Layers panel and drag it below the image:
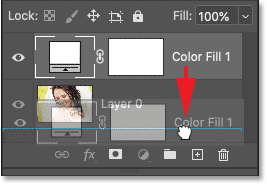
Release the mouse button to drop it into place:
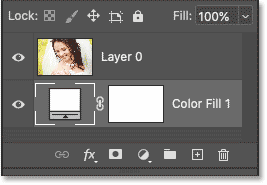
And now, let's go back to viewing the image, with the fill layer hidden behind it:
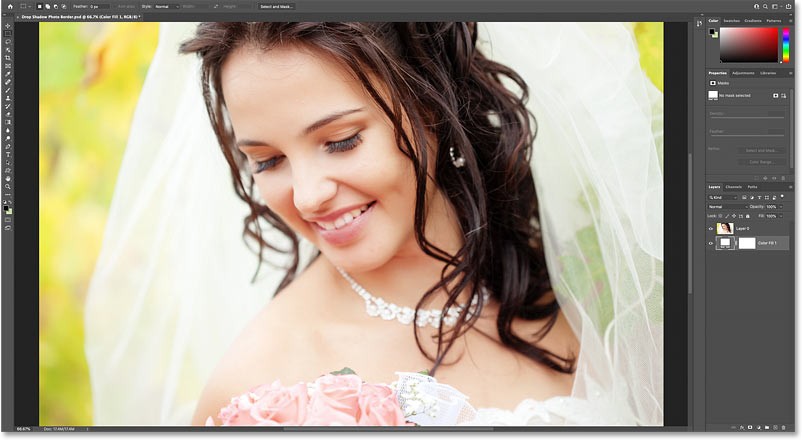
Step 5: Open the Canvas Size dialog box
Next, we need to add more canvas space around the image. The extra space will become the border. And since we want the border to be the same size on all four sides, the best way to do this is to use Photoshop's Canvas Size command.
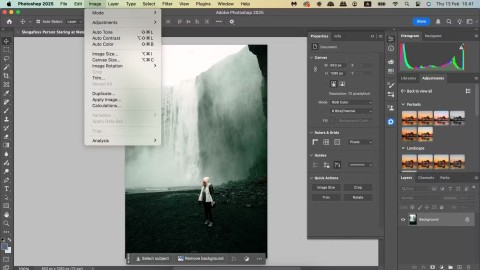
Go to the Image menu in the Menu Bar and select Canvas Size :

Step 6: Increase the width and height of the canvas
In the Canvas Size dialog box, click the Relative option . This option tells Photoshop to start with the current canvas size and the values we enter for Width and Height will be added to that.
In the Anchor grid , make sure the middle box is selected so that the extra spacing will be added evenly at the top, bottom, left, and right:
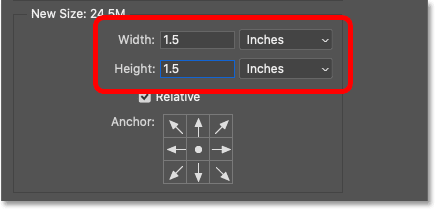
Next, enter a size for the border in the Width and Height fields. But remember that the values you enter will be divided equally on both sides. So, for example, entering 2 inches for Width will create a 1-inch border on the left and right sides of the photo. And entering 2 inches for Height will create a 1-inch border on the top and bottom.
For the example image, a 1-inch border would be a bit too wide. A 3/4-inch border would look better. So to add a 3/4-inch border to the left and right of the image, the Width would need to be set to double that amount, which would be 1.5 inches. And to keep the border the same size everywhere, the Height would need to be set to 1.5 inches as well.
Click OK when you're done to close the Canvas Size dialog box :
Photoshop adds additional canvas space around the image, creating a border for the image. Although the additional space is actually transparent, it appears white because the Solid Color fill layer below the image is showing through:
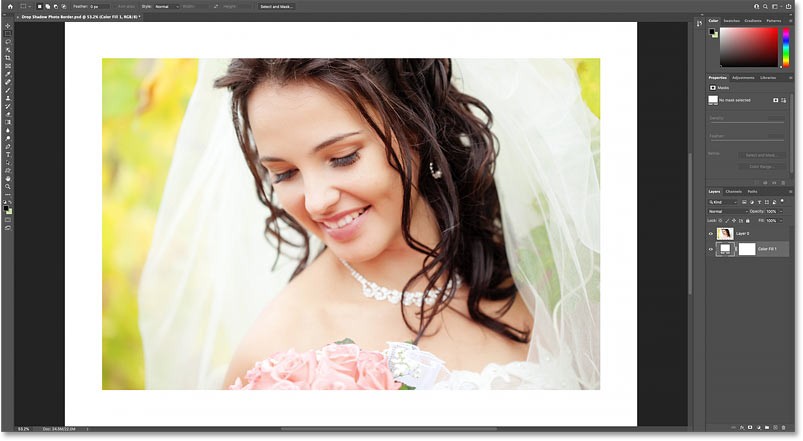
How to adjust image borders on screen
If the border is too large to fit the screen, go to the View menu in the Menu Bar and select Fit on Screen :
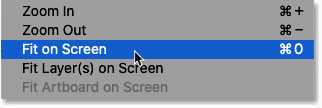
How to change border size
The downside to Photoshop's Canvas Size command is that there's no way to preview the new size before committing to it. So if the border is too wide or too narrow, go to the Edit menu and choose Undo Canvas Size :

Then go back to the Image menu , go back to Canvas Size , try again with different Width and Height values :

Step 7: Select the image layer
We've added a border, now we need to add a drop shadow. In the Layers panel, click on the image layer to select it:
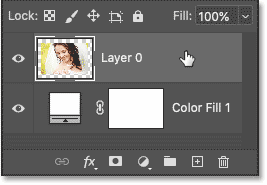
Step 8: Add a drop shadow effect
Then click on the fx icon at the bottom:
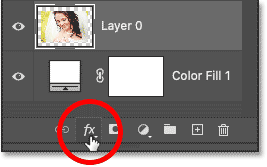
And select Drop Shadow from the list:
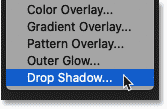
Step 9: Adjust Drop Shadow settings
The options for Drop Shadow open in Photoshop's Layer Style dialog box. And the three main options are Angle, Distance , and Size . Angle controls the direction of the light source, Distance is how far the shadow extends from the subject, and Size controls the softness of the shadow edges:
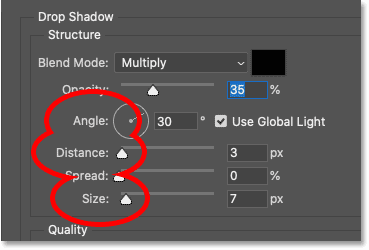
Angle and Distance options
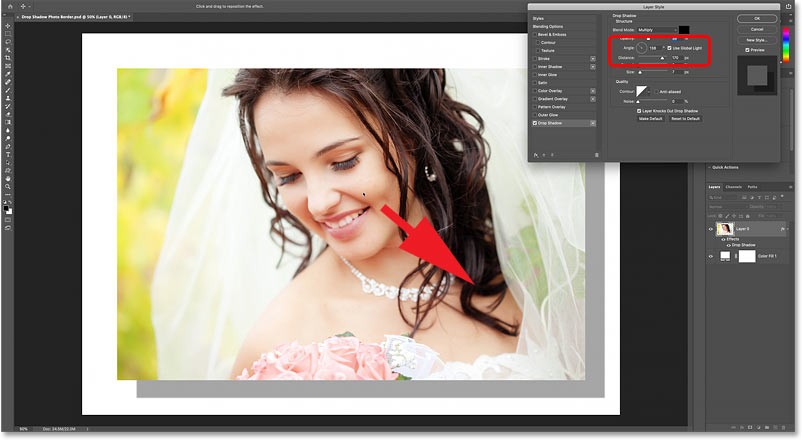
The quickest way to set the Angle and Distance of a drop shadow is to simply click inside the document, hold down the mouse button, and drag the drop shadow to position it. As you drag, the Angle and Distance values in the dialog box will change.
Here, the example is dragging the shadow down and to the right:
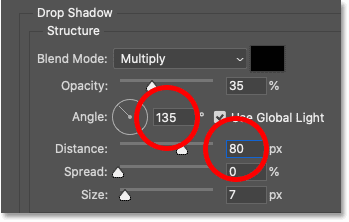
Or you can enter specific Angle and Distance values. The example will set the Angle to 135 degrees and the Distance to 80 px. The values you need, especially Distance and Size, will depend on your image:
Here are the results so far:
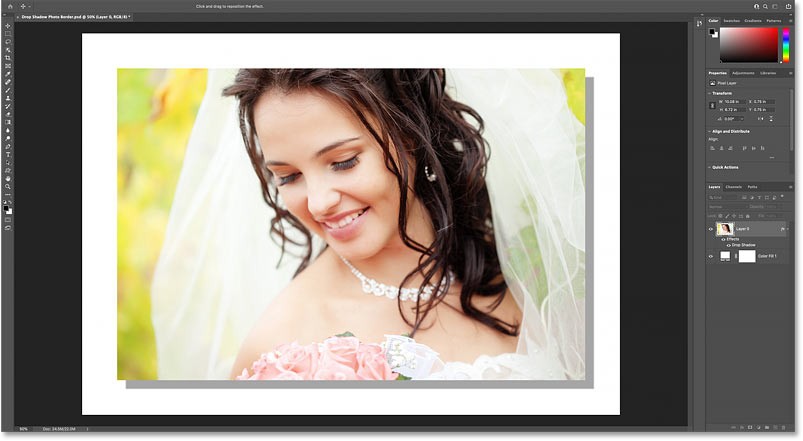
Size Options
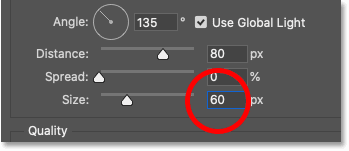
Then increase the Size value to soften the shadow edges. The example will set the value to 60 px, but again this will depend on your image:
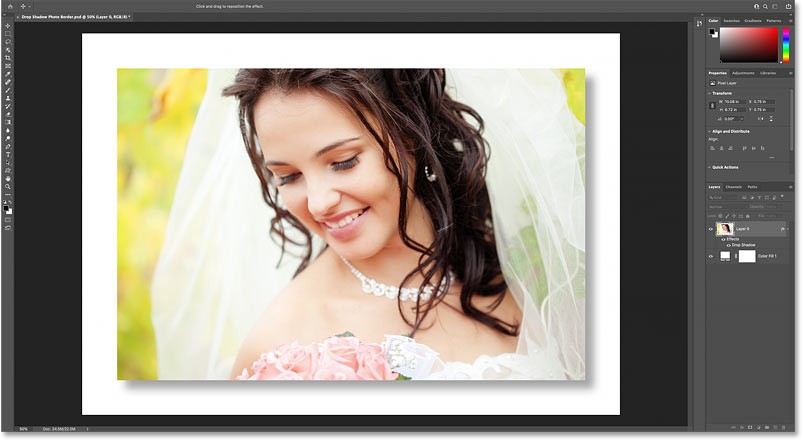
And here is the result with the edges now softer:
Opacity option
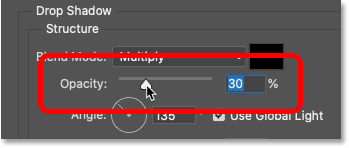
You can also adjust the strength of the shadow using the Opacity slider. Higher Opacity values will darken the shadow, and lower values will lighten the shadow. For example, lowering the value to 30% would be:
When you're happy with the results, click OK to close the Layer Style dialog box :
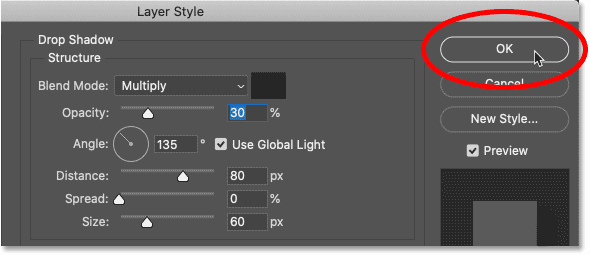
And here is the result after lowering the shadow opacity:
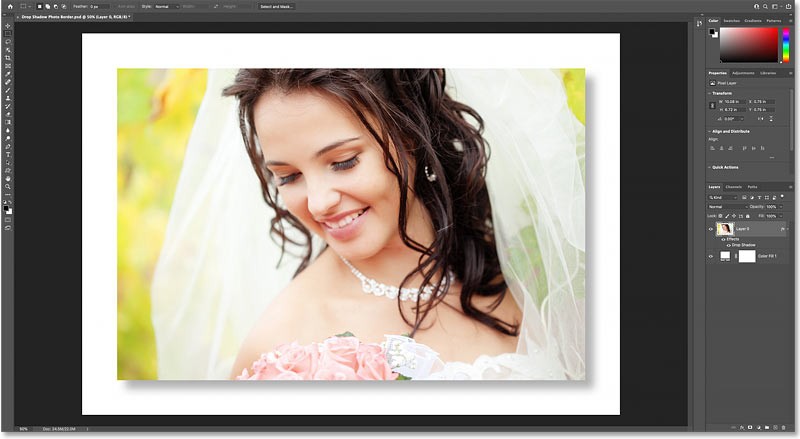
How to customize border color and shadow
At this point, the main effect is complete. We've added a border around the image and a drop shadow behind it. But instead of using a white border and black drop shadow, we can customize the effect by picking a color directly from the image. Here's how to do it.
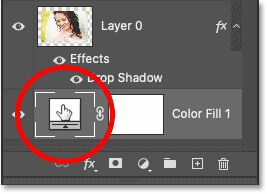
Step 10: Double click on the fill layer color swatch
To change the border color, double-click the fill layer's color swatch in the Layers panel:
Step 11: Sample new border color from image
This will reopen the Color Picker. But instead of selecting a new color from the Color Picker itself, hover your mouse over the image and click on a color to sample it.
The example would be clicking on the woman's shoulder:
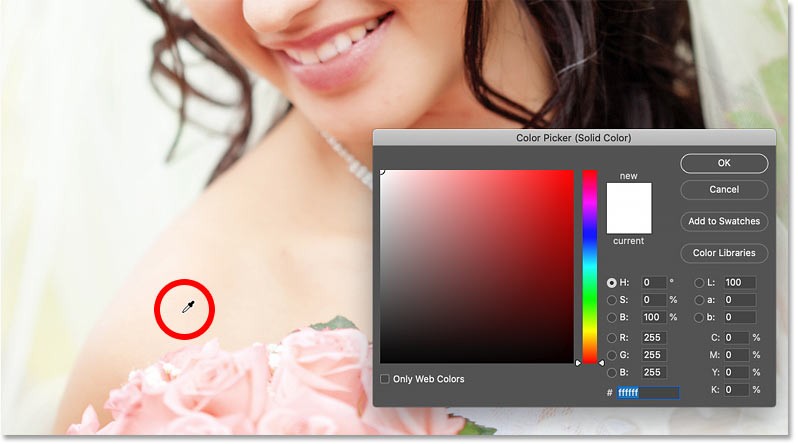
The color you sampled immediately becomes the new outline color. You can continue clicking different areas of the image to find the best match. When you're done, click OK to close the Color Picker.
Here is the result with the border set to the new color:

Step 12: Reopen Drop Shadow settings
Then, to choose a new color for the shadow, double-click the Drop Shadow layer effect below the image layer:
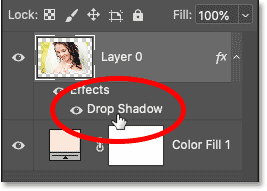
And in the Layer Style dialog box , click the shadow color swatch:
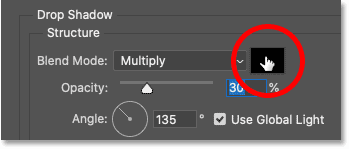
Step 13: Sample new shadow color from image
Once the Color Picker opens, hover your mouse over the image and click on a color to sample. For example, we'll click on the woman's shoulder again:
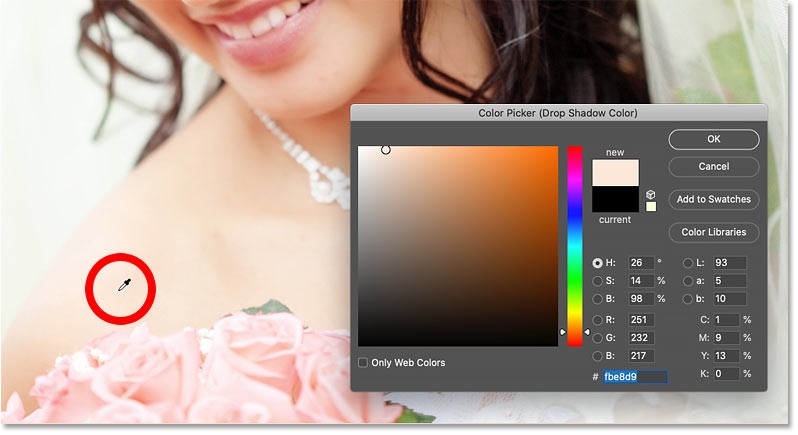
Step 14: Adjust the brightness and saturation of the color
The shadow color needs to be dark and highly saturated. So before closing the Color Picker, increase the Saturation (S) value of the color to 100% or close to that number.
Then darken the color by reducing the Brightness (B) value of the color. For example, we'll reduce the value to 30% so the shadow doesn't look too dark, but you may want to darken it even more depending on your image:
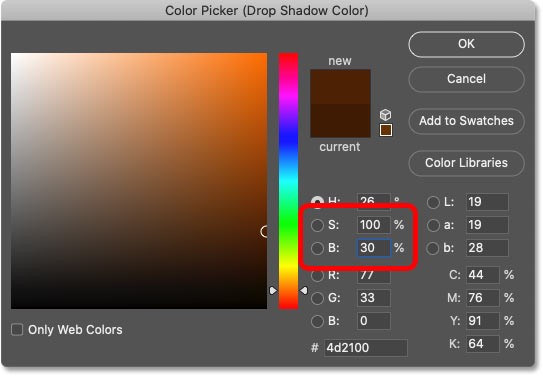
Click OK to close the Color Picker and you're done! Here's the final result using the custom border and new color for the shadow:
Video tutorial on how to create a shadow border in Photoshop
People spend too much time manually removing backgrounds, and AI isn't always the magic it claims to be.
This tutorial will show you how to easily turn a photo into a pencil sketch using Adobe Photoshop.
Many people used to find resizing images very annoying until they learned about Photoshop's simple channel-based protection method.
Add a quick and easy poster effect to your images using Photoshop to recreate the classic look of posters printed with limited ink colors.
There are many AI photo editors that make Photoshop a second choice and AI features are useful tools for editing photos without having to learn complex Photoshop.
Photoshop 2025 packs new AI tools, smarter selections, and features you didn't know you needed until now.
This tutorial will show you a quick and easy way to add a monochrome color effect to an image using Adobe Photoshop.
Adobe's Lens Blur tool makes it easy to review your photos, adding depth and focus to your photos.
Hidden away in the app, Photoshop Actions is a beloved feature of the popular photo editing tool, meant to speed up workflows without the need for AI.
Lightroom and Adobe Photoshop are two of the best photo editing tools, but while many professionals use both together, you only need Lightroom if you're an amateur photographer.
This tutorial will show you how to create a cool Picture in Picture effect with Adobe Photoshop by taking a single photo and creating the illusion that a smaller, cropped version of the same photo is inside it.
Generative Workspace is one of the top AI features announced at Adobe Max 2024. It will be the new home for your Generative AI images and files.
With Generative Fill, powered by Adobe's Generative AI called Firefly, anyone can add realistic water reflection effects to their photos simply by drawing a selection, typing a few words, and clicking a button.
This tutorial will show you how to copy an image and paste it into a selection in another image using the Paste Into command in Adobe Photoshop.
Struggling with Microsoft Teams "Đăng nhập" login error? Discover step-by-step fixes for smooth sign-in. Clear cache, update app, and more – no tech skills needed! Works on Windows, Mac, and web.
Tired of Microsoft Teams Web Error 503 Service Unavailable blocking your meetings? Discover quick, step-by-step fixes to resolve the 503 error fast – no tech skills needed! Clear cache, check status, and get back to collaborating seamlessly.
Stuck with Microsoft Teams Update Error 0x80070002? Discover proven troubleshooting steps to resolve this frustrating issue quickly and get your Teams app updated seamlessly for uninterrupted collaboration.
Tired of Microsoft Teams Error AADSTS50020 blocking your sign-in? Discover step-by-step fixes for user account conflicts, backed by the latest Azure AD solutions. Get back to work fast!
Tired of Microsoft Teams microphone error with no sound? Discover quick, step-by-step fixes for Teams mic not working on Windows, Mac, and more. Restore crystal-clear audio in minutes!
Tired of the Microsoft Teams "Task Management" Error disrupting your workflow? Discover proven fixes like clearing cache, updating Teams, and troubleshooting permissions to get back to seamless collaboration in minutes. Updated with the latest solutions.
Frustrated by the Microsoft Teams 'How to Teams' Help Error? Discover proven, step-by-step solutions to fix it quickly and restore smooth help access. Latest 2026 updates included for seamless teamwork.
Struggling with Microsoft Teams "Room Error" Syncing? This ultimate guide provides step-by-step fixes for Microsoft Teams Room Error Syncing issues, ensuring seamless meetings and quick resolutions. Updated with the latest tips.
Master troubleshooting Microsoft Teams Workflows Power Automate issues with step-by-step fixes for common errors. Get your automations running smoothly – no more frustration! Proven solutions for triggers, permissions, and more.
Struggling with Microsoft Teams "Restart Error" in 2026? Discover proven, step-by-step fixes to resolve the endless restart loop quickly. Clear cache, reset app, and more for seamless collaboration. Get back online fast!
Master how to create breakout rooms in Microsoft Teams before a meeting with this easy guide. Pre-assign participants, boost collaboration, and elevate your virtual sessions effortlessly.
Tired of Microsoft Teams sidebar missing? Get instant fixes for layout errors. Step-by-step guide with latest tips to restore your Teams sidebar fast and frustration-free.
Struggling with Microsoft Teams Download Error on MacBook? Get step-by-step fixes for smooth installation on the latest macOS. Solve download failed issues quickly and easily.
Tired of Microsoft Teams Error J blocking your accounts? Get instant fixes for Error J in Teams with step-by-step guides, cache clears, and account resets. Regain access fast—no tech skills needed!
Work slows down when files sit in too many places, approval steps feel confusing, and people spend more time searching than actually finishing tasks. Strong document management can bring order back without making daily work feel complicated.
