
Pop Culture Costume Ideas That Will Dominate Halloween 2026
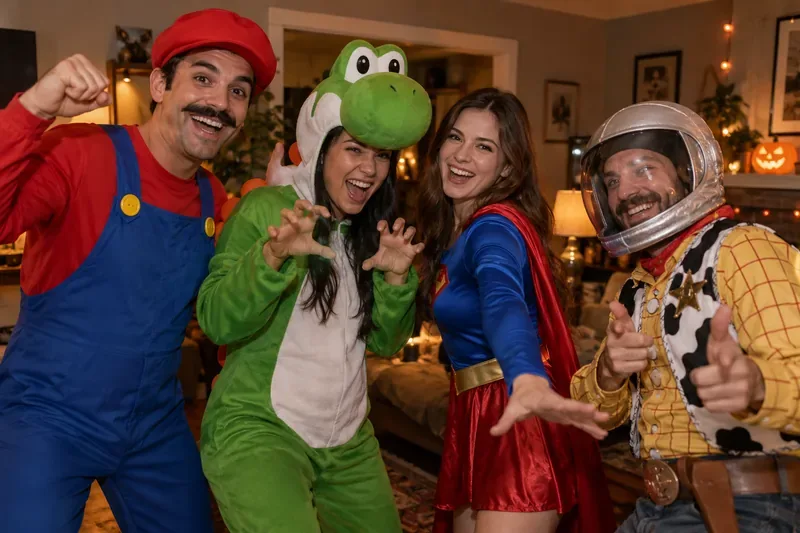
Plan a recognizable Halloween 2026 look with pop culture costumes inspired by Spider-Man, Supergirl, Toy Story 5, Moana, Mario, and Wednesday.
Creating water reflections in Photoshop used to be a time-consuming and skilled process. Or you could use a water reflection plugin and mess around with confusing options.
But with Generative Fill , powered by Adobe's Generative AI called Firefly, anyone can add realistic water reflection effects to their photos simply by drawing a selection, typing a few words, and clicking the Generate button.
Step 1: Add space below the image to create a reflection effect on the water surface
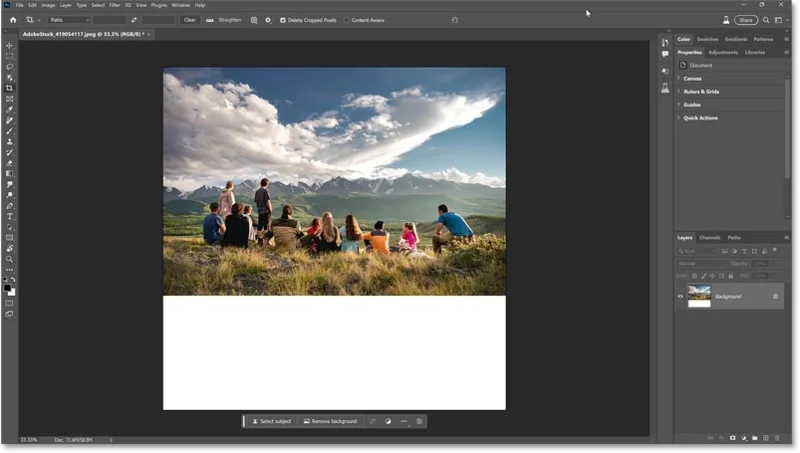
First, you need to add space below the image to make room for the reflection effect on the water, which means expanding the canvas.
So, select the Crop Tool from Photoshop's toolbar.
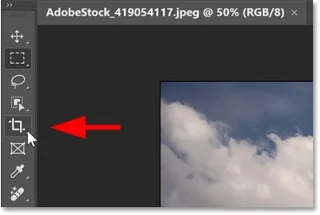
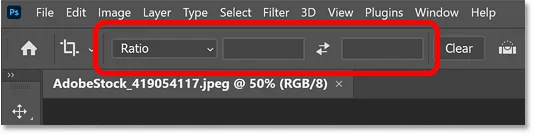
In the Options Bar, make sure the aspect ratio is set to Ratio and the Width and Height boxes next to it are blank.
To gain more working space, zoom out of the image by going to the View menu in the menu bar and selecting Zoom Out .
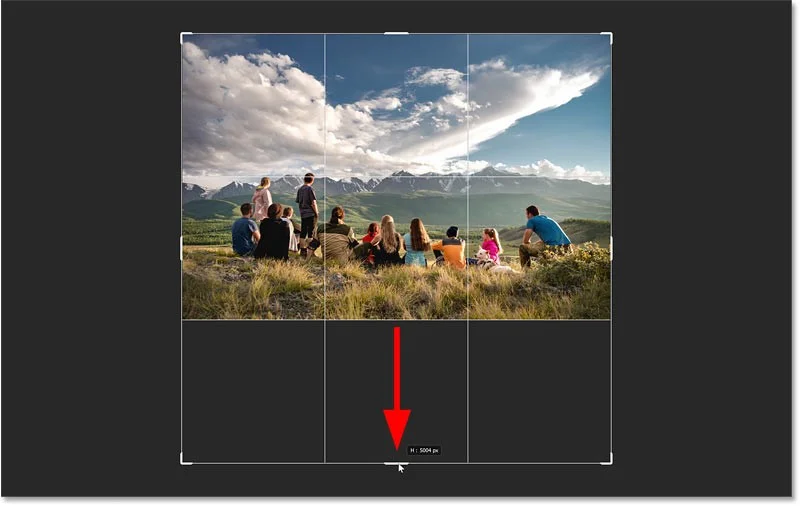
Then, expand the canvas below the image by clicking and dragging the bottom crop handle down.
Photoshop fills the new canvas area with white when you release the mouse button.
Press Enter (or Return on a Mac) on your keyboard to accept.
Step 2: Select the area below the image
Next, you need to select the new canvas.
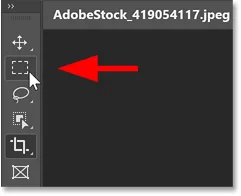
So, let's switch to the Rectangular Marquee Tool on the toolbar.
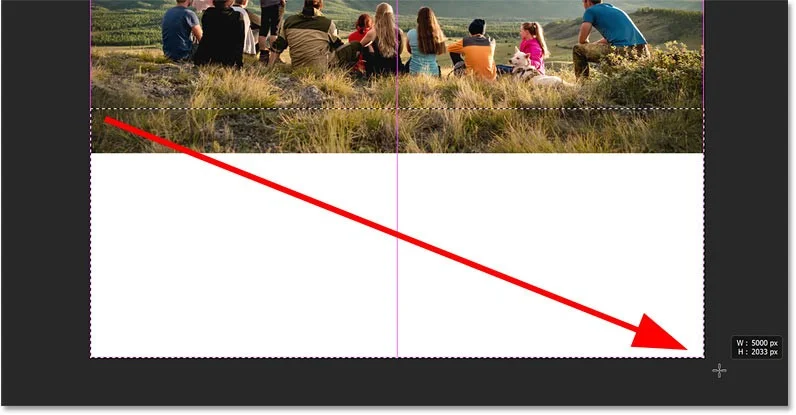
Then drag the selection border around the canvas at the bottom.
But don't just choose a blank canvas. Make sure to include some images on top of it so that the Generative Fill has enough room to transition between the original image on top and the water reflection below.
You don't need to include many images. But in the example case, since the author wanted the water reflection to start closer to the people, it would be appropriate to include more images here than usual.
Step 3: Click Generative Fill in the Contextual Task Bar
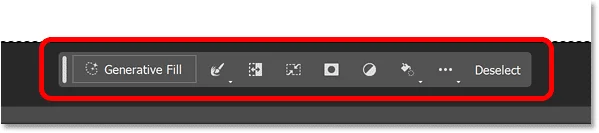
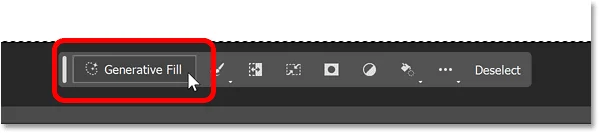
Photoshop's Generative Fill option is located in the new Contextual Task Bar, a small horizontal bar that displays different options depending on what you're doing. The Contextual Task Bar usually appears just below the outline of your selection.
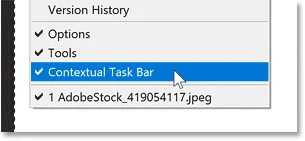
If you don't see it, go to the Window menu in the menu bar and select Contextual Task Bar near the bottom.
In the Taskbar, click the Generative Fill button .
Step 4: Enter the prompt to create a reflection effect on the water surface
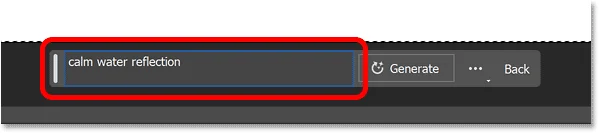
A prompt box will appear where you can enter a description of what you want Photoshop to add to your photo. In this case, we'll add a water reflection effect.
With Generative Fill, short and simple prompts tend to work best. Use nouns (people, places, things) and adjectives (words that describe people, places, or things). Also, avoid words like add, remove, or create, as Photoshop will calculate them for you.
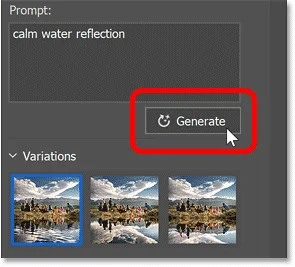
So in the prompt input box, just type " calm water reflection ". You can also try a calm water reflection effect with ripples, lake reflection or something similar. All 3 prompts will give great results.
Step 5: Click the Generate button
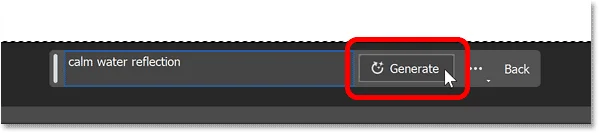
Then, next to the prompt box, click the Generate button.
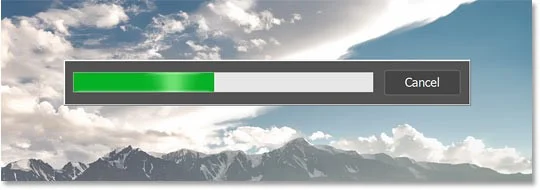
Photoshop sends the file over the internet to Adobe's servers, where the AI content is generated, and a progress bar appears while you wait. This usually takes 10-15 seconds.
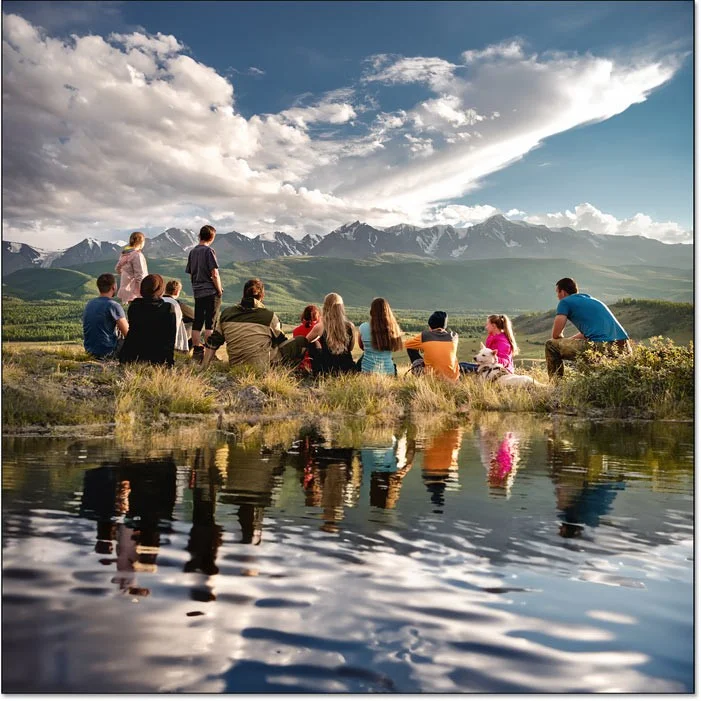
The initial water reflection effect will appear.
When finished, your AI-generated water reflection will appear. And the results can be spectacular.
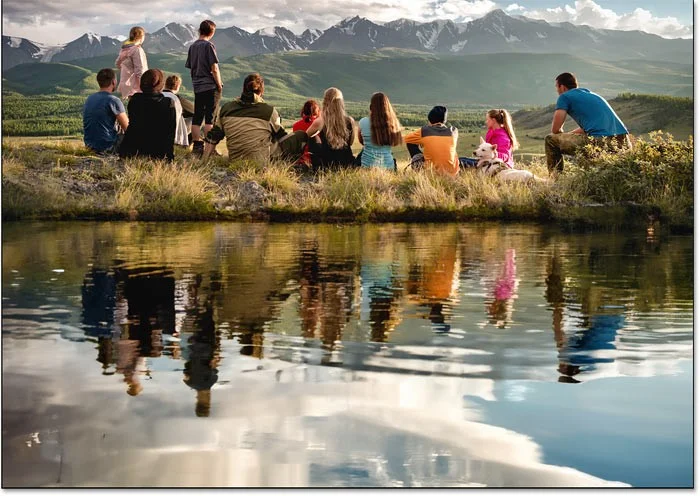
With the example image, notice how the water reflects the clouds, people, grass, and pretty much everything in the original image above, as well as how the reflection effect is distorted by the ripples on the water's surface (although the author doesn't mention ripples in his prompt).
Generative Fill even adds a little border where the water and the original image meet. Imagine how long it would take to create something like this manually. But with Generative Fill, all you need is a simple text prompt.
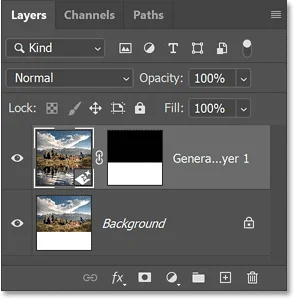
Photoshop's New Generative Layers
In the Layers panel, a new layer type called a Generative layer appears above your image. Generative layers hold AI-generated content and are separate from your original image, allowing effects to be added non-destructively.
Step 6: Choose from 3 variations of the water reflection effect
Generative Fill creates 3 variations of the water reflection effect that you can choose from, and you'll find them in the Properties panel . Click on the thumbnail to try them out.
Some variations will be better than others. For example, I'll choose one of the other two.
But this result lacks the ripples on the water and the reflection of people looks weird. The original result is better.
Step 7: Create additional variations (optional)
If you don't like any of the initial water reflection effects, click the Generate button in the Properties panel to create 3 more variations. You can click Generate as many times as you like and you won't lose the variations you already have.
New variations will appear above previous variations. For example, we will select the first variation.
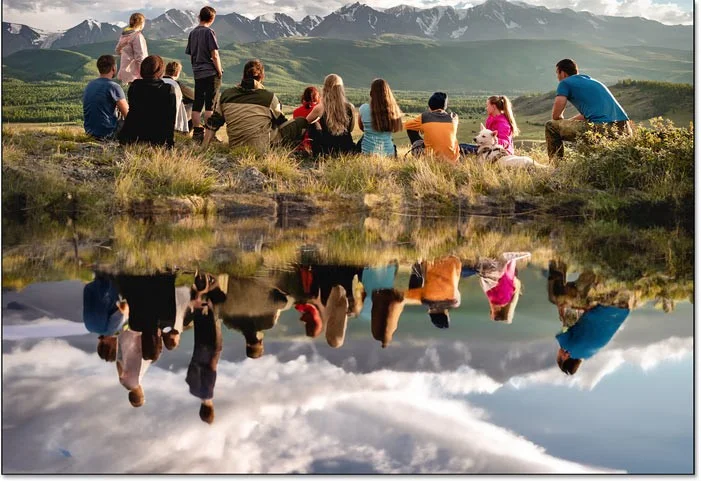
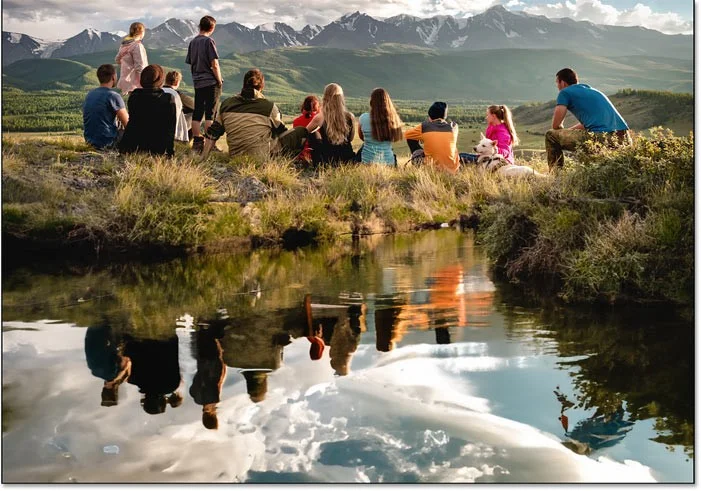
This is pretty cool. Generative Fill added a creek behind the people curving to the right. Again, how long would it take to get the same result manually? It could be hours, days, or never. But with Generative Fill, it only takes seconds.
But the last variation is the best, due to the way the ripples spread out from the shore.
There are some small distracting spots in the water, but you can easily remove them with Photoshop's new Remove Tool, which is also AI-powered (like everything else these days).
Overall, the water reflections created by Generative Fill are almost unbelievable, both in how amazing they look and how incredibly easy they are to create.
Plan a recognizable Halloween 2026 look with pop culture costumes inspired by Spider-Man, Supergirl, Toy Story 5, Moana, Mario, and Wednesday.
Sort leftover Halloween candy safely, share or repurpose sealed treats, and choose food use or compost for pumpkins based on their condition.
Compare workplace Halloween costume choices by respect, dress code, mobility, and safety—and learn when a subtle accessory or a policy check is the better option.
Find a couples costume that fits your style, budget, and comfort level, from Addams Family classics to original inside-joke duos.
Need a last-minute high school Halloween costume? Compare 10 easy closet-based ideas by prep time, comfort, school-day practicality, and simple safety checks.
Use a simple 2026 Halloween decorating timeline for indoor décor, outdoor displays, and fresh pumpkins, with practical adjustments for weather and events.
Mix five vivid, approachable Halloween cocktails with measured recipes, simple prep tips, and an alcohol-free option for your party guests.
Find 15 office-friendly Halloween costume ideas for 2026, with practical checks for dress codes, respectful themes, comfort, and workplace safety.
Plan a fun elementary school Halloween party with easy crafts, games, inclusive treats, costume tips, and a sample 75-minute classroom schedule.
Compare realistic side hustles for 2026 by startup cost, fees, flexibility, and income control, with current tax and scam guidance from official sources.