Many Windows 10 users have reported that in the process of loading data, they often encounter File Explorer hangs causing the File Explorer window to completely freeze. Especially when the number of files is large and the computer configuration is weak.
Explaining this situation, on Windows 10 , Microsoft has integrated a Quick Access bar on File Explorer, allowing users to quickly access the frequently used folders and files for the purpose of helping users. Quick action on this tool.
Technically, when you launch File Explorer, the system will start the process of loading data related to the Quick Access bar , including the files you have recently opened, the clipboard, etc.In This load process, if any data is damaged or expired, File Explorer displays the message Working on it on the main interface until the boot process is complete.
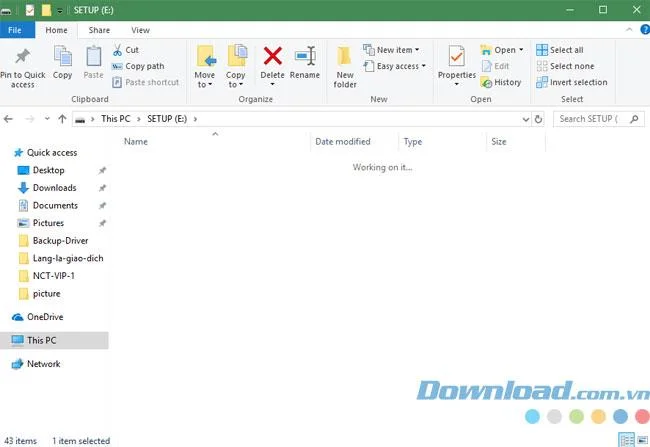
However, if you open windows and applications on the computer too much, most of the RAM is being used, or the computer is configured as weak as I mentioned above, the message Working on it may cause File Explorer Unresponsive to users or also called hangs.
And to fix this situation, Download.com.vn has done a few instructions below so that you can fix the File Explorer error that freezes or hangs. Stay tuned for how to do it.
How to fix File Explorer crashes, freeze
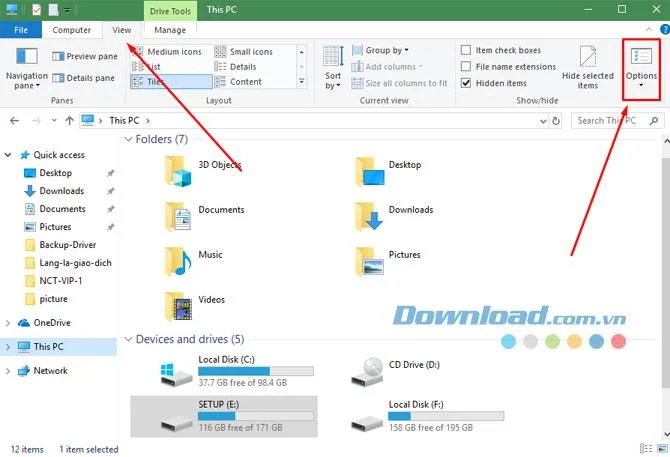
Step 1: Press Windows key + E to open your File Explorer, click the View tab and select Options , then select Next

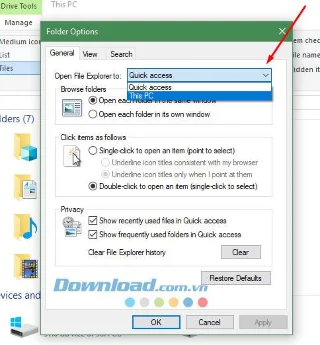
Step 2: In Folder Options , select This PC in the Open File Explorer to section .

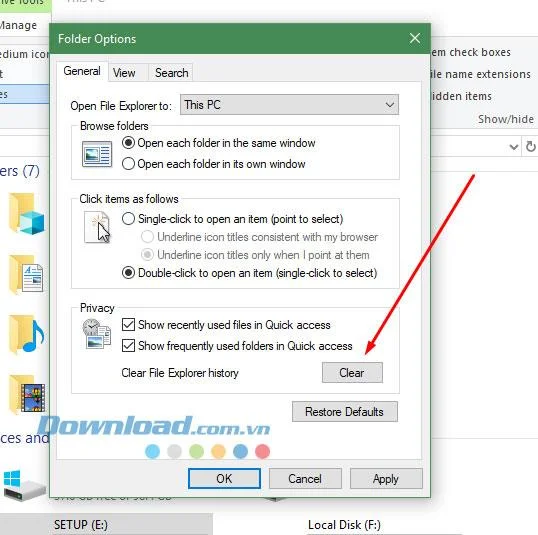
Continue in the Folder Options panel , click Clear in the Privacy area , and Windows will now clear the entire File Explorer browsing history.

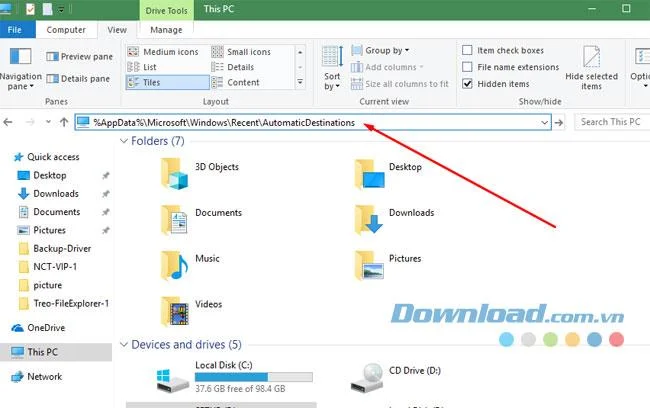
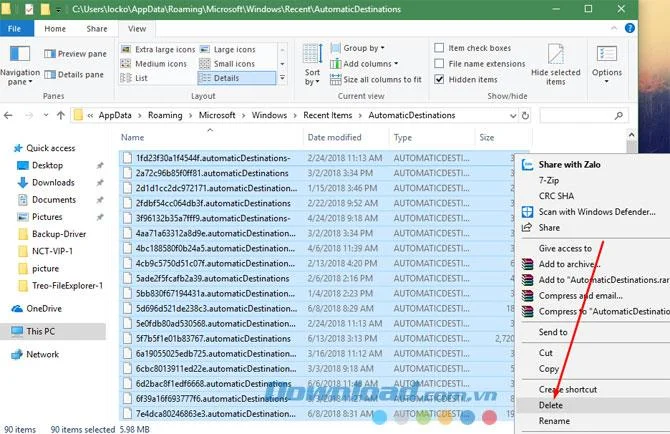
Step 3: Next, copy the following path % AppData% \ Microsoft \ Windows \ Recent \ AutomaticDestinations and paste into the address of File Explorer to access the folder containing data related to the Quick Access bar.

Here you can highlight all the files in this folder and delete all files in it.

This way, File Explorer will no longer take too long to load data related to the Quick Access bar, at which point the system will begin the process of rebuilding the cache. And of course you will not have quick access to frequently used folders anymore.
So if you frequently visit a folder, you can pin it to the area below the Quick Access bar. And then Windows will not have to load too much data related to this folder.