What is the best AI photo background remover?

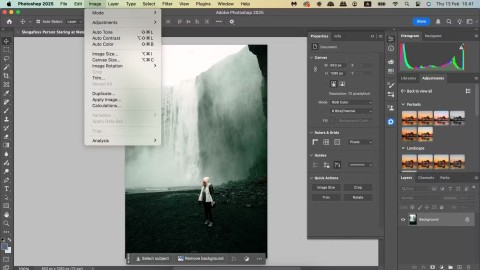
People spend too much time manually removing backgrounds, and AI isn't always the magic it claims to be.
This tutorial will show you how to insert a photo into a shape using Adobe Photoshop . As you will see, it is easy to place a photo into any type of shape, from a basic rectangle or circle to a fancy custom shape. This tutorial will use a custom shape and the article will show you how to load all the missing shapes into Photoshop for a wide range of options.
Table of Contents
Start by creating a new Photoshop document. If you're on the main screen, click the New file button .
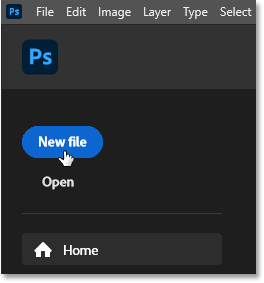
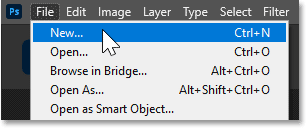
Or you can go to the File menu in the menu bar and select New .
Either way, the New Document dialog box will open, where you can enter the necessary settings in the right column. The example will create a square document by setting both Width and Height to 2000 pixels.
Since we'll be placing an image into the shape and images are usually saved at a higher resolution, change the Resolution value to 300 pixels per inch and leave the Background Contents set to White .
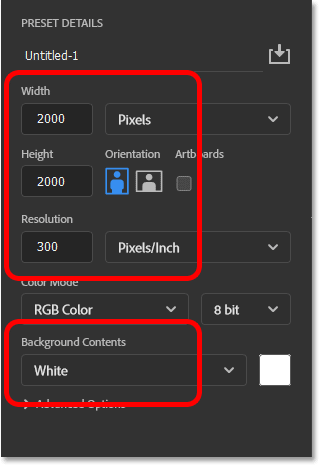
Then click the Create button .

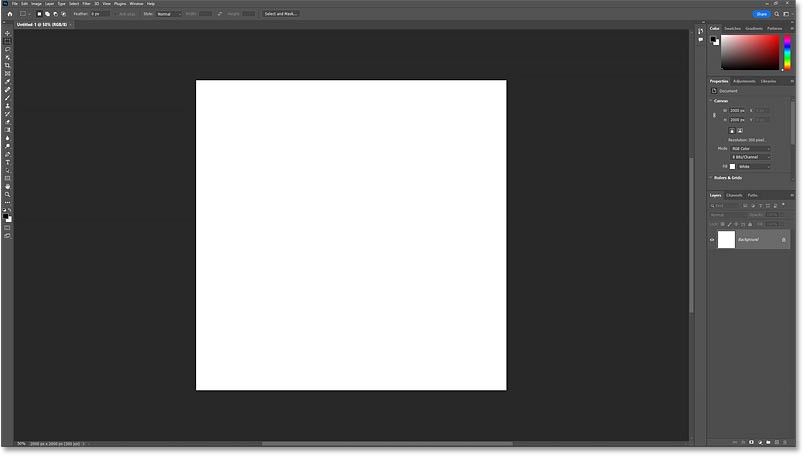
And Photoshop creates a new document.
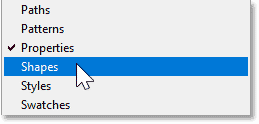
The quickest way to draw custom shapes in Photoshop is to add them from the Shapes panel. To open this panel, go to the Window menu and select Shapes.
The Shapes panel opens in the sub-panel column to the left of the main panels. You can show or hide the panel by clicking the panel icon.
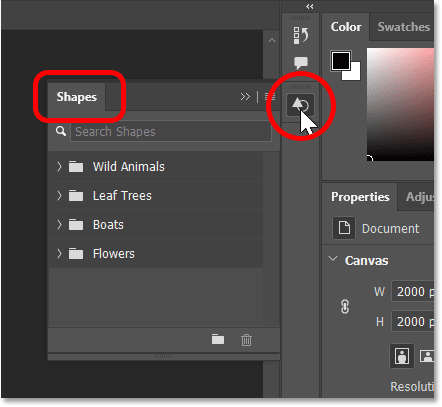
At first, all we see are default shapes divided into groups.
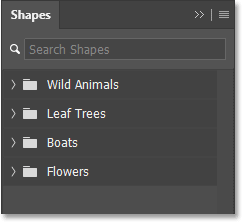
You can rotate any group to reveal the shapes inside that group by clicking the arrow next to that group's folder icon.
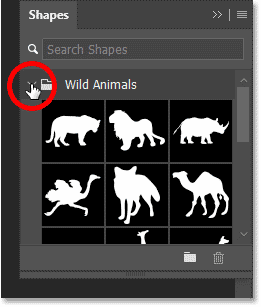
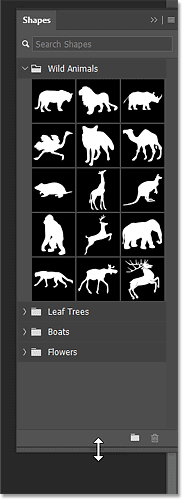
And you can drag the bottom of the Shapes panel down to expand and see multiple shapes at once.
To load all the missing shapes available in Photoshop, click on the Shapes panel menu icon .
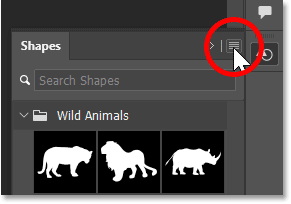
Then, select Legacy Shapes and More .

A new Legacy Shapes and More group appears below the defaults.
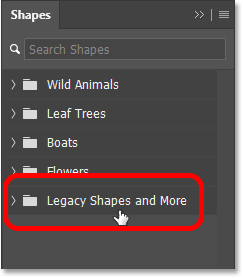
And inside there are two more groups. 2019 Shapes contains hundreds of new shapes added to Photoshop 2020. And All Legacy Default Shapes contains classic shapes from older versions of Photoshop.
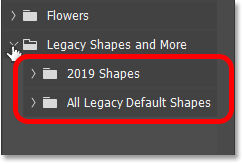
This tutorial will use one of the classic shapes. The example will open the All Legacy Default Shapes group.

Then scroll down to Nature and click to open.
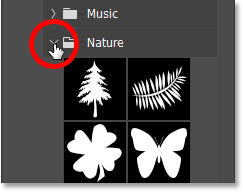
And inside Nature, use the butterfly shape.
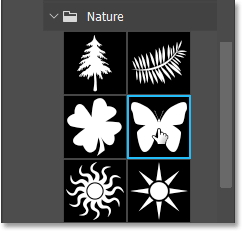
To add a shape, simply click and drag a shape thumbnail from the Shapes panel and drop it onto the canvas.
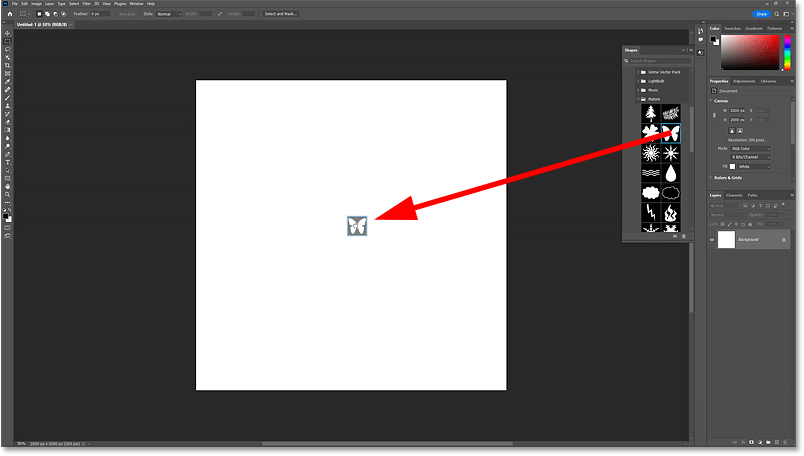
Photoshop draws the shape when you release the mouse button.
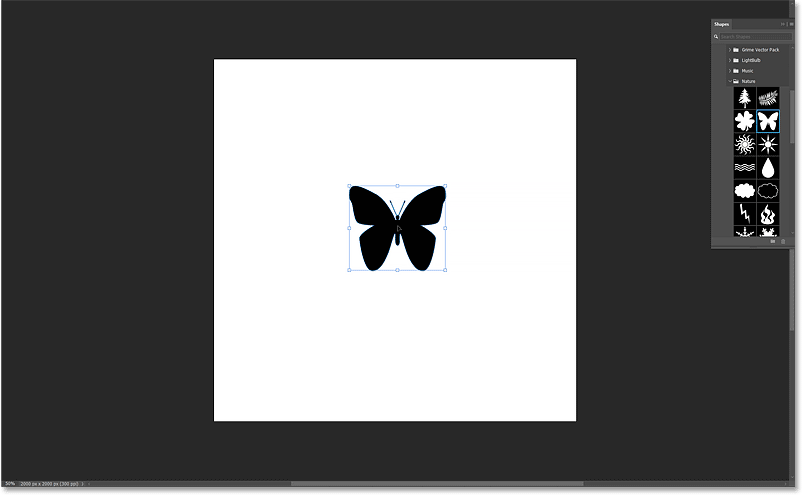
Before resizing the image, go up to the Options Bar and make sure the link icon is selected between the Width and Height fields so that the image's aspect ratio is locked.

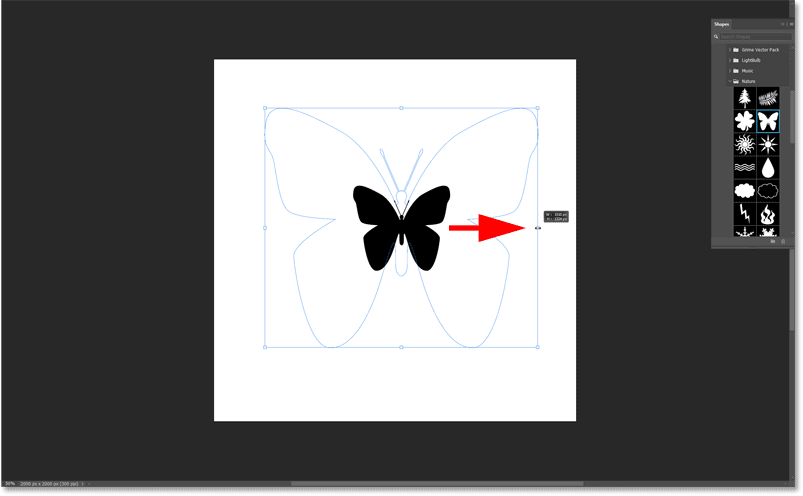
Then, resize the shape by clicking and dragging any of the transform handles. If you hold down the Alt (Win) / Option (Mac) key on your keyboard as you drag, you'll resize the shape from its center.
Click and drag the shape to the center of the canvas. As you get closer to the center, it will snap into place.
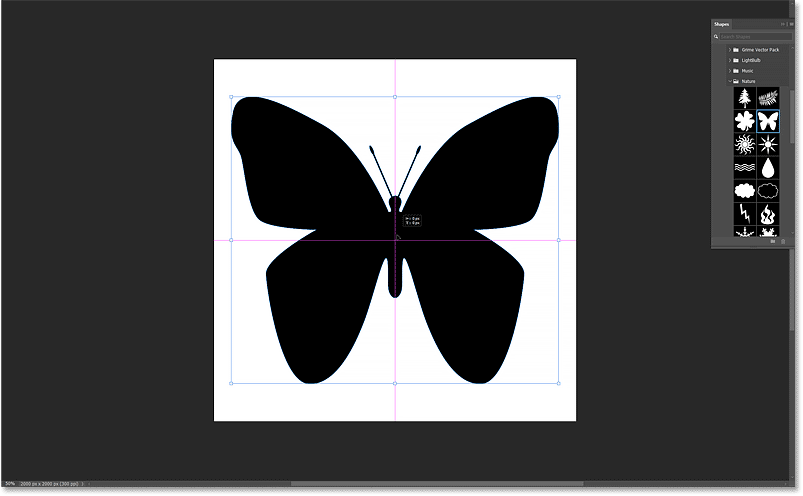
Then click the check mark in the Options Bar to accept.

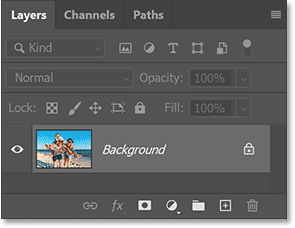
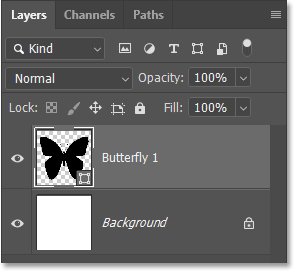
In the Layers panel , the shape appears on its own layer. We know it's a shape layer by the icon in the lower right corner of the thumbnail.
With the shape layer selected, the Properties panel gives access to all of the shape's options, including Fill and Stroke.
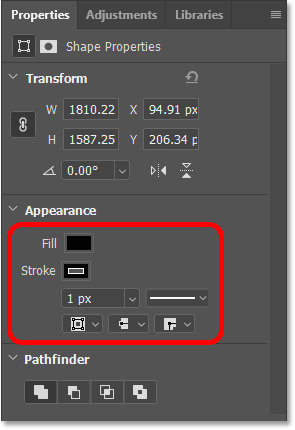
By default, Photoshop uses black for the Fill color, which is okay since we won't see that color anyway after inserting the image into the shape.
But Photoshop also adds a 1 pixel black stroke around the shape.
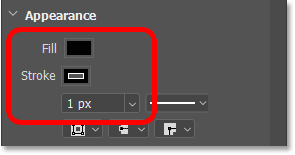
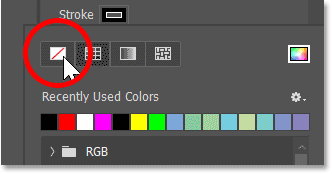
You can add Stroke later if you want. But for now, turn off Stroke by clicking on the Stroke color swatch:
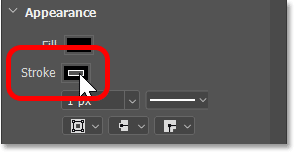
And click the No Color icon in the upper left corner of the panel. Then click outside the panel to close it or press Enter (Win) / Return (Mac) on your keyboard.
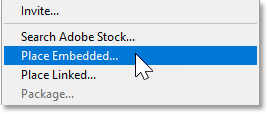
Next, we'll place our image into the document. And since we want the image to appear in the same document as our shape, let's use Photoshop's Place Embedded command.
Go to the File menu and select Place Embedded .
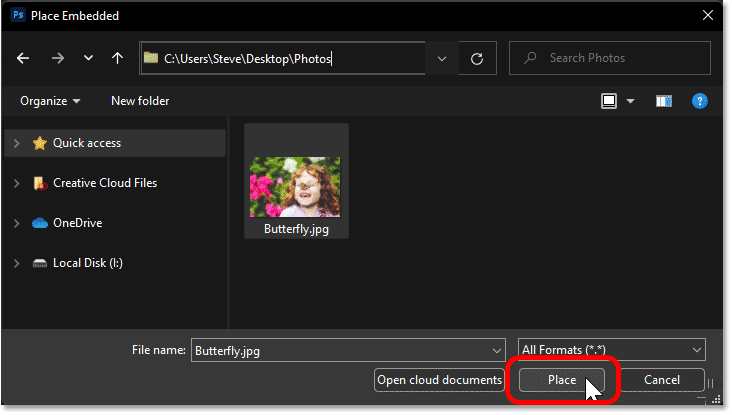
Navigate to where the image is saved on your computer. In our example, the image is in a folder on the desktop. Click the image to select it, then click Place .
Photoshop will add the image in front of the shape. If the image is larger than the document size, Photoshop will resize it to fit. The image used is from Adobe Stock.
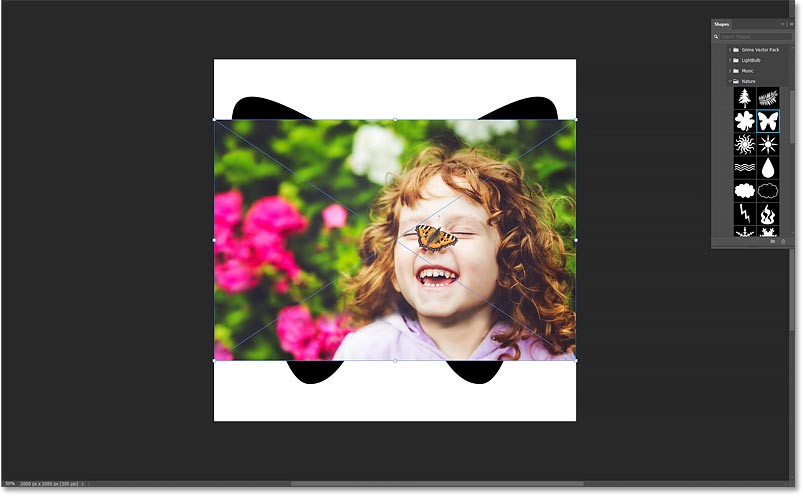
We will resize the image after placing it in the shape. Now click the check mark in the Options Bar to accept.
Back in the Layers panel, the image appears on a new layer above the shape layer. And notice that Photoshop has converted the image into a smart object, which we can tell by the smart object icon in the bottom right corner of the thumbnail. This means that no matter how many times we resize the image, the quality of the image will not be reduced.
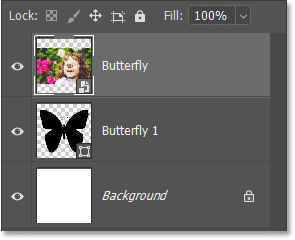
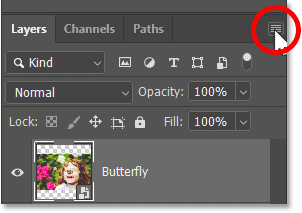
The image is currently in front of the shape. To place the image in the shape, click the Layers panel menu icon.
Then select Create Clipping Mask .
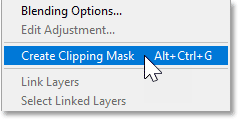
A clipping mask will clip the image to the underlying shape, meaning that the only part of the image that remains visible is the area directly above or in front of the shape. Any part of the image that falls outside the shape is hidden from view, creating the illusion that the image is actually inside the shape.
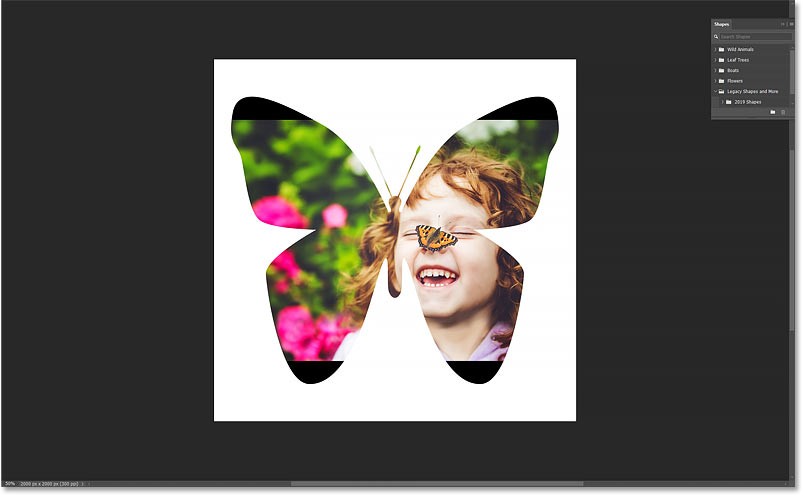
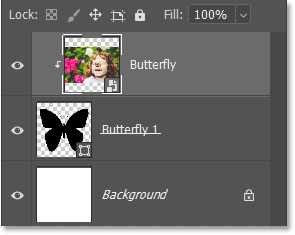
Back in the Layers panel, notice that the image layer is now indented to the right, with a little arrow pointing down to the shape layer below. This is Photoshop's way of telling us that we've created a clipping mask.
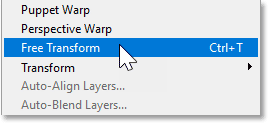
To resize and reposition the image inside the shape, go to the Edit menu and select Free Transform .
In the Options Bar, make sure the link icon is selected between the Width and Height fields.

Then, resize the image by dragging any of the transform handles. You can hold down the Alt (Win) / Option (Mac) key on your keyboard as you drag the handle to resize the image from its center.
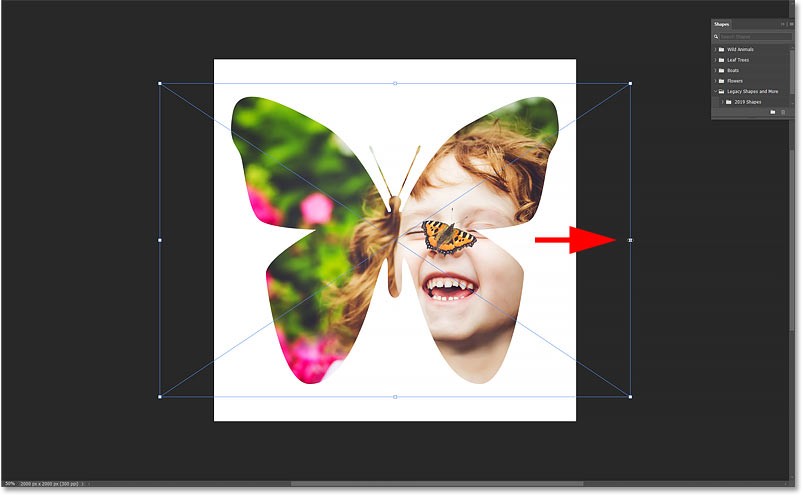
Then, drag the image to position the object within the shape. You may need to switch back and forth between resizing and repositioning the image until you get it right.
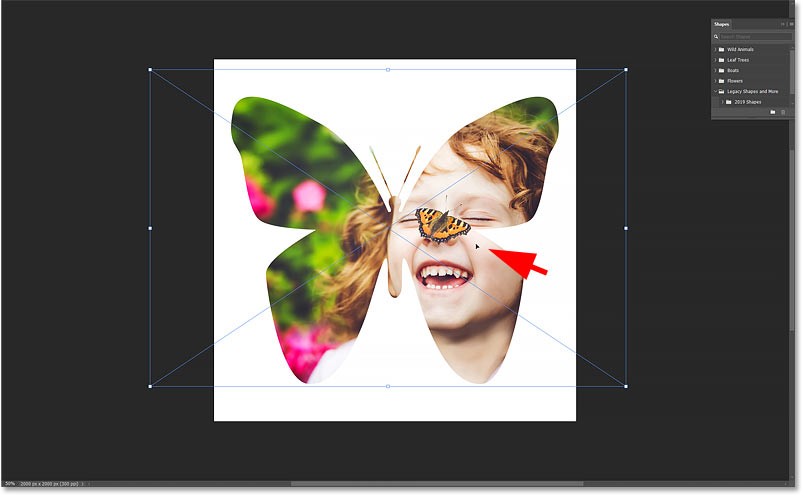
When you're done, click the check mark in the Options Bar.
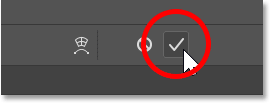
Now that we have placed the image into the shape and the main effect is complete, there are a few things we can do next. We can add a stroke around the shape, change the background color behind the shape, or remove the background completely.
We’ll start by showing you how to change the background color. And the easiest way to do that is to use a Solid Color fill layer.
We want the Solid Color fill layer to appear just above the Background layer. So in the Layers panel, click on the Background layer to select it.

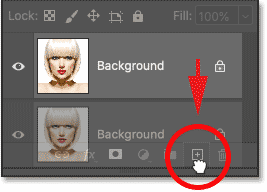
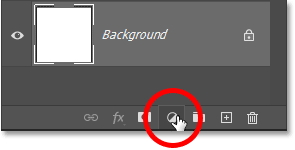
Then, click the New Fill or Adjustment Layer icon at the bottom of the Layers panel :
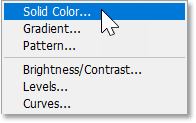
And select Solid Color from the top of the list.
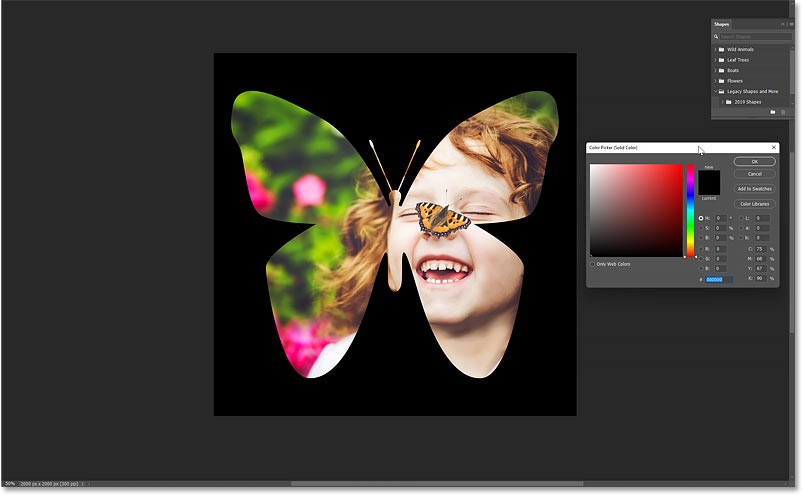
Photoshop opens the Color Picker so we can choose a new color for the background. The default color is black, which definitely brings out the details of the shape. But in this case, as a background color for a butterfly, it's too dark.
You can choose a different color from the Color Picker. But you can also sample a color directly from an image inside a shape. Just hover your mouse over the image and the cursor will change to a dropper. Then click the color you want to sample.
For example it will sample a light skin tone from the girl's forehead and it will instantly become the new background color.
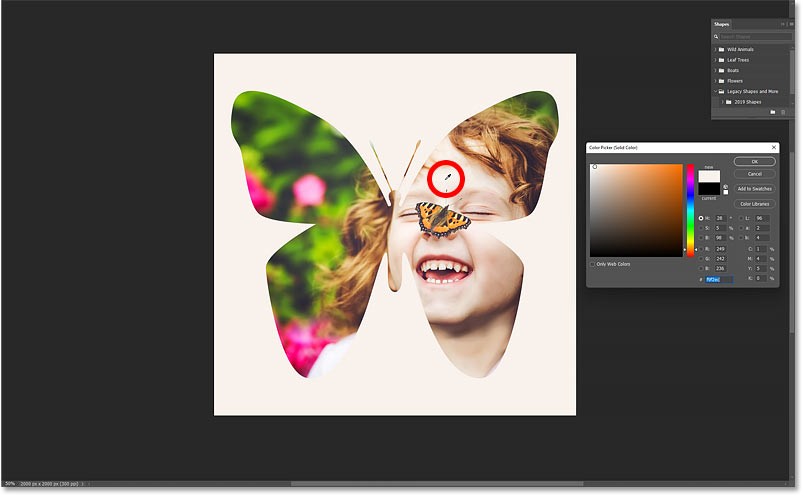
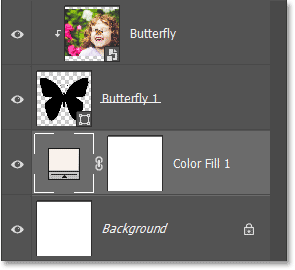
Once you find a color you like, click OK to close the Color Picker. And back in the Layers panel, we see that the Solid Color fill layer has been added between the Background layer and the Shape layer above.
Another way to enhance the effect is to add strokes around the shape.
First, in the Layers panel , click on the shape layer to select it.
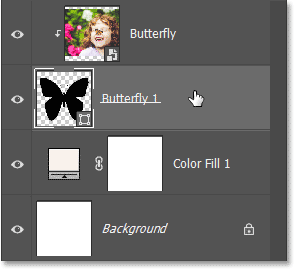
While you can add strokes from the Properties panel , many people still prefer the old-fashioned way of adding them using layer effects. So, with the shape layer selected, click the fx icon at the bottom of the Layers panel :
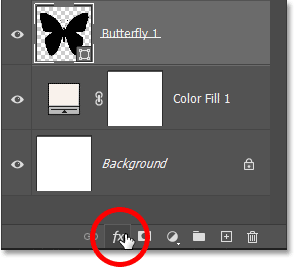
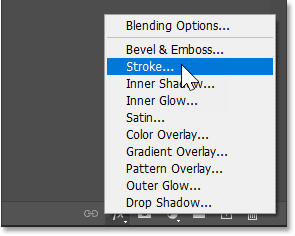
And select Stroke .
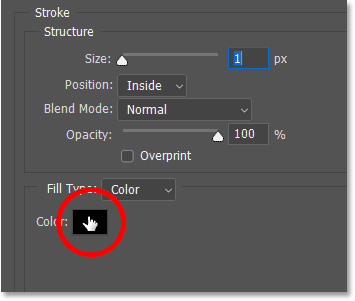
Photoshop opens the Layer Style dialog box with Stroke options in the middle column. To change the color of the stroke, click the color swatch.
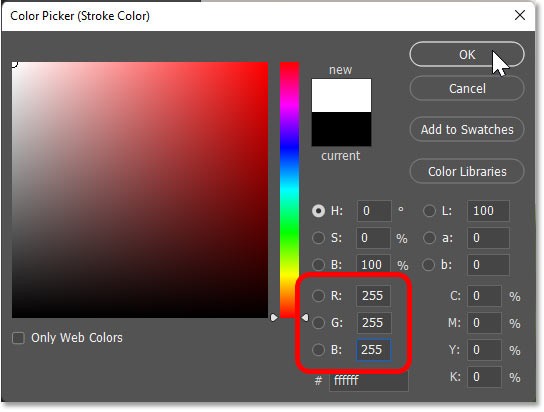
Then, select a new color from the Color Picker. For example, we will select white by setting the R, G, and B values to 255. Click OK when you are done to close the Color Picker.
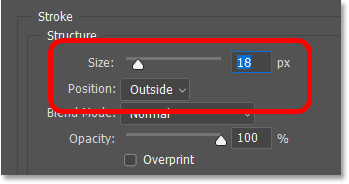
Back in the Layer Style dialog box , set the Position to Outside so that the stroke appears around the outside of the shape. Then, increase the Size value to adjust the thickness of the stroke. For the example image, a size of around 18px is suitable.
Click OK to close the Layer Style dialog box . And here is the result with the stroke around the shape in the example.

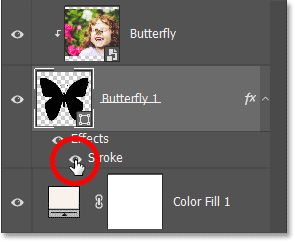
If you decide you don't like the stroke, you can turn it off in the Layers panel by clicking the visibility icon next to the word Stroke .
People spend too much time manually removing backgrounds, and AI isn't always the magic it claims to be.
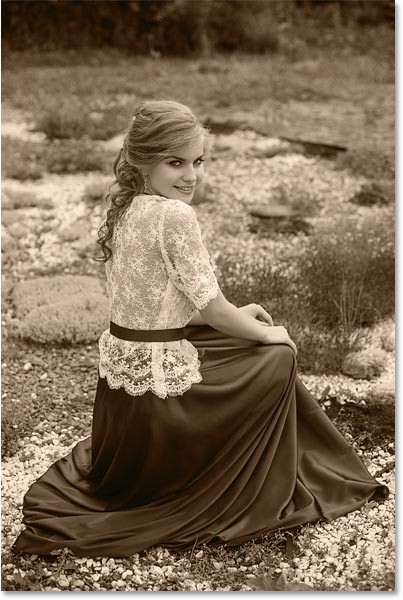
This tutorial will show you how to easily turn a photo into a pencil sketch using Adobe Photoshop.
Many people used to find resizing images very annoying until they learned about Photoshop's simple channel-based protection method.
Add a quick and easy poster effect to your images using Photoshop to recreate the classic look of posters printed with limited ink colors.
There are many AI photo editors that make Photoshop a second choice and AI features are useful tools for editing photos without having to learn complex Photoshop.
Photoshop 2025 packs new AI tools, smarter selections, and features you didn't know you needed until now.
This tutorial will show you a quick and easy way to add a monochrome color effect to an image using Adobe Photoshop.
This tutorial will show you how to add canvas space and drop shadow to your photo in Photoshop to create a simple yet stylish photo border.
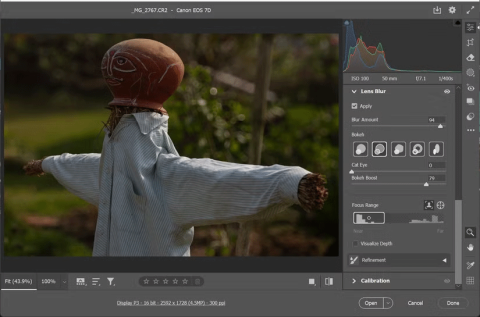
Adobe's Lens Blur tool makes it easy to review your photos, adding depth and focus to your photos.
Hidden away in the app, Photoshop Actions is a beloved feature of the popular photo editing tool, meant to speed up workflows without the need for AI.
Lightroom and Adobe Photoshop are two of the best photo editing tools, but while many professionals use both together, you only need Lightroom if you're an amateur photographer.
This tutorial will show you how to create a cool Picture in Picture effect with Adobe Photoshop by taking a single photo and creating the illusion that a smaller, cropped version of the same photo is inside it.
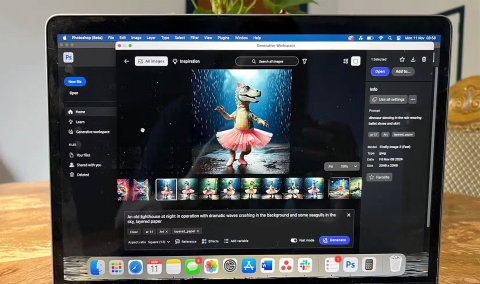
Generative Workspace is one of the top AI features announced at Adobe Max 2024. It will be the new home for your Generative AI images and files.
With Generative Fill, powered by Adobe's Generative AI called Firefly, anyone can add realistic water reflection effects to their photos simply by drawing a selection, typing a few words, and clicking a button.
This tutorial will show you how to copy an image and paste it into a selection in another image using the Paste Into command in Adobe Photoshop.
Struggling with Microsoft Teams "Joining Error" via link? Discover quick, step-by-step troubleshooting fixes for smooth meeting joins. Updated with the latest solutions for desktop, web, and mobile.
Frustrated by Microsoft Teams "MS Team Error" 2026? Discover proven, step-by-step solutions to get back online instantly. Latest 2026 updates included for seamless fixes.
Struggling with Microsoft Teams "Loading Error" infinite loop? Follow our expert, step-by-step guide to fix it quickly. Clear cache, update app, and more for seamless teamwork. Works on Windows, Mac & web.
Struggling with Microsoft Teams "Chat Error" not sending messages? Discover step-by-step fixes for the latest Teams issues, from cache clearing to network tweaks. Get back to chatting seamlessly in minutes!
Tired of Microsoft Teams "Meet" joining error blocking your meetings? Discover proven, step-by-step fixes to resolve Microsoft Teams Meet joining issues quickly and get back to seamless collaboration. Updated with the latest troubleshooting tips.
Struggling with Microsoft Teams "Installation Has Failed" on Windows 11? Follow our step-by-step troubleshooting guide with proven fixes, from clearing cache to advanced repairs, to resolve the error quickly and painlessly. Get Teams running smoothly today!
Tired of Microsoft Teams Breakout Rooms not showing up? Follow our ultimate guide with step-by-step fixes, troubleshooting tips, and prevention strategies to get breakout rooms working seamlessly for productive meetings.
Tired of Microsoft Teams shortcut error blocking your workflow? Learn proven steps to solve Microsoft Teams shortcut error and startup crashes for smooth collaboration. Quick, easy fixes inside!
Struggling with Microsoft Teams "Planner Error" in channels? Discover proven, step-by-step solutions to resolve it quickly and restore seamless collaboration. No tech skills needed!
Discover how to set up Microsoft Teams for school and education effortlessly. Get free access, create classes, assignments, and meetings with our ultimate guide for teachers and students. Boost learning today!
Discover how to use Microsoft Teams Whiteboard in 2026 with this complete guide. Learn access methods, AI-powered features, step-by-step tutorials, and pro tips for seamless collaboration in virtual meetings. Boost productivity today!
Stuck with Microsoft Teams errors? Get step-by-step fixes for crashes, sign-in failures, audio glitches, and more. Proven solutions to resolve general Teams issues fast and frustration-free.
Stuck with Microsoft Teams Wiki not loading error? This ultimate troubleshooting guide delivers quick, step-by-step solutions to fix the issue fast and restore seamless collaboration.
Struggling to locate the Microsoft Teams Installation Folder on your PC? This step-by-step guide reveals exact paths for new and classic Teams, per-user & per-machine installs. Save time troubleshooting!
Struggling with Microsoft Teams Proxy Error? Discover proven Troubleshooting Microsoft Teams "Proxy Error" Settings Fix steps. Clear cache, adjust proxy settings, and get back to seamless calls in minutes with our expert guide.
