What is the best AI photo background remover?

People spend too much time manually removing backgrounds, and AI isn't always the magic it claims to be.
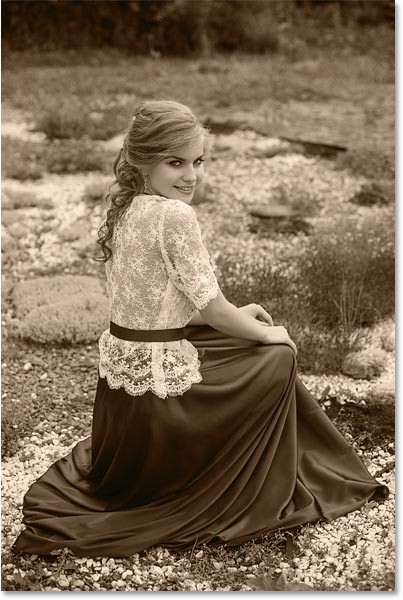
The Oil Paint filter in Photoshop can turn any photo into an oil painting masterpiece. In this tutorial, you will learn how to use it to create an oil painting effect, even if you have no painting skills at all.
You'll even learn how to combine two Oil Paint filters on the same image, with different settings for different areas, for even better results.
Step 1: Convert layer to smart object
Before applying the Oil Paint filter, first convert the layer to a smart object. This will allow you to apply the Oil Paint as a smart filter, allowing you to edit the filter settings in case you want to go back and make changes.
This is especially useful if you need to apply two copies of the Oil Paint filter to the same image, as follows.
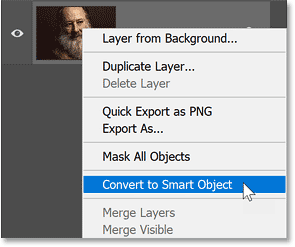
In the Layers panel , right-click on the empty gray part of the layer.
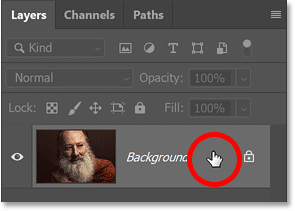
Then select Convert to Smart Object from the menu.
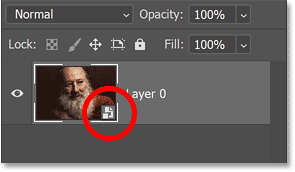
A smart object icon appears in the layer thumbnail, indicating that the layer is now a smart object.
Step 2: Select the Oil Paint filter
Next, go to the Filter menu in the menu bar, select Stylize and then select Oil Paint .
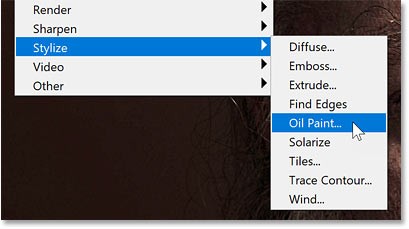
This will open the Oil Paint filter dialog box.

Step 3: Make sure Preview is enabled
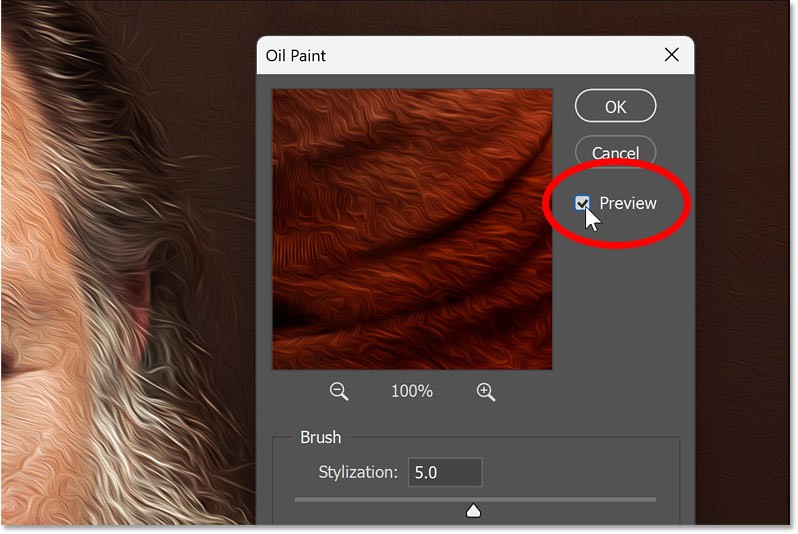
Make sure the Preview option in the dialog box is enabled. This will give you a live preview of the oil painting effect as you adjust the sliders.
Step 4: Center a portion of the image in the Preview window
Then, click on a part of the image to center inside the Preview window. For example, I'll click on the man's eye.

You can then examine that portion of the image in the Preview window at 100% zoom, while still zooming out far enough from the document to see what the oil painting effect looks like across the entire image.
And you can click and drag inside the Preview window to scroll the image around and examine different areas.
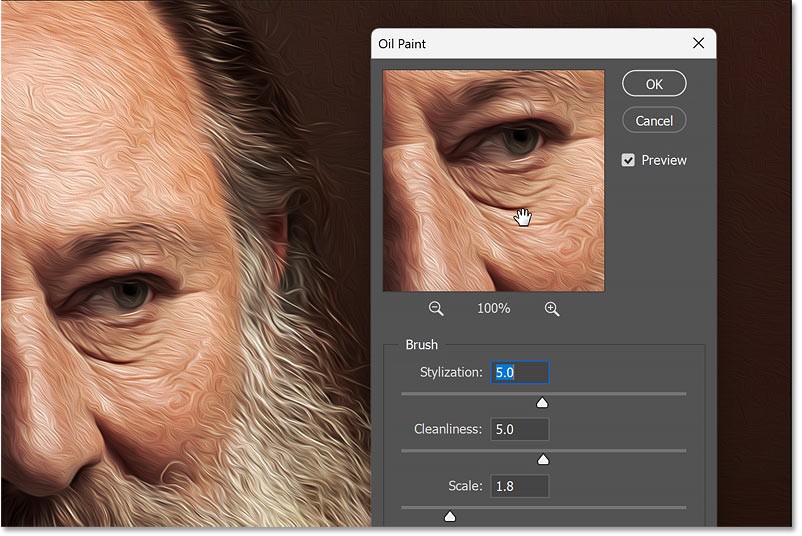
Step 5: Drag the Brush slider to create an oil painting effect
The Oil Paint filter is very easy to use. The first 4 sliders from the top control different aspects of the brush. And the options at the bottom let you adjust the lighting.
We'll start with the brush options to create the main effect, then look at how the lighting options can change the intensity of the effect.
But one thing to note is that all of these sliders work together. So the result you get when you drag one slider will depend on the settings for the other sliders.
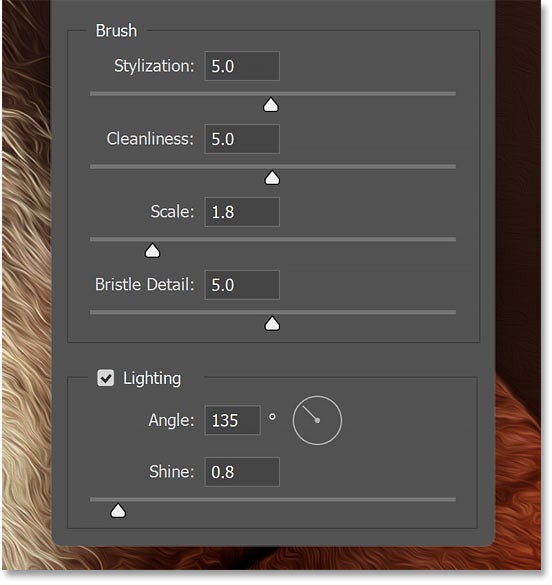
Stylization
The Stylization slider at the top controls the length of the brush strokes. Drag to the left for shorter, more detailed brush strokes.

Or right for longer, smoother brush strokes.
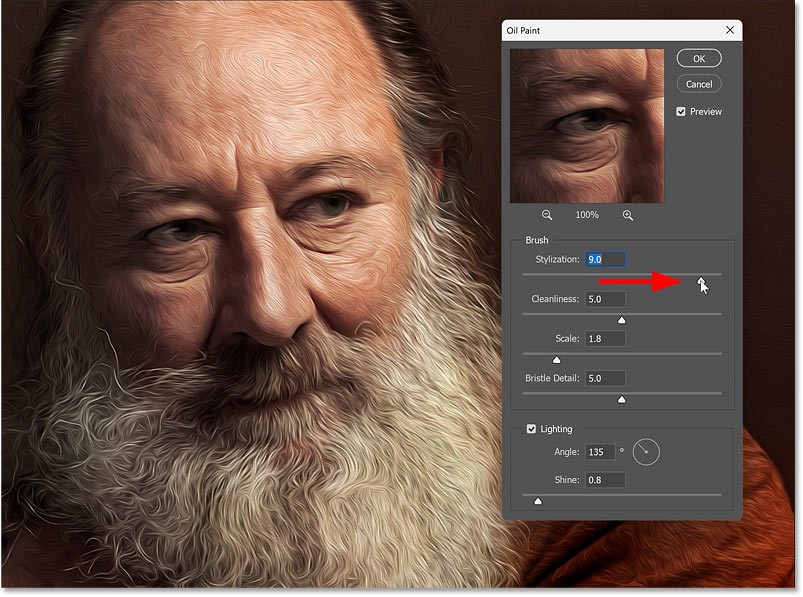
Cleanliness
The Cleanliness slider controls the smoothness of the brush strokes. Dragging the slider to the left makes the painting look more textured and detailed.
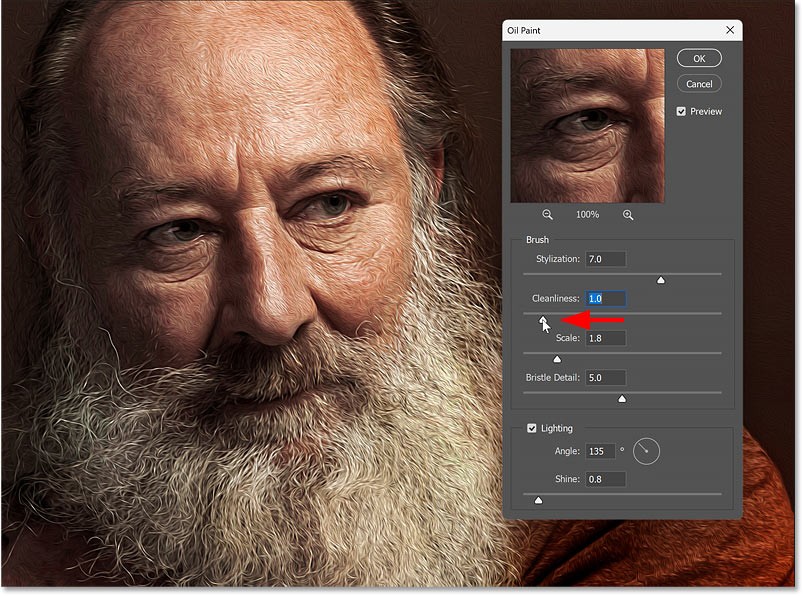
And drag to the right to make the picture look smoother and cleaner.
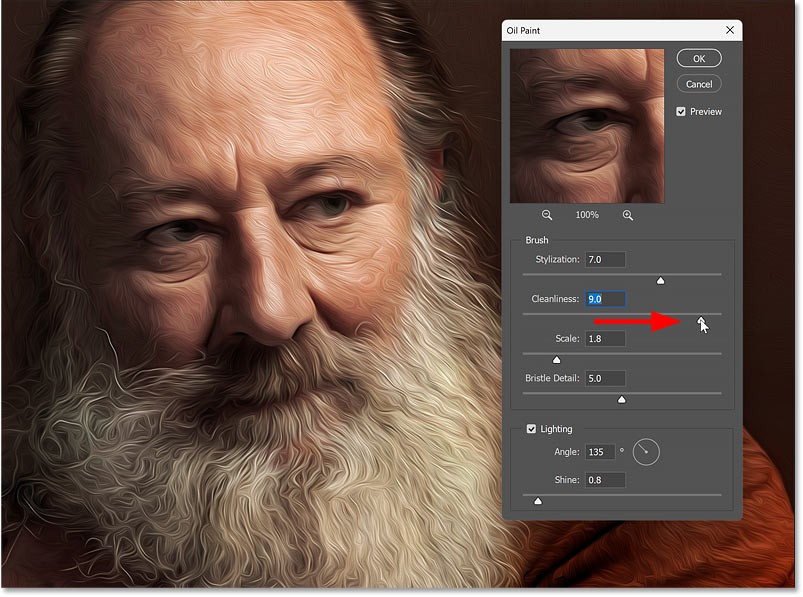
Different slider combinations produce different results
All of these sliders work together to create the overall oil painting effect. And that's especially true of these first two sliders.
Drag both the Stylization slider and the Cleanliness slider all the way to their maximum values. This gives the painting the longest, smoothest lines possible.
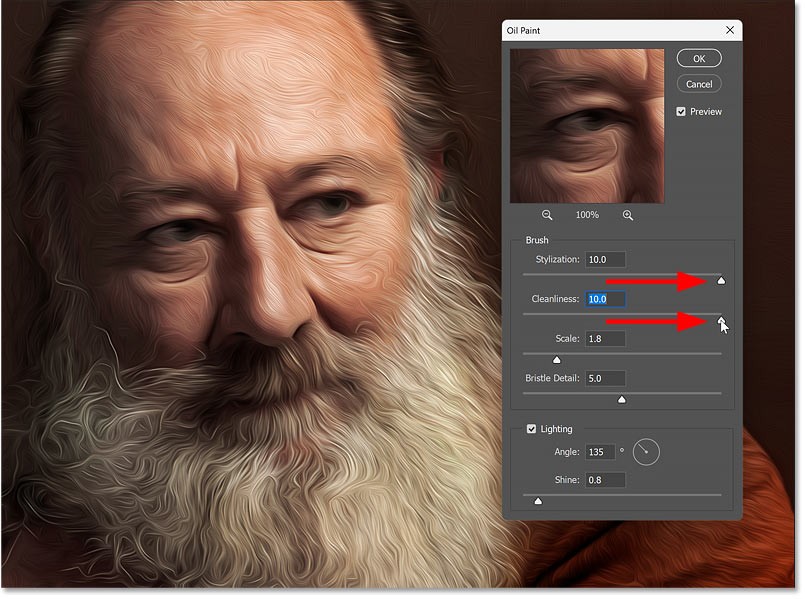
But if you reduce Cleanliness, notice how the brush strokes tend to look shorter even though the Stylization slider (which controls the length of the strokes) is still at its maximum value.
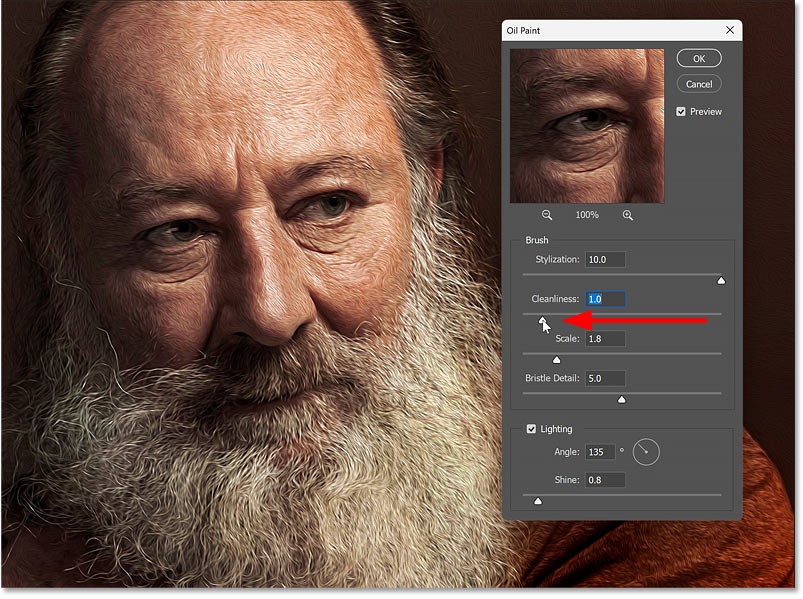
If you pull Cleanliness back to the right but reduce Stylization, the picture looks very detailed and textured even with Cleanliness at its highest setting.
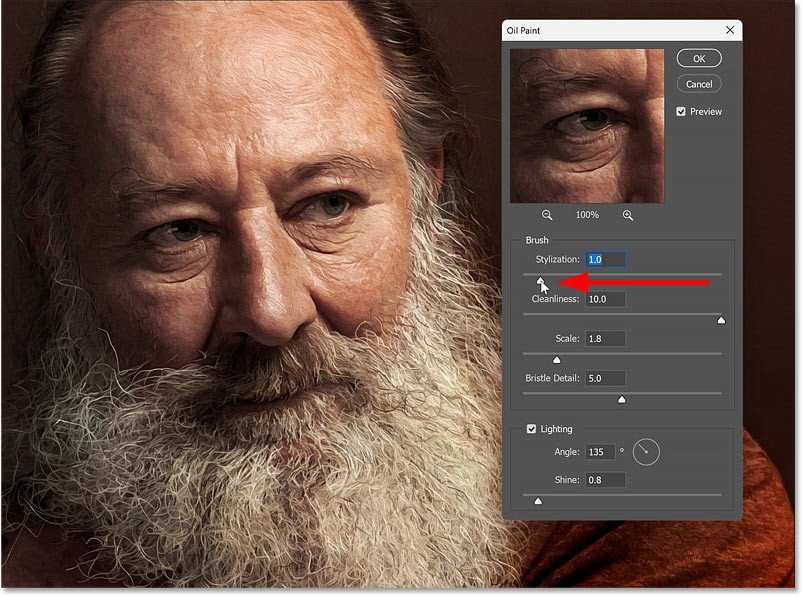
And if you then reduce the Cleanliness value, the textures and details will be highlighted even more.
So you will definitely need to experiment with the sliders to get the desired look.

Some areas of the picture look better than others.
Before moving on to the next slider, let's quickly review a problem you often encounter when trying to find the best Oil Paint filter settings for your image.
For example, set Stylization to 7 and Cleanliness to 8 for a smooth, wispy effect, especially in the man's hair and beard.
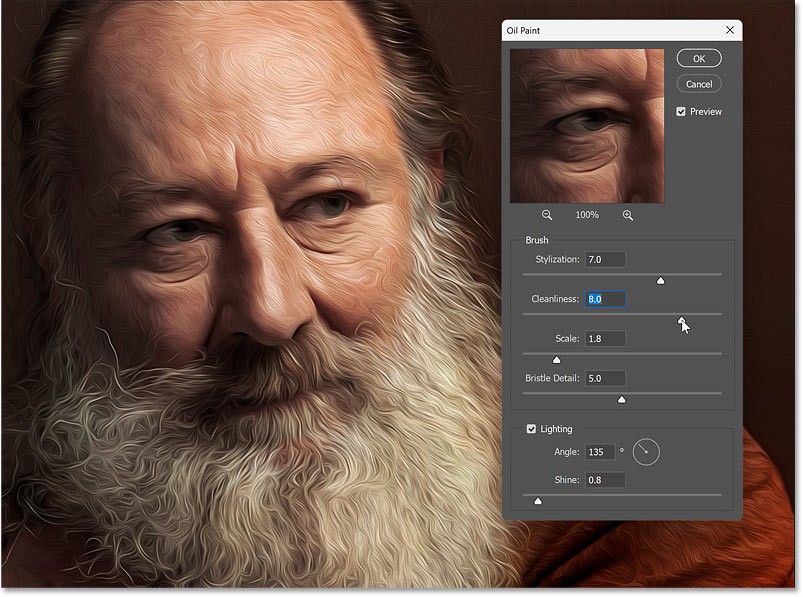
But those settings affect the subject's eyes, they are too blurry and distorted.
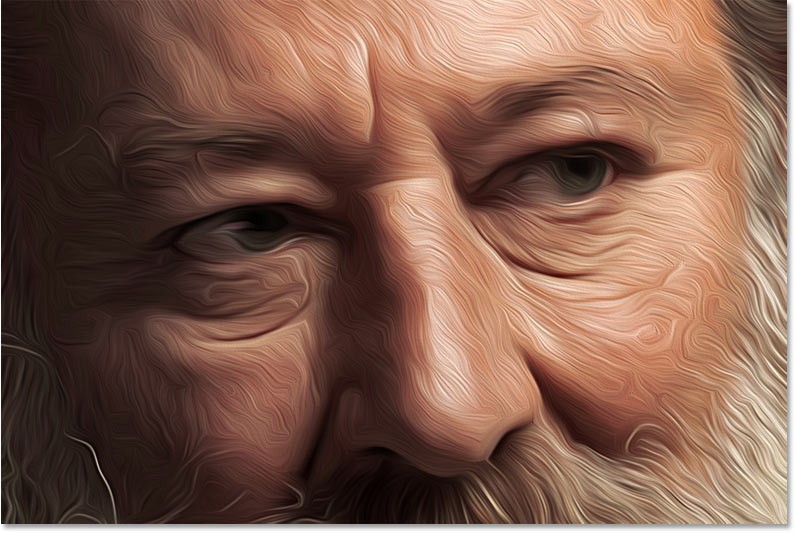
For now, the example will ignore the problem with the eyes and just focus on finding the best settings for the entire image.
Once you have the main effect, you can apply a second Oil Paint filter with different settings, then combine the two filters together using a layer mask.
Scale
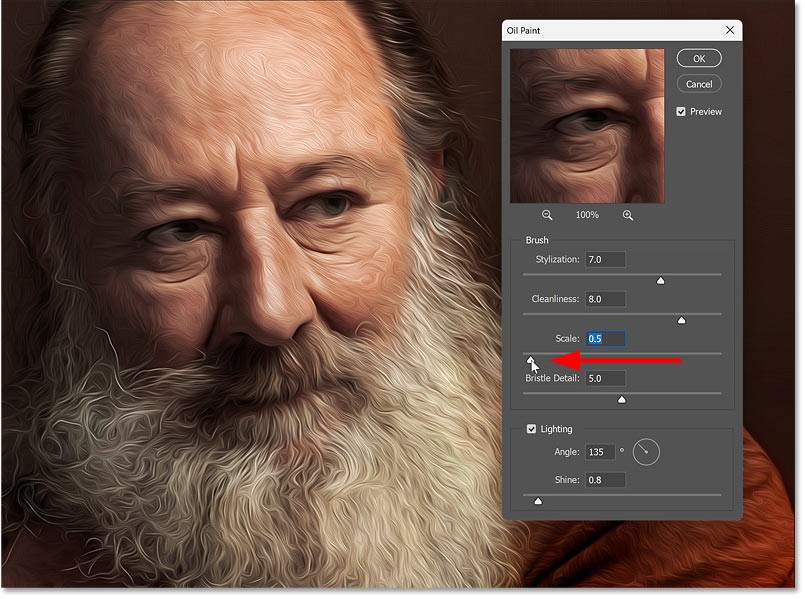
The Scale slider controls the thickness of the brush stroke. Larger values will give you a wider brush stroke.
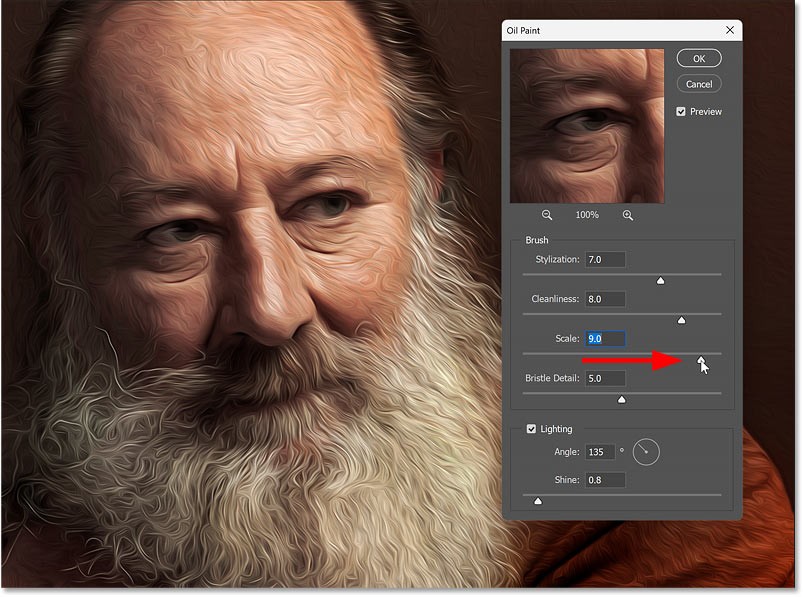
And smaller values will give you a thinner brush stroke.
Larger Scale values tend to work better with high resolution images. But all of these sliders will give you different results depending on the size of your image. So if you’re working with a smaller image, you’ll need to dial back the settings to get the same effect.
Bristle Detail
The final slider is Bristle Detail, which sharpens or softens brush strokes.
Lower values will give you a softer image and higher values will bring out more detail. But the effect is quite subtle even at higher settings.

Step 6: Adjust the light
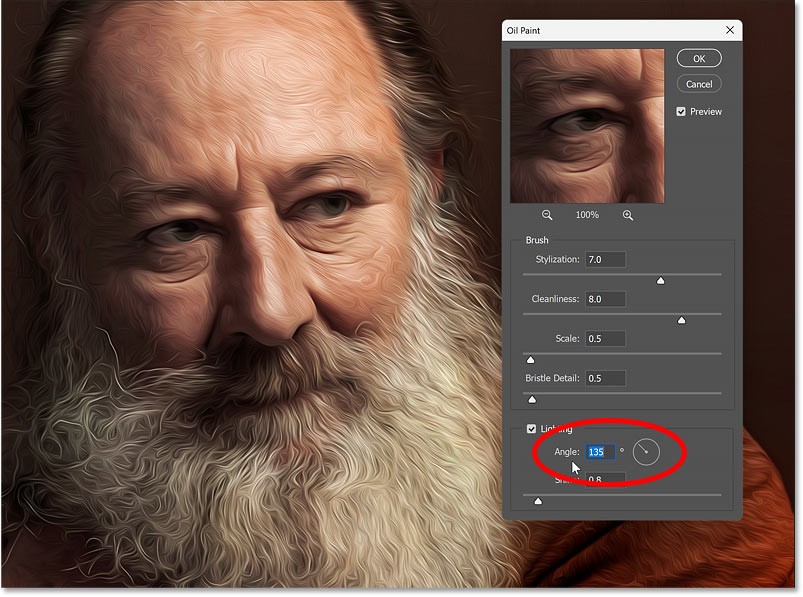
Once you've used the brush sliders to create the main oil painting effect, use the Lighting options to control the direction and intensity of the imaginary light source shining on the painting.
Angle
The Angle option sets the direction of the light source. Some angles will highlight details in the brush strokes more than others.
You can adjust the angle by dragging the rotation knob or by using the scrubby slider (click and drag over the word Angle).
Shine
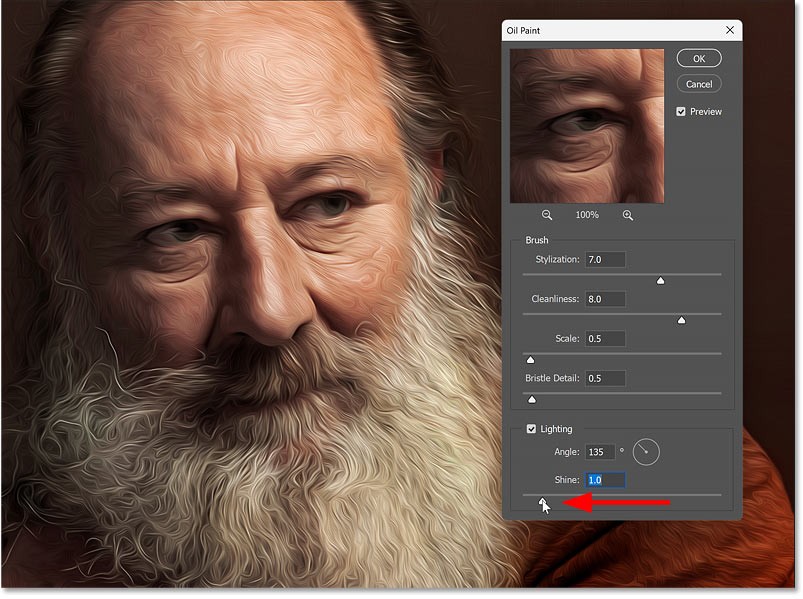
Shine controls the intensity of the light. Higher values can make the painting look like it belongs in an art gallery.
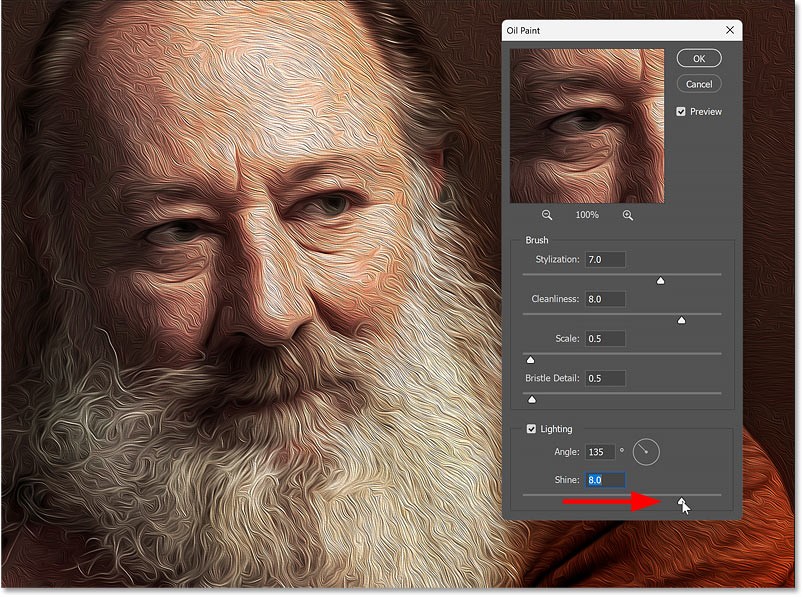
But lower values are more subtle and tend to look better.
Turn off the light
You can uncheck the Lighting option to turn off the light source, which usually looks great. But I'll leave it on in the tutorial to make the brush strokes easier to see.

Hide/show preview
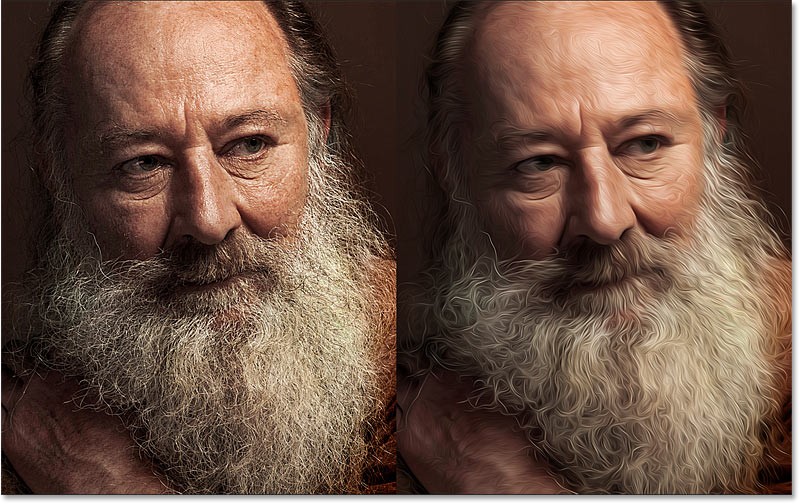
To compare the effect of the Oil Paint filter with the original image, simply toggle the Preview option on and off using the checkbox. You can also toggle this option on by pressing the letter P on your keyboard.
On the left is the original image (cropped around the most detailed area). And on the right is the Oil Paint effect turned on. Aside from the eyes looking a bit too smudged, the overall effect is pretty good.
People spend too much time manually removing backgrounds, and AI isn't always the magic it claims to be.
This tutorial will show you how to easily turn a photo into a pencil sketch using Adobe Photoshop.
Many people used to find resizing images very annoying until they learned about Photoshop's simple channel-based protection method.
Add a quick and easy poster effect to your images using Photoshop to recreate the classic look of posters printed with limited ink colors.
There are many AI photo editors that make Photoshop a second choice and AI features are useful tools for editing photos without having to learn complex Photoshop.
Photoshop 2025 packs new AI tools, smarter selections, and features you didn't know you needed until now.
This tutorial will show you a quick and easy way to add a monochrome color effect to an image using Adobe Photoshop.
This tutorial will show you how to add canvas space and drop shadow to your photo in Photoshop to create a simple yet stylish photo border.
Adobe's Lens Blur tool makes it easy to review your photos, adding depth and focus to your photos.
Hidden away in the app, Photoshop Actions is a beloved feature of the popular photo editing tool, meant to speed up workflows without the need for AI.
Lightroom and Adobe Photoshop are two of the best photo editing tools, but while many professionals use both together, you only need Lightroom if you're an amateur photographer.
This tutorial will show you how to create a cool Picture in Picture effect with Adobe Photoshop by taking a single photo and creating the illusion that a smaller, cropped version of the same photo is inside it.
Generative Workspace is one of the top AI features announced at Adobe Max 2024. It will be the new home for your Generative AI images and files.
With Generative Fill, powered by Adobe's Generative AI called Firefly, anyone can add realistic water reflection effects to their photos simply by drawing a selection, typing a few words, and clicking a button.
This tutorial will show you how to copy an image and paste it into a selection in another image using the Paste Into command in Adobe Photoshop.
Struggling with Microsoft Teams "Joining Error" via link? Discover quick, step-by-step troubleshooting fixes for smooth meeting joins. Updated with the latest solutions for desktop, web, and mobile.
Frustrated by Microsoft Teams "MS Team Error" 2026? Discover proven, step-by-step solutions to get back online instantly. Latest 2026 updates included for seamless fixes.
Struggling with Microsoft Teams "Loading Error" infinite loop? Follow our expert, step-by-step guide to fix it quickly. Clear cache, update app, and more for seamless teamwork. Works on Windows, Mac & web.
Struggling with Microsoft Teams "Chat Error" not sending messages? Discover step-by-step fixes for the latest Teams issues, from cache clearing to network tweaks. Get back to chatting seamlessly in minutes!
Tired of Microsoft Teams "Meet" joining error blocking your meetings? Discover proven, step-by-step fixes to resolve Microsoft Teams Meet joining issues quickly and get back to seamless collaboration. Updated with the latest troubleshooting tips.
Struggling with Microsoft Teams "Installation Has Failed" on Windows 11? Follow our step-by-step troubleshooting guide with proven fixes, from clearing cache to advanced repairs, to resolve the error quickly and painlessly. Get Teams running smoothly today!
Tired of Microsoft Teams Breakout Rooms not showing up? Follow our ultimate guide with step-by-step fixes, troubleshooting tips, and prevention strategies to get breakout rooms working seamlessly for productive meetings.
Tired of Microsoft Teams shortcut error blocking your workflow? Learn proven steps to solve Microsoft Teams shortcut error and startup crashes for smooth collaboration. Quick, easy fixes inside!
Struggling with Microsoft Teams "Planner Error" in channels? Discover proven, step-by-step solutions to resolve it quickly and restore seamless collaboration. No tech skills needed!
Discover how to set up Microsoft Teams for school and education effortlessly. Get free access, create classes, assignments, and meetings with our ultimate guide for teachers and students. Boost learning today!
Discover how to use Microsoft Teams Whiteboard in 2026 with this complete guide. Learn access methods, AI-powered features, step-by-step tutorials, and pro tips for seamless collaboration in virtual meetings. Boost productivity today!
Stuck with Microsoft Teams errors? Get step-by-step fixes for crashes, sign-in failures, audio glitches, and more. Proven solutions to resolve general Teams issues fast and frustration-free.
Stuck with Microsoft Teams Wiki not loading error? This ultimate troubleshooting guide delivers quick, step-by-step solutions to fix the issue fast and restore seamless collaboration.
Struggling to locate the Microsoft Teams Installation Folder on your PC? This step-by-step guide reveals exact paths for new and classic Teams, per-user & per-machine installs. Save time troubleshooting!
Struggling with Microsoft Teams Proxy Error? Discover proven Troubleshooting Microsoft Teams "Proxy Error" Settings Fix steps. Clear cache, adjust proxy settings, and get back to seamless calls in minutes with our expert guide.
