Converting clip art, hand-drawn images and images into vector graphics only requires one feature in Adobe Illustrator, which is Image Trace. While it works perfectly with simple drawings and handwriting, this feature gives you more challenges when used with photos.
Download Adobe Illustrator CC 2017 Download Adobe Illustrator CS6 Download Adobe Illustrator CS6 for Mac
Image files are created in programs like Photoshop and camera photos are made up of small dots (called pixels). When you change an image based on pixels, it will lose quality and may even be blurred. On the other hand, vector graphics are a variable image that you can shrink or zoom without losing image quality. The following article will show you how to turn photos and hand-drawn images into vectors in Adobe Illustrator.
Image Trace feature
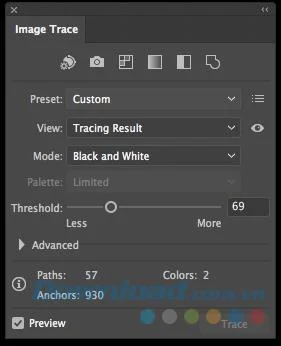
To access this feature, go to Windows> Image Trace to open the control panel. Before adjusting any settings, make sure that the Preview option is selected. This allows you to test multiple settings before selecting and applying to your image.
There are 11 presets from high to low honest images to 3-, 6- or 16- color vectors, to black, white and gray vectors. You can also convert your photos into sketch art, graphics, line textures, or technical drawings.
You can also manually adjust the number of colors and choose between 3 modes: color, black and white, and gray, so you can find the perfect settings for your particular photo.

The power of the Image Trace feature is truly fully realized when you use it on PNG files, simple pictures with white backgrounds or simple clip art.
Once you have the desired settings, click Expand in the menu located at the top of the screen. This will convert each part of the image into separate editable paths. Right-click on the image and choose Ungroup if you want to edit or change the color of the individual sections.
Image Trace is used in Clip Art
To use Image Trace on Clip Art, it's best to use a PNG file with no background or a JPG file with a white background. If the image has a white background, you can delete it after you finish using the Image Trace feature , just use the Direct Selection Tool (or shortcut A ) and select the white background, then remove it. (If you have Photoshop, you can also use the Magic Erase tool to erase the white background. Access this tool with the keyboard shortcut E ).
![Turn photos and hand-drawn images into vectors with Adobe Illustrator Turn photos and hand-drawn images into vectors with Adobe Illustrator]()
Hand-drawn doodles or letters
The Image Trace feature is applied more beautifully with symbolic hand drawings or letter letters. Scan your doodle and put it on your computer, then perform the following steps:
1. The first thing you will want is to darken the black and lighten the white in the image. You can do this in Photoshop using the Levels feature , or you can also take a picture with your phone and edit it with an application like Scanner Pro.
2. Open the image in Illustrator and return to the Image Trace feature , then select the Black and White setting . You can adjust the Threshold threshold if you choose, the higher the Threshold threshold is, the thicker the line is.
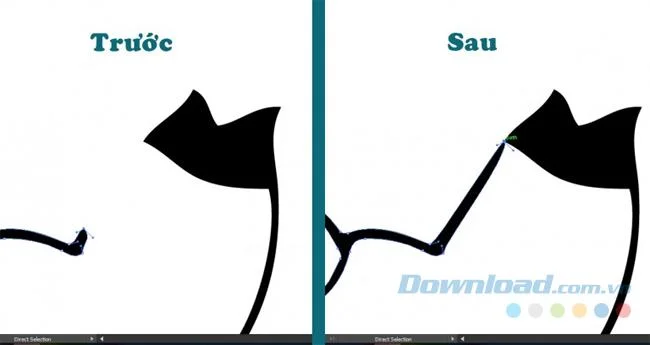
3. Next, edit the outline of your hand drawing with the Pencil tool . If you have a Wacom tablet or an iPad Pro with Astro Pad, this process is a lot easier, but the same result works with a mouse. You just need a little more clever.
4. Click the anchor point on the path you want to make it smoother and drag the line to the position you want. The pencil tool smooths out any imperfections or shaky lines that appear in your drawings.
As such, you can convert your images or drawings to vector graphics for easy editing using Adobe Illustrator software. Hope you get the beautiful photos you want.

