How to customize the submenu bar on Nox App Player

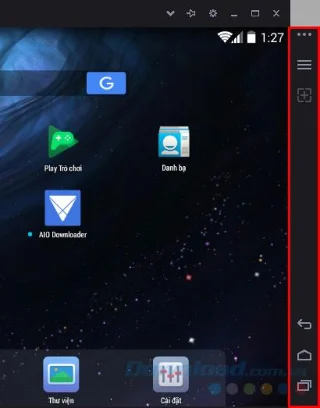
The Nox App Player (NAP) sub menu is designed to customize according to users' habits, preferences and needs. With just a few simple steps, we can easily change the sub menu of Nox App Player on the computer. And if you don't know, this submenu is the solution that displays the options on the right of NAP.

Download Nox App Player for Mac

By default, after installing Nox App Player on the computer, the right hand side of this simulator will appear a small range of options, which are quick actions that users can choose to use. .

Change options in the Nox App Player menu

This change can make the emulator in a cleaner, more scientific way or simply users want to turn off the features that they do not use or rarely use on this simulator.

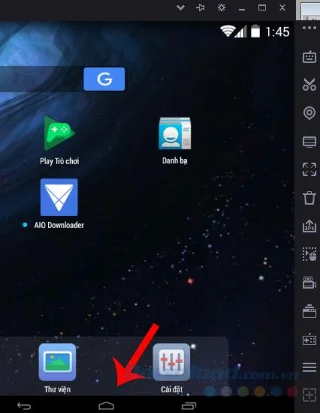
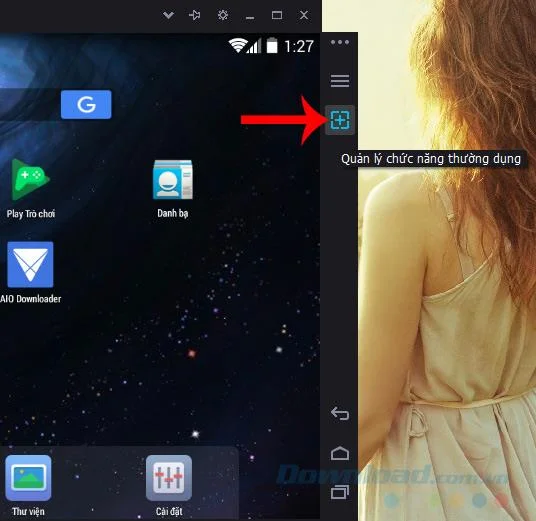
Step 1 : From the main interface of the Nox App Player emulator, you can observe the emulator's sub menu with several options displayed.
How to customize the submenu bar on Nox App Player

Step 2: Left-click on the icon Management function often (square with plus sign).

How to customize the submenu bar on Nox App Player

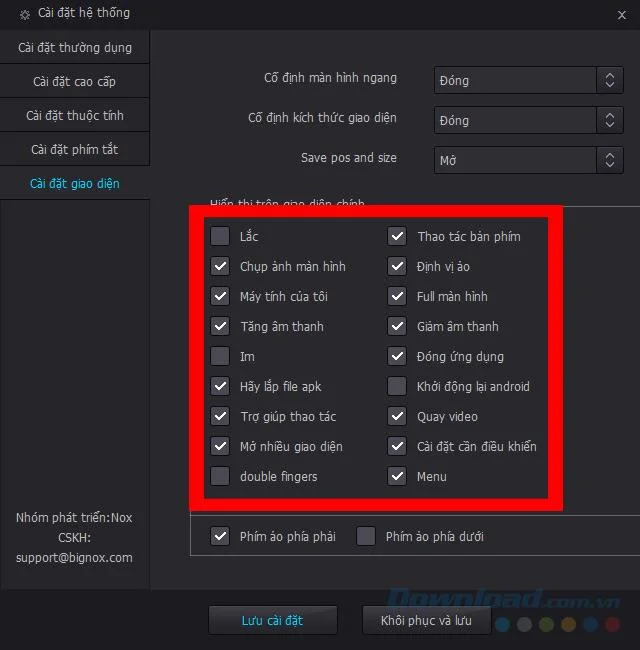
Step 3: This is a list of options that can be changed to show or hide on this menu bar.

How to customize the submenu bar on Nox App Player
Check or uncheck to select whether or not to use an option

Step 4: Tick ​​the options you need to use and then select the Save settings to confirm.

How to customize the submenu bar on Nox App Player

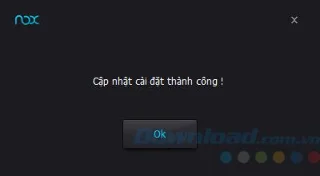
At this time, a small notification window will appear, indicating that the setup process has been successful. Click on OK to close this window.

How to customize the submenu bar on Nox App Player

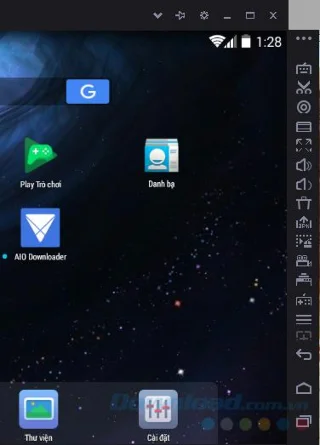
And here is the change we just made, a custom bar with quite a few basic options.

How to customize the submenu bar on Nox App Player

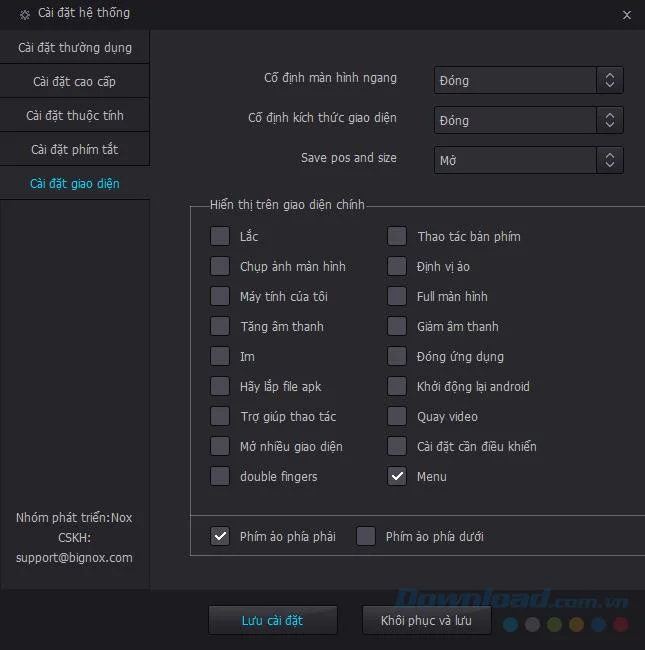
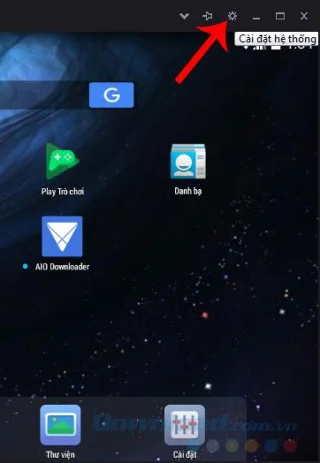
Also, in some cases, when the options appear too much, it will obscure the Manage function icon. Now you can use another way, that is left-click on the System Settings icon (gear shape) to enter the settings.

How to customize the submenu bar on Nox App Player

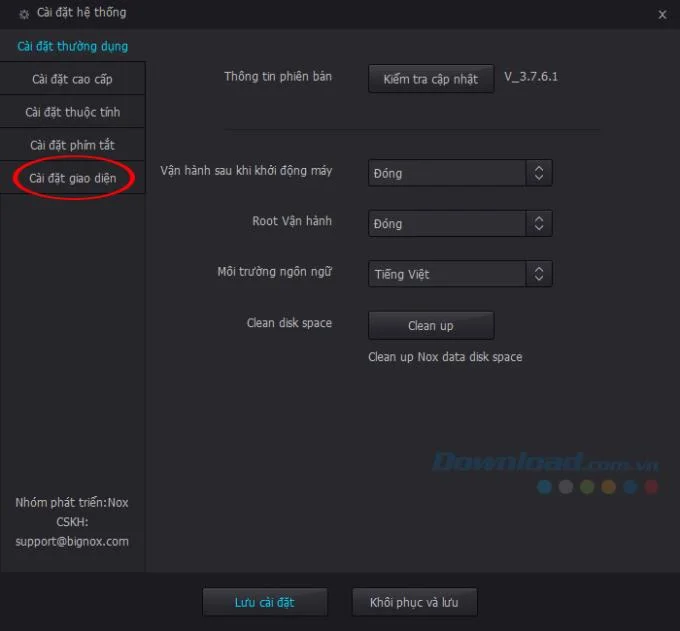
Select the Interface settings tab .

How to customize the submenu bar on Nox App Player

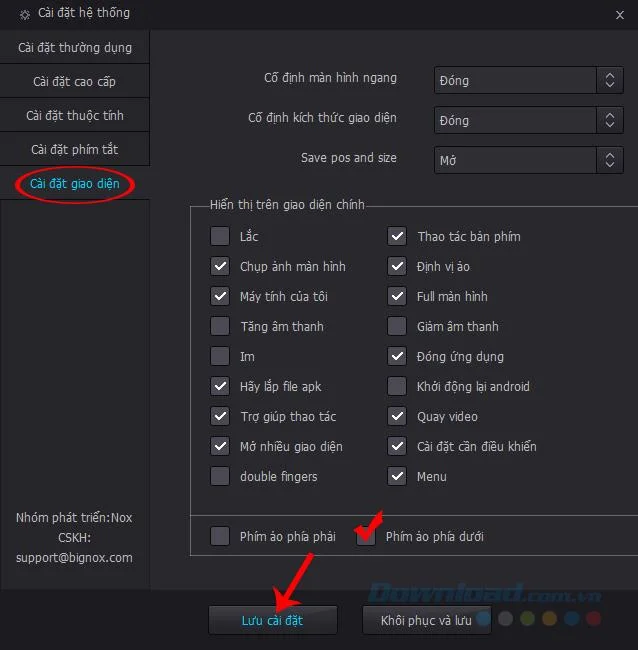
Select Next Install interface and tick the items as above and save. However, if you notice, the last three icons in the menu bar are the extra keys that help users return to the previous operation or return to the main screen.

How to customize the submenu bar on Nox App Player
Change extra keys to another location

If you do not want them to the right because it will cause confusion and cover other icons, you can do the following:

  • Put a checkmark in the Virtual Keys section on the right .
  • Tick ​​the Virtual Keys section below to change the position of these symbols.

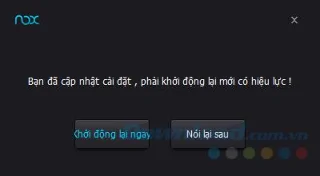
However, unlike the above options, to change the location of these three extra keys users need to restart the emulator.

How to customize the submenu bar on Nox App Player

After reopening, we can observe these changes.

How to customize the submenu bar on Nox App Player

Although not really appreciated as BlueStacks or Droid4X , Nox App Player is also in the top 10 best and most popular Android emulators today.

I wish you successful implementation!
Leave a Comment

How to Use Windows 11 Quick Assist for Help

How to Use Windows 11 Quick Assist for Help

Discover how to use Windows 11 Quick Assist for seamless remote support. Learn step-by-step setup, troubleshooting, and tips to help friends or family with tech issues instantly.

Troubleshooting Windows 11 Dual Monitor Lag Fixes

Troubleshooting Windows 11 Dual Monitor Lag Fixes

Struggling with dual monitor lag on Windows 11? Discover proven troubleshooting fixes to eliminate stuttering, delays, and performance issues for seamless multi-monitor setups. Step-by-step guide inside.

How to Fix Windows 11 Startup Settings Blank Error

How to Fix Windows 11 Startup Settings Blank Error

Struggling with the frustrating Windows 11 "Startup Settings" blank error? Discover proven, step-by-step fixes to restore your boot options quickly and get your PC running smoothly again. No tech expertise needed!

How to Activate Windows 11 Enterprise with KMS

How to Activate Windows 11 Enterprise with KMS

Discover how to activate Windows 11 Enterprise using KMS effortlessly. This comprehensive guide covers everything from requirements to troubleshooting, ensuring seamless activation for your business needs.

How to Fix Windows 11 Kmode Exception Not Handled

How to Fix Windows 11 Kmode Exception Not Handled

Struggling with the dreaded KMODE EXCEPTION NOT HANDLED error on Windows 11? Discover proven, step-by-step fixes to resolve this blue screen nightmare quickly and get your PC running smoothly again. No tech expertise needed!

Troubleshooting Windows 11 Motherboard Driver Error Fix

Troubleshooting Windows 11 Motherboard Driver Error Fix

Struggling with Windows 11 "Motherboard" Driver Error? Discover proven troubleshooting steps to fix it fast and get your PC running smoothly again. Easy, step-by-step guide for beginners.

How to Fix Windows 11 Ping Spikes Over Wi-Fi Fixes

How to Fix Windows 11 Ping Spikes Over Wi-Fi Fixes

Struggling with ping spikes on Windows 11 over Wi-Fi? Discover proven fixes to stabilize your connection, reduce lag, and enjoy smooth gaming or streaming. Step-by-step solutions for instant results.

How to Recover Deleted Photos in Windows 11

How to Recover Deleted Photos in Windows 11

Accidentally deleted precious photos? Discover proven methods to recover deleted photos in Windows 11 effortlessly. Step-by-step guides, tools, and tips to restore your images safely.

How to Use Windows 11 Terminal Instead of CMD

How to Use Windows 11 Terminal Instead of CMD

Discover how to use Windows 11 Terminal instead of CMD for a modern, efficient command-line interface. Learn installation, setup, and tips to boost your productivity with tabs, themes, and more.

How to Activate Windows 11 Pro Without a Product Key

How to Activate Windows 11 Pro Without a Product Key

Discover safe, legitimate ways to activate Windows 11 Pro without a product key. Learn step-by-step methods using built-in tools and official Microsoft options to get your OS up and running smoothly. No risks, no hassle – just pure productivity.