The mouse and keyboard are two indispensable accessories during computer use. However, one day the mouse was broken and you could not buy it, but there was too much work to solve immediately. What should I do?
Don't worry yet! Download.com.vn will guide you to enable the Mouse Keys feature, to use the keyboard to replace the mouse on Windows 10 extremely convenient:
Instructions for activating Mouse Keys on Windows 10
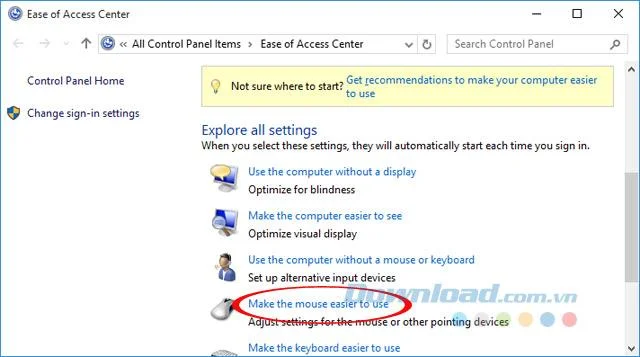
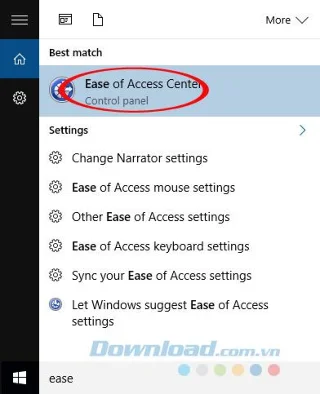
Step 1: Enter the keyword "Ease" in the search box, then click Ease of Access Center.
Step 2: The Ease of Access Center dialog box appears, click the Make the mouse easier to use option.

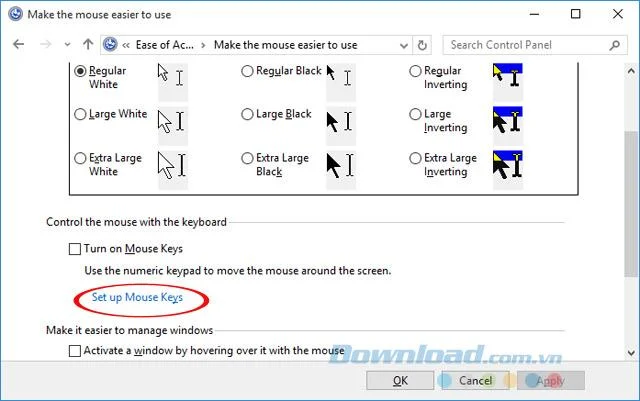
Step 3: Here, if you want to use the mouse settings by default, just check the Turn on Mouse Keys box . If you want to customize as you like, click the option Set up Mouse Keys.

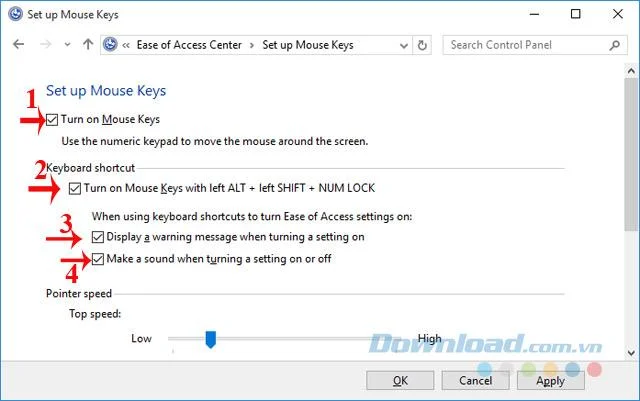
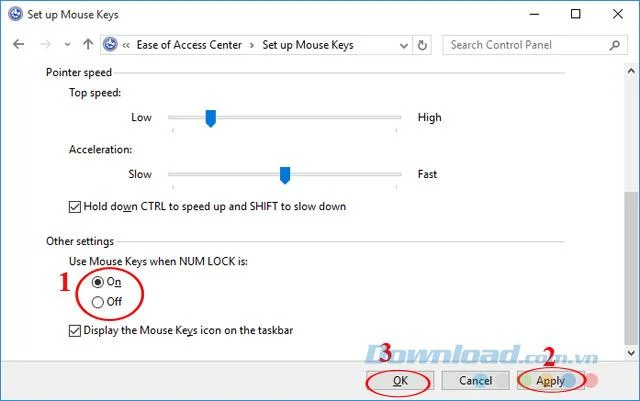
Step 4: Set up Mouse Keys interface appears, tick Turn on Mouse Keys . If you want to quickly activate the Mouse Keys feature, select the following 3 options:
- Turn on Mouse Keys with left ALT + left SHIFT + NUM LOCK: Activate Mouse Keys with Alt + Shift + Num Lock.
- Display a warning message when turning a setting on: Displays a message when this feature is enabled.
- Make a sound when turning a setting on or off: A tone appears when this feature is turned on or off.

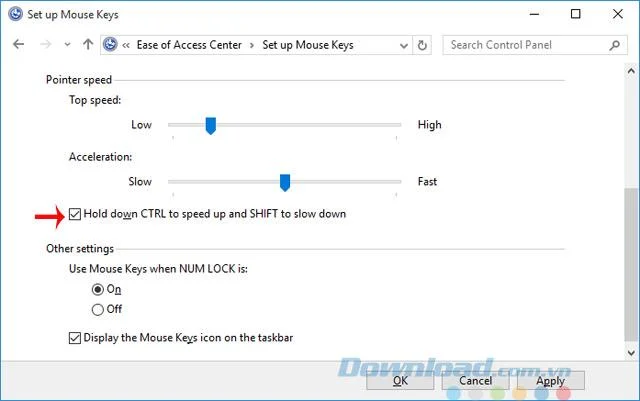
Step 5: Next, you can set the mouse pointer speed through the Top Speed and Acceleration bar in the Pointer Speed section . Remember to check the box Hold down CTRL to speed up and SHIFT to slow down to allow the use of CTRL and SHIFT keys to increase and decrease the mouse pointer speed.

Step 6: In the Other Settings section , you will be given the option to use Mouse Keys with the number keys through opening or turning off with the Num Lock key. After setting everything up, click Apple> OK to save all changes.

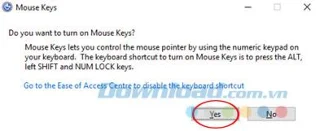
Step 7: Now, whenever the Mouse Keys feature is enabled, a notification will appear, just click Yes to be able to use.

So with just a few very simple steps, you can use the keyboard to replace the mouse on Windows 10. Pretty simple, isn't it?
I wish you successful implementation!