While changes are often a good thing, changes to an operating system are difficult to handle. Operating systems such as Windows tend to change completely from version to version. These changes are mostly about the interface (UI), helping users to have a more intimate and convenient experience, but due to the habit of those changes can confuse users.
If you are unfamiliar with the look and feel of Windows 10 and prefer the interface of previous operating systems, the following article will help you turn the Windows 10 interface into Windows XP, Windows 7 and Windows 8.1 that you are familiar with. use.
Windows XP is the oldest Windows operating system, so familiar to users and even popular among high user market share. More importantly, Windows XP users often feel comfortable with its interface. That's why emulating the operating system of an old interface while maintaining the current operating system security standards is the most important thing.
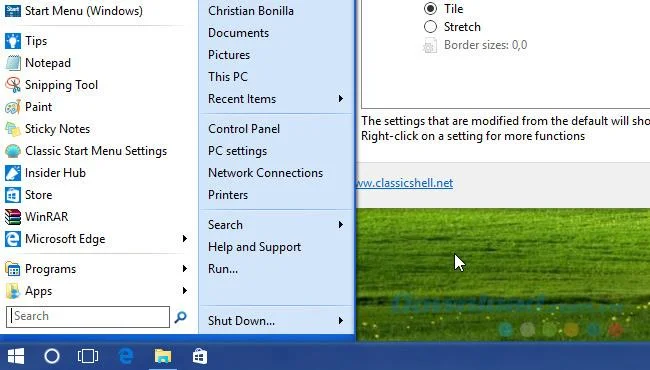
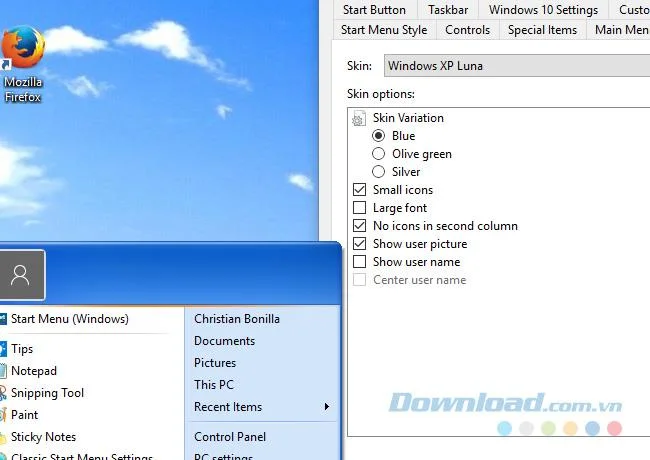
To convert the Windows 10 interface to XP, download and install Classic Shell. After successful installation, enter Classic Start Menu in the search bar in the Start menu and click Classic Start Menu Settings to open the software's installation window.
Download Classic Shell
Classic Shell allows users to change the look or color of the Start Menu and the Start button . Before continuing, Download Windows XP suit for Classic Shell. The content of this file will allow you to reconstruct some window properties, simulating the UI of XP. You extract the contents into a handy folder.
Start Menu
- First, check the Show all settings option at the top of the window. This will open all program options.
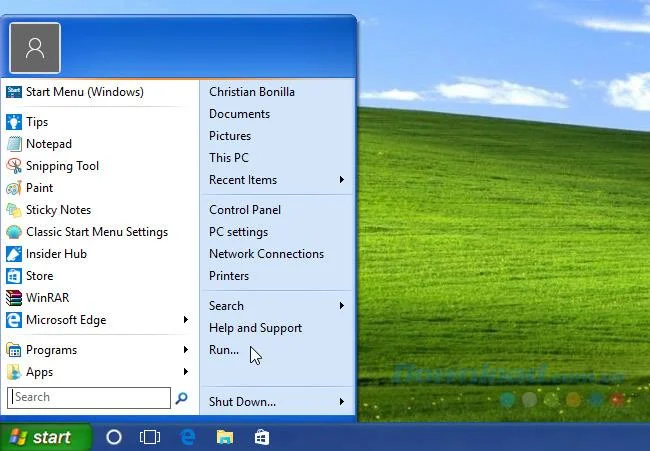
- Then, click on the Start Menu Style tab and click on the radio button labeled Classic with two columns.
- Select Windows XP Luna in the Skin section . Configure it to your liking and click OK.
Taskbar
- Click on the Taskbar and check the Customize Taskbar option .
- Click on the Taskbar texture and the image button (...) , a file option will open.
- Click on the link to where you downloaded the XP suite above and select the xp_bg file that appears as a thin image. Classic will use this template to change the look and feel of your Taskbar.
- Then, click on Horizontal stretching to activate that interface. You select Tile for both Horizontal and Vertical stretching options .

Start button
Classic Shell also provides the ability to change the Start button . You go to the Start Button tab and click on the Replace Start button . Then click Custom button> Button image and image button (...) .

This effect will require many of the same functionality in Classic Shell.
Start Menu
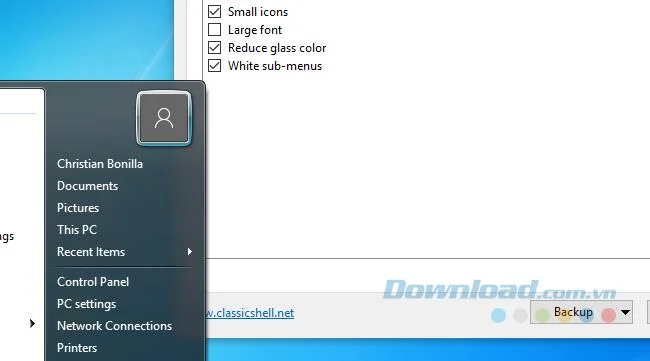
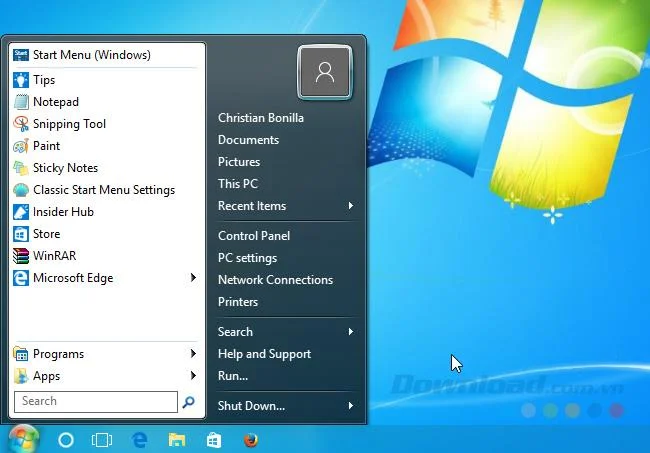
Go to the location where you selected the previous Skin (selected Windows XP Luna ) and select Windows Aero.

Edit settings until you see fit.
Taskbar
Go to the Taskbar tab of Classic Shell. While Classic Shell does not have a copy of Windows 7 for the Taskbar, it has the closest Glossy option . Choose Customize taskbar and activate the Glass radio button .

Adjust the transparency and color you see fit.
Start button
Go to Classic Shell: Forum and download the Windows 7 Start button icon .

Then, click on the Start Button tab and replace the previous Start button with the button downloaded from the link above.
Windows Aero Glass
Aero Glass creates beautiful and transparent edges for your system program window. Although Windows Aero Glass is an alluring aspect of Windows 7, it mysteriously disappears on Windows 10.
A wonderful application that applies the gorgeous Aero Glass developed by a Reddit user, / u / HV250 . You can activate and edit the theme of Aero, creating a perfect ending to the overall Windows 7.
While Windows 8 is not as successful as other operating systems, it has incorporated an interesting new option, Mordern UI (formerly Metro UI), that provides useful features for users with capabilities. power on touch screen.
Modern UI
There are two ways to incorporate Modern UI into Windows 10 and both are the default.
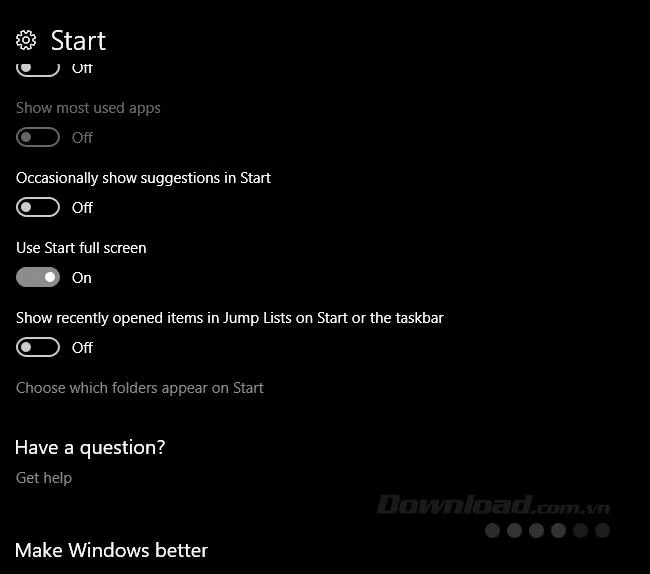
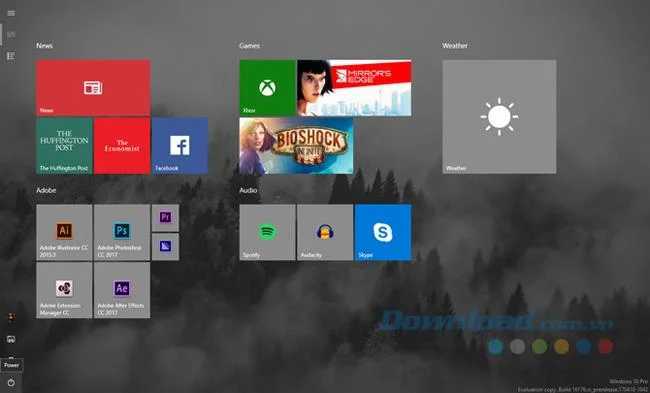
First, you activate the Start screen , unlike the typical Start Menu, which shows pinned programs on your entire screen. To activate, right-click on a blank space on the screen and select Personalize.
Click the Start option of the Personalization window and select Use Start full screen.

This option will not give you a full Modern UI. Instead, it simply creates a full-screen version of the Start menu.

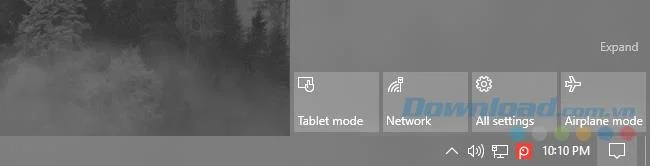
The second default option will emulate the Modern UI more fully than the first option. Using Windows 10 tablet mode, you can convert your regular desktop screen into a full-screen Start menu with additional Taskbar features. To activate, go to Action Center and select Tablet mode.

These default options are not only useful but also provide a slight difference to the Start menu without removing the functionality that makes it iconic. However, there are also third-party options that provide a deeper experience for Windows 10, and Omnimo is one of the best.
Omnimo is a complete Rainmeter package for emulating Windows 8. Simply install and configure.
Thus, the above article has shown you how to turn Windows 10 interface into Windows XP / 7 and 8.1, giving you the familiar experience of the old operating systems while still having the full features of Windows 10.