Set Default Storage Quotas by User Role in ownCloud oCIS
Assign byte-based storage limits to new ownCloud Infinite Scale users by role, with a proxy.yaml example and a safe verification checklist.
Microsoft will "kill" Windows Vista from April 11, 2017, which means that if you are using a computer running old operating systems, then it is time to upgrade your computer operating system . However, the "death" does not mean that Windows Vista will no longer be available but after April 11, 2017, if users continue to use this version, they will not receive any support from Microsoft. more, including security, updates and performance issues ...
If you do not want your device to be exposed to security risks or virus attacks ... then you should plan to upgrade the operating system. Although Microsoft does not provide a direct way to upgrade Windows Vista to Windows 10 , there is a way for us to do that. However, this process requires backing up all data before proceeding.
If the computer is still running Windows Vista, your device may have a low hardware specification. Before you begin the upgrade process, make sure your device meets the following minimum hardware requirements (these are the minimum standards for a device running Windows 10):
After checking, you need to buy a copy of Windows 10 license. You can buy Windows 10 Home or Windows 10 Pro at a Microsoft store. In addition, you need an 8GB booted USB to install (see " How to create a USB Boot, a USB to install Windows using Rufus ").
You need to clean up your computer before proceeding to install Windows 10. It is best to back up all data on the computer using an external storage drive and copy all data to it. Once done, make sure you save all the installation files and keys of the applications you are using.
You can also connect an external hard drive with enough free space and use the Windows Vista backup utility to create and restore system images, which is a form of backing up everything in your computer. . If you want to use this tool, follow these steps:
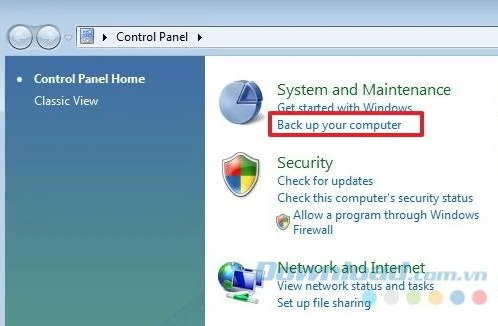
Step 1: Open the Control Panel.
Step 2: Under System and Maintenance , click Back up your computer.
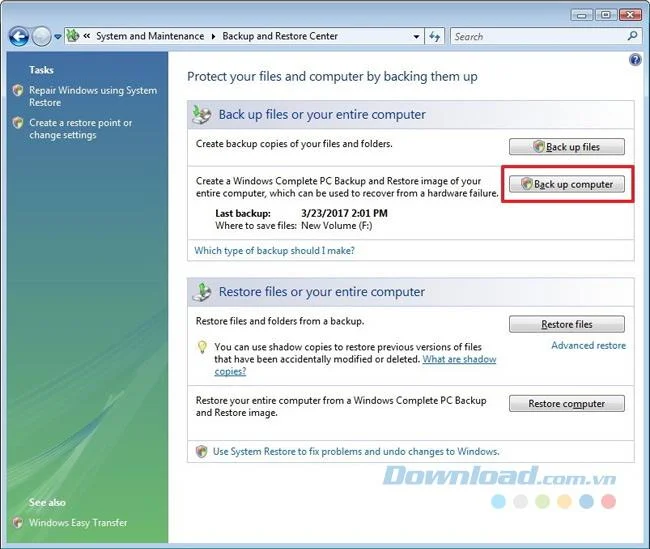
Step 3: Click the Back up computer button .
Step 4: If a message appears, select Continue.
Step 5: Select the hard drive you want to use for backup, then select Next.
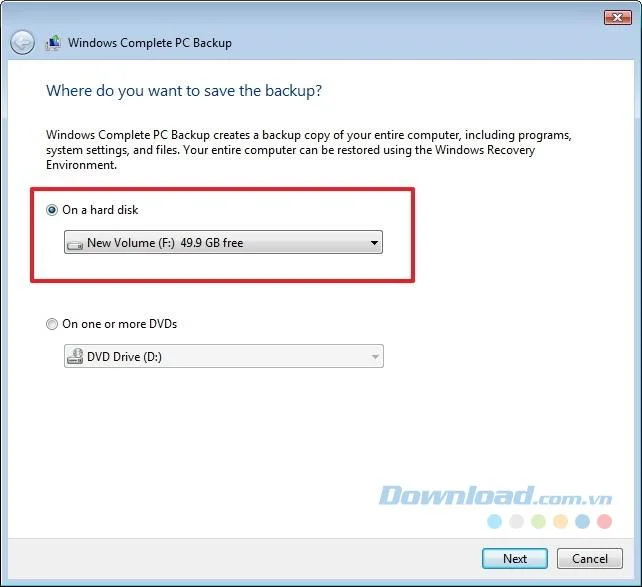
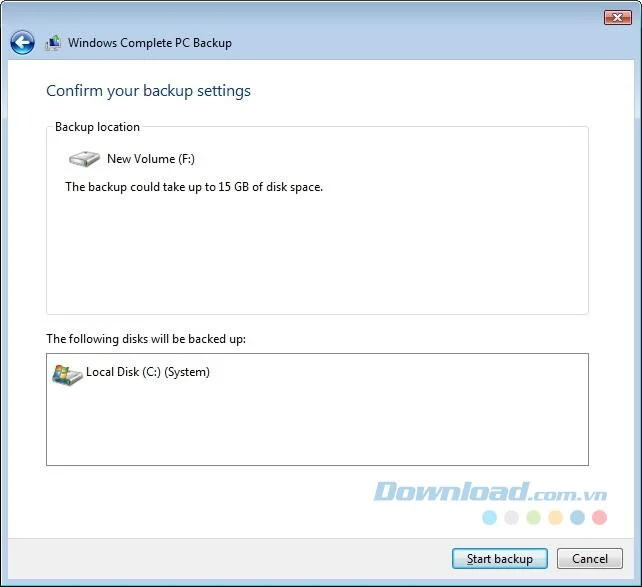
Step 6: Click Start backup to start the backup process.
Step 7: Then select Close.
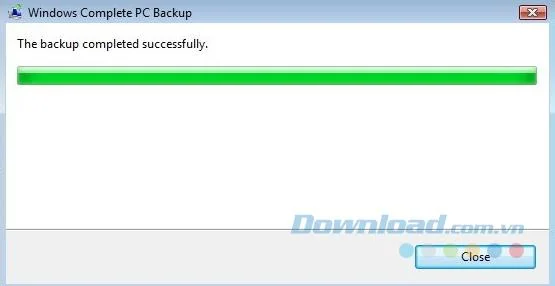
When the backup process is complete, disconnect the external memory and you can proceed with the upgrade process of the computer to Windows 10 . In case you need to restore a previous version, you will need a boot drive and Windows Vista file to perform.
You can upgrade Windows Vista to Windows 7 first, then Windows 10. However, this is not an ideal option because it takes time and must be copyrighted. The best way to upgrade Windows Vista to Windows 10 is to follow the instructions below:
Step 1: Download the Windows 10 ISO file from the Microsoft support website.
Note:
If you are using an older version of Internet Explorer , you should replace it with Google Chrome or Mozilla Firefox for faster download.
Step 2: Under Select edition , select Windows 10 , then Confirm.
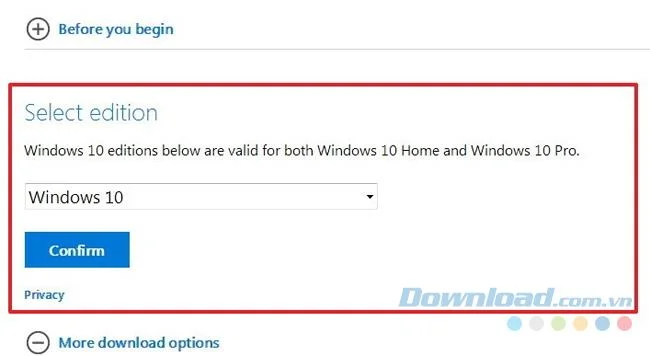
Step 3: Select the language of the operating system and click Confirm.
Step 4: Depending on the hardware of the device, download the 32-bit or 64-bit version.
How to check the computer operating system version:
Use the Windows + R keyboard shortcut to open the Run command , type msinfo32 and press Enter , then:
Step 5: Copy the ISO file to USB, download and install Rufus - a free and easy-to-use utility for creating USB boot.
Step 6: Run Rufus and select the USB device you want to use in the Devices section .
Step 7: Under Format Options , click the Disk driver icon next to the Create a bootable disk using ISO image option .
Step 8: Select the Windows 10 ISO file you want to use, then click Open.
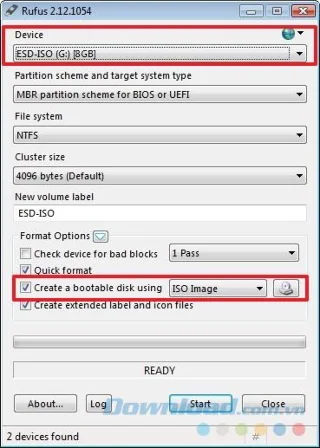
Step 9: Click the Start button to continue and the OK button to confirm again. Note, all data in the drive will be erased before starting the process.
Step 10: Restart the computer after connecting the computer with the created USB Boot.
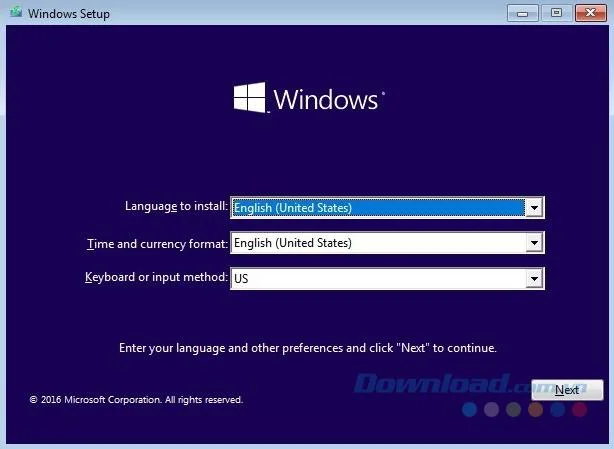
If your device does not boot from a USB flash drive, then you need to change the system's BIOS settings to make sure it can boot from USB. Usually, you turn on your computer and press one of the function keys or the ESC key to access the BIOS . Click Next on the first screen of the Windows installation wizard.
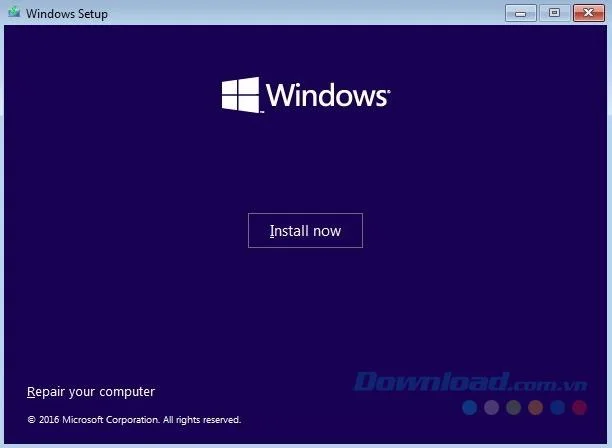
Step 11: Click Install now.
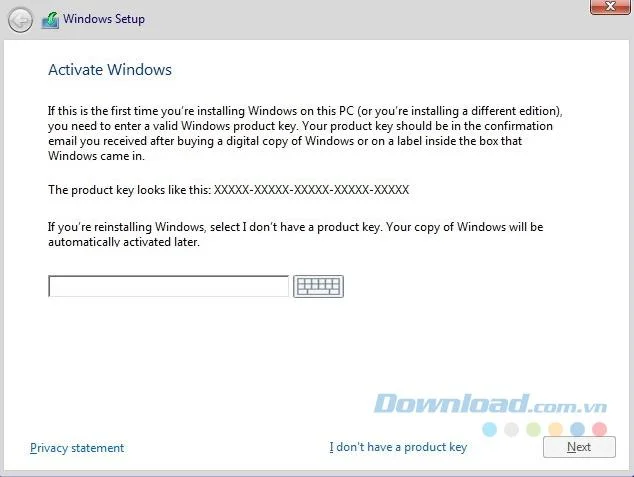
Step 12: Enter the product key of the copy of Windows 10, then select Next.
Step 13: Select the version of Windows 10 you want to install (if available). This selection must match the product key, then select Next.
Step 14: Put a tick in the I accept the licensing agreement and click Next.
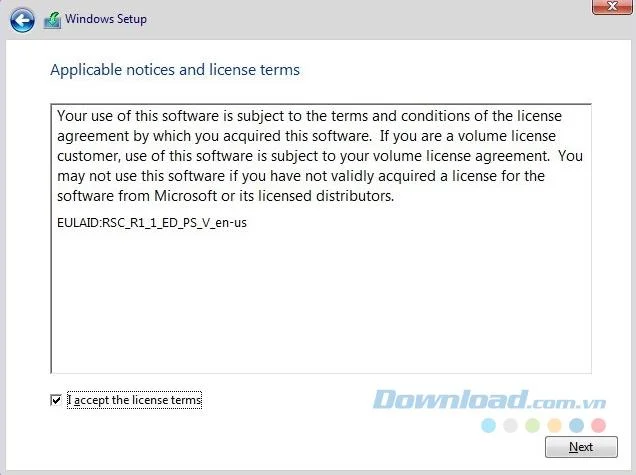
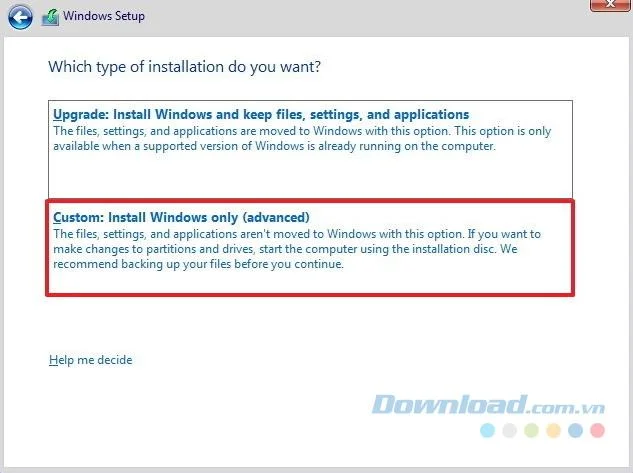
Step 15: Click Custom: Install Windows only (Advanced) to start installing Windows 10.
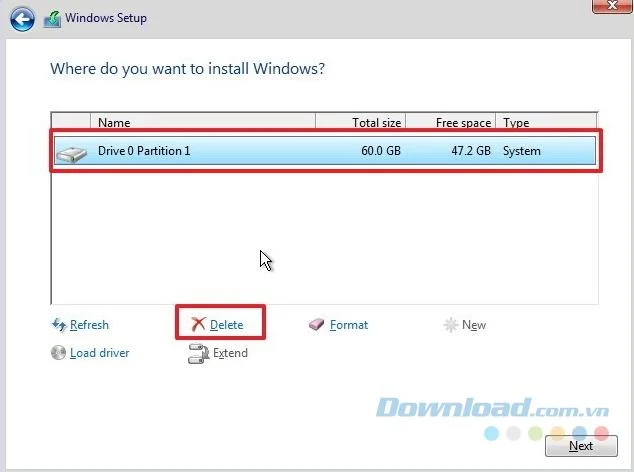
Step 16: Select all areas on the hard disk (usually Drive 0) and click on Delete to erase all.
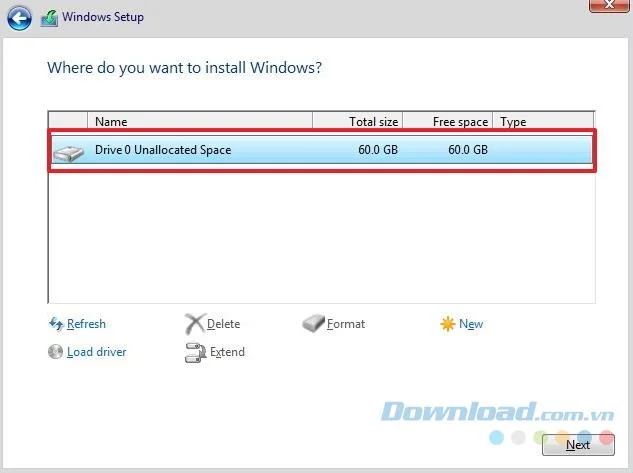
Step 17: Select Drive Hard Drive 0 Unallocated Space and click on Next to begin the installation process.
After completing the steps, the setup will proceed and complete the installation of Windows 10. After that, you only need to follow the on-screen instructions to complete the out-of-box-experience (OOBE) mode. ) with the settings you want.
Besides, you should go to Settings > Update & security > Windows Update and click on Check for updates to make sure your device is fully updated. Also, use Device Manager to check all hardware and peripherals to make sure they are installed correctly on your computer. If not, go to the manufacturer's support website to install or update the latest driver version.
In case you cannot find a driver compatible with Windows 10, some drivers designed for earlier versions can still work well on this operating system, but should only be used no other way. .
I wish you successful implementation!
Assign byte-based storage limits to new ownCloud Infinite Scale users by role, with a proxy.yaml example and a safe verification checklist.
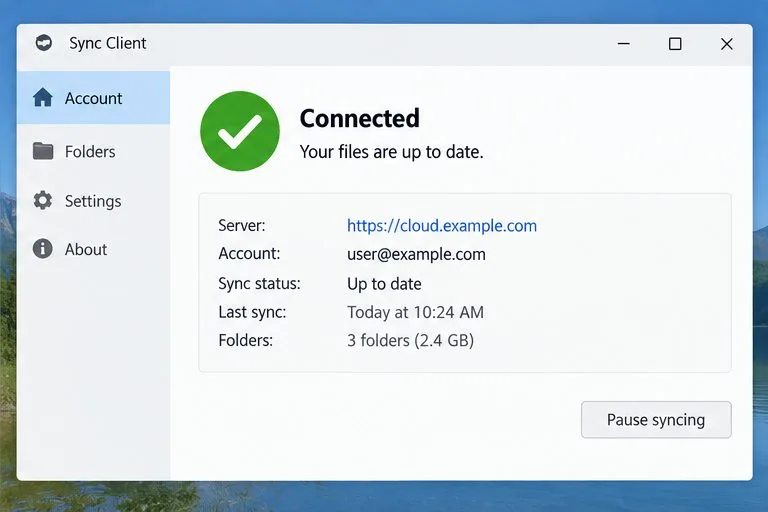
Restore ownCloud desktop syncing by checking the server hostname, certificate chain, private CA trust, and captive portal issues without disabling TLS verification.
Use the invalid-file report to identify mismatched core files or app signatures, restore the correct release files, and verify the integrity check safely.
Deploy ownCloud Infinite Scale from its official Compose example, configure domains and persistent storage, then verify TLS, containers, and first login.
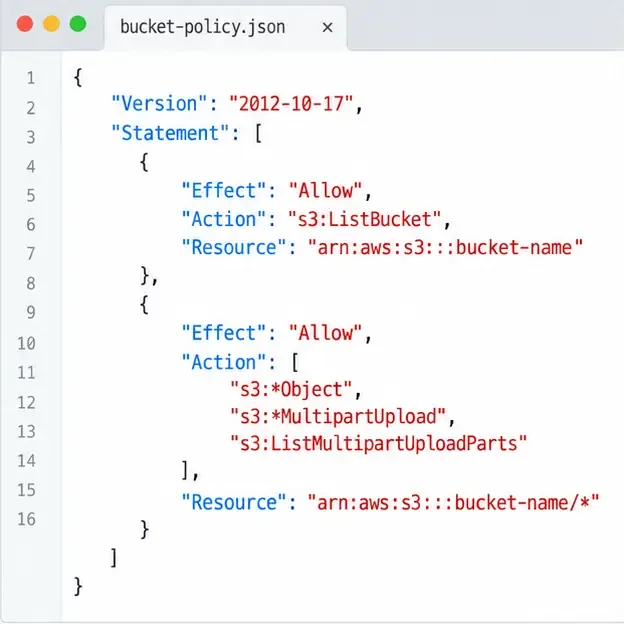
Set up the S3NG driver, bucket permissions, persistent metadata storage, and upload sizing so ownCloud Infinite Scale can store file contents reliably.
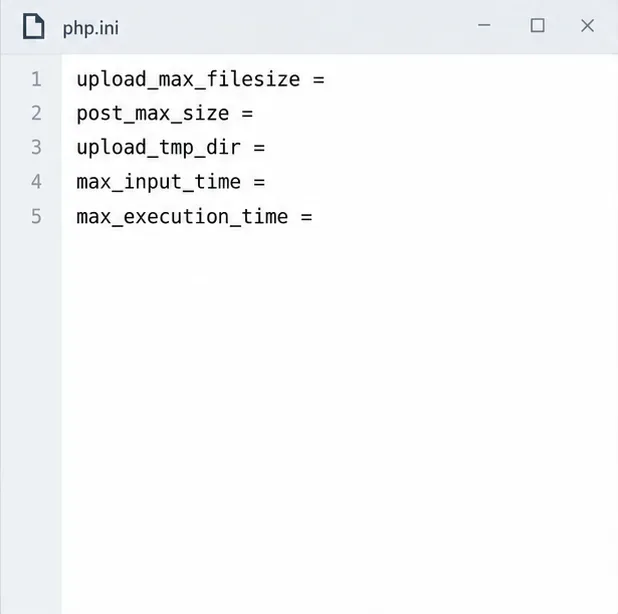
Find why an ownCloud Server upload stops near completion by checking file status, quota, temporary disk space, PHP limits, and proxy timeouts.
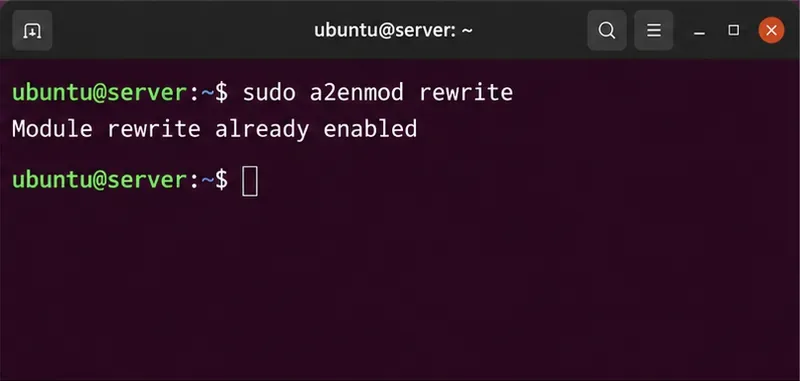
Set AllowOverride All only for ownCloud’s web root, validate the active Apache vhost, and reload safely to restore .htaccess rules.
Enable ownCloud’s Enterprise Auditing app, route admin_audit events to a protected log file, and confirm that real user actions are being recorded.
Align Keycloak’s realm issuer, web client, and user claims to let ownCloud Infinite Scale sign users in reliably across the web and mobile clients.
Transfer owned files and outgoing shares with ownCloud’s occ command, understand what stays behind, and verify access before deleting the old account.