What is the best AI photo background remover?

People spend too much time manually removing backgrounds, and AI isn't always the magic it claims to be.
Learn how to turn your photo into a halftone dot pattern in Photoshop with this step-by-step tutorial, including how to create a black and white halftone pattern and add color!
Note : This tutorial is for Photoshop 2024 or older.
Step 1: Convert the image to black and white
First, you need to convert the photo from color to black and white.
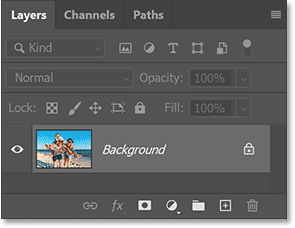
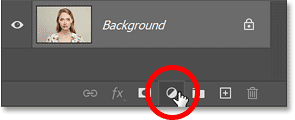
In the Layers panel , click the New Fill or Adjustment Layer icon at the bottom.
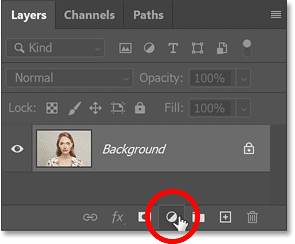
Then select Black and White from the list.
A Black and White adjustment layer is added above the image on the Background layer.
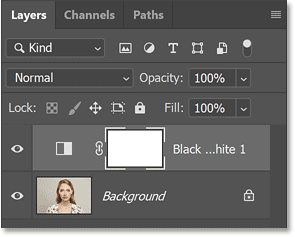
Photoshop's Layers panel showing the new adjustment layer.
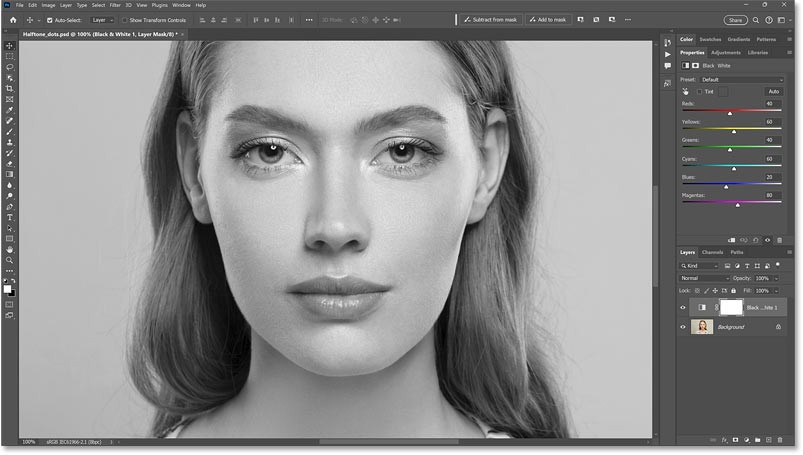
And the image is instantly converted to black and white.
Step 2: Increase the contrast of the image
The halftone vignette effect works best on high contrast images. So we'll use a Levels adjustment layer to increase the contrast of our black and white image.
Still in the Layers panel, click the New Fill or Adjustment Layer icon again .
This time, select Levels from the list.

A Levels adjustment layer is added above the Black and White adjustment layer.
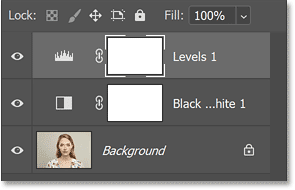
Then, in the Properties panel , use the black point (left) and white point (right) sliders below the histogram to increase the contrast.
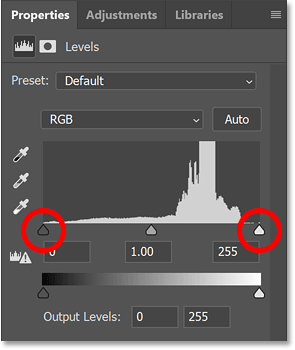
Ideally the black point slider should be moved to start on the left side of the histogram and the white point slider should be moved to start on the right side of the histogram. This ensures you have true blacks in the dark areas and true whites in the light areas.
Not all images will need both sliders moved. In the example image, the histogram is already fully extended to the left, so there is no need to adjust the black point. But there is still some room to brighten by dragging the white point slider a little to the left.
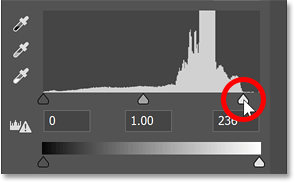
And now the contrast looks better.
Step 3: Add a new layer filled with 50% gray
Next, we'll add a new layer to use for the halftone effect.
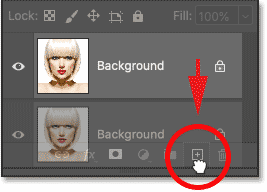
Click the Add New Layer icon at the bottom of the Layers panel.
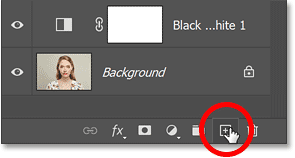
A new blank layer is added above the Levels adjustment layer.
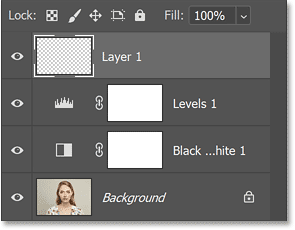
You need to fill this new layer with 50% gray.
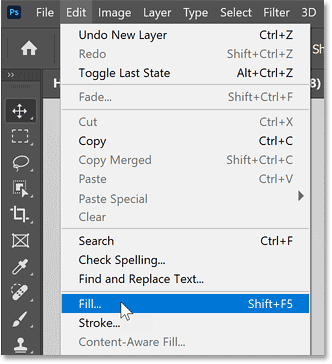
So with the layer selected, go to the Edit menu in the Menu bar and select Fill.
In the Fill dialog box , set Contents to 50% Gray and click OK.
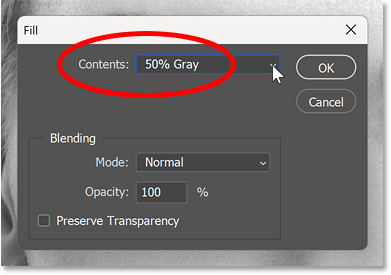
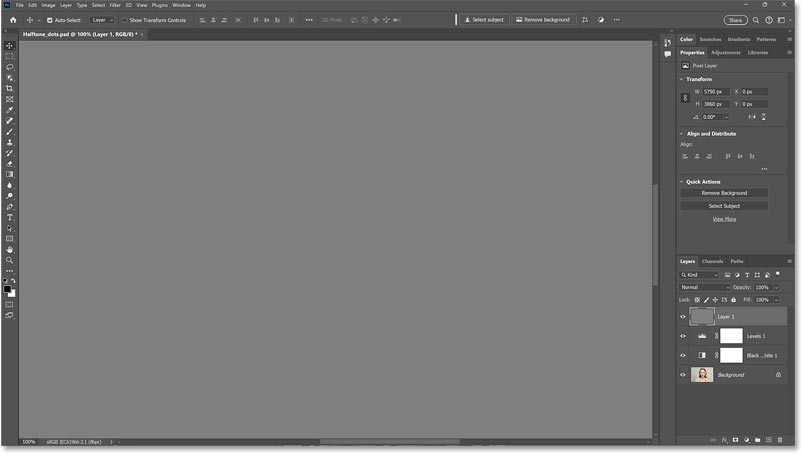
The image is temporarily hidden by a gray layer.
Step 4: Convert layer to smart object
The biggest challenge when creating a halftone pattern is knowing how big the dots need to be. But you can give yourself some room to experiment by first converting the layer to a smart object.
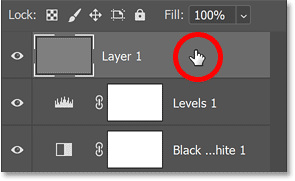
In the Layers panel, right-click on the layer.
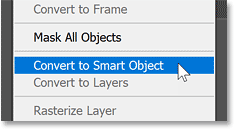
Then select Convert to Smart Object from the menu.
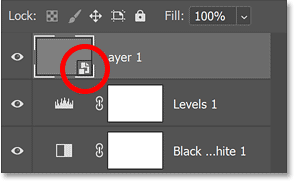
A smart object icon appears in the lower right corner of the layer thumbnail.
Step 5: Reset Foreground and Background colors
Before continuing, press the letter D on your keyboard to reset Photoshop's Foreground and Background colors to default.
This sets the Foreground color to black and the Background color to white. We will need these colors for the filters in the next step.
The current Foreground and Background colors are displayed in thumbnails near the bottom of the toolbar. Right-click the layer in the Layers panel.

Step 6: Open Photoshop's Filter Gallery
To create a halftone pattern, two filters are needed from Photoshop's Filter Gallery.
So go to the Filter menu and select Filter Gallery .
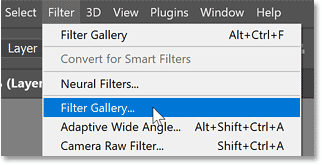
The Filter Gallery consists of a large preview area on the left and two columns on the right. The first column is where we select the filter and the second column is where we adjust the filter settings.
Filters are divided into groups, with the Artistic group open by default. Each filter in the group is displayed as a thumbnail.
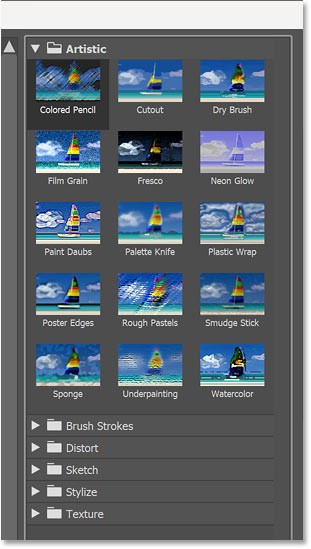
Step 7: Use the Halftone Pattern filter to add dots
Open the Sketch group. Then, click the Halftone Pattern filter to select it.
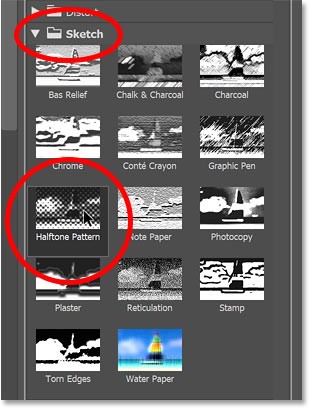
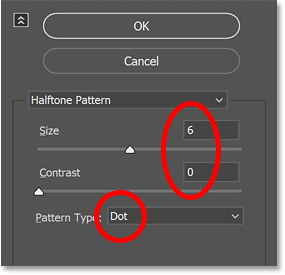
The filter options appear in the upper right corner. Make sure that Pattern Type is set to Dot and Contrast is set to 0 .
Then use the Size slider to set the initial size for the dots. For example, I'll set mine to 6.
Since we can't see the image in the preview area, we don't know what this size will look like until we apply the filter. But that's okay because we can go back and resize it if needed.
Step 8: Use the Torn Edges filter to roughen the dots
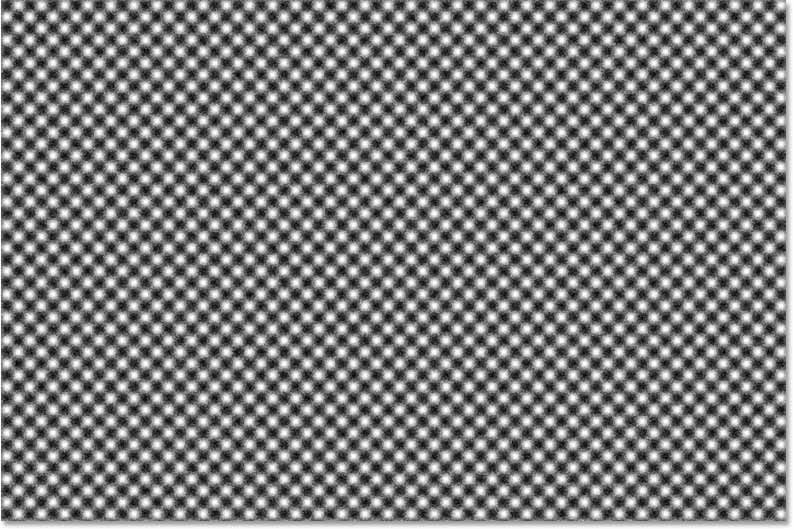
Notice in the preview area that our dots are actually just blurry squares. So we'll use the Torn Edges filter to roughen them up and make them look more rounded.
In the lower right corner of the Filter Gallery, click the plus icon to add a new filter above the Halftone Pattern filter.

Then, still in the Sketch group, select the Torn Edges filter .
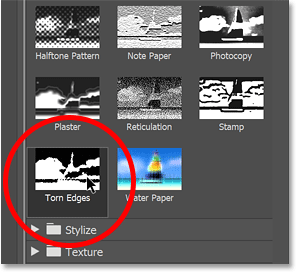
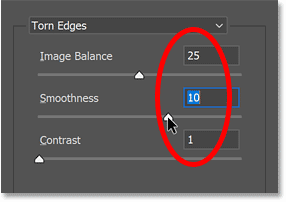
In the options, leave Image Balance at default (25) and reduce Contrast to 1.
Then, drag the Smoothness slider until the blurred squares start to look more rounded. The setting you need will depend on the dot size you chose in the Halftone Pattern filter.
Since the dot size in the example is set to 6, a Smoothness value of 10 would be appropriate. But just like the Size value , you can always go back and change the Smoothness value if needed.
The dots should now look like this.
Step 9: Apply filters
Click OK to close the Filter Gallery and apply the two filters to the image.
The document is filled with halftone dots. We will blend the dots with the image next.
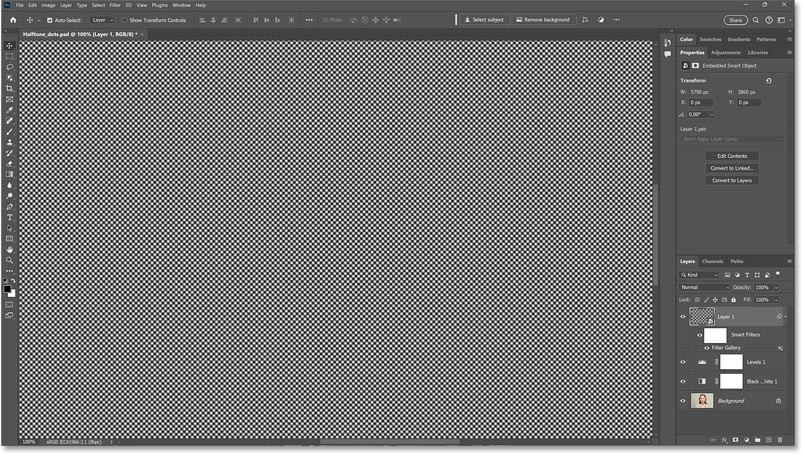
In the Layers panel , notice that the Filter Gallery has been applied to the layer as a smart filter. This is because we converted the layer to a smart object before applying the filter.
The benefit of smart filters is that you can go back and edit the settings. We'll do that in a moment.
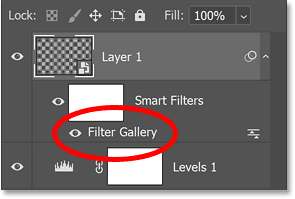
Step 10: Change blend mode to Hard Mix
To blend the dots with the image, change the layer's blend mode from Normal to Hard Mix.
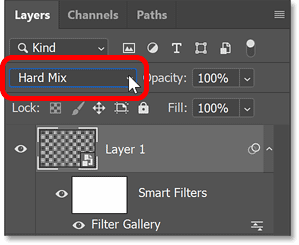
The black and white image is displayed through halftone dots, but the effect is too strong.
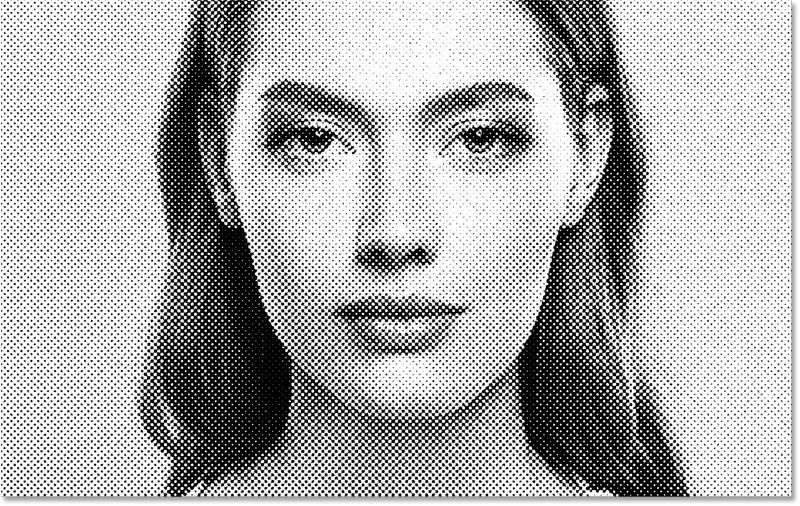
Step 11: Decrease the Fill value
To reduce the effect, reduce the Fill value of the layer.
Hard Mix is one of the eight blend modes in Photoshop that behave differently when we decrease the Fill value relative to the Opacity value .
So reduce the Fill value (not the Opacity) until you are happy with the result. For example, reduce it to 70%.
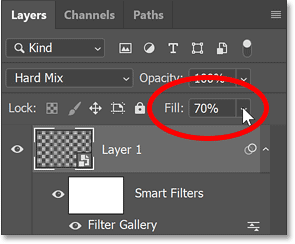
This blurs the dots in the highlights and pushes the effect more into the shadows, closer to a real halftone pattern.
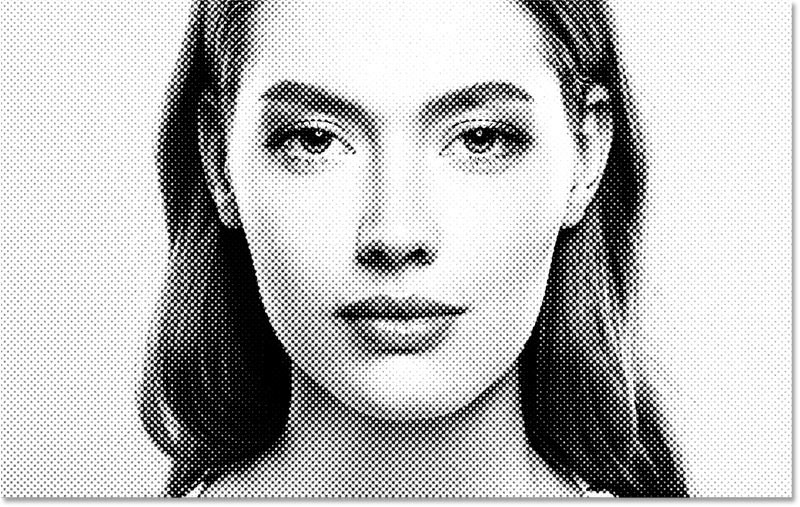
Step 12: Adjust the dot size
If you are not satisfied with the size of the dots, you can easily change it.
In the Layers panel , double-click the word Filter Gallery to reopen it.
Right click on the layer in the Layers panel.
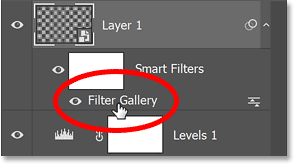
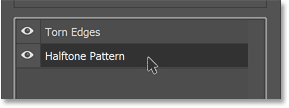
In the right column of the Filter Gallery, the two filters we added are displayed stacked on top of each other, similar to how layers are stacked in the Layers panel .
Select the Halftone Pattern filter .
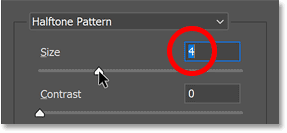
Then drag the Size slider to select a different size. For example, we will make the dots smaller by lowering the size from 6 to 4.
Again, the value you need will depend a lot on the size of your image.
After changing the dot size, you may also need to adjust the Smoothness value . So select the Torn Edges filter again.
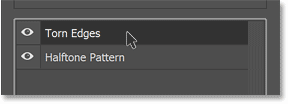
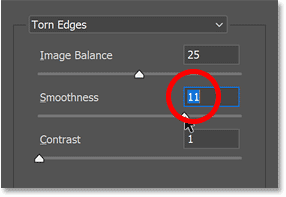
Since the dot size has been lowered, you will have to compensate by increasing Smoothness from 10 to 11.
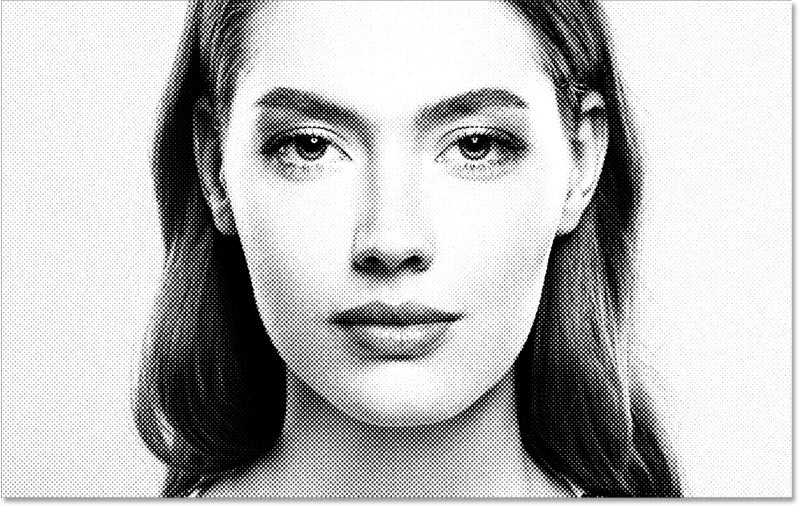
Click OK to close the Filter Gallery. The halftone pattern updates with the new settings and the dots become more consistent.
At this point we have created a black and white halftone vignette effect and you can stop here.
But if you want to add color to the effect, follow the next steps.
Step 13: Add a Solid Color adjustment layer
To add color to the halftone pattern, we'll use a Solid Color adjustment layer.
Make sure the halftone pattern layer (top layer) is active in the Layers panel.
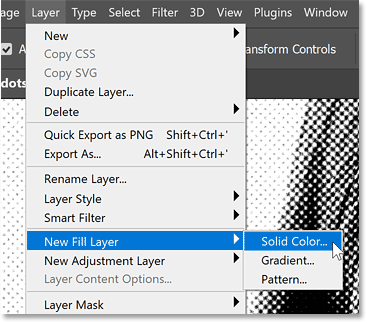
Then go to the Layer menu in the Menu Bar, select New Fill Layer then Solid Color.
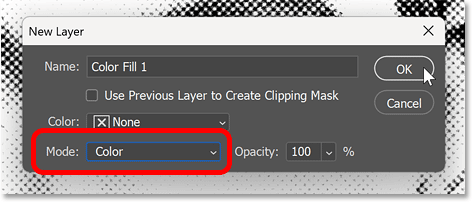
Step 14: Set blend mode to Color
In the New Layer dialog box , change the Mode (blend mode) from Normal to Color. Then click OK.
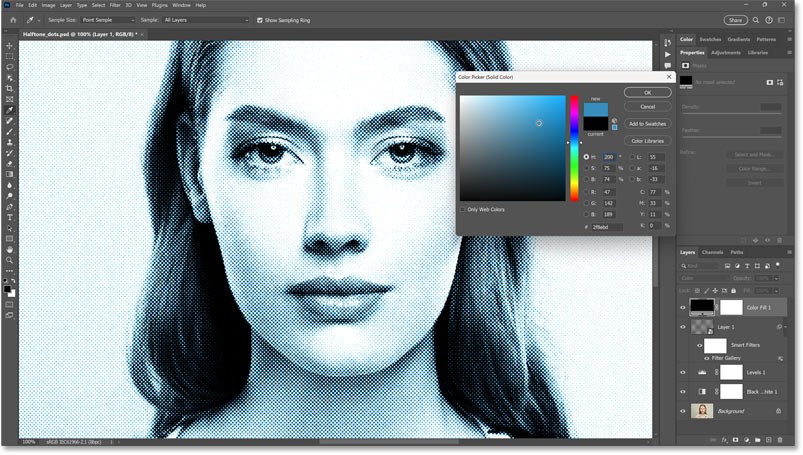
Step 15: Select a color from the Color Picker
Select a color from Photoshop's Color Picker.
Since we set the blend mode to Color in the previous step, you will see a live preview of how the color will look with the effect.
Click OK to close the Color Picker when you are finished.
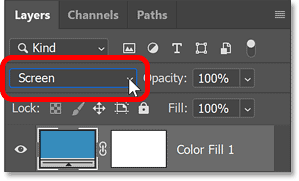
Step 16: Try blend mode Screen
For a different look to the color effect, try changing the blend mode of the fill layer from Color to Screen.
Blend mode Screen uses color to brighten the image and create a lower contrast effect, especially if you choose a bright color in the Color Picker.
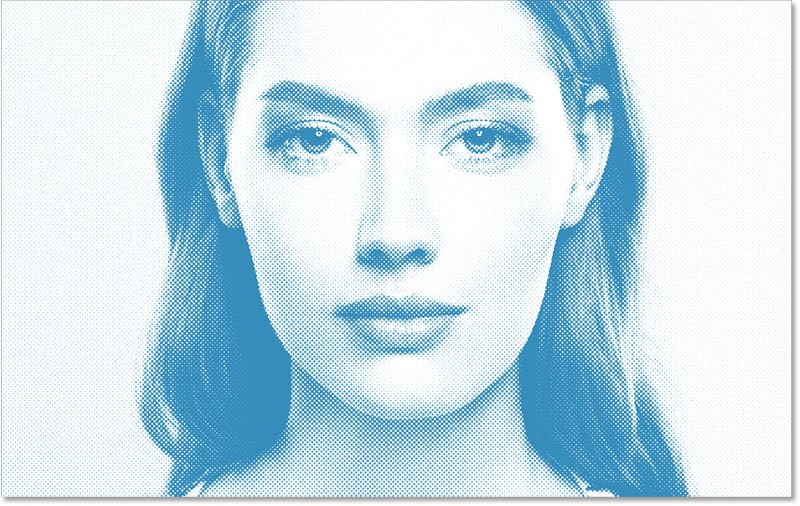
If the color is too bright and the effect looks too pale or flat, double-click the fill layer's color swatch in the Layers panel.
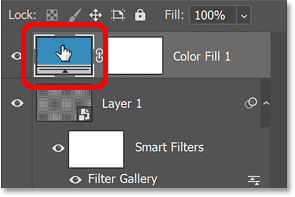
Then, select the darker version of the color in the Color Picker.
Or choose a completely different color like the example doing here.
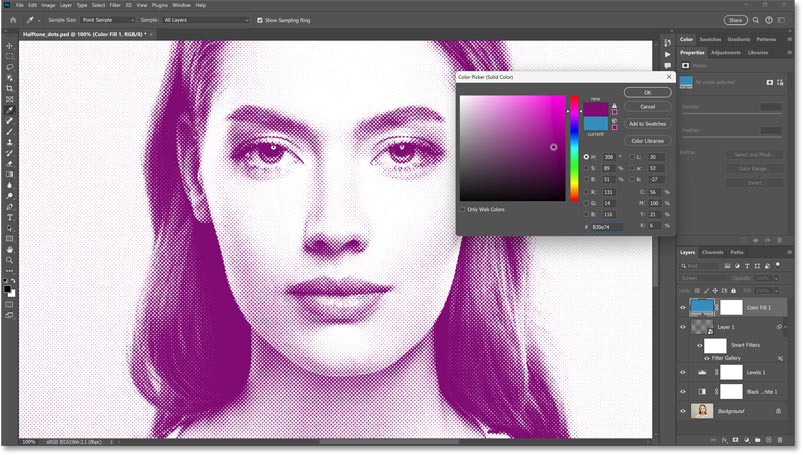
Click OK when you are finished to close the Color Picker.
And here is the final result.
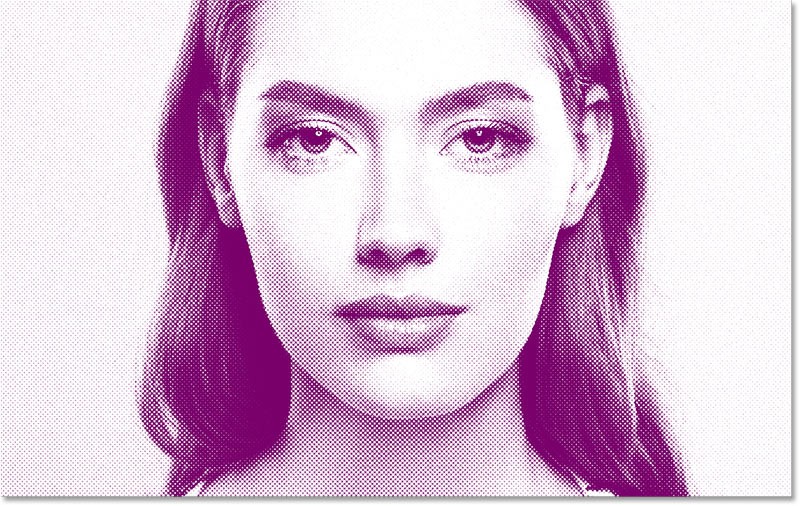
And that's it! That's an easy way to create a halftone dot texture effect in Photoshop.
People spend too much time manually removing backgrounds, and AI isn't always the magic it claims to be.
This tutorial will show you how to easily turn a photo into a pencil sketch using Adobe Photoshop.
Many people used to find resizing images very annoying until they learned about Photoshop's simple channel-based protection method.
Add a quick and easy poster effect to your images using Photoshop to recreate the classic look of posters printed with limited ink colors.
There are many AI photo editors that make Photoshop a second choice and AI features are useful tools for editing photos without having to learn complex Photoshop.
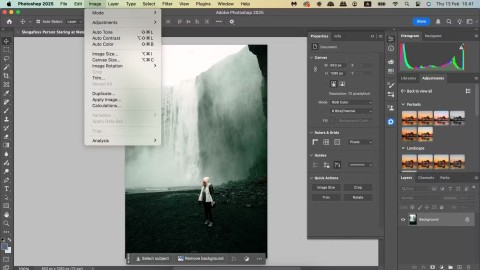
Photoshop 2025 packs new AI tools, smarter selections, and features you didn't know you needed until now.
This tutorial will show you a quick and easy way to add a monochrome color effect to an image using Adobe Photoshop.
This tutorial will show you how to add canvas space and drop shadow to your photo in Photoshop to create a simple yet stylish photo border.
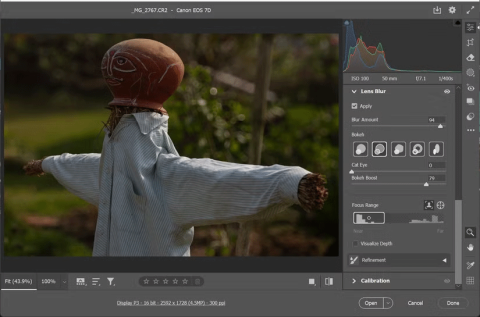
Adobe's Lens Blur tool makes it easy to review your photos, adding depth and focus to your photos.
Hidden away in the app, Photoshop Actions is a beloved feature of the popular photo editing tool, meant to speed up workflows without the need for AI.
Lightroom and Adobe Photoshop are two of the best photo editing tools, but while many professionals use both together, you only need Lightroom if you're an amateur photographer.
This tutorial will show you how to create a cool Picture in Picture effect with Adobe Photoshop by taking a single photo and creating the illusion that a smaller, cropped version of the same photo is inside it.
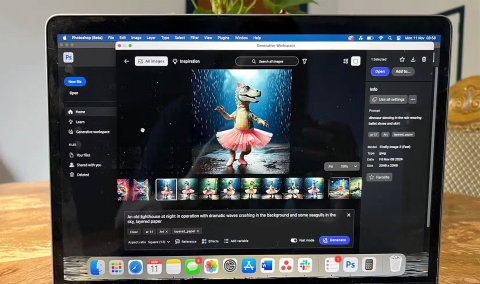
Generative Workspace is one of the top AI features announced at Adobe Max 2024. It will be the new home for your Generative AI images and files.
With Generative Fill, powered by Adobe's Generative AI called Firefly, anyone can add realistic water reflection effects to their photos simply by drawing a selection, typing a few words, and clicking a button.
This tutorial will show you how to copy an image and paste it into a selection in another image using the Paste Into command in Adobe Photoshop.
Tired of Microsoft Teams OneDrive Error blocking file sync? Follow our step-by-step guide to solve Microsoft Teams "OneDrive Error" File Sync issues quickly. Proven fixes for smooth collaboration in Teams channels. Get your files syncing error-free today!
Tired of Microsoft Teams workflows and Power Automate errors halting your productivity? Get step-by-step solutions to common issues like authentication failures, timeouts, and flow errors. Fix them in minutes and automate effortlessly!
Facing Microsoft Teams "Download Error" on MacBook? Discover proven troubleshooting steps to resolve download failures quickly, from cache clears to reinstalls, and get back to smooth teamwork.
Tired of the frustrating Microsoft Teams "Where is Teams" Folder Error? Discover proven, step-by-step troubleshooting fixes to resolve it quickly and restore smooth teamwork. Latest methods included!
Frustrated by Microsoft Teams JavaScript Error on desktop app? Discover proven steps to fix it fast: clear cache, update, reset, and reinstall. Get back to seamless collaboration in minutes!
Struggling with Microsoft Teams "Guest Login" Error? Discover step-by-step fixes, from quick cache clears to admin settings, to resolve guest access issues fast and collaborate seamlessly. Updated with the latest tips!
Tired of the Microsoft Teams "For PC" download error blocking your work? Follow our proven, step-by-step guide to resolve it quickly and get Teams running smoothly on your PC today.
Struggling with Microsoft Teams "Windows 7" login error? Discover step-by-step fixes for this frustrating issue on Windows 10/11. Clear cache, edit registry, and more – get back to seamless collaboration today!
Tired of Microsoft Teams Error Code 0x80070005 blocking your meetings? Follow this 2026 guide with step-by-step fixes for access denied issues. Get Teams running smoothly in minutes!
Master the installation of the Microsoft Teams Add-in for Outlook 2026 effortlessly. Boost your productivity with seamless scheduling and meetings. Follow our proven, up-to-date steps for instant success!
Struggling with Microsoft Teams "License Error" 2026? Discover proven, step-by-step solutions to resolve it fast. Clear cache, check licenses, and get back to seamless collaboration—no IT help needed!
Whether youre in your 50s, 60s, or even 70s, its not too late to prioritize your health and put yourself first. Here are the best exercises for people 50 and older.
Struggling with Microsoft Teams Error Caa50024 on Windows 10/11? Follow our step-by-step fixes to resolve crashes and launch issues quickly. Latest proven solutions for seamless teamwork.
Stuck with Microsoft Teams login error AADSTS50011? Discover proven, step-by-step fixes to resolve the reply URL mismatch issue and log in seamlessly. No tech skills needed!
Tired of the frustrating Microsoft Teams "Win 7" Compatibility Error blocking your meetings? Get instant fixes with our step-by-step guide, including workarounds for older Windows versions. Resolve it now and stay connected!
