What is the best AI photo background remover?

People spend too much time manually removing backgrounds, and AI isn't always the magic it claims to be.
Do you have a perfect photo of someone, but you just wish they were smiling instead of frowning? It's an easy fix in Photoshop . There are a few ways to edit smiles in photos in Photoshop, like using the Liquify tool, Neural Filters, layers, and the Puppet Warp tool. Let's dive in!
1. Add a smile with another image

Overlaying images, using Photoshop Layers and the Selection tool is an old technique for replacing smiles. While this technique has a high success rate, it depends on having the right image.
It’s best to use another photo of the same person rather than a similar photo of a stranger. It can happen that you’re taking multiple photos of a group and most of your subjects look great, but one person isn’t smiling. If you have another photo of them smiling, it’s easy to “transfer” that smile onto the better photo.
If you don't have a photo of the same person smiling, you can copy a photo of a similar looking person from the same angle. You can edit the skin tone to help match the images together more accurately.
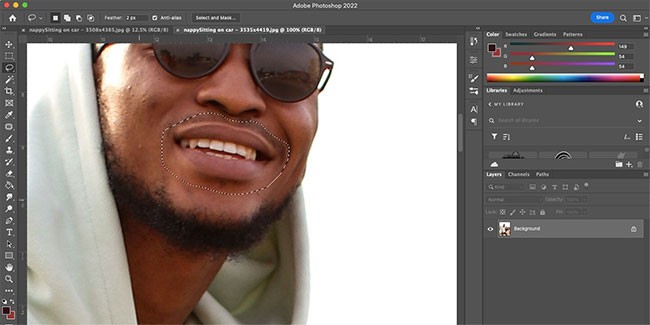
Open both of your images in Photoshop. On the smiling image, use the Magnetic Lasso (L) to select the area around the smile and then copy the selection ( Cmd + C for Mac and Ctrl + C for Windows).
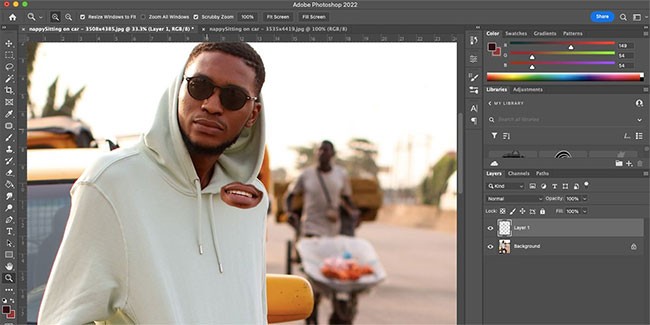
Paste the selection you just copied ( Cmd + V for Mac and Ctrl + V for Windows) onto a new layer above the non-smiling image. Use Free Transform ( Cmd + T for Mac and Ctrl + T for Windows) to select the smile.
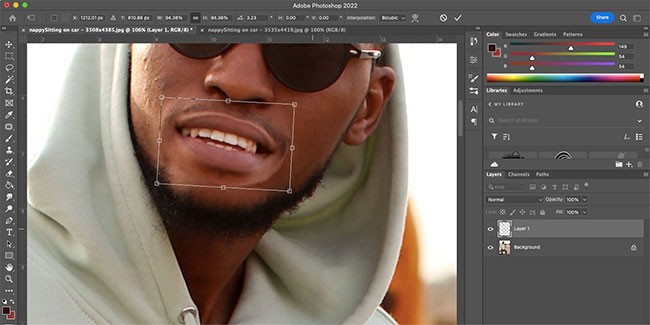
Move the smile so it fits the mouth in the non-smiling photo. You can resize it by dragging the corner handles, and rotate the smile by hovering near a corner until the cursor turns into an arrow, then clicking and dragging the corner to rotate.
You may want to flip the smile horizontally to reflect the new angles on the face. While in Free Transform mode , right-click the smile and select Flip Horizontal. Move the smile around until it fits the new image.

Once you're happy with the position, double-click the smile to exit the Free Transform tool. Use the Eraser Tool (E) to remove any unwanted parts of the image that overlap, such as excess skin around the mouth.
2. Add a smile using the Be Happy filter!

Photoshop's Neural Filters can create an artificial smile on any portrait. The technique uses Adobe Sensei, which provides a quick and easy way to add smiles to photos using facial recognition technology. This can work for group portraits or individual portraits.
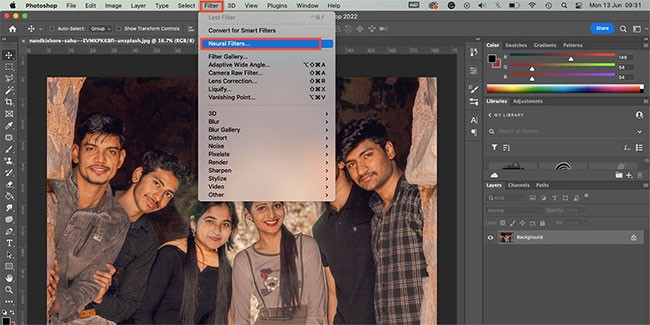
With the photo on your canvas, go to Filter > Neural Filters . If this is your first time using the Smart Portrait filter , you'll have to download it by clicking the cloud button. Enable the filter.
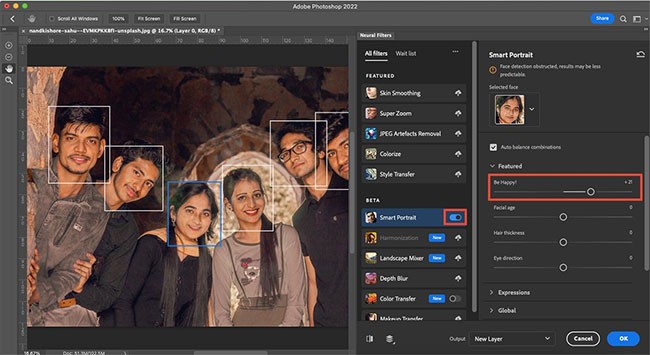
Under Featured , you'll see the Be Happy! filter . Move the slider to the right to add varying degrees of smile to your portrait. Once you're happy with the smile, click OK.
This filter only uses one smile image, which means it may not work on everyone. And if you apply this filter to multiple people in the same photo, they will all have the same smile.
However, for quick and easy smile editing, this feature works very well, as the slider gives you some control over the size of the smile.
3. Add a smile using the Liquify tool

Convert your photo to a Smart Object by right-clicking on the layer in the Layers panel and selecting Convert to Smart Object .
In the tools above, go to Filter > Liquify . This will open the filter settings. Use the Zoom Tool (Z) in the settings box to zoom in on the mouth part of the image.
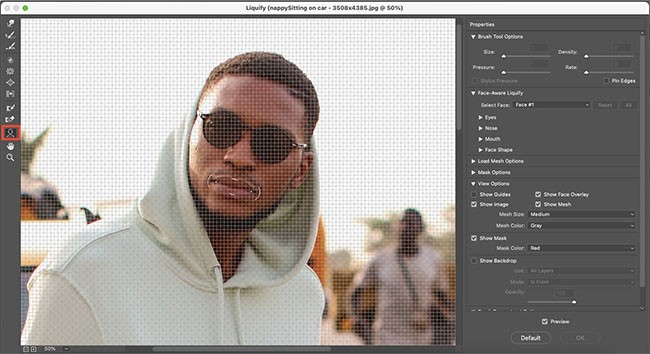
Select the Face Tool (A) in the toolbar on the left. Move your cursor around the mouth and use the guides to move the edges of the lips up. You can also use the properties on the right to change these values.
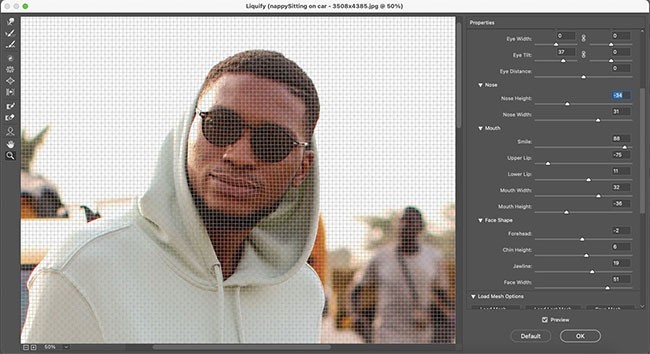
The other properties on the right give you options to move the eye position, widen the jaw, move the nose, etc. You can change these settings until your facial features look natural with a smile. Click OK when you are happy with the results.
4. Add a smile using the Puppet Warp Tool

Photoshop's Puppet Warp Tool is awesome, treating a 2D image as a movable puppet. While it works best on entire bodies, you can also use it on individual body parts, like mouths.
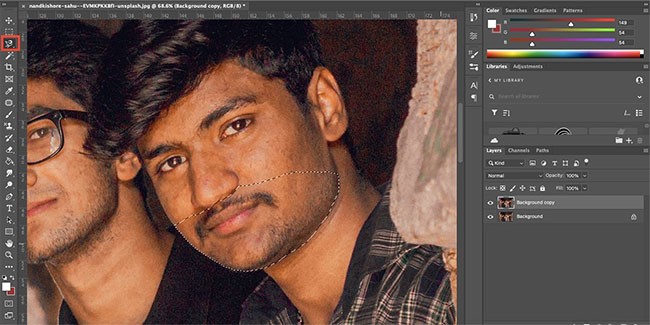
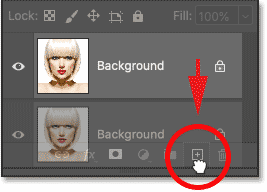
Duplicate the image in the Layers panel by right-clicking on the layer and selecting Duplicate Layer. Use the Lasso Tool (L) to select the lower half of the face.
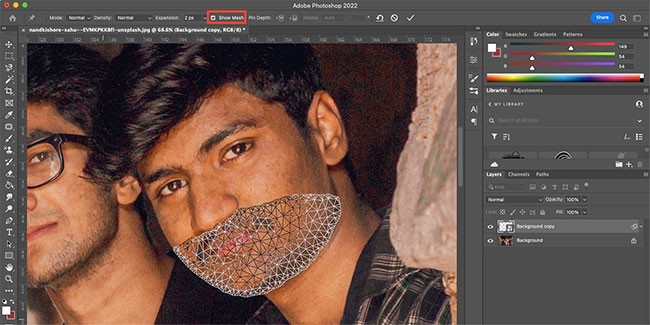
Go to Edit > Puppet Warp . This will apply a mesh to the selected area. Uncheck Show Mesh in the top toolbar to make the face more visible.
When you hover over the selected area, your cursor will turn into a pin tool. Pin areas that move naturally when smiling, such as the corners of your mouth and the center of your lips. You can also pin areas of your cheeks if they are within your selection.
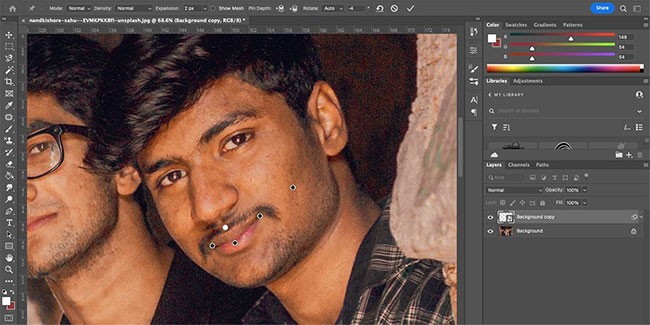
Once all the pins are in place, gently move each pin to show a natural smile. If you move too much, the distortion will be obvious, so be careful. If you are happy with the smile position, click on any other tool, then click Apply on the pop-up window that appears.
To further refine the image, check out Quantrimang.com's tutorial on how to use the Clone Stamp tool in Photoshop .
If you can't get the perfect smile in your photo, that's not a bad thing. With a variety of smile editing techniques, you can choose the one that best suits your editing needs.
The Liquify and Puppet Warp methods are best for adding a subtle smile to an image. But if you want to show a smile with natural teeth, your best bet is to composite another photo or use the Be Happy! filter.
People spend too much time manually removing backgrounds, and AI isn't always the magic it claims to be.
This tutorial will show you how to easily turn a photo into a pencil sketch using Adobe Photoshop.
Many people used to find resizing images very annoying until they learned about Photoshop's simple channel-based protection method.
Add a quick and easy poster effect to your images using Photoshop to recreate the classic look of posters printed with limited ink colors.
There are many AI photo editors that make Photoshop a second choice and AI features are useful tools for editing photos without having to learn complex Photoshop.
Photoshop 2025 packs new AI tools, smarter selections, and features you didn't know you needed until now.
This tutorial will show you a quick and easy way to add a monochrome color effect to an image using Adobe Photoshop.
This tutorial will show you how to add canvas space and drop shadow to your photo in Photoshop to create a simple yet stylish photo border.
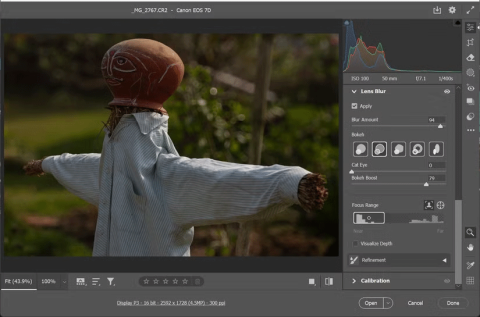
Adobe's Lens Blur tool makes it easy to review your photos, adding depth and focus to your photos.
Hidden away in the app, Photoshop Actions is a beloved feature of the popular photo editing tool, meant to speed up workflows without the need for AI.
Lightroom and Adobe Photoshop are two of the best photo editing tools, but while many professionals use both together, you only need Lightroom if you're an amateur photographer.
This tutorial will show you how to create a cool Picture in Picture effect with Adobe Photoshop by taking a single photo and creating the illusion that a smaller, cropped version of the same photo is inside it.
Generative Workspace is one of the top AI features announced at Adobe Max 2024. It will be the new home for your Generative AI images and files.
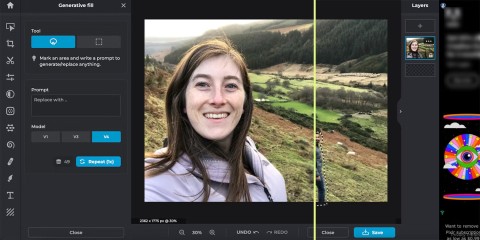
With Generative Fill, powered by Adobe's Generative AI called Firefly, anyone can add realistic water reflection effects to their photos simply by drawing a selection, typing a few words, and clicking a button.
This tutorial will show you how to copy an image and paste it into a selection in another image using the Paste Into command in Adobe Photoshop.
Struggling to locate the Microsoft Teams Installation Folder on your PC? This step-by-step guide reveals exact paths for new and classic Teams, per-user & per-machine installs. Save time troubleshooting!
Struggling with Microsoft Teams Proxy Error? Discover proven Troubleshooting Microsoft Teams "Proxy Error" Settings Fix steps. Clear cache, adjust proxy settings, and get back to seamless calls in minutes with our expert guide.
Tired of Microsoft Teams OneDrive Error blocking file sync? Follow our step-by-step guide to solve Microsoft Teams "OneDrive Error" File Sync issues quickly. Proven fixes for smooth collaboration in Teams channels. Get your files syncing error-free today!
Tired of Microsoft Teams workflows and Power Automate errors halting your productivity? Get step-by-step solutions to common issues like authentication failures, timeouts, and flow errors. Fix them in minutes and automate effortlessly!
Facing Microsoft Teams "Download Error" on MacBook? Discover proven troubleshooting steps to resolve download failures quickly, from cache clears to reinstalls, and get back to smooth teamwork.
Tired of the frustrating Microsoft Teams "Where is Teams" Folder Error? Discover proven, step-by-step troubleshooting fixes to resolve it quickly and restore smooth teamwork. Latest methods included!
Frustrated by Microsoft Teams JavaScript Error on desktop app? Discover proven steps to fix it fast: clear cache, update, reset, and reinstall. Get back to seamless collaboration in minutes!
Struggling with Microsoft Teams "Guest Login" Error? Discover step-by-step fixes, from quick cache clears to admin settings, to resolve guest access issues fast and collaborate seamlessly. Updated with the latest tips!
Tired of the Microsoft Teams "For PC" download error blocking your work? Follow our proven, step-by-step guide to resolve it quickly and get Teams running smoothly on your PC today.
Struggling with Microsoft Teams "Windows 7" login error? Discover step-by-step fixes for this frustrating issue on Windows 10/11. Clear cache, edit registry, and more – get back to seamless collaboration today!
Tired of Microsoft Teams Error Code 0x80070005 blocking your meetings? Follow this 2026 guide with step-by-step fixes for access denied issues. Get Teams running smoothly in minutes!
Master the installation of the Microsoft Teams Add-in for Outlook 2026 effortlessly. Boost your productivity with seamless scheduling and meetings. Follow our proven, up-to-date steps for instant success!
Struggling with Microsoft Teams "License Error" 2026? Discover proven, step-by-step solutions to resolve it fast. Clear cache, check licenses, and get back to seamless collaboration—no IT help needed!
Whether youre in your 50s, 60s, or even 70s, its not too late to prioritize your health and put yourself first. Here are the best exercises for people 50 and older.
Struggling with Microsoft Teams Error Caa50024 on Windows 10/11? Follow our step-by-step fixes to resolve crashes and launch issues quickly. Latest proven solutions for seamless teamwork.
