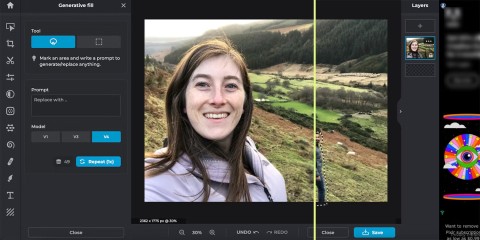
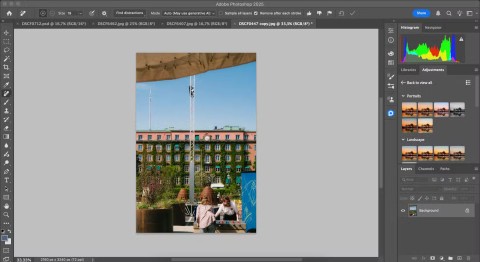
What is the best AI photo background remover?

People spend too much time manually removing backgrounds, and AI isn't always the magic it claims to be.
One of the most popular effects to create in Photoshop is Color Halftone, which is based on the way printers use cyan, magenta, yellow, and black ink dots, of varying sizes and patterns, to create the illusion of a continuous tone image.
The Color Halftone effect can give images a vintage or nostalgic look by emulating printing techniques used in newspapers, magazines, comics, and pop art.
Photoshop even includes a Color Halftone filter, which is perfect for creating a halftone effect. But if you've ever used the Color Halftone filter, the results may not be as good as you'd expect.
Let's take a quick look at the problem with the Color Halftone filter, then we'll show you how to get much better results from it with a simple trick.
Where to find the Color Halftone filter in Photoshop?
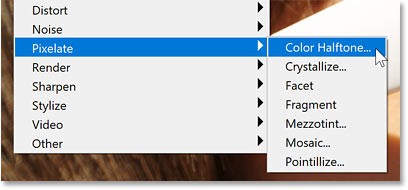
The Color Halftone filter is found by going to the Filter menu in the menu bar, selecting Pixelate then Color Halftone .

How does the Color Halftone filter work?
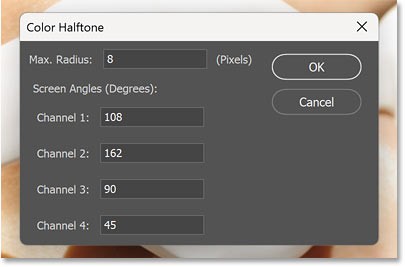
In the Color Halftone dialog box, the Max Radius value at the top sets the maximum size of the dots, in pixels.
And each Channel option sets the angle for the dot pattern of a particular color (1 is cyan, 2 is magenta, 3 is yellow, and 4 is black). As the dots overlap, the colors mix together to create new colors.
The Channel options are usually left at default and the only value that changes is the dot size ( Max Radius ).
Standard Color Halftone filter results
The default Max Radius value is 8 pixels.
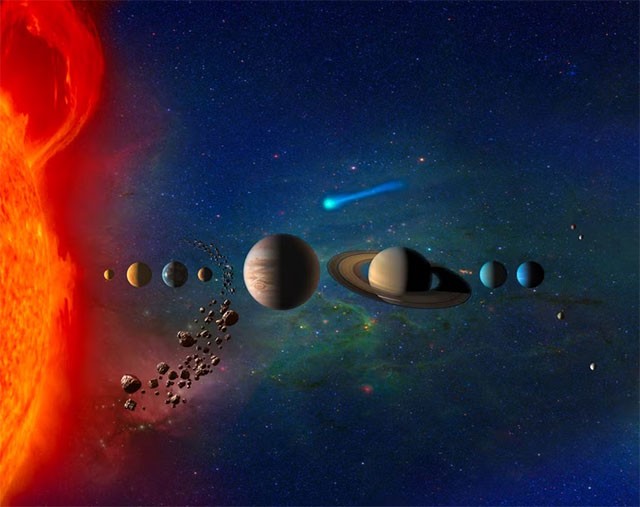
Since the example is working with a large image (5000 px x 3333 px) and needs the effect to be visible in the screenshot, the author will increase the radius to 20.
Then click OK to apply the filter.
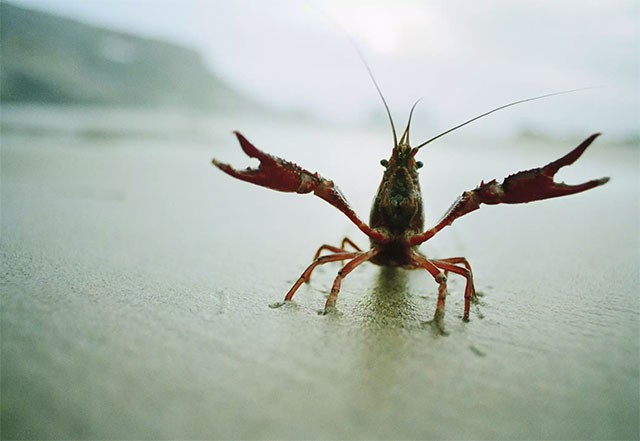
But the result is not what is expected from a halftone pattern.
Instead of the cyan, magenta, yellow, and black dots blending together to create the original color of the photo, they just look like they're added to the front of the photo.
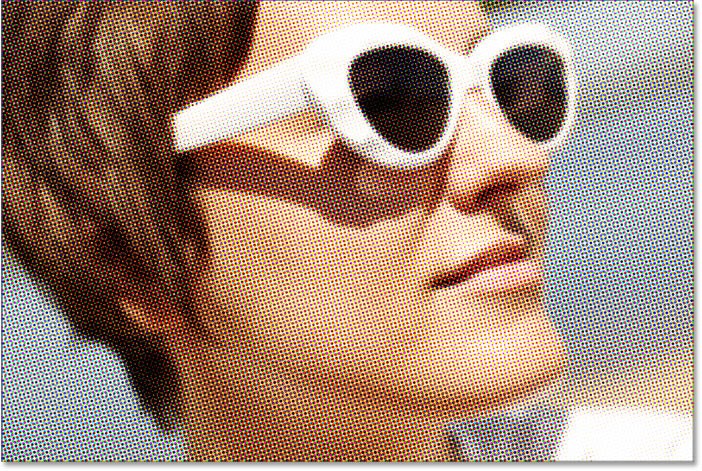
If you zoom in to 100% to get a closer look, the problem becomes more obvious. The dots don't blend with the original color at all.
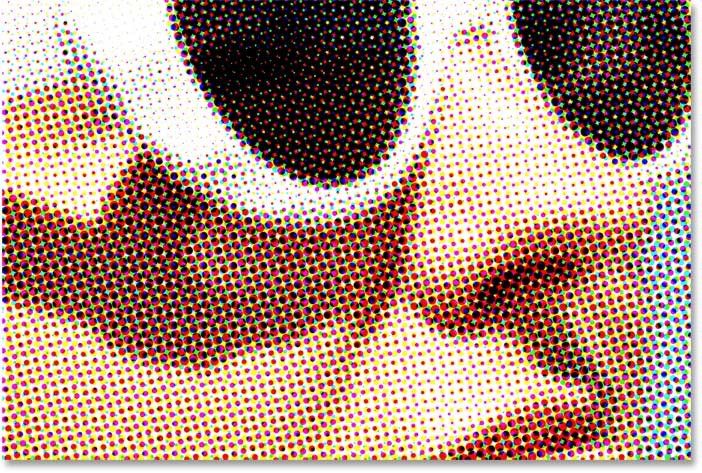
Problems with Photoshop's Color Halftone filter
So why is the Color Halftone filter so bad at creating a halftone effect? The filter itself isn't the problem. The real problem is that our image is in the wrong color mode.
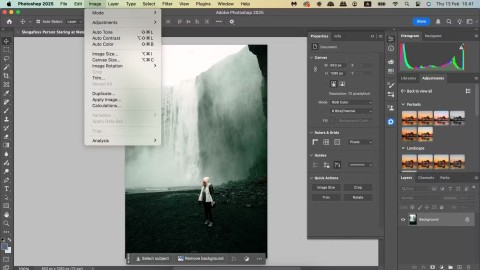
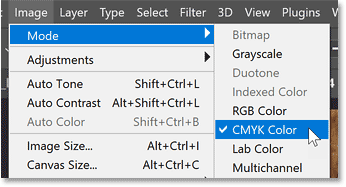
If you go into the Image menu and select Mode (short for Color Mode), you'll see that your image is most likely in RGB color mode. And in RGB (Red, Green, and Blue) color mode, all the colors in an image are made up of different combinations of red, green, and blue.
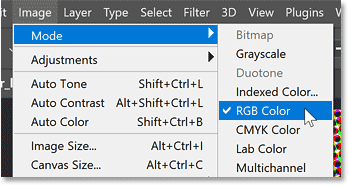
The problem is that the Color Halftone filter wants to be in CMYK color mode .
CYMK stands for Cyan, Magenta, Yellow and Black, which are the same colors as halftone dots (the same color as the printer). So if you want to get better results from the Color Halftone filter, you need to convert the color mode first.
Since the first attempt with the Color Halftone filter didn't work, undo it by going to the Edit menu and selecting Undo Color Halftone .
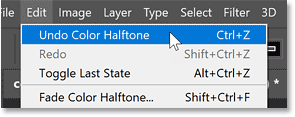
And now, let's go back to the original image.
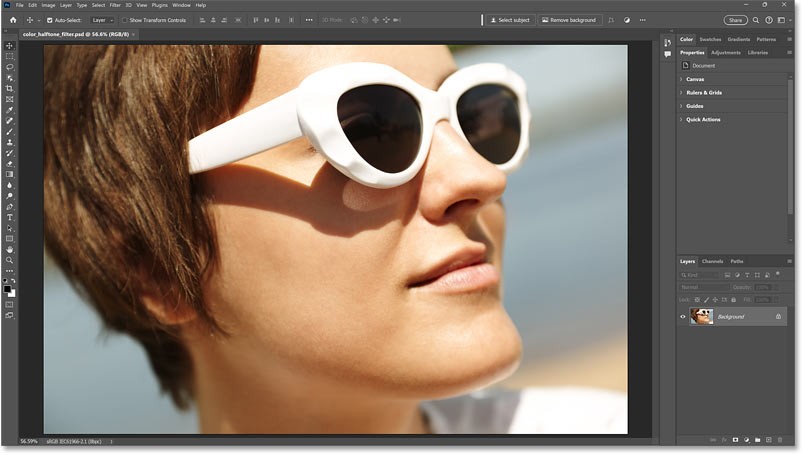
How to get better Color Halftone filter results
To get the best results from the Color Halftone filter, you need to first convert the image from RGB to CMYK.
But to be safe and avoid making any permanent changes to the image, we'll duplicate the image and work on it in a separate document. Then, move the halftone effect back to the original document when we're done.
Step 1: Duplicate the image
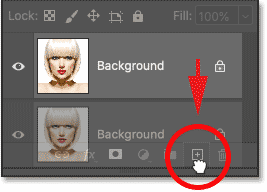
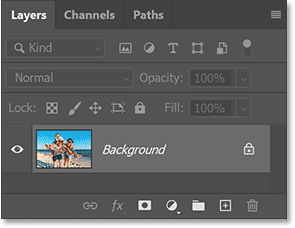
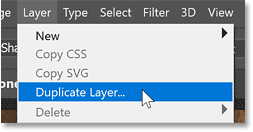
With the Background layer selected in the Layers panel, go to the Layer menu and choose Duplicate Layer.
In the Duplicate Layer dialog box, set Document to New and click OK.
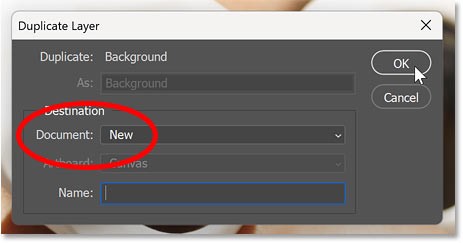
A copy of the image will open in a separate document, as you can tell from the new tab at the top.

Step 2: Convert image to CMYK color
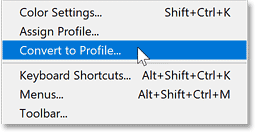
With the new document active, go to the Edit menu and select Convert to Profile .
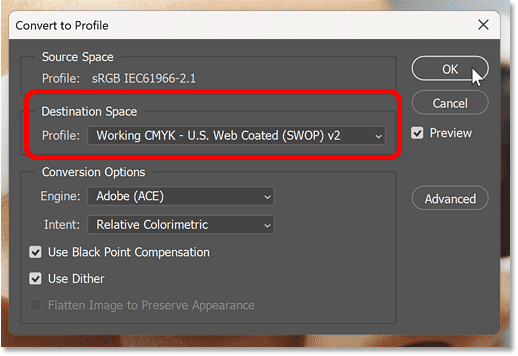
In the Convert to Profile dialog box , make sure that Destination Space is set to Working CMYK .
The information you see next to it may vary depending on where you are in the world. But the important part is Working CMYK.
Click OK to close the dialog box.
Then, if you go back to the Image menu and select Mode , you'll see that the image is now in CMYK color mode.
We are ready to apply the Color Halftone filter.
Step 3: Apply the Color Halftone filter
Go up to the Filter menu , select Pixelate then Color Halftone , just like we did before.
In the Color Halftone dialog box, enter a Max Radius value to set the maximum size of the halftone dots, in pixels. The example will use the same value of 20 to start with, but you can go back and change it if needed.
Leave the 4 Channel options at their default values.
Then click OK to apply the filter.
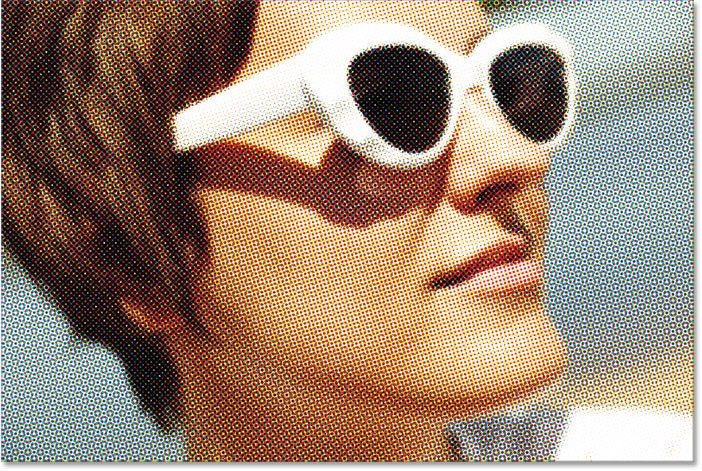
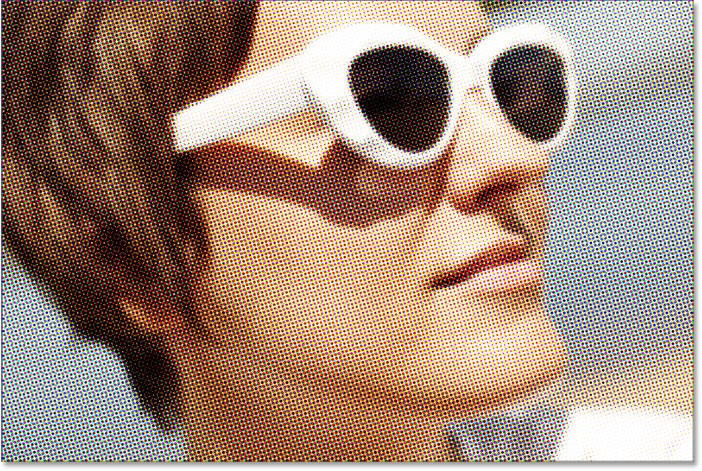
This time, since the image is in CMYK color mode, the Color Halftone filter produces a much better effect.
The cyan, magenta, yellow, and black Color Halftone dots don't just sit in front of the image like they do in RGB color mode. Instead, the dots blend with the original color of the image, giving the photo a beautiful vintage look.
For comparison, here is again the original Color Halftone effect using RGB colors.
Step 4: Change the size of the halftone dot
If you want to try a different dot size:
Enter a different Max Radius value . The value you need will depend on the size of the image and the look you want to achieve. The default size is 8 and the lowest size you can choose is 4.
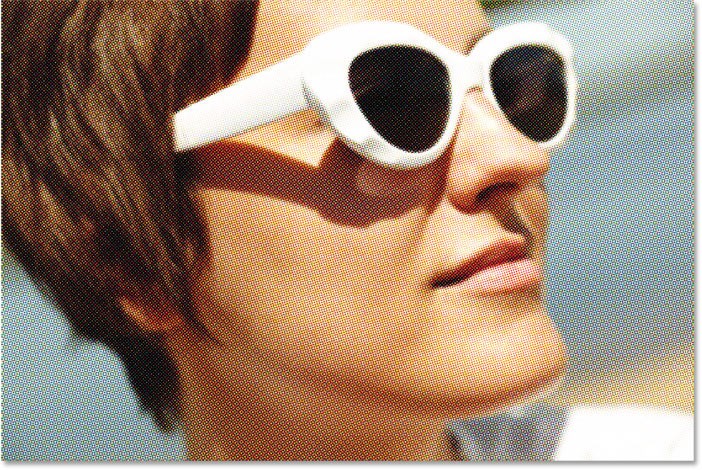
For example I would lower my settings from 20 to 12 pixels.
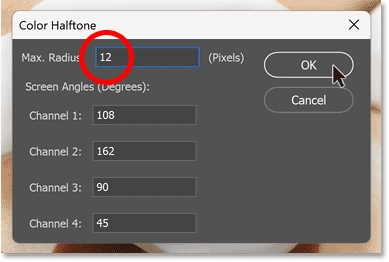
Click OK to apply the filter and these smaller halftone dots look better.
Step 5: Copy and paste the halftone effect into the original document
To move the halftone effect to the original document, go to the Select menu and choose All .
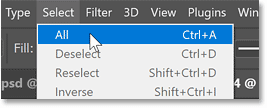
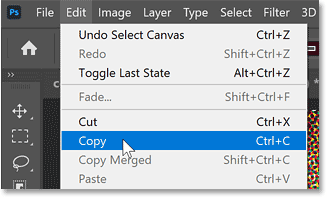
Then go to the Edit menu and select Copy .
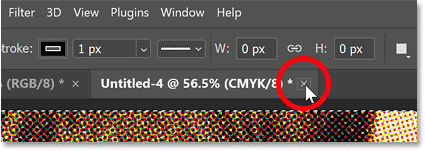
Close the halftone template document by clicking the small x in the document's tab. Leave the original document open.
Choose No (or Don't Save on a Mac) when Photoshop asks if you want to save your changes.
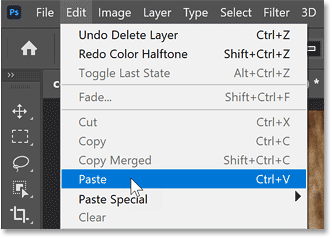
Then go back to the original document, go to the Edit menu and select Paste .
Photoshop pastes the Color Halftone effect into the document.
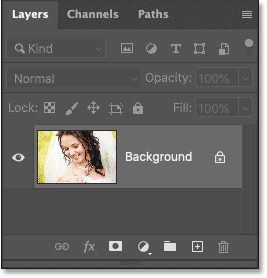
And in the Layers panel , the halftone effect appears on its own layer above the original image on the Background layer.
That's the trick to creating a better halftone pattern effect using Photoshop's Color Halftone filter.
People spend too much time manually removing backgrounds, and AI isn't always the magic it claims to be.
This tutorial will show you how to easily turn a photo into a pencil sketch using Adobe Photoshop.
Many people used to find resizing images very annoying until they learned about Photoshop's simple channel-based protection method.
Add a quick and easy poster effect to your images using Photoshop to recreate the classic look of posters printed with limited ink colors.
There are many AI photo editors that make Photoshop a second choice and AI features are useful tools for editing photos without having to learn complex Photoshop.
Photoshop 2025 packs new AI tools, smarter selections, and features you didn't know you needed until now.
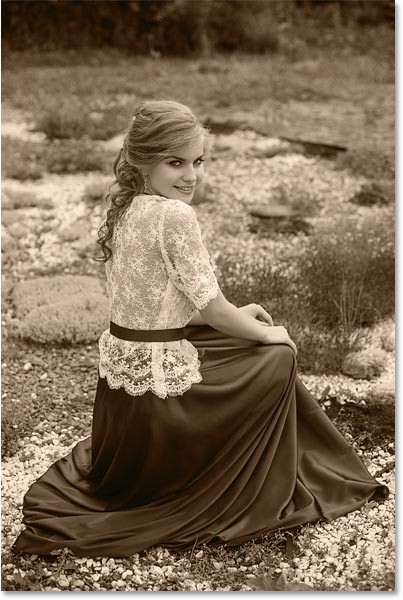
This tutorial will show you a quick and easy way to add a monochrome color effect to an image using Adobe Photoshop.
This tutorial will show you how to add canvas space and drop shadow to your photo in Photoshop to create a simple yet stylish photo border.
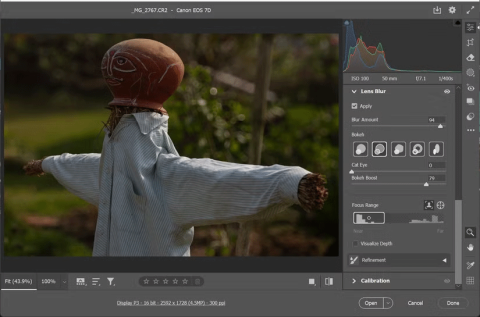
Adobe's Lens Blur tool makes it easy to review your photos, adding depth and focus to your photos.
Hidden away in the app, Photoshop Actions is a beloved feature of the popular photo editing tool, meant to speed up workflows without the need for AI.
Lightroom and Adobe Photoshop are two of the best photo editing tools, but while many professionals use both together, you only need Lightroom if you're an amateur photographer.
This tutorial will show you how to create a cool Picture in Picture effect with Adobe Photoshop by taking a single photo and creating the illusion that a smaller, cropped version of the same photo is inside it.
Generative Workspace is one of the top AI features announced at Adobe Max 2024. It will be the new home for your Generative AI images and files.
With Generative Fill, powered by Adobe's Generative AI called Firefly, anyone can add realistic water reflection effects to their photos simply by drawing a selection, typing a few words, and clicking a button.
This tutorial will show you how to copy an image and paste it into a selection in another image using the Paste Into command in Adobe Photoshop.
Tired of Microsoft Teams workflows and Power Automate errors halting your productivity? Get step-by-step solutions to common issues like authentication failures, timeouts, and flow errors. Fix them in minutes and automate effortlessly!
Facing Microsoft Teams "Download Error" on MacBook? Discover proven troubleshooting steps to resolve download failures quickly, from cache clears to reinstalls, and get back to smooth teamwork.
Tired of the frustrating Microsoft Teams "Where is Teams" Folder Error? Discover proven, step-by-step troubleshooting fixes to resolve it quickly and restore smooth teamwork. Latest methods included!
Frustrated by Microsoft Teams JavaScript Error on desktop app? Discover proven steps to fix it fast: clear cache, update, reset, and reinstall. Get back to seamless collaboration in minutes!
Struggling with Microsoft Teams "Guest Login" Error? Discover step-by-step fixes, from quick cache clears to admin settings, to resolve guest access issues fast and collaborate seamlessly. Updated with the latest tips!
Tired of the Microsoft Teams "For PC" download error blocking your work? Follow our proven, step-by-step guide to resolve it quickly and get Teams running smoothly on your PC today.
Struggling with Microsoft Teams "Windows 7" login error? Discover step-by-step fixes for this frustrating issue on Windows 10/11. Clear cache, edit registry, and more – get back to seamless collaboration today!
Tired of Microsoft Teams Error Code 0x80070005 blocking your meetings? Follow this 2026 guide with step-by-step fixes for access denied issues. Get Teams running smoothly in minutes!
Master the installation of the Microsoft Teams Add-in for Outlook 2026 effortlessly. Boost your productivity with seamless scheduling and meetings. Follow our proven, up-to-date steps for instant success!
Struggling with Microsoft Teams "License Error" 2026? Discover proven, step-by-step solutions to resolve it fast. Clear cache, check licenses, and get back to seamless collaboration—no IT help needed!
Whether youre in your 50s, 60s, or even 70s, its not too late to prioritize your health and put yourself first. Here are the best exercises for people 50 and older.
Struggling with Microsoft Teams Error Caa50024 on Windows 10/11? Follow our step-by-step fixes to resolve crashes and launch issues quickly. Latest proven solutions for seamless teamwork.
Stuck with Microsoft Teams login error AADSTS50011? Discover proven, step-by-step fixes to resolve the reply URL mismatch issue and log in seamlessly. No tech skills needed!
Tired of the frustrating Microsoft Teams "Win 7" Compatibility Error blocking your meetings? Get instant fixes with our step-by-step guide, including workarounds for older Windows versions. Resolve it now and stay connected!
Tired of the endless Microsoft Teams "Error R" restart loop? Get step-by-step fixes to solve Microsoft Teams Error R quickly. Clear cache, reset, reinstall & more for smooth collaboration. Works on Windows, Mac & web.
