What is the best AI photo background remover?

People spend too much time manually removing backgrounds, and AI isn't always the magic it claims to be.
Need to add text to an image but don't have a good place to put it? Try adding it as transparent text in Photoshop!
This tutorial will show you how to create a transparent text area, meaning the typography itself is completely transparent, allowing the image underneath to show through. We surround the text with a solid block of color, usually white, to reveal the shape of the letters, and then the text becomes the frame for the subject. This is a great design trick for images that are too busy for the text to be legible.
Creating transparent text in Photoshop is easy. Start by adding a new layer above your image and filling it with white. Then, add your text. To make the text transparent, we’ll use Photoshop’s Advanced Blending options to turn the typography layer into a highlight layer. This will punch holes in the shape of the letters, leading directly to the image below.
Step 1: Open the image
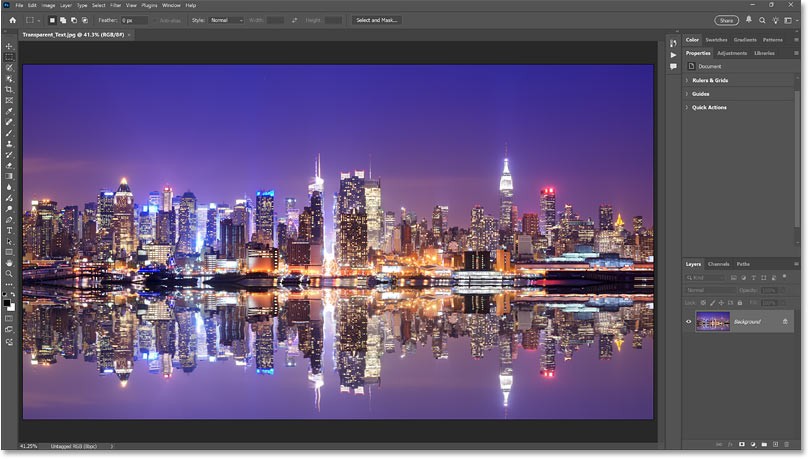
Start by opening the image you want to add a transparency effect to. For example, I downloaded this image of the New York skyline from Adobe Stock :
Step 2: Add a new layer
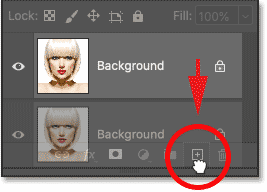
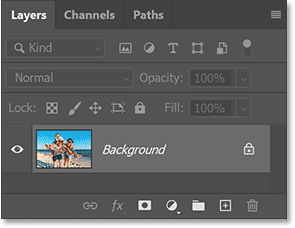
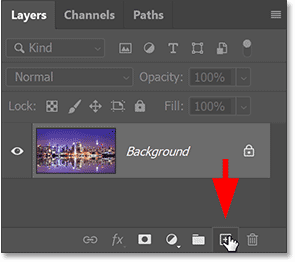
In the Layers panel, the image is on the Background layer. Click the Add New Layer icon at the bottom of the Layers panel.
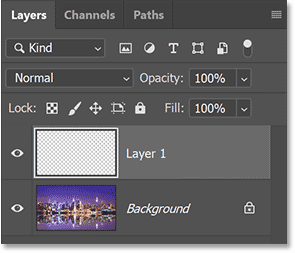
A new blank layer named Layer 1 appears above the image.
We will use this layer to create the white area around the text.
Step 3: Fill the new layer with white
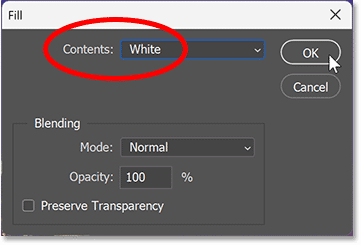
Fill the layer with white by going to the Edit menu in the menu bar and selecting Fill .
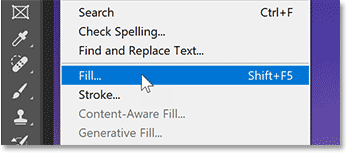
In the Fill dialog box , set Contents to White. Then click OK.
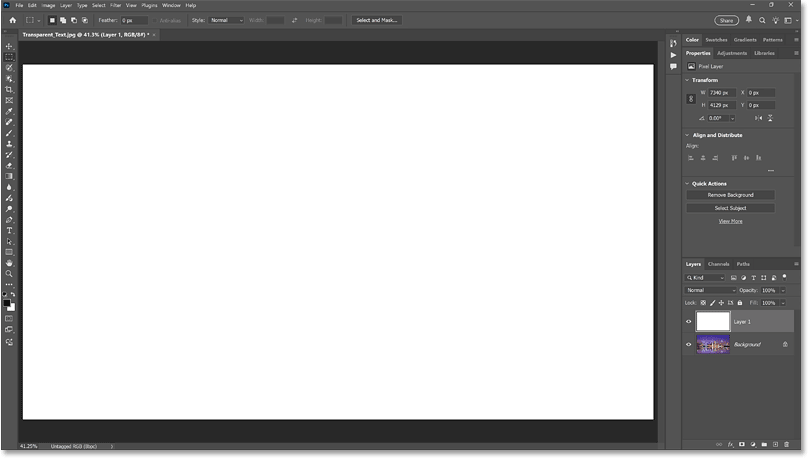
Photoshop will fill the layer with white, temporarily blocking the image from view.
Step 4: Reduce the layer opacity
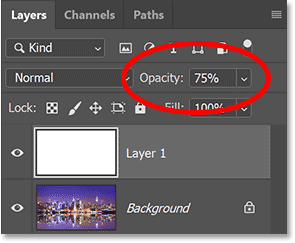
In the Layers panel, reduce the opacity of Layer 1 to 75%.
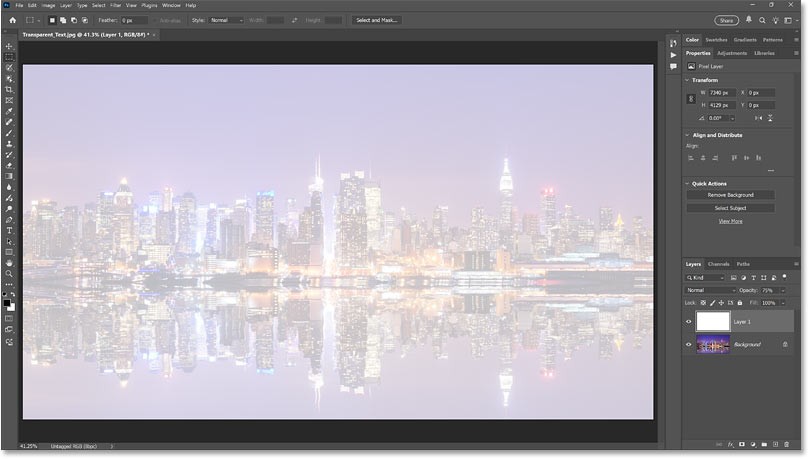
When the opacity is reduced, the image is now partially visible so we can see when adding text.
Step 5: Select Type Tool
In the toolbar, select the Type Tool .

Step 6: Choose font
In the Options Bar, select your font. We'll use Futura PT Heavy for this example, but any font with thick text will work.

Still in the Options Bar, set the font size to 150 pt. We'll need to resize the text once we've added it, but this should give us a large enough starting point.

Step 7: Set the text color to black
Before leaving the Options Bar, make sure the text color is set to black. If not, press D on your keyboard to reset it to default.
Black will allow us to see the text in front of a white background, but will disappear when we make the text transparent.
Step 8: Add text
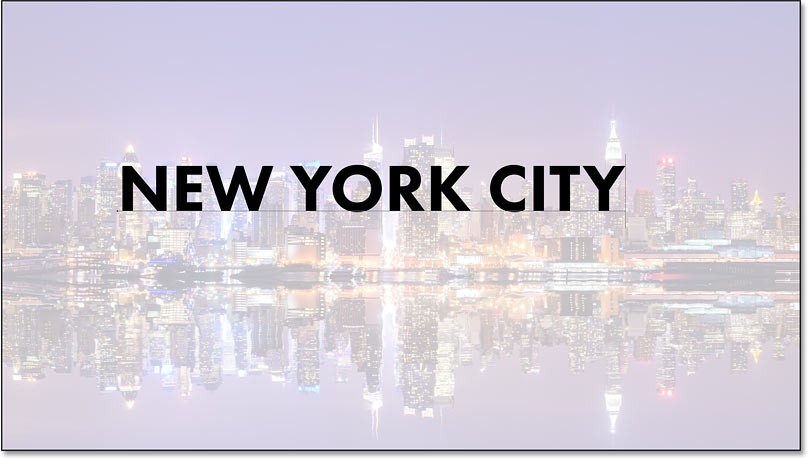
Click inside the document and add your text. For example, we will type the words NEW YORK CITY.
Click the check mark in the Options Bar to accept.
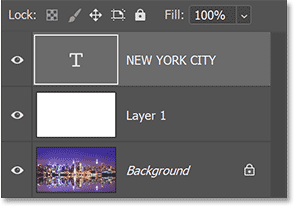
In the Layers panel, the new text layer appears above Layer 1.
Step 9: Change text size
Go to the Edit menu in the menu and select Free Transform .
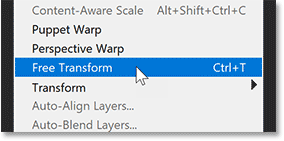
Photoshop surrounds the text with a transform box and handles.
But before dragging the handles, go to the Options Bar and make sure the link icon between the Width and Height fields is selected. This will lock the aspect ratio of the text when resizing so that the letters don't distort.

Then drag any handle to resize the text.
Here, the example will make the text larger to cover as much of the image as possible.

Then click and drag inside the transform box to reposition the text. For example, it will move the text in front of the water border.
When finished, press Enter (Win) / Return (Mac) on your keyboard to accept and close Free Transform.
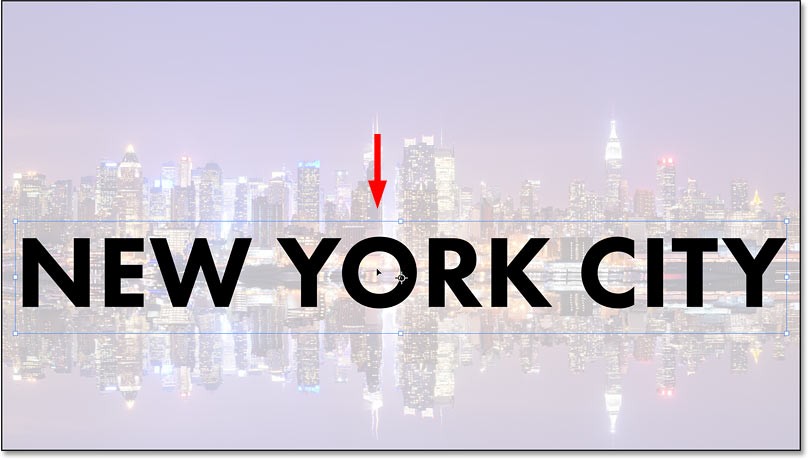
Step 10: Change Blending Options
In the Layers panel, make sure the text layer is selected and click the Layer Effects (fx) icon at the bottom.
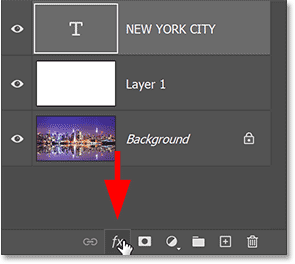
Then, select Blending Options from the top menu.
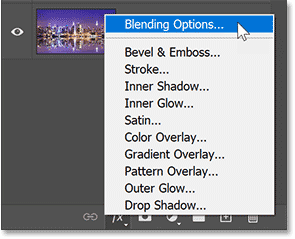
This will open Photoshop's Layer Style dialog box set to the main Blending Options.
In the Advanced Blending section , change the Knockout from None to Shallow. This will turn the text layer into a knockout layer, meaning Photoshop will use the shape of the letters to punch through layer 1 and reveal the image on the Background layer.
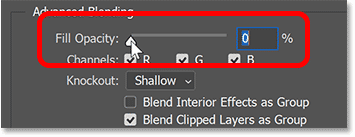
You won't see the effect until you drag the Fill Opacity down to 0%.

Click OK to close the Layer Style dialog box .
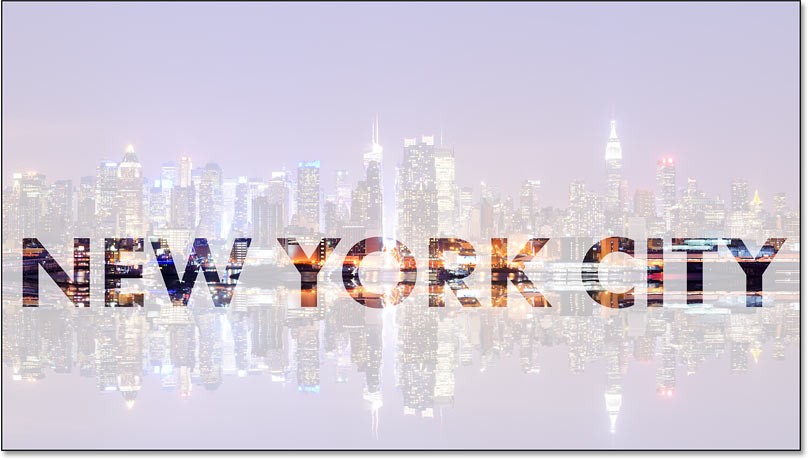
Not only does the text itself become transparent, but so does the area on layer 1 directly below the text, as if the text has been punched through.
The image on the Background layer is now visible through the letters.
Step 11: Select Layer 1
Resize the white area around the text so it doesn't cover the entire image.
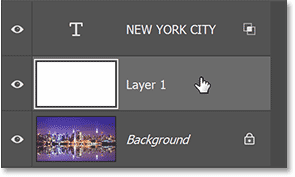
Click Layer 1 in the Layers panel to select Layer 1.
Step 12: Resize the layer using Free Transform
Go back to the Edit menu and select Free Transform.

Before dragging the transform handles, go back to the Options Bar and this time unlink the Width and Height fields. This will allow us to drag the handles freely without worrying about the aspect ratio.

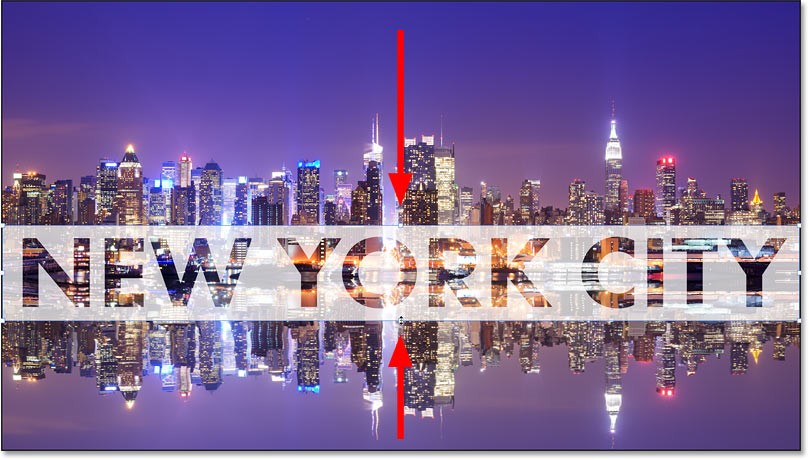
Then drag the top and bottom handles towards the text. Press Enter (Win) / Return (Mac) on your keyboard when you're done.
Step 13: Adjust the layer opacity
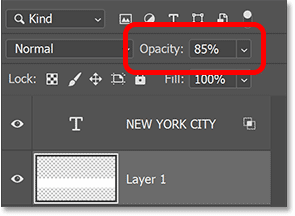
Finally, adjust the opacity of layer 1 to fine-tune the visibility of the text.
Increasing the opacity will make the white area around the text more readable. Decreasing the opacity will blur the text area in the image.
The example will set the opacity to 85%.
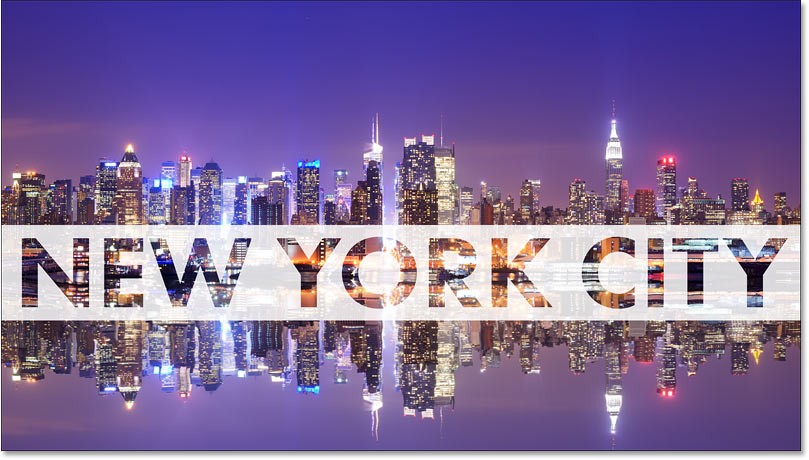
After increasing the opacity, the final transparent text area result should look like this.
People spend too much time manually removing backgrounds, and AI isn't always the magic it claims to be.
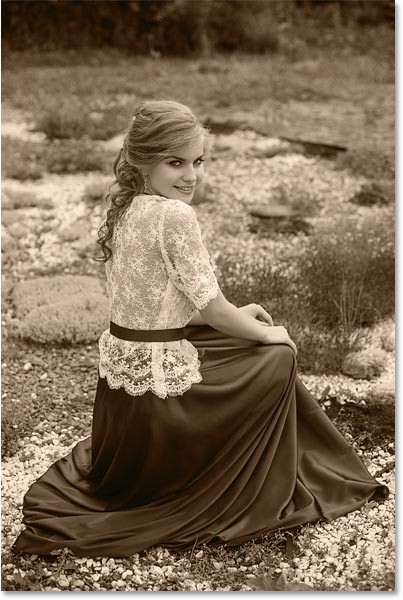
This tutorial will show you how to easily turn a photo into a pencil sketch using Adobe Photoshop.
Many people used to find resizing images very annoying until they learned about Photoshop's simple channel-based protection method.
Add a quick and easy poster effect to your images using Photoshop to recreate the classic look of posters printed with limited ink colors.
There are many AI photo editors that make Photoshop a second choice and AI features are useful tools for editing photos without having to learn complex Photoshop.
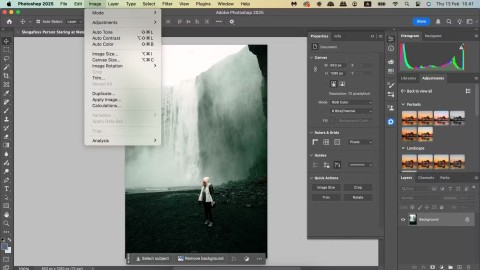
Photoshop 2025 packs new AI tools, smarter selections, and features you didn't know you needed until now.
This tutorial will show you a quick and easy way to add a monochrome color effect to an image using Adobe Photoshop.
This tutorial will show you how to add canvas space and drop shadow to your photo in Photoshop to create a simple yet stylish photo border.
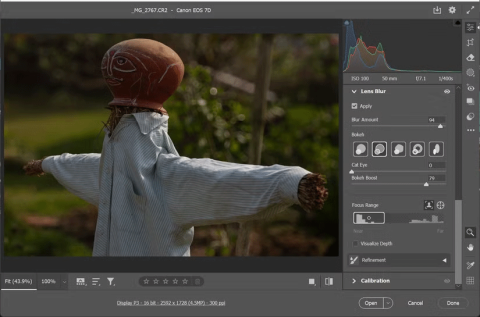
Adobe's Lens Blur tool makes it easy to review your photos, adding depth and focus to your photos.
Hidden away in the app, Photoshop Actions is a beloved feature of the popular photo editing tool, meant to speed up workflows without the need for AI.
Lightroom and Adobe Photoshop are two of the best photo editing tools, but while many professionals use both together, you only need Lightroom if you're an amateur photographer.
This tutorial will show you how to create a cool Picture in Picture effect with Adobe Photoshop by taking a single photo and creating the illusion that a smaller, cropped version of the same photo is inside it.
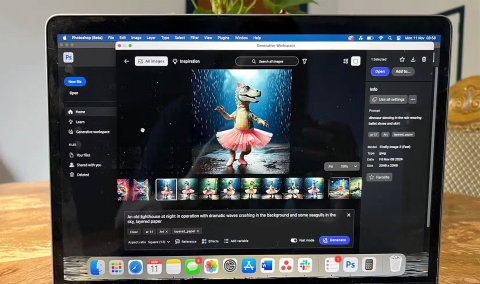
Generative Workspace is one of the top AI features announced at Adobe Max 2024. It will be the new home for your Generative AI images and files.
With Generative Fill, powered by Adobe's Generative AI called Firefly, anyone can add realistic water reflection effects to their photos simply by drawing a selection, typing a few words, and clicking a button.
This tutorial will show you how to copy an image and paste it into a selection in another image using the Paste Into command in Adobe Photoshop.
Struggling with Microsoft Teams "Error K" Security? Follow our step-by-step guide to fix it quickly—no tech expertise needed. Get back to seamless collaboration today!
Struggling with Microsoft Teams Update Error 0x80070002? Discover step-by-step fixes to resolve it quickly. Clear cache, repair files, and get back to seamless updates today!
Tired of Microsoft Teams "Web Error" blocking your browser login? Follow our step-by-step guide with proven fixes to resolve Teams web login issues fast and securely. Get back to work!
Stuck with Microsoft Teams "Error O" Offline? Discover proven, step-by-step fixes to get back online fast. Clear cache, restart, and more – no tech skills needed!
Frustrated by the missing Microsoft Teams icon in Outlook? Learn exactly where to find it, why it disappears, and proven steps to restore it for effortless meetings. Updated for the latest versions!
Struggling with Microsoft Teams "Windows 10 Error" login issues? Get instant fixes for cache clears, updates, and more. Step-by-step solutions to solve Microsoft Teams login error on Windows 10 fast and frustration-free.
Tired of the frustrating Microsoft Teams "Website Error" where tabs won’t load? Get step-by-step fixes to resolve it quickly and boost your productivity. Essential troubleshooting for seamless Teams experience.
Tired of the frustrating Microsoft Teams "Web Error" 503 Service Unavailable? Discover proven, step-by-step fixes for Teams 503 error on web. Get back online fast with our expert guide. Works on all browsers!
Struggling with Microsoft Teams "Win 7 Error" compatibility? Discover step-by-step fixes to restore seamless video calls and chats on unsupported Windows versions. Quick, reliable solutions inside!
Master troubleshooting Microsoft Teams Breakout Rooms license errors with this step-by-step guide. Quick fixes for common license issues, admin checks, and prevention tips to get your meetings running smoothly.
Struggling with Microsoft Teams "Version History" Error? Discover proven, step-by-step fixes to restore access instantly. Clear cache, update Teams, and more—no tech skills needed!
Tired of the frustrating Microsoft Teams Joining Error: Meeting ID Not Found? Get step-by-step fixes to rejoin meetings fast. Updated with the latest Teams patches for seamless collaboration. Solve it now!
Struggling with Microsoft Teams "Video Error" green screen? Discover proven, step-by-step troubleshooting fixes for seamless video calls. Quick solutions inside!
Struggling with the Microsoft Teams "How Teams Works" Tutorial Error? Discover proven, step-by-step fixes to resolve it quickly. Clear cache, update, and more for seamless onboarding. Works on latest versions!
Tired of the frustrating Microsoft Teams "Error Today" on Windows 10? Discover proven, step-by-step fixes to resolve it quickly and restore smooth teamwork. No tech skills needed!
